- Операционные системы Astra Linux
- Установка TightVNC на Ubuntu Server 18.04 LTS
- Установка Xfce и TightVNC
- Порты VNC-сервера
- Настройка VNC-сервера
- Подключение к VNC-серверу
- Создание файла сервиса
- Безопасное подключение
- Remote GUI access to a Linux computer using Tightvnc with systemd
- TightVNC vs Real VNC
- Installing a start-up script using Systemd
- Choosing TightVNC
- Client server model
- Install the TightVNC server software
- Start server and configure a password
- Adding Tightvnc to systemd startup
- Installing Tightvnc viewer (VNC client) on a Linux computer
- Installing Tightvnc view on a Windows computer
- Securing TightVNC
- Starting your window manager
Операционные системы Astra Linux
Оперативные обновления и методические указания
Операционные системы Astra Linux предназначены для применения в составе информационных (автоматизированных) систем в целях обработки и защиты 1) информации любой категории доступа 2) : общедоступной информации, а также информации, доступ к которой ограничен федеральными законами (информации ограниченного доступа).
1) от несанкционированного доступа;
2) в соответствии с Федеральным законом от 27.07.2006 № 149-ФЗ «Об информации, информационных технологиях и о защите информации» (статья 5, пункт 2).
Операционные системы Astra Linux Common Edition и Astra Linux Special Edition разработаны коллективом открытого акционерного общества «Научно-производственное объединение Русские базовые информационные технологии» и основаны на свободном программном обеспечении. С 17 декабря 2019 года правообладателем, разработчиком и производителем операционной системы специального назначения «Astra Linux Special Edition» является ООО «РусБИТех-Астра».
На web-сайтах https://astralinux.ru/ и https://wiki.astralinux.ru представлена подробная информация о разработанных операционных системах семейства Astra Linux, а также техническая документация для пользователей операционных систем и разработчиков программного обеспечения.
Мы будем признательны Вам за вопросы и предложения, которые позволят совершенствовать наши изделия в Ваших интересах и адаптировать их под решаемые Вами задачи!
Репозитория открытого доступа в сети Интернет для операционной системы Astra Linux Special Edition нет. Операционная система распространяется посредством DVD-дисков.
Информацию о сетевых репозиториях операционной системы Astra Linux Common Edition Вы можете получить в статье Подключение репозиториев с пакетами в ОС Astra Linux и установка пакетов.
В целях обеспечения соответствия сертифицированных операционных систем Astra Linux Special Edition требованиям, предъявляемым к безопасности информации, ООО «РусБИтех-Астра» осуществляет выпуск очередных и оперативных обновлений.
Очередные обновления (версии) предназначены для:
- реализации и совершенствования функциональных возможностей;
- поддержки современного оборудования;
- обеспечения соответствия актуальным требованиям безопасности информации;
- повышения удобства использования, управления компонентами и другие.
Оперативные обновления предназначены для оперативного устранения уязвимостей в экземплярах, находящихся в эксплуатации, и представляют собой бюллетень безопасности, который доступен в виде:
- инструкций и методических указаний по настройке и особенностям эксплуатации ОС, содержащих сведения о компенсирующих мерах или ограничениях по примене- нию ОС при эксплуатации;
- отдельных программных компонентов из состава ОС, в которые внесены изменения с целью устранения уязвимостей, инструкций по их установке и настройке, а также информации, содержащей сведения о контрольных суммах всех файлов оперативного обновления;
- обновлений безопасности, представляющих собой файл с совокупностью программных компонентов из состава ОС, в которые внесены изменения с целью устранения уязвимостей, а также информации, содержащей сведения о контрольных суммах всех файлов обновлений безопасности, указания по установке, настройке и особенностям эксплуатации ОС с установленными обновлениями безопасности.
Ввиду совершенствования нормативно-правовых документов в области защиты информации и в целях обеспечения соответствия информационных актуальным требованиям безопасности информации, а также обеспечения их долговременной эксплуатации, в том числе работоспособности на современных средствах вычислительной техники, рекомендуется на регулярной основе планировать проведение мероприятий по применению очередных и оперативных обновлений операционной системы.
Источник
Установка TightVNC на Ubuntu Server 18.04 LTS
По умолчанию серверы Ubuntu 18.04 поставляются без предустановленного графического окружения рабочего стола и сервера VNC. Потому сначала нужно установить эти компоненты. Мы будем использовать пакеты Xfce и TightVNC, доступные в официальном репозитории Ubuntu.
Установка Xfce и TightVNC
Сначала устанавливаем пакет Xfce:
Следом за ним — пакет TightVNC:
Запускаем VNC-сервер командой:
При первом запуске vncserver предложит выбрать и подтвердить пароль. Пароль должен быть длинной от шести до восьми символов. Кроме того, будет возможность создать пароль только для просмотра.
Порты VNC-сервера
При запуске первого экземпляра VNC-сервера без указания порта, сервер будет прослушивать порт 5901 (или :1). При запуске следующего экземпляра сервер будет прослушивать порт 5902 (или :2). Можно явно указать порт при запуске экземпляра сервера:
Посмотреть список запущенных серверов можно так:
Остановим работу первого и второго экземпляра VNC-сервера:
Настройка VNC-сервера
Теперь нужно задать команды, которые сервер VNC будет выполнять при запуске. Эти команды должны находиться в файле xstartup в каталоге
/.vnc/ текущего пользователя. Сценарий запуска уже был создан при первом запуске сервера с помощью команды vncserver , но его нужно откорректировать для работы с Xfce.
При помощи первой команды GUI сервера VNC читает файл .Xresources . В файле .Xresources пользователь может вносить изменения в некоторые настройки графического рабочего стола (цвет терминала, темы курсора, шрифты). Вторая команда просто запускает графическую оболочку Xfce.
Этот файл нужно сделать исполняемым:
Все, можно запускать сервер:
Подключение к VNC-серверу
Теперь попробуем подключиться с другого компьютера, используя VNC-клиент Remmina:
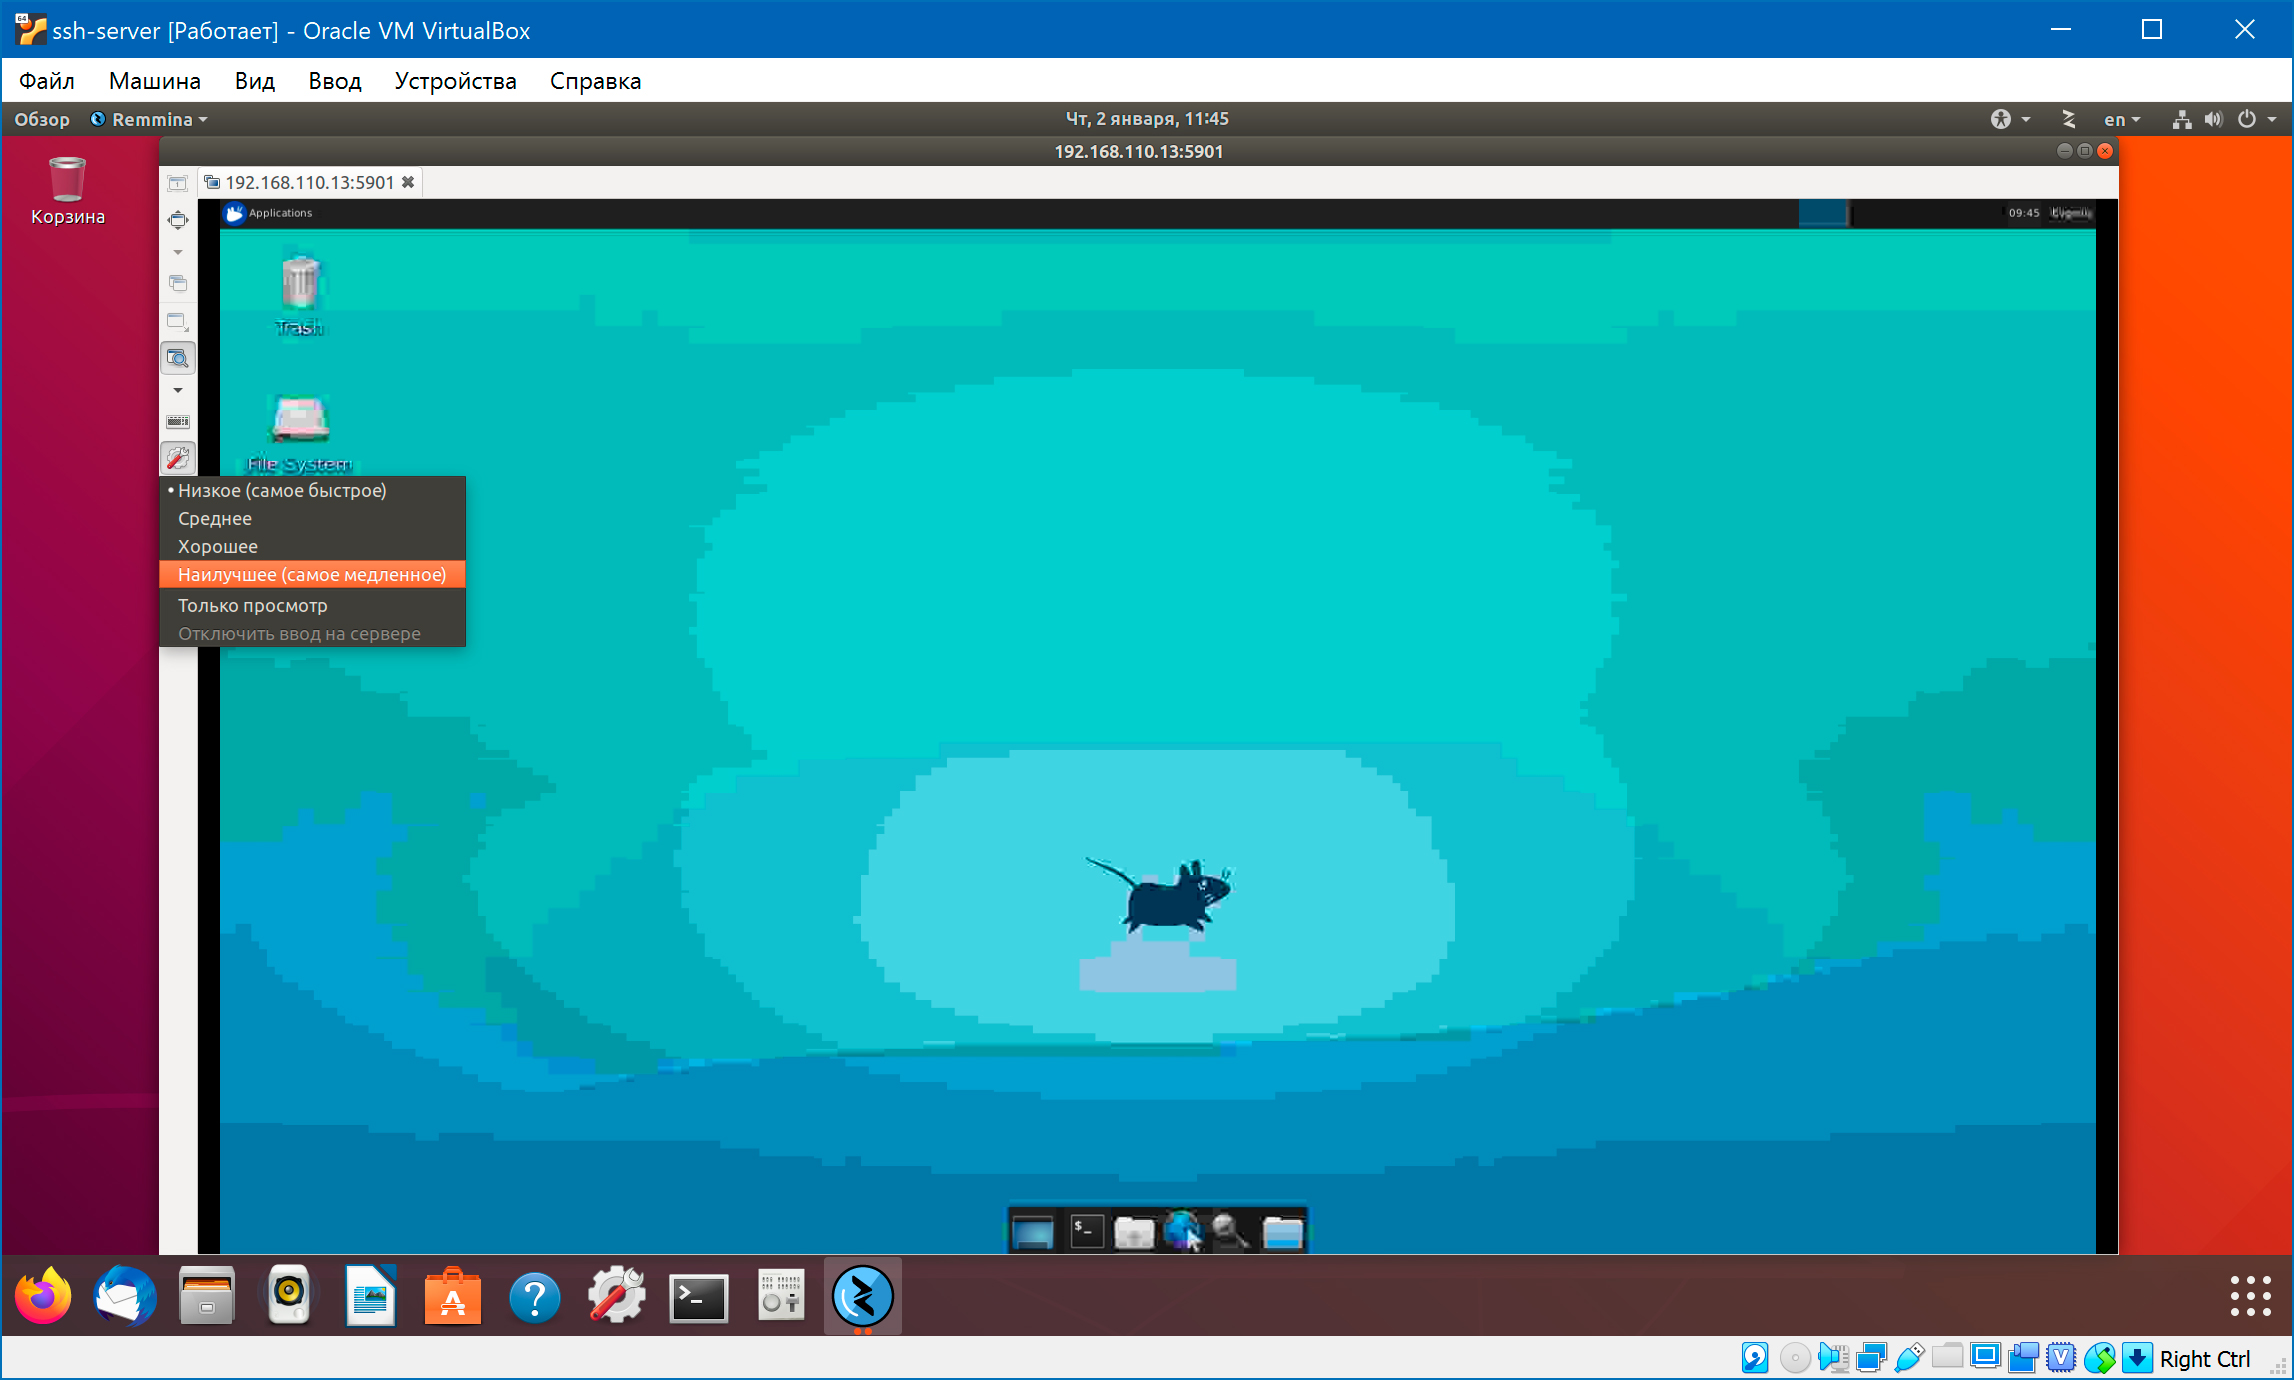
Изначально качество изображения низкое, но это можно изменить в настройках клиента:
Перед подключением надо открыть несколько портов на той машине, где мы установили VNC-сервер:
Создание файла сервиса
Теперь нужно настроить сервер VNC как сервис Systemd, чтобы он запускался при загрузке системы. Для этого создаем новый unit-файл:
Символ @ в конце имени файла позволит нам передать аргумент, который можно использовать в конфигурации сервиса. С его помощью можно указать порт VNC, который нужно использовать при управлении сервисом.
Команда ExecStartPre останавливает VNC, если сервис уже запущен. Команда ExecStart запускает VNC и устанавливает глубину цвета и разрешение. Давайте сообщим системе про новый unit-файл.
Добавляем три службы в автозагрузку:
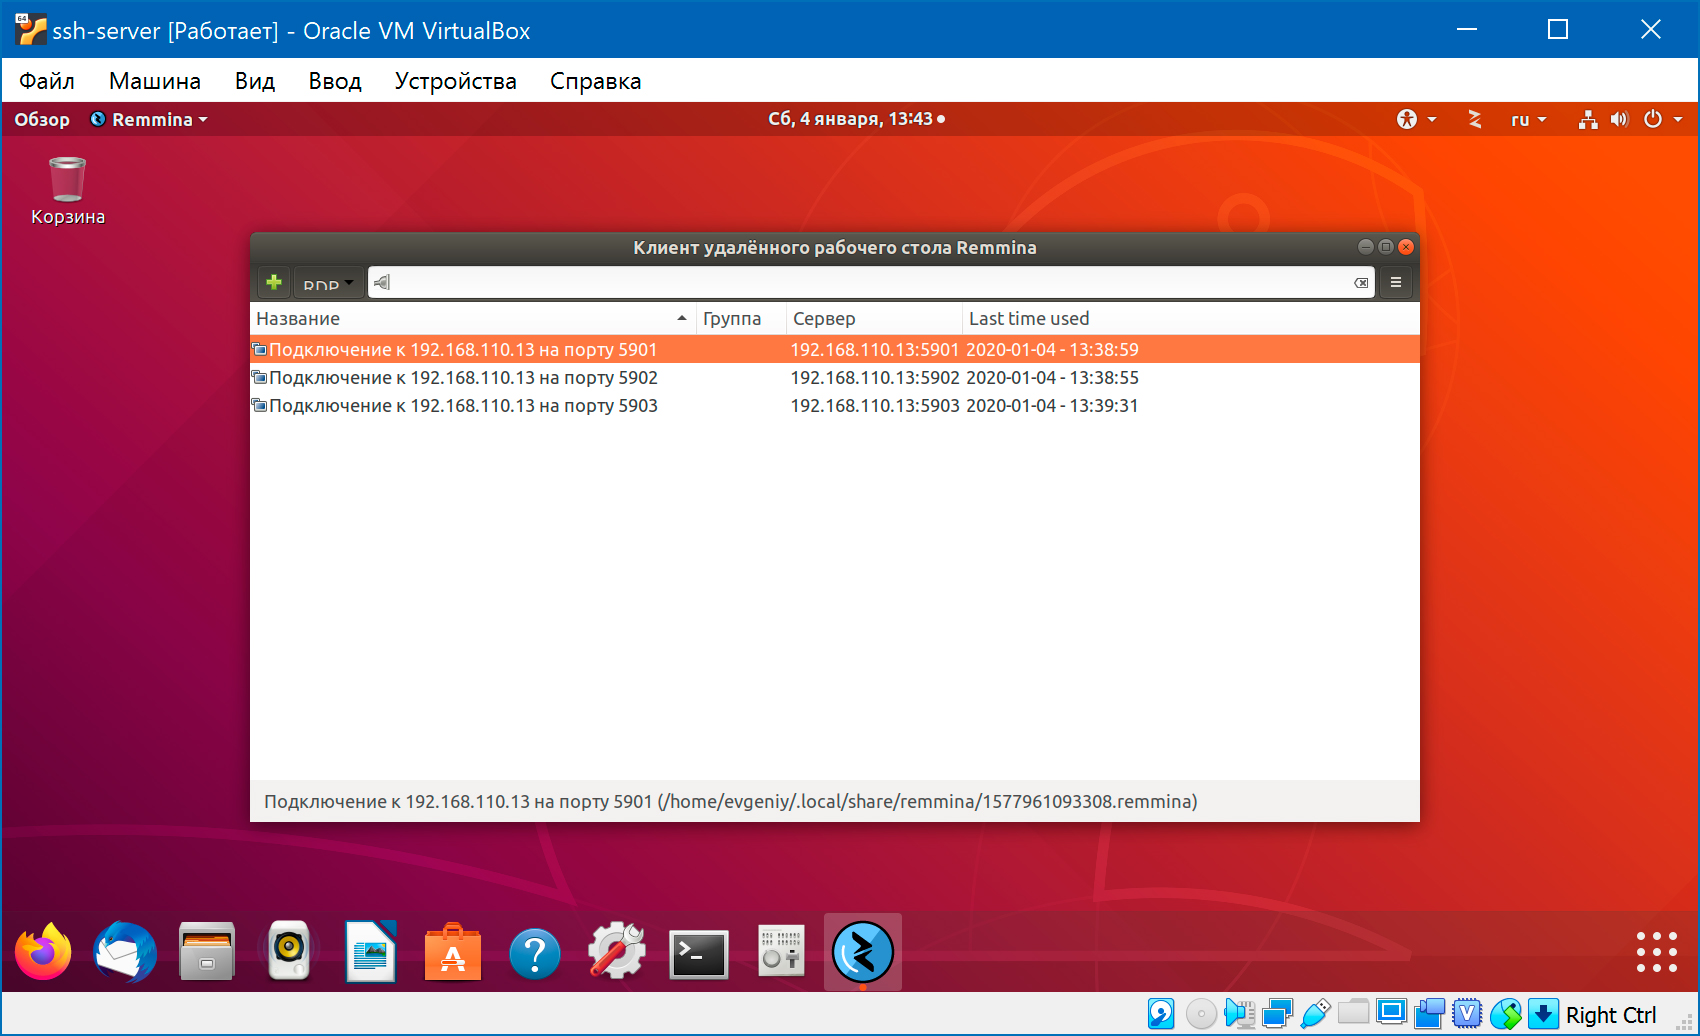
Теперь, после загрузки системы, VNC-сервер будет прослушивать три порта: 5901, 5902 и 5903. И мы можем подключиться на любом из них:
И мы можем вручную запустить или остановить VNC-сервер, как любую другую службу:
Безопасное подключение
При подключении VNC не использует безопасные протоколы. Давайте создадим SSH-туннель для безопасного подключения к серверу (для этого на машине с VNC-сервером должен быть установлен SSH-сервер):
У меня возникло затруднение при попытке установить ssh-соединение с виртуальной машиной, на которой установлен VNC-сервер (и SSH-сервер):
Причина в том, что большинство дистрибутивов Linux создают ключи хоста во время установки OpenSSH-сервера. А эта виртуальная машина была клонирована с уже установленным SSH-сервером. Так что все ключи теперь недействительны. Исправить это просто — нужно удалить старые ключи хоста и сформировать их заново:
Ключ сервера используется в процессе обмена ключами для подтверждения того, что клиент действительно связывается с нужным сервером. Клиент ssh запрашивает публичный ключ сервера и спрашивает, можно ли ему доверять:
После этого отпечаток публичного ключа сохраняется в файле
/.ssh/known_hosts . В моем случае сам сервер, просматривая свои ключи, обнаруживал в них ошибку. Если посмотреть файл /var/log/auth.log , то можно увидеть такие записи
При подключении к VNC-серверу указываем не 192.168.110.13:5901 , а localhost:5901 . Мы как бы подключаемся к локальной машине, но соединение будет проброшено через ssh-туннель на машину с VNC-сервером.

При этом на машине с установленным VNC-сервером должен быть открыт 22-ой порт:
А вот держать открытыми порты 5901:5903 больше не нужно, так что закрываем:
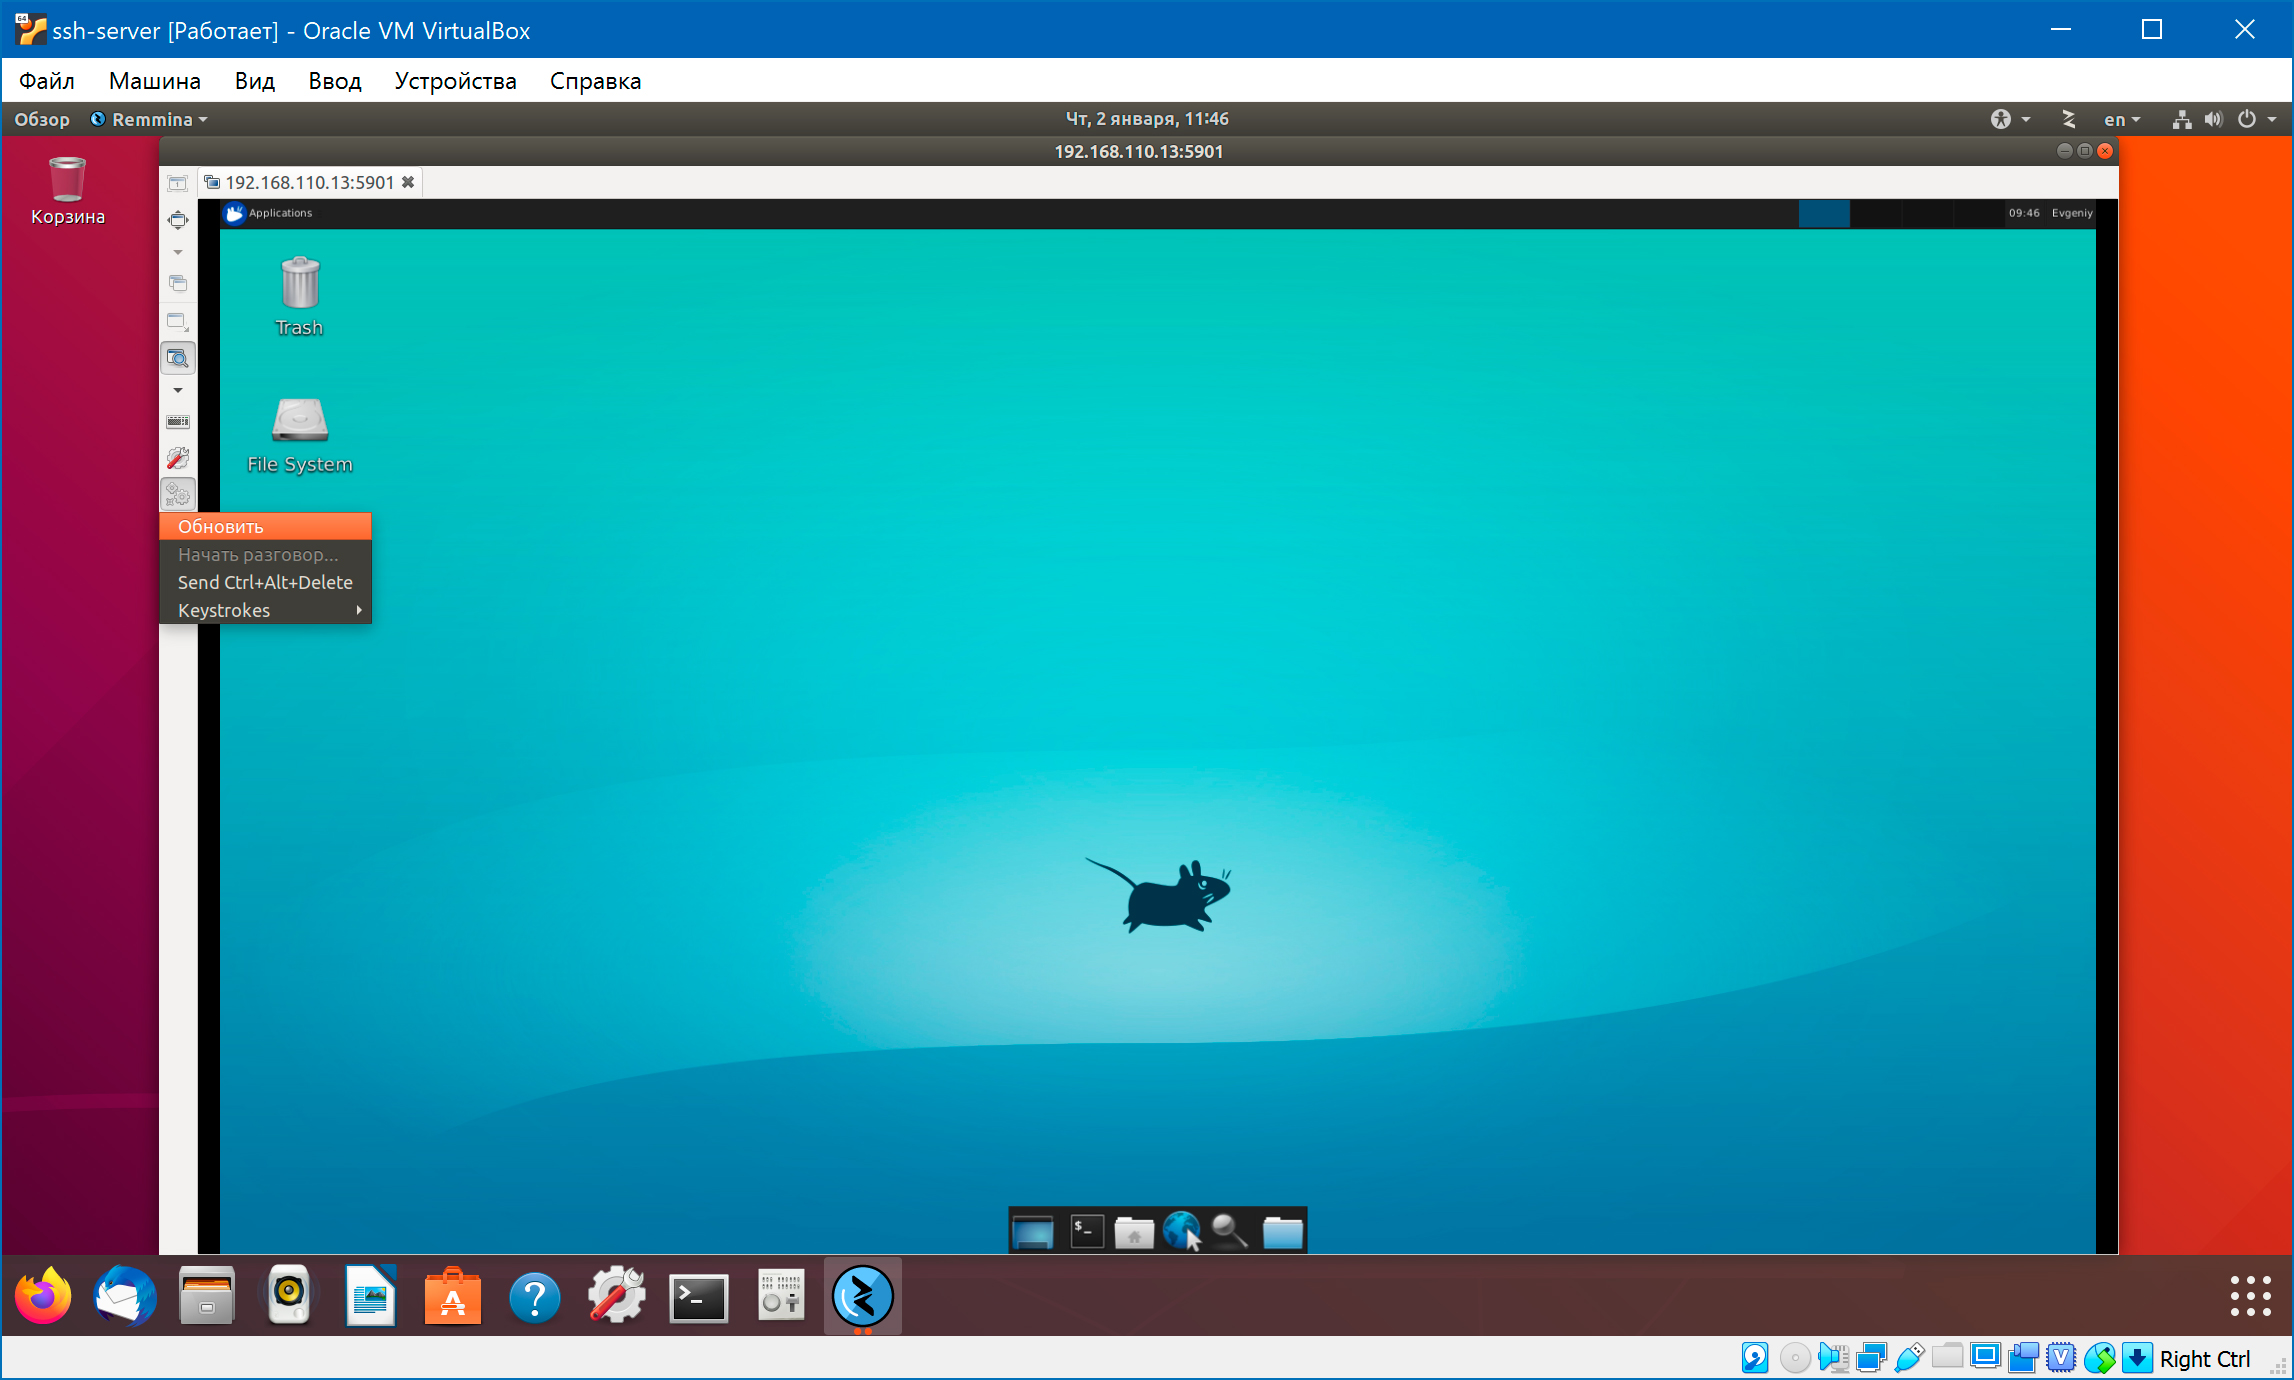
Обратите внимание, что VNC-клиент Remmina умеет создавать ssh-туннель самостоятельно:
Источник
Remote GUI access to a Linux computer using Tightvnc with systemd
This is a guide to installing TightVNC on the Raspberry Pi. The latest version of Raspbian now includes the RealVNC which is an alternative remote desktop tool. If you would prefer to use RealVNC then it is easily enabled through the raspi-config tool, this guide will be useful for those wanting to understand about creating other applications to run on start-up through systemd.
The command line is a great way to manage a remote Linux computer if you don’t mind typing in commands, but sometimes you need to be able to view a GUI. Short of a very long cable one of the best ways of doing this is using the VNC protocol (Virtual Network Computing).
TightVNC vs Real VNC
The TightVNC server creates a different virtual window which is replicated on a different machine using the TightVNC client. This differs from RealVNC which normally usually echos the default screen.
When most people think of a remote desktop tool then they usually think of the way that RealVNC operates. In this case when you move the mouse, or launch an application it displays the same output on a physically attached screen (normally HDMI) and on a remote client over the network.
TightVNC is useful if you want to run something different to what is on the main screen. For example you could use it so that you can have a status display on the main screen (via HDMI) with a different display used for the configuration which is displayed on a laptop.
Another advantage of TightVNC is that it is FREE open source software. As such it has no restrictions on use and you can view and modify the source code. Real VNC is a commercial version of VNC and needs to be licensed. Real VNC is free to use for personal use on the Raspberry Pi, but does have restrictions if you want to do other things with it which may require a commercial license. This includes running the Raspbian Desktop image on a PC as that does not included the commercial software.
Installing a start-up script using Systemd
The following are instructions on how to configure this on the Raspberry Pi (Debian based distribution). It should be similar for any other Debian based distribution (eg. Ubuntu) which uses Systemd start-up files. Some other distributions use different software install tools and possibly different init setup tools.
If this is used in combination with the guide to running the Raspberry Pi headless with Debian Linux then it can be used to setup a Raspberry Pi for remote access without ever needing to connect it to a monitor.
Choosing TightVNC
There are several software projects that support VNC. I have chosen to use TightVNC because it is free open source software (GPL2), provides compression to allow it to work over a slow network (Internet) and is readily available in the software repositories.
Client server model
VNC follows the traditional client sever model. The server software runs on the host to be accessed, and client software runs on the local machine that wishes to control the host. The server and client do not have to be the same (eg. the client can be RealVNC when the server is TightVNC), but some features may only work when the same client and server are used.
Install the TightVNC server software
First refresh the software repository information using
sudo apt update
This is particularly important if you have just installed the operating system as the repository information may be incomplete.
Install the server software from the repositories:
sudo apt install tightvncserver
Start server and configure a password
The first time you run the server it will prompt you to set a password. This is the password that you use when connecting remotely.
There is no need to create a view only password, unless you have a specific need.
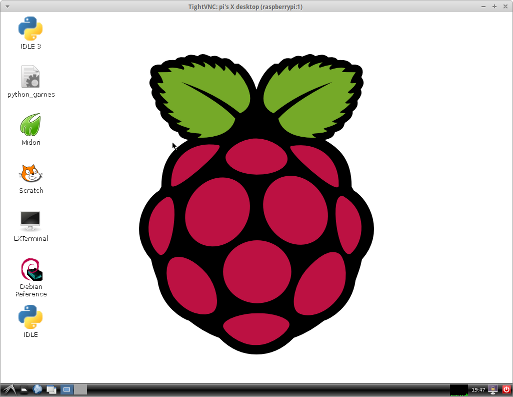
When the server starts it will tell you which virtual desktop has been setup. In this case:
New ‘X’ desktop is raspberrypi:1
says that it’s virtual desktop 1. You would connect to this using :1 at the end of the IP address in the client, this is the one we will setup to start automatically later.
You can run multiple instances. Each time you start tightvncserver it will use the next available desktop, but in most cases you will just need one.
Adding Tightvnc to systemd startup
To have Tightvnc startup automatically we need to create a new startup file, which needs to be stored in the /etc/systemd/system/ directory and end with the suffix «.service». I called this tightvncserver.service. This needs to be created as the root user so using sudo
sudo nano /etc/systemd/system/tightvncserver.service
You may need to change the user name on line 8. It is currently set to pi which is the default username on the Raspberry Pi Raspbian image. Set this to whatever username you want to login to TightVNC as. Do not put root as the user.
Change the file so it is owned by root
sudo chown root:root /etc/systemd/system/tightvncserver.service
Make the file executable by running
sudo chmod 755 /etc/systemd/system/tightvncserver.service
It’s a good idea to test the script at this point rather than waiting until after a reboot. This is done using:
sudo systemctl start tightvncserver.service
Don’t worry if you get the following error message, which is because you’ve already started tightvnc
A VNC server is already running as :1
Enable startup at boot using
sudo systemctl enable tightvncserver.service
TightVNC will now start at startup. I’d recommend you reboot at this point to make sure it’s working but youc an just stop and start the service using the systemctl command instead.
Note that this is designed for running only one instance of TightVNC on the computer. If you want to be able to start and stop specific instances of TightVNC then you will need to tweak the startup script appropriately.
Installing Tightvnc viewer (VNC client) on a Linux computer
On a Linux computer you can install the viewer with
sudo apt install xtightvncviewer
or if that is not in the repositories try:
sudo apt-get install ssvnc
This will work with Debian / Ubuntu based distributions only, for other distributions use the normal package manager.
Note that ssvnc — which is the version I installed on my Kubuntu computer is based on tightvnc, but also has the ability to configure the ssh tunnelling (see later) through the GUI.
Login using
xtightvncviewer 192.168.1.6:1
(replace with your own IP address as appropriate)
Installing Tightvnc view on a Windows computer
To access from Windows or using the Java Client download from TightVNC.com
Securing TightVNC
TightVNC allows anyone that knows the password to login as the user that it’s running under. It also does this without encryption so anyone can snoop in on the session. Fortunately there is a secure solution, which is to tunnel the connection over an ssh (secure shell) login.
First step is to restrict Tightvnc to the local computer only. This is done by adding the option -localhost when starting the tightvncserver. To do this edit line 7 in the /etc/systemd/system/tightvncserver.service file to read:
Then restart the server.
To login using ssh — first login to the host computer using ssh
ssh pi@192.168.1.6 -L 5901:localhost:5901
The -L option creates the tunnel, from the current computer (default) port 5901 to the host computer (as localhost) port 5901. Port 5901 is the default port for display 1, 5902 for display 2 etc.
To connect using tightvnc now use the command
xtightvncviewer 127.0.0.1:1
Note that your previous terminal will now be logged into the Raspberry Pi so you will need to start a new terminal or tab to run the viewer.
If using Windows then the ssh tunnel can be created from within PuTTY 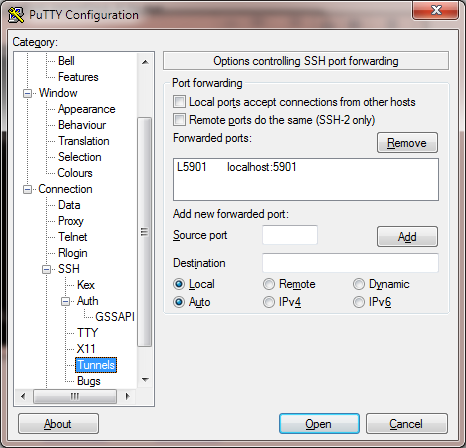
Then connect using the vnc client using 127.0.0.1:1.
You can now use the GUI to run applications on the Raspberry Pi without needing a monitor or keyboard. If you have port forwarding set on your router you can do this over the Internet.
Starting your window manager
The instructions above are sufficient for the Raspberry Pi running Raspbian (Debian). On other systems you may need to make a further configuration change to start your normal window manager / application launcher. If you get a blank screen when connecting edit the file
/.vnc/xstartup and replace the line /etc/X11/Xsession with one of the following as appropriate.
For instance with Ubuntu you would use the entry for gnome, for xubuntu you would use xfce and for kubuntu use kde. The Raspberry Pi uses lxde, but this is started automatically on the Raspberry Pi there is no need to add it to the xstartup file.
Источник


