- Back up your Mac with Time Machine
- Create a Time Machine backup
- Connect an external storage device
- Select your storage device as the backup disk
- Enjoy the convenience of automatic backups
- Learn more
- Use Screen Time on your Mac
- Turn on Screen Time
- Use a Screen Time passcode
- Track usage
- Limit usage
- Approve Screen Time requests
- Learn more
- Timing для Mac или Как перестать растрачивать свое время впустую
- Итоги
Back up your Mac with Time Machine
Learn how to create a backup of the files on your Mac.
Use Time Machine, the built-in backup feature of your Mac, to automatically back up your personal data, including apps, music, photos, email, and documents. Having a backup allows you to recover files that were deleted, or that were lost because the hard disk (or SSD) in your Mac needed to be erased or replaced. Learn how to restore your Mac from a backup.
Create a Time Machine backup
To create backups with Time Machine, all you need is an external storage device. After you connect the storage device and select it as your backup disk, Time Machine automatically makes hourly backups for the past 24 hours, daily backups for the past month, and weekly backups for all previous months. The oldest backups are deleted when your backup disk is full.
Connect an external storage device
Connect one of the following external storage devices, sold separately. Learn more about backup disks that you can use with Time Machine.
- External drive connected to your Mac, such as a USB or Thunderbolt drive
- Network-attached storage (NAS) device that supports Time Machine over SMB
- Mac shared as a Time Machine backup destination
- AirPort Time Capsule, or external drive connected to an AirPort Time capsule or AirPort Extreme Base Station (802.11ac)
Select your storage device as the backup disk
- Open Time Machine preferences from the Time Machine menu in the menu bar. Or choose Apple menu > System Preferences, then click Time Machine.
- Click Select Backup Disk.
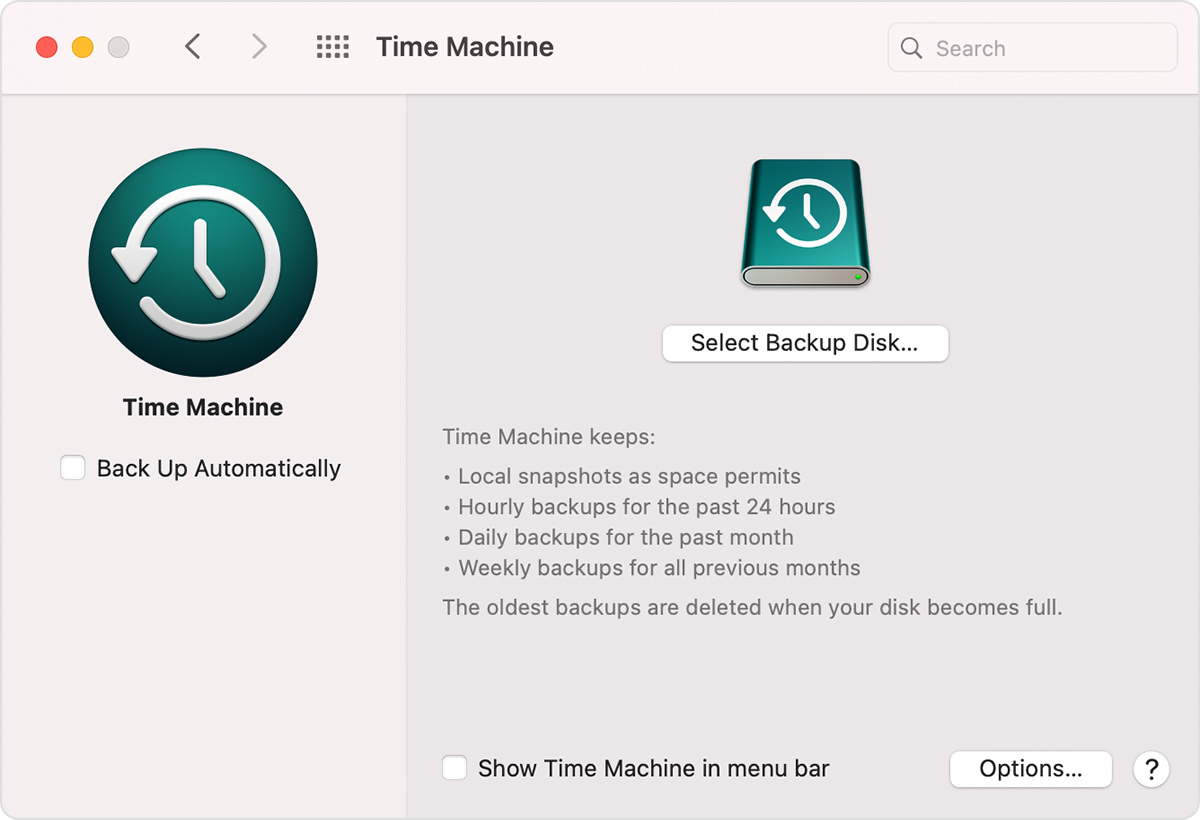
Enjoy the convenience of automatic backups
After you select a backup disk, Time Machine immediately begins making periodic backups—automatically and without further action by you. The first backup may take a long time, but you can continue using your Mac while a backup is underway. Time Machine backs up only the files that changed since the previous backup, so future backups will be faster.
To start a backup manually, choose Back Up Now from the Time Machine menu in the menu bar. Use the same menu to check the status of a backup or skip a backup in progress.

Learn more
- Learn about other ways to back up and restore files.
- If you back up to multiple disks, you can press and hold the Option key, then choose Browse Other Backup Disks from the Time Machine menu.
- To exclude items from your backup, open Time Machine preferences, click Options, then click the add (+) button to add an item to be excluded. To stop excluding an item, such as an external hard drive, select the item and click the remove (–) button.
- If using Time Machine to back up to a network disk, you can verify those backups to make sure they’re in good condition. Press and hold Option, then choose Verify Backups from the Time Machine menu.
Information about products not manufactured by Apple, or independent websites not controlled or tested by Apple, is provided without recommendation or endorsement. Apple assumes no responsibility with regard to the selection, performance, or use of third-party websites or products. Apple makes no representations regarding third-party website accuracy or reliability. Contact the vendor for additional information.
Источник
Use Screen Time on your Mac
With Screen Time, you can monitor usage, schedule downtime, and set limits across all your devices.
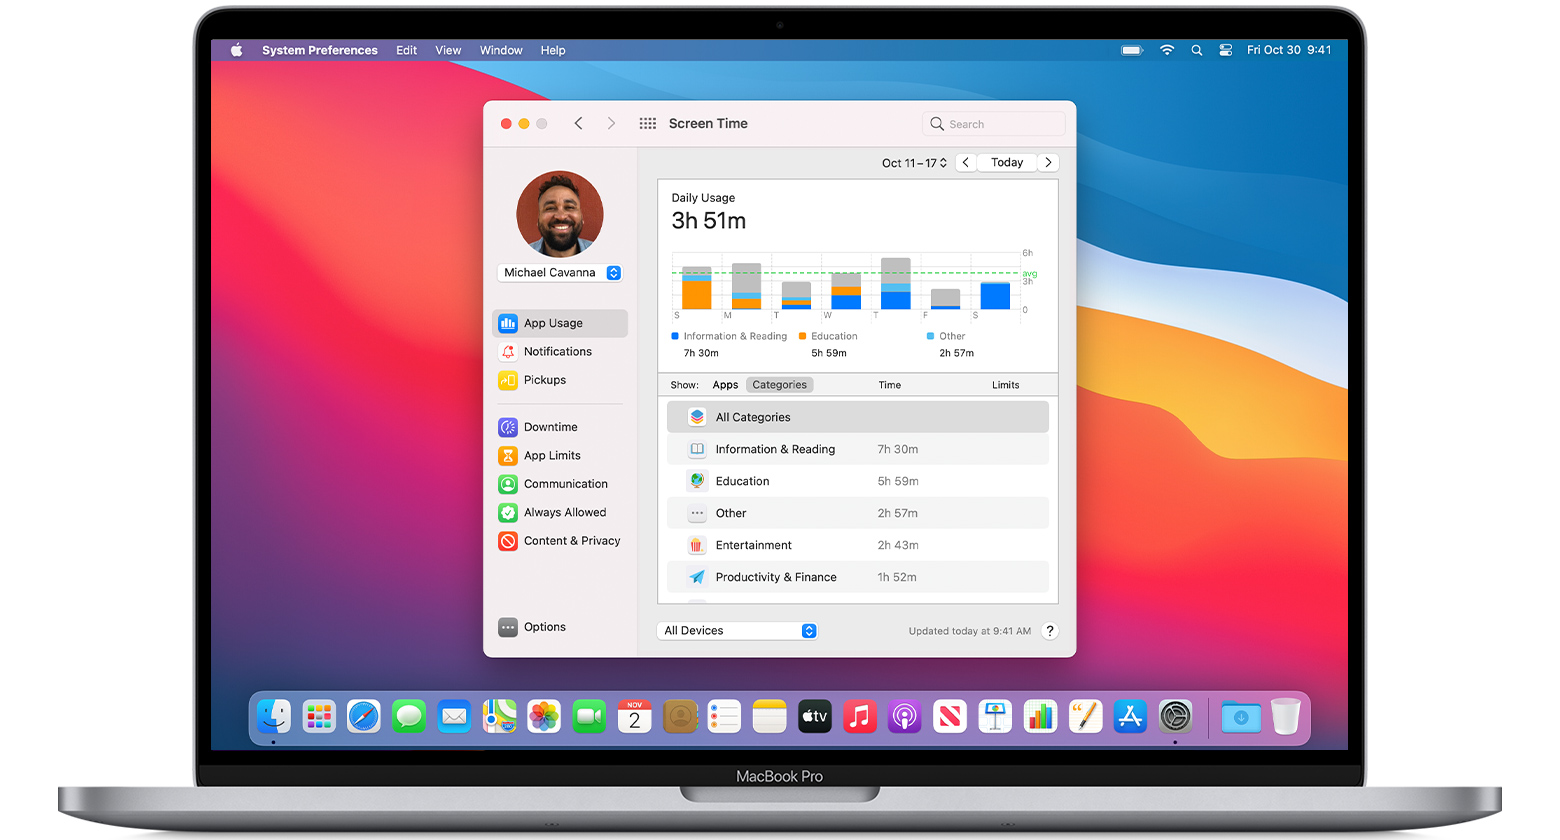
Use Screen Time to see how much time you and your kids spend on apps, websites, and more. Then make informed decisions about how you use your devices, and set limits if you’d like to.
Turn on Screen Time
Follow these steps in macOS Catalina or later:
- Choose Apple menu > System Preferences, then click Screen Time.
- Click Options in the lower-left corner.
- Click Turn On.
- To be able to see usage information for every other device signed in to iCloud with your Apple ID, select “Share across devices” on each Mac. And on each iPhone, iPad, or iPod touch, go to Settings > Screen Time and turn on the same setting.
If you’re using Family Sharing to manage a child account, you can turn on Screen Time directly from each of your child’s devices. Or follow these steps to do it from your Mac:*
- Choose Apple menu > System Preferences, then click Family Sharing.
- Click Screen Time in the sidebar, then select your child’s name from the list on the right.
- Click the Open Screen Time button to return to Screen Time preferences.
- Choose your child’s name from the menu in the upper-left corner.
- Click Options in the lower-left corner.
- Click Turn On.
Before deciding whether to select “Use a Screen Time Passcode,” learn about Screen Time passcodes.
Use a Screen Time passcode
Set a passcode so that only you can change Screen Time settings and allow more time when app limits expire. If you’re a parent, use this feature to set up enforceable content, communication, and privacy limits for your child.
If you’re using Family Sharing to manage a child account, follow these steps:*
- Choose Apple menu > System Preferences, then click Screen Time.
- Choose your child’s name from the menu in the upper-left corner.
- Click Options in the lower-left corner.
- Select “Use Screen Time Passcode,” then enter a passcode when prompted.
- If you’re using the latest macOS, you’re offered the option to enter your Apple ID to enable Screen Time passcode recovery, in case you forget your Screen Time passcode.
If you’re not using Family Sharing to manage a child account, follow these steps:
- Make sure that you’re on the same Mac used by the child, and are logged in to the standard account used by the child. If you’re not sure what to do, just continue with the steps below: Screen Time will help you.
- Choose Apple menu > System Preferences, then click Screen Time.
- Set up Downtime, App Limits, Communication Limits, and Content & Privacy with all of the limits that you want for your child.
- Click Options in the lower-left corner.
- Select “Use Screen Time Passcode,” then enter a passcode when prompted.
- If you’re using the latest macOS, iOS, or iPadOS, you’re offered the option to enter your Apple ID to enable Screen Time passcode recovery, in case you forget your Screen Time passcode.
If you’re setting a passcode while logged in to your administrator account, an alert explains that you should do this from a standard account. If you haven’t set up a standard account for your child, you can either do that and log into their account, or choose from these options:
- Allow this user to administer this computer. If you choose this option, the passcode affects the current user, even though they’re also an administrator of this Mac. This isn’t recommended, because administrators have macOS privileges that could allow them to work around passcode restrictions.
- Don’t allow this user to administer this computer. If you choose this option, you’re prompted to enter your account password in order to modify your configuration. You’re then guided through the steps to create a new administrator account—for use by the parent. The administrator account you’re currently logged in to is converted to a standard account—for use by the child.
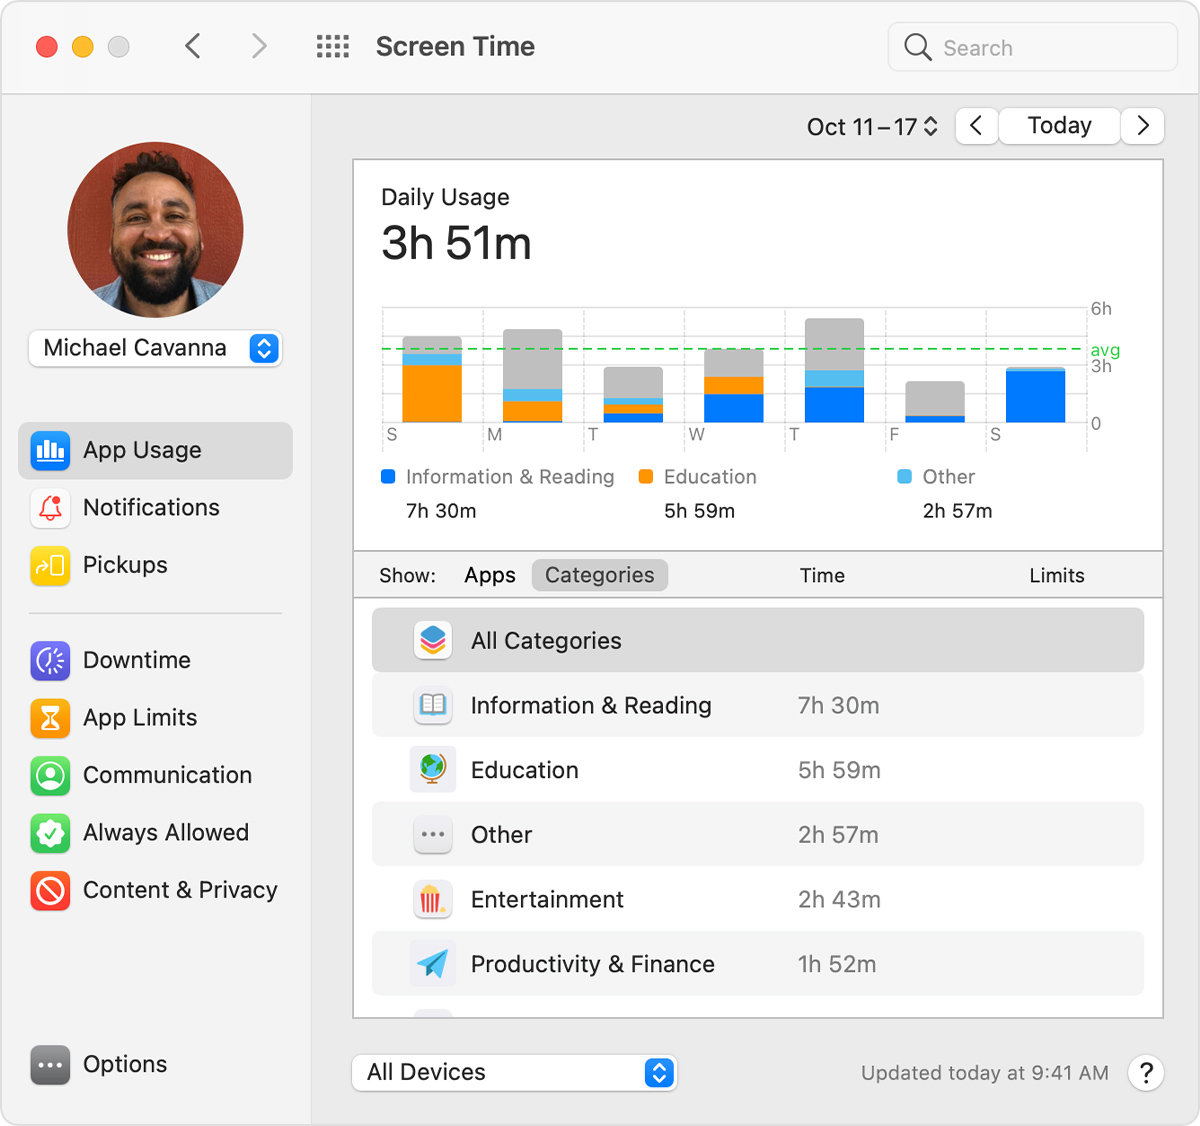
Track usage
Use the App Usage, Notifications, and Pickups features in the Screen Time sidebar to see how much time you spent using apps and websites.
Each feature offers several views:
- To see usage for only one of your devices, choose a device from the menu at the bottom of the window.
- To switch between days, click within the weekly chart, or use the arrow buttons above the chart. To see total usage by week, including how much more or less time you spent compared to last week, choose This Week from the date menu at the top of the window.
- To see usage for a child account, choose the child’s name from the menu in the upper-left corner.
App Usage
See how much time you spent using each app. Click Categories to view usage by categories such as social networking, productivity, or entertainment. To see an app’s category, click the information icon that appears when your pointer is over an app in the list. Or click the app limit icon to quickly create a new app limit for that app or category.
Notifications
See how many notifications you received from each app. Remember, you can use the devices menu at the bottom of the window to separate the notifications received on your Mac from the notifications received on your iPhone, iPad, or iPod touch.
Pickups
See how many times you picked up your iPhone, iPad, or iPod touch, and which app you checked first after picking up the device.
Limit usage
Use the Downtime, App Limits, Communication Limits, Always Allowed, and Content & Privacy features in the Screen Time sidebar to schedule downtime and set limits on apps and websites. Limits apply to this Mac and all of your other devices that are using Screen Time and have “Share across devices” turned on.
To set limits for a child account, choose the child’s name from the menu in the upper-left corner, then set up each feature.* Or do it from each of your child’s devices.
Downtime
Schedule periods during which you can use only the apps that you’ve allowed. A downtime notification appears 5 minutes before downtime starts. After downtime starts, the app shows a message saying that you’ve reached your limit on the app.
- Click OK to close the app and honor the limit you’ve set. Or click Ignore Limit, then choose One More Minute, Remind Me in 15 Minutes, or Ignore Limit For Today.
- If you’ve set a Screen Time passcode, Downtime includes an additional setting: Block At Downtime. When this setting selected and you click Ask For More Time when downtime starts, entering the passcode allows you to approve the app for 15 minutes, an hour, or all day. Child accounts can click One More Minute once, or click Ask For More Time to send their request to the parent account for approval.
App Limits
Set the amount of time you want to be able use apps. You can set limits on specific apps, or entire categories of apps.
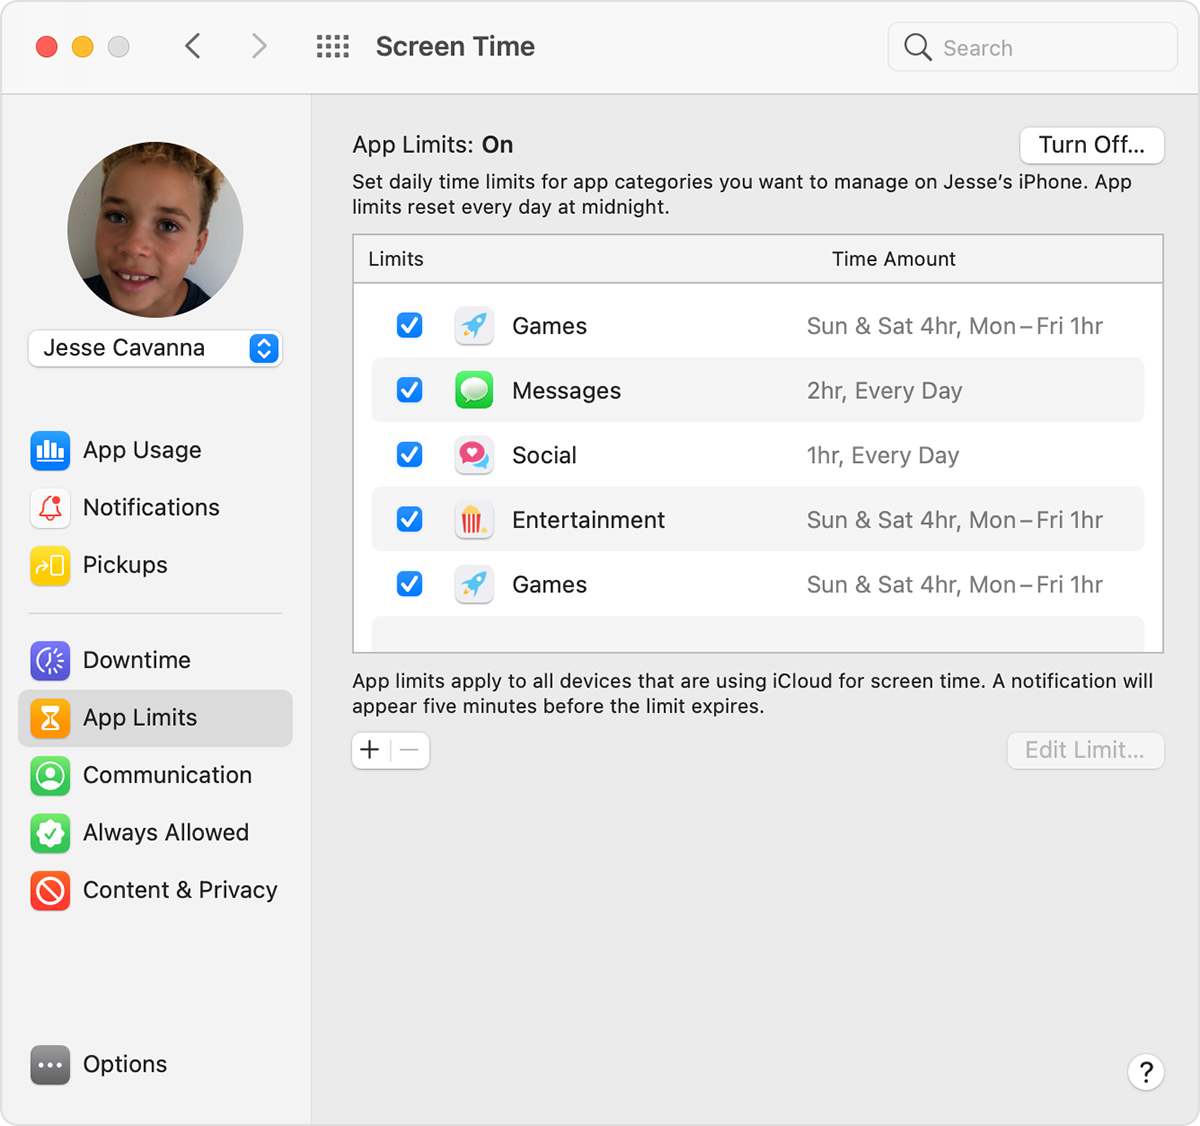
An app-limit notification appears 5 minutes before a limit is reached (expires). After the limit is reached, the app shows a window saying that you’ve reached your limit.
- Click OK to close the app and honor the limit you’ve set. Or click Ignore Limit, then choose One More Minute, Remind Me in 15 Minutes, or Ignore Limit For Today.
- If you’ve set a Screen Time passcode, App Limits includes an additional setting: “Block at end of limit.” When this setting is selected and you click Ask For More Time when a limit is reached, entering the passcode allows you to approve the app for 15 minutes, an hour, or all day. Child accounts can click One More Minute once, or click Ask For More Time to send their request to the parent account for approval.
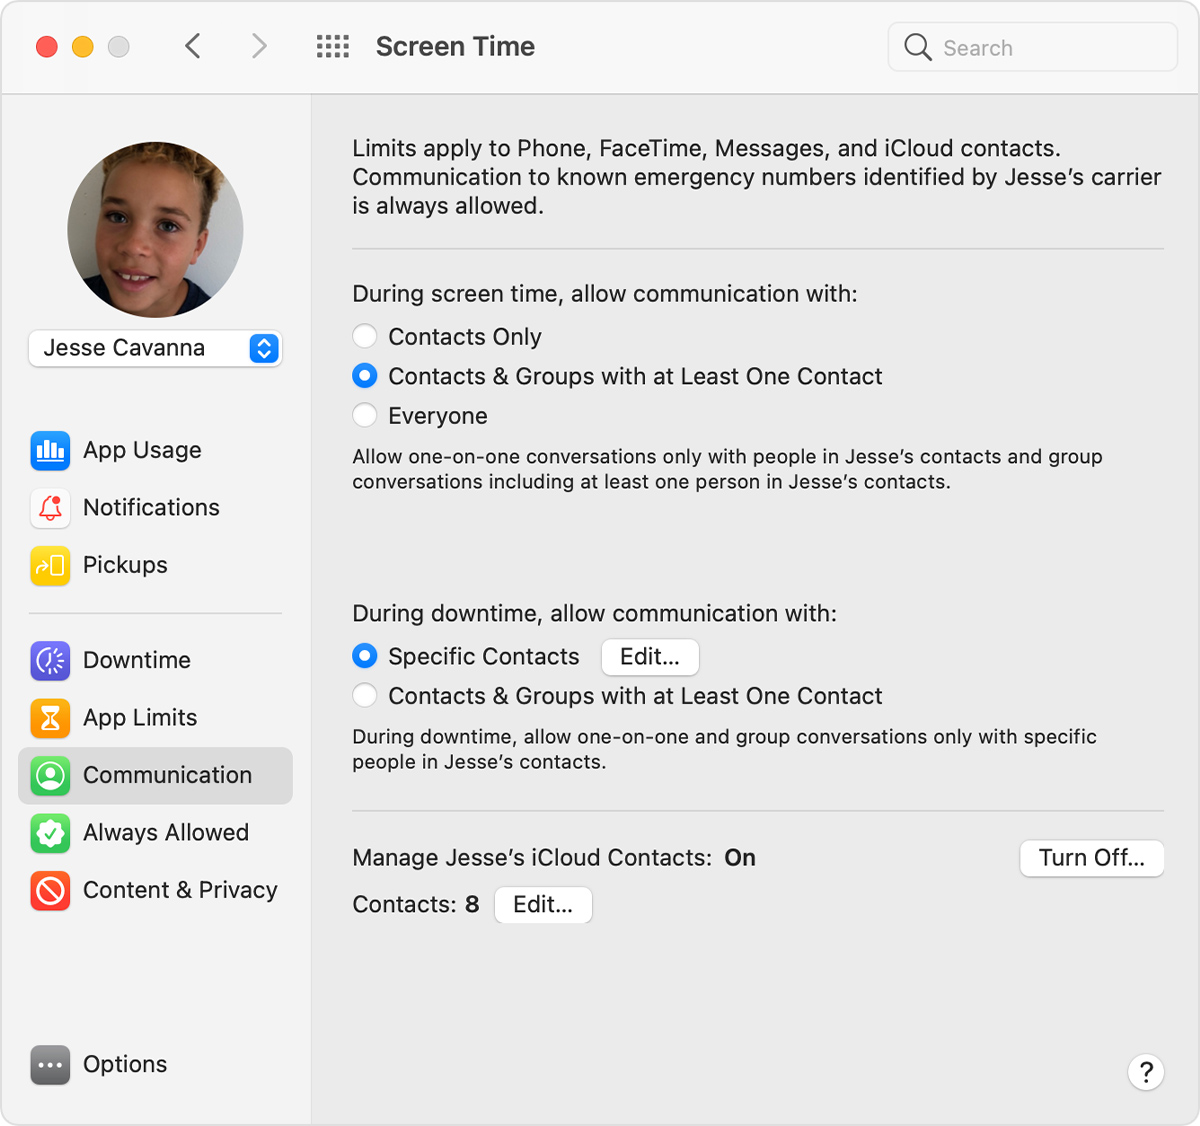
Communication Limits
Control who your children can communicate with throughout the day and during downtime. These limits apply to Phone, FaceTime, Messages, and iCloud contacts. Communication to known emergency numbers identified by your wireless carrier is always allowed. To use this feature, you must have Contacts turned on in iCloud preferences.
Always Allowed
Allow use of certain apps even during downtime or when an app limit has been set for “All Apps & Categories.” Phone, Messages, FaceTime, and Maps are always allowed by default, but you can change that here.
Content & Privacy
Restrict content, purchases, and downloads, or configure privacy settings. If you attempt to use one of the restricted items, you see a message explaining why you can’t do it. For example, if you visit a blocked website, the message says that the website was blocked by a content filter. If you’re using a Screen Time passcode, the message includes the option to click Add Website. You can then enter the passcode to allow the website. Child accounts can send a request for approval to the parent account.
Approve Screen Time requests
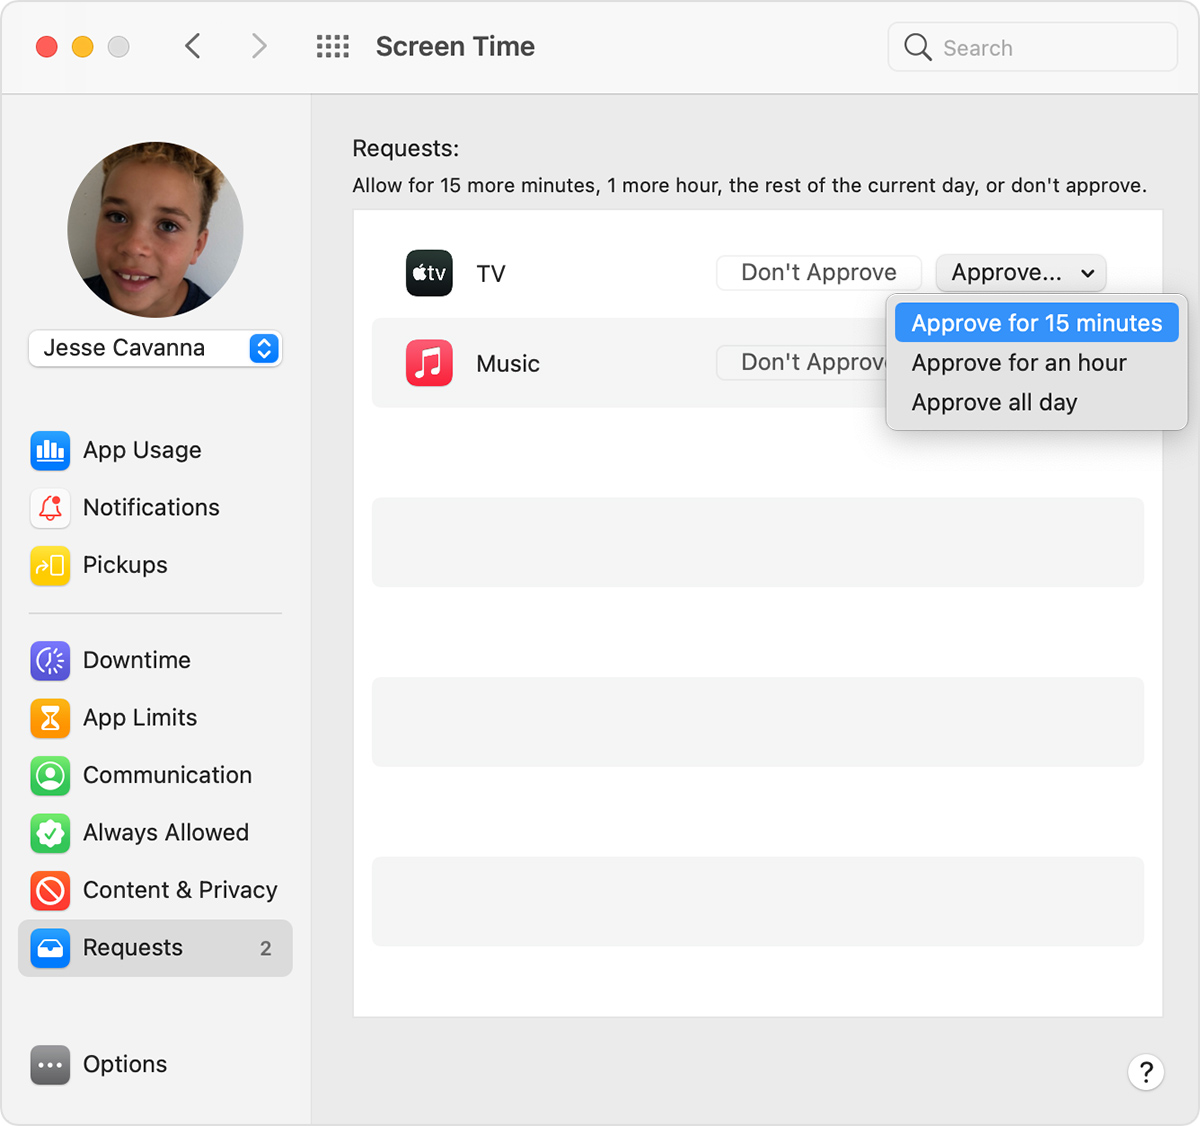
Requests
The Screen Time sidebar includes a Requests section when you have unanswered requests from a child account. From here you can manage all requests from your child. Approve the request for 15 minutes, an hour, or a day. Or click Don’t Approve.
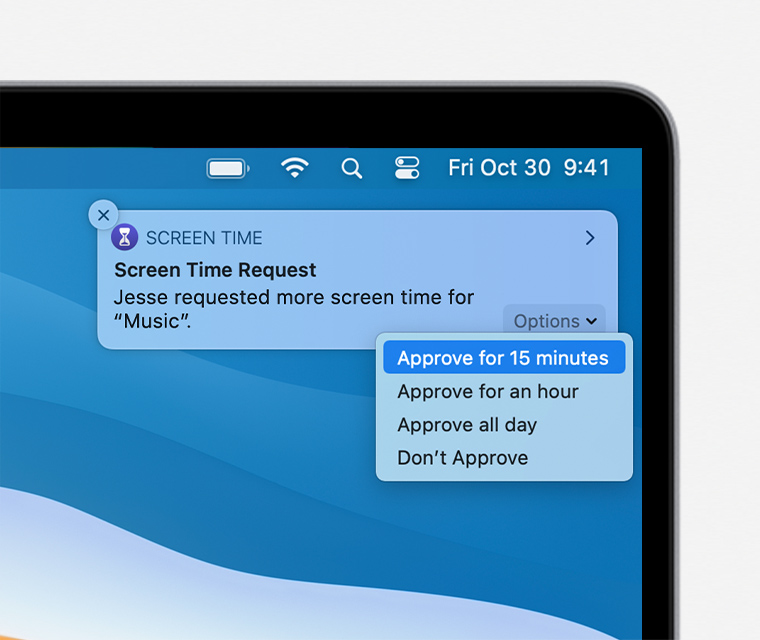
Requests for approval also arrive as notifications, and you can approve directly from the notification:
Learn more
- Use Screen Time on your iPhone, iPad, or iPod touch
- With Ask to Buy, you can give kids the freedom to make their own choices while still controlling their spending.
* If you used your iPhone to set up an Apple Watch for a family member, you need a device using iOS 14 or iPadOS 14 to set up or adjust Screen Time for that watch.
Источник
Timing для Mac или Как перестать растрачивать свое время впустую
- Категория: продуктивность
- Разработчик/Издатель: Thomas Osthege und Daniel Alm
- Версия: 1.6.4
- Русский язык: нет
- Mac: 1490 руб. [Скачать с Mac App Store]
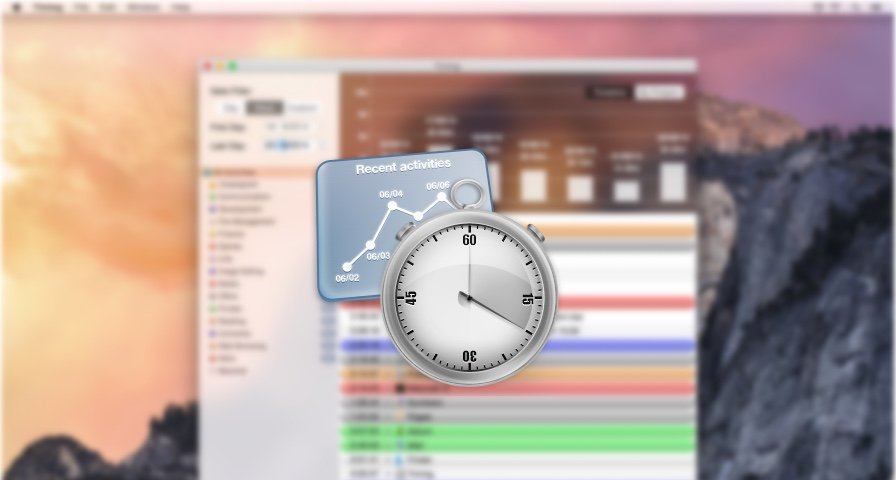
Все мы порой отвлекаемся от работы на Twitter, сериал или Starcraft 2, например. Но это отрицательно влияет на нашу продуктивность, а небольшая трудовая задача неизбежно растягивается на весь день. Однако, с помощью приложения для контроля времени Timing можно расставить все по полкам и выявить ту активность, которая не дает вам спокойно работать.
Приложение находится в строке меню и в фоновом режиме следит за тем, что именно вы используете на протяжении всего дня. Timing ведет запись только тех приложений, окна которых активны в данный момент. Вы же, в свою очередь, можете посмотреть на графики, подробно описывающие, на что и как долго вы тратили свое время.
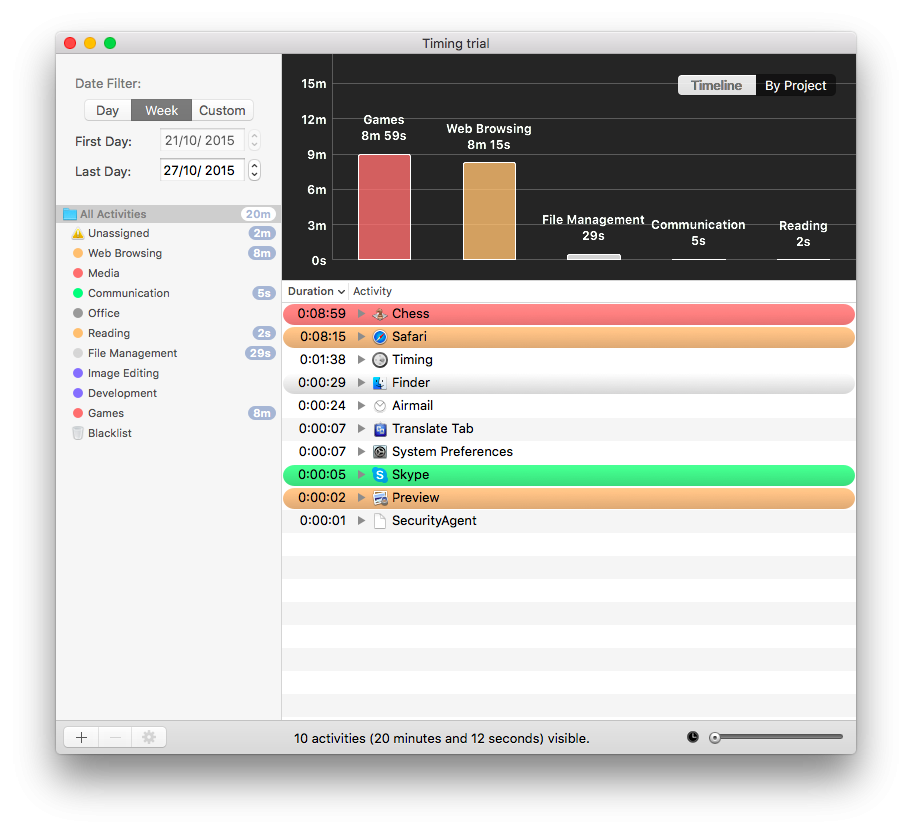
Вся статистика разбита по категориям, вроде игр, офисных приложений, браузеров и мессенджеров. Вы также можете добавлять свои категории или редактировать существующие. Кроме того, вы можете ставить трекинг на паузу, чтобы сделать данные более точными, ведь согласитесь, если вас, например, раньше отпустили с работы в пятницу, то незачем портить статистику развлечениями.
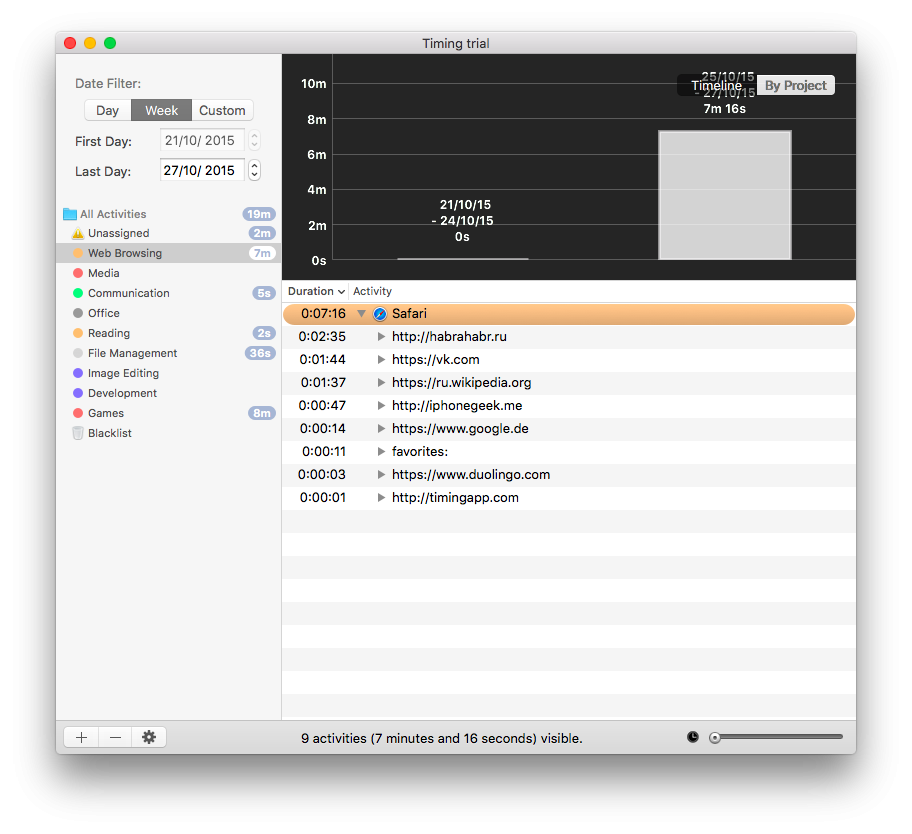
Самое интересное, что Timing отслеживает не только приложения, но и их активность, вплоть до лога ходов в шахматах и истории браузера. Эта особенность позволяет переносить определенную активность в другие категории. Так, например, общение в Facebook явно не относится к “полезной” активности в браузере, поэтому лучше отправить весь серфинг на домене facebook.com в раздел “общение” или создать отдельный раздел и назвать его “соцсети”.
Итоги
Timing позволяет довольно точно определять, когда и на что вы тратили свое время, хотя есть в этом подходе и свой недостаток: если вы слушаете музыку, а окно iTunes свернуто, то приложение не запишет эту активность, но таких примеров немного. Зато всего за пару дней вы сможете наглядно увидеть, что именно отнимает ваше время и стать чуточку продуктивней. На официальном сайте можно скачать демо-версию и попробовать Timing ограниченное время бесплатно.
Источник


