- Tiny core linux repo
- About Our Project
- Tiny core linux repo
- About Our Project
- Tiny core linux repo
- 1. Start the installation
- 2. Browse to the install files
- 3. Formatting
- 4. Bootcodes
- 5. CorePlus installation options
- 6. Tiny Core installation options
- 7. Install
- 8. Testing
- Tiny core linux repo
- 1. Obtaining cfdisk and GRUB via Appbrowser
- 2. Open a root shell
- 3. Partitioning
- 4. Formatting
- 5. Copy over TC system files and prepare for PPR mode.
- 6. Installing GRUB
- 7. Testing
Tiny core linux repo
The Core Project is a highly modular based system with community build extensions.
It starts with a recent Linux kernel, vmlinuz, and our root filesystem and start-up scripts packaged with a basic set of kernel modules in core.gz. Core (11MB) is simply the kernel + core.gz — this is the foundation for user created desktops, servers, or appliances. TinyCore is Core + Xvesa.tcz + Xprogs.tcz + aterm.tcz + fltk-1.3.tcz + flwm.tcz + wbar.tcz
TinyCore becomes simply an example of what the Core Project can produce, an 16MB FLTK/FLWM desktop.
CorePlus offers a simple way to get started using the Core philosophy with its included community packaged extensions enabling easy embedded frugal or pendrive installation of the user’s choice of supported desktop, while maintaining the Core principle of mounted extensions with full package management.
It is not a complete desktop nor is all hardware completely supported. It represents only the core needed to boot into a very minimal X desktop typically with wired internet access.
The user has complete control over which applications and/or additional hardware to have supported, be it for a desktop, a netbook, an appliance, or server, selectable by the user by installing additional applications from online repositories, or easily compiling most anything you desire using tools provided.
The latest version: 12.0
About Our Project
Our goal is the creation of a nomadic ultra small graphical desktop operating system capable of booting from cdrom, pendrive, or frugally from a hard drive. The desktop boots extremely fast and is able to support additional applications and hardware of the users choice. While Tiny Core always resides in ram, additional applications extensions can either reside in ram, mounted from a persistent storage device, or installed into a persistent storage device.
We invite interested users and developers to explore Tiny Core. Within our forums we have an open development model. We encourage shared knowledge. We promote community involvement and community built application extensions. Anyone can contribute to our project by packaging their favorite application or hardware support to run in Tiny Core. The Tiny Core Linux Team currently consists of eight members who peruse the forums to assist from answering questions to helping package new extensions.
Join us here and on IRC Freenode #tinycorelinux.
Learn. Share. Grow your knowledge of Linux.
Источник
Tiny core linux repo
The first step before you install any operating system such as Tiny Core is to back up everything on your computer before starting.
Before making the commitment to perform a frugal install you should consider our Quick and Easy Overview. It covers the basics of running Tiny Core from CDROM and/or USB pendrive. Most will find learning Tiny Core the quick and easy way a better starting point.
But for those who are ready to take the plunge to frugal, this guide shows step by step information on how to install TC via the installer. The older instructions for a manual install are still available, but using the installer is recommended.
The guide assumes you’ve either booted the CorePlus CD, or have installed the tc-install extension (tc-install.tcz)
Keep in mind that this guide is basic and that the user may choose to adapt, remove and/or add parts as desired.
The installer is also applicable to USB sticks and other external media.
Note: If you already have a Linux System booting, then you do not need to make a partition for Tiny Core! Tiny Core can run in a single directory in your existing Linux installation. To do so, at step 1, uncheck the option to «Install boot loader». At step 2, select an existing partition, and at Step 3, do not format it. Upon completion you will need to manually configure your existing boot loader.
1. Start the installation
Open the installer:

It can also be started via the shell or Run icon by typing «tc-install».
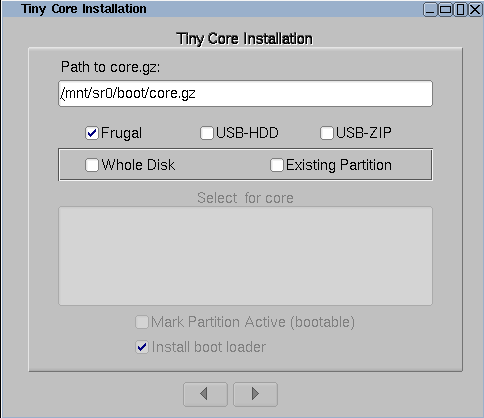
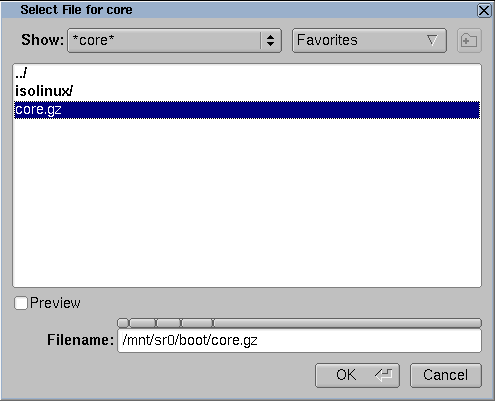
2. Browse to the install files
Browse to /mnt/device/boot and select the core.gz file.
With the source selected, pick the desired install type and target. We’re going to install to an empty hard drive.
If using an existing partition, tick the box to mark it active to have it bootable.

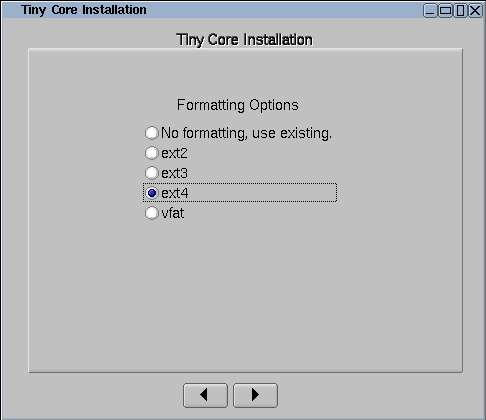
3. Formatting
Format the new partition. It’s recommended to pick one of the ext* options to support linux permissions.
4. Bootcodes
If you want to use additional bootcodes, enter them now. Otherwise leave this blank.
The example bootcodes set a framebuffer resolution and disable wbar icons.
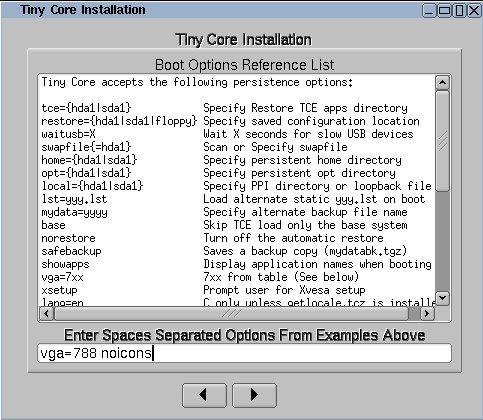
Note that you can edit them any time after the install in the bootloader’s config file, usually extlinux.conf.
5. CorePlus installation options
If you are installing from the CorePlus CD you will see an additional screen asking which extensions from CorePlus you would like to install. Note that you will only see this screen if running the installer from a CorePlus CD.
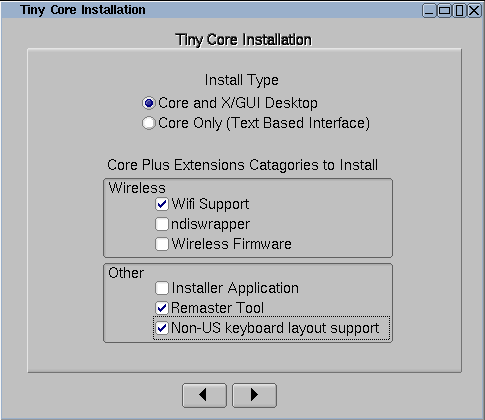
The selected extensions will be installed.
6. Tiny Core installation options
If you are installing from the Tiny Core CD you will see an additional screen asking which directory extensions should be installed from. You should select the cde or tce directory that contains the extensions that you would like installed. For example, if the Tiny Core CD is mounted on /mnt/sr0 you should select /mnt/sr0/cde
Note that you will not see this screen if installing from CorePlus.
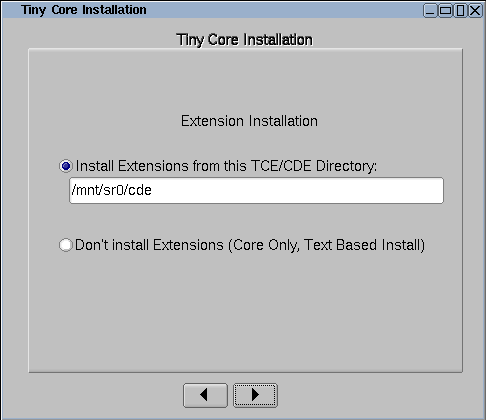
All extensions from selected directory will be installed.
7. Install
If everything’s OK, click on proceed:
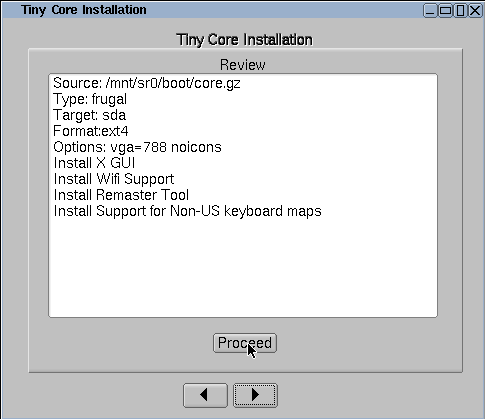
The time required will depend on the size of your hard drive.
8. Testing
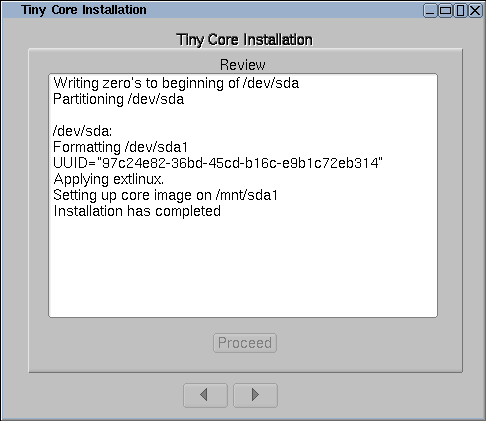
TC is now installed!
Remove the original CD boot media and reboot.
Note: the system may need to be configured to boot hdX first in the BIOS.
Источник
Tiny core linux repo
Before making the commitment to perform a frugal install you should consider our Quick and Easy Overview. It covers the basics of running Tiny Core from CDROM and/or USB pendrive. Most will find learning Tiny Core the quick and easy way a better starting point.
But for those who are ready to take the plunge to frugal, this guide shows step by step information on how to partition a blank IDE hard drive using cfdisk, copy over the TC operating system files, and install the GRUB bootloader on that drive.
It assumes that TC was booted from a liveCD and is already running on the target system with Internet access.
Keep in mind that this guide is basic and that the user may choose to adapt, remove and/or add parts as desired.
The result: a standard TC PPR installation.
Note: If you already have a Linux System booting via Grub, then you do not need to make a partition for Tiny Core! Tiny Core can run in a couple of directories in your existing Linux Grub installation. Skip to Step 5. You will only need to do Step 5 and add a Grub menu item (title, kernel, and initrd lines) as shown in Step 6.
1. Obtaining cfdisk and GRUB via Appbrowser
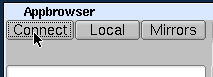
Click on the wbar icon Apps (or access the right-click menu on the desktop and selecting SystemTools/Appbrowser)

Click on Connect
The list on the left side should now be populated. Select cfdisk.tcz from the list.
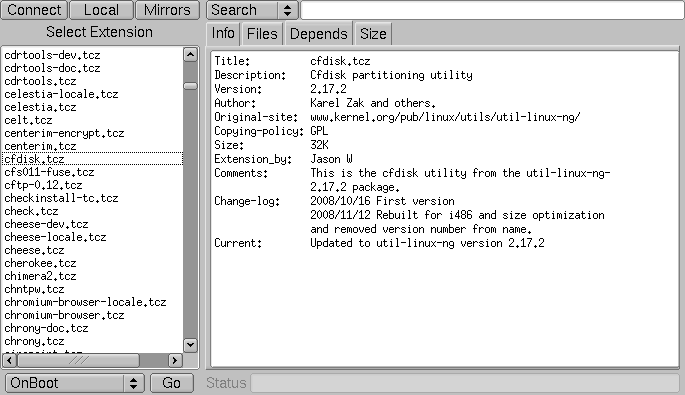
Then click the Go button located in the bottom left corner. It should report that it was installed successfully.

Note: For microcore users, the command-line version of Appbrowser is ab, so you could use ab cfdisk, or to directly download and install, use tce-load -wi cfdisk.tcz
Now repeat this process, by selecting and installing grub-0.97-splash.tcz.
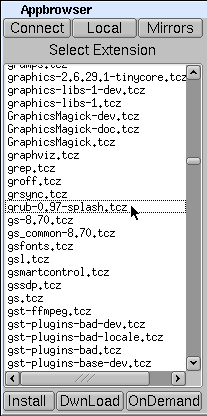
Note: For microcore users, the commnand line version of Appbrowser is ab, so you could use ab grub and select grub-0.97-splash.tcz, or to directly download and install, use tce-load -wi grub-0.97-splash.tcz
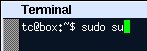
2. Open a root shell
Start a terminal, and type sudo su to make it a root shell:

3. Partitioning
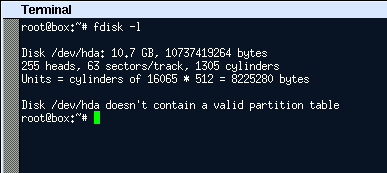
Find a disk you want to install on. The following command will list your disks and their current partitions.
Remember which disk will be used for installation. For the purposes of this guide, /dev/hda will be used.
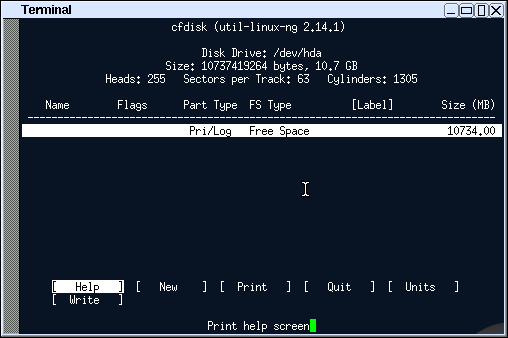
The cfdisk command will be used to partition the hard drives.
Use the left and right arrow keys to navigate the bottom menu, and press Enter to select an option.
Navigate and select [ New ]
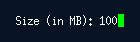
Input the size by entering the numbers you want, or accept the default. Press enter to accept. This demonstration will use 100 MB.
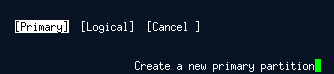
If prompted, choose where to put the new partition.

Set the boot flag on the new partition by selecting [ Bootable ]. Remember this partition as it will be used for installation. This guide will use hda1.
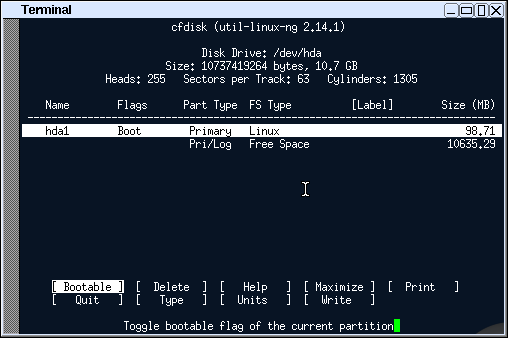
Setup the rest of the disk if preferred, when completed. Adding a swap partition is recommended.

Confirm the write by entering «yes«:


4. Formatting
Format the new partition. This demonstration will use ext3. You may format other partitions here as preferred.
After formatting rebuild the fstab file
Note that if you wish to migrate to ext4, or use grub 2, enable 256-byte inodes by adding -I 256 to the mkfs command above. (capital i)
5. Copy over TC system files and prepare for PPR mode.
Mount the new install partition:
Create directories for TC files and GRUB:
mkdir -p /mnt/hda1/boot/grub
Mount the original boot media. For this guide, TC was booted from an IDE cd-rom drive on the second channel:
Copy over the file:
cp -p /mnt/hdc/boot/* /mnt/hda1/boot/
This will copy over bzImage and tinycore.gz. Ignore any «omitting directory» warnings.
Next setup the tce directory to store application extensions:
mkdir -p /mnt/hda1/tce
Prepare file for backup & restore
6. Installing GRUB
Copy over GRUB files (please note that the grub-0.97-splash.tcz extension will need to be installed as mentioned in step 1):
cp -p /usr/lib/grub/i386-pc/* /mnt/hda1/boot/grub/
The following assumes vi, a console text editor. You can use any other editor instead, for example the «editor» in TC.
Create menu.lst: (note that «lst» contains a lower case ‘L’)
Presss i (enters insert mode)
Enter the following:
default 0
timeout 10
title tinycore
kernel /boot/bzImage quiet
initrd /boot/tinycore.gz
If unsure, copy and paste the above. Note there’s a capital i in bzImage.
Optionally, add other bootcodes now on the kernel line separated by spaces. Note: If you are using a pendrive or other Flash device, be sure to add the boot code of waitusb=5
Press when done. Enter 😡 (saves and quits)
Note that grub uses hd numbers in the form of (hdM,n) and (hdM), instead of hdXy and hdX.
M corresponds to a number from ‘0’, which represents ‘a’ for X.
For every letter after that, add one.
‘b’ is ‘1’, ‘c’ is ‘2’, ‘d’ is ‘3’, etc.
n corresponds to a number from ‘0’, which represents ‘1’ for y.
Subtract 1 from y to get n.
‘1’ becomes ‘0’, ‘2’ becomes ‘1’, ‘3’ becomes ‘2’, etc.
Since this guide is using hda1 for hdXy, this means that (hdM,n) is (hd0,0)
and that the use of hda for hdX means (hdM) is (hd0)
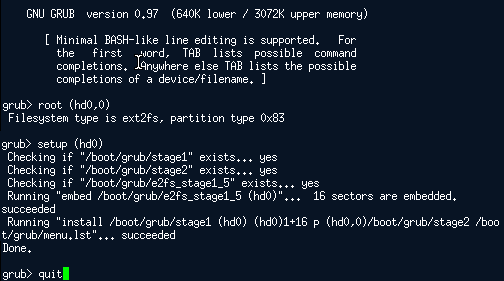
In the grub prompt,
root (hd0,0)
setup (hd0)
quit
Note: you can use tab to auto-complete.
7. Testing
TC and GRUB are now installed!
Remove the original CD boot media:
To test, reboot the system.
Note: the system may need to be configured to boot hdX first in the BIOS.
Источник


