- Как установить Windows 10
- Как восстановить заводские настройки ноутбука
- Как восстановить заводские настройки ноутбука
- Windows 10 Toshiba Hard Drive Deleted File Recovery
- Windows 10 Toshiba Hard Drive Recovery Software Download
- The Bottom Line
- Toshiba recovery from windows
- Toshiba Recovery Disk – Guide for Windows XP, Vista, 7, 8
- Download alternative recovery disk for Toshiba
- Create Toshiba recovery disks
- Create disc for Windows XP
- Create disc for Windows Vista
- Create disc for Windows 7
- Create disc for Windows 8
- Restore a Toshiba computer
- Restore Windows XP with partition or disc
- Restore Windows Vista with partition or disc
- Restore Windows 7 with partition or disc
- Restore Windows 8
- More Information
- Support Links
- Applicable Systems
- Applicable Models
Как установить Windows 10

- Просмотров: 719 288
- Автор: admin
- Дата: 20-06-2013
Как восстановить заводские настройки ноутбука
- Доброго времени суток, хотел спросить у вас, как восстановить ноутбук до оригинальных заводских настроек? Знаю, что эти настройки находятся в скрытом разделе жёсткого диска, но этот раздел я неосторожно удалил и теперь при попытке отката к заводским установкам у меня выходит ошибка. Диски восстановления DVD не создавал и вообще, ни разу не доводилось восстанавливать ноутбук до заводских настроек. Какой выход из моей ситуации?
- Привет админ, объясни пожалуйста как мне быть. Ноутбук Toshiba, на нём есть скрытый раздел, ещё диск C: и диск D:. Скрытый раздел я не трогал, но на диске D: я всё удалил, а теперь не могу откатиться к заводским настройкам, говорят, ноутбуки Toshiba используют для восстановления заводских настроек скрытый раздел и ещё какую-то папку HDD RECOVERY, которая находится как раз на диске D:. Что мне теперь делать?
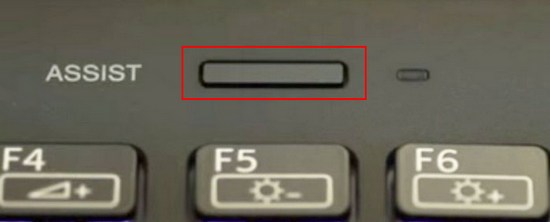
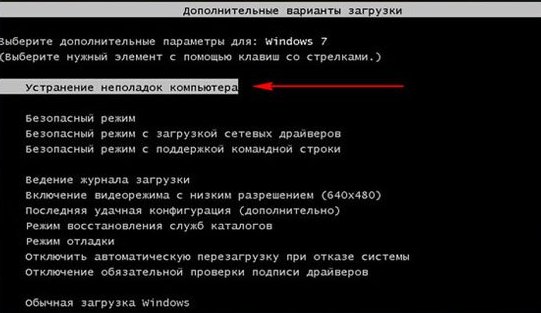
- Купил ноутбук Toshiba, в инструкции к ноуту написано, при желании откатиться к заводским настройкам, жмите клавишу F8, запустится программа восстановления. Нажимал, но запускаются Дополнительные варианты загрузки и всё. А дальше-то, что делать? И ещё вопрос, при первом запуске вышло сообщение – Рекомендуем вам создать носитель реаниматор на USB-флеш-накопителе или DVD-дисках, с помощью программы Recovery, он поможет вам восстановить содержимое компьютера до оригинального заводского состояния, даже в случае серьёзного повреждения компьютера. Объясните, как применить этот носитель-реаниматор в случае проблем?
- Здравствуйте, скажите, как восстановить заводские настройки ноутбука Hewlett-Packard (HP), если бук совсем не загружается. При загрузке Windows выходит синий экран с ошибкой.
- Админ, ответь на такой вопрос. Все производители ноутбуков комплектуют их специальной программой RECOVERY, находящейся в скрытом разделе, с помощью этой программы можно откатить ноутбук к заводским настройкам в случае серьёзных проблем с операционной системой. Вопрос – Есть ли какая альтернатива у этой программы?
Как восстановить заводские настройки ноутбука
- Примечание : Перед откатом к заводским настройкам можете скопировать все данные с диска C: и рабочего стола с помощью бесплатного Live CD.
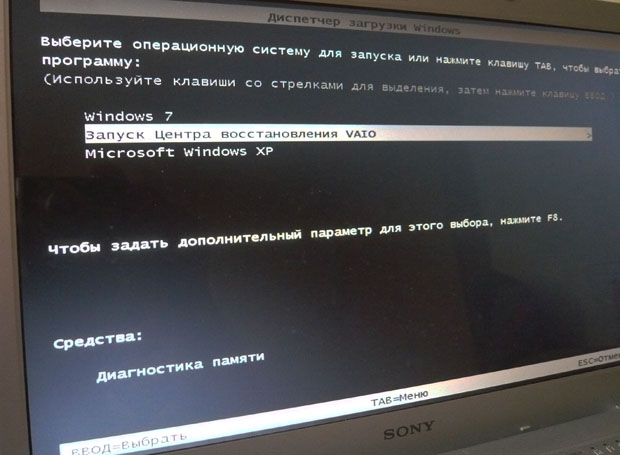
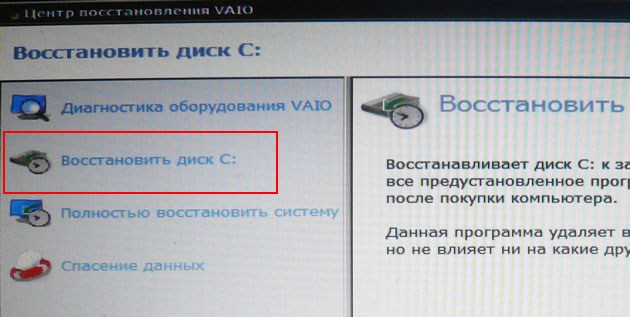
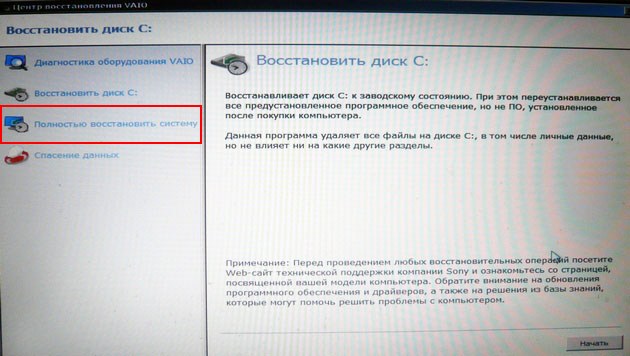
Вы перезагружаете ноутбук и при загрузке жмёте определённую клавишу на клавиатуре, далее запускается программа восстановления заводских настроек, вот здесь нужно быть внимательным. Программа восстановления заводских настроек может предложить вам восстановить только диск C: или восстановить весь жёсткий диск. Если вы выберите диск C:, значит до заводских настроек восстановится только он, а остальные разделы с вашими данными останутся нетронутыми. Если вы выберите восстановить до заводских настроек весь жёсткий диск, значит все созданные вами разделы, со всеми вашими файлами будут удалены и ваш ноутбук будет в таком состоянии, как на момент покупки.
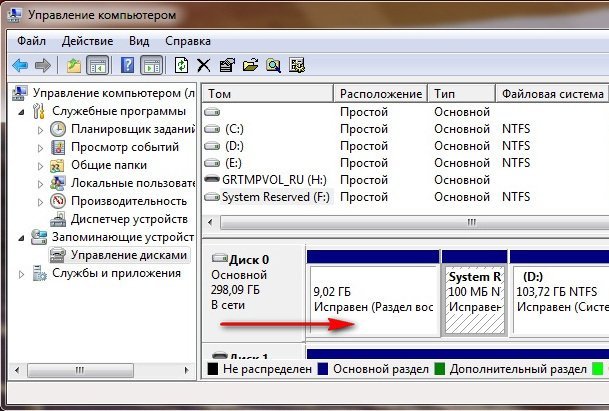
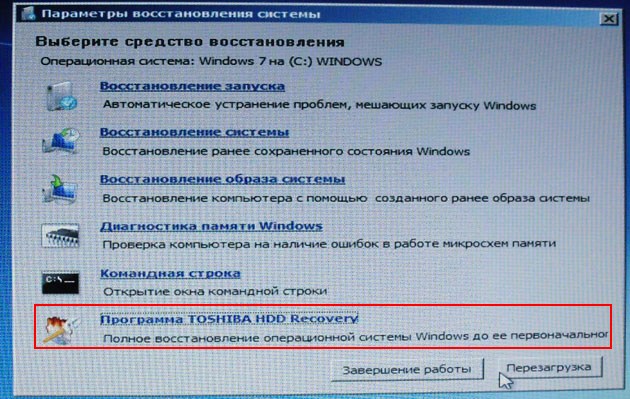
Владельцам ноутбука Toshiba нужно знать, что кроме скрытого раздела RECOVERY, у них ещё есть папка HDD RECOVERY, находящаяся на диске D:, её тоже удалять нельзя.
Примечание : Друзья, если скрытые разделы на вашем ноутбуке не удалены, но программа восстановления заводских настроек не работает, прочитайте нашу статью — Как восстановить изначальные настройки ноутбука, если встроенная изготовителем программа RECOVERY не работает.
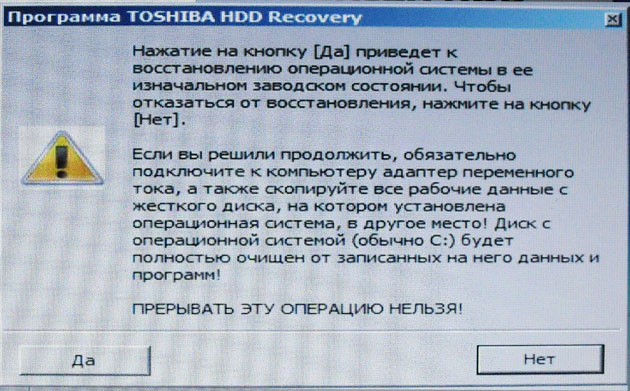
В следующем окне нас предупреждают, что будет восстановлен к изначальному состоянию диск C:, то есть, с него всё будет удалено и состояние его будет приведено на момент покупки ноутбука, диск D: останется нетронутым.
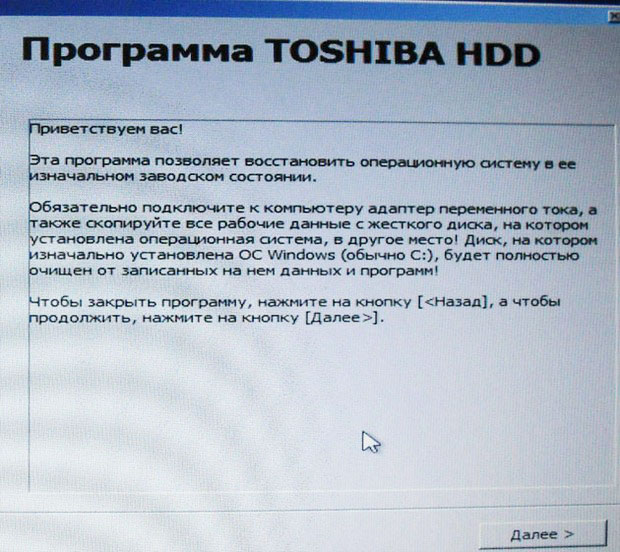
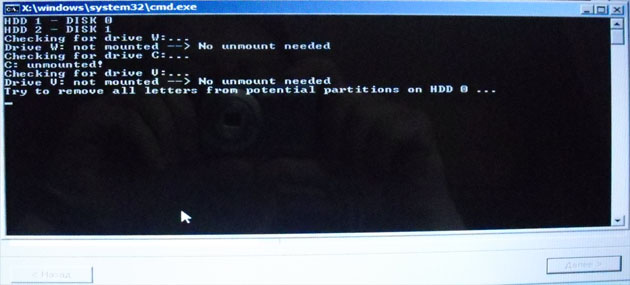
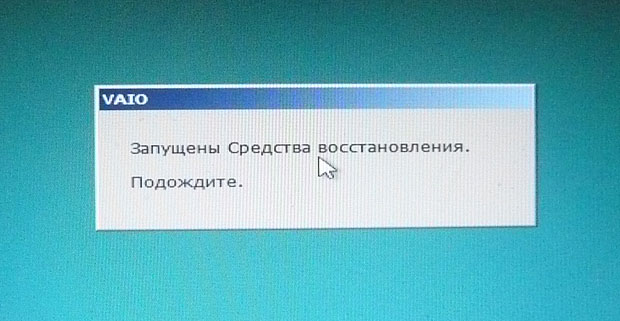
Прерывать операцию нельзя, поэтому убедитесь, что сетевой адаптер питания подключен к ноутбуку. Нажимаем Да и запускаем процесс восстановления ноутбука к первоначальному заводскому состоянию.
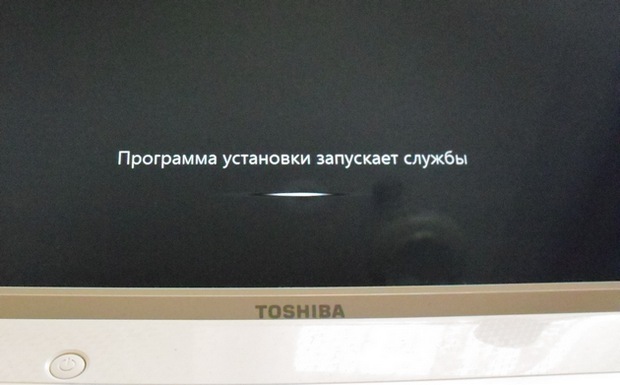
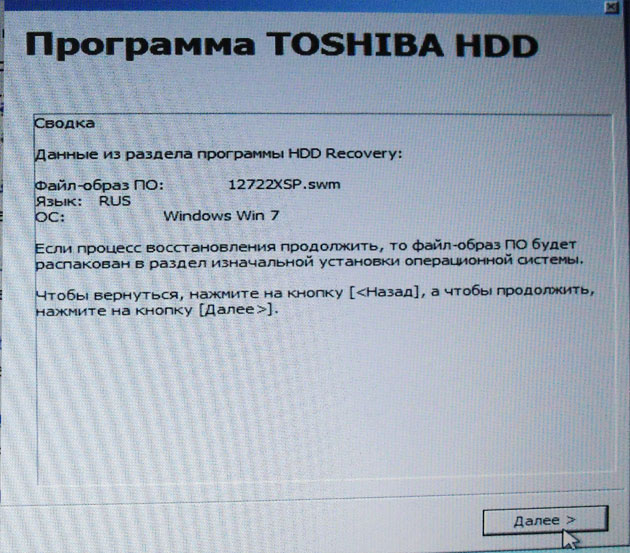
Происходит установка программного обеспечения и драйверов.
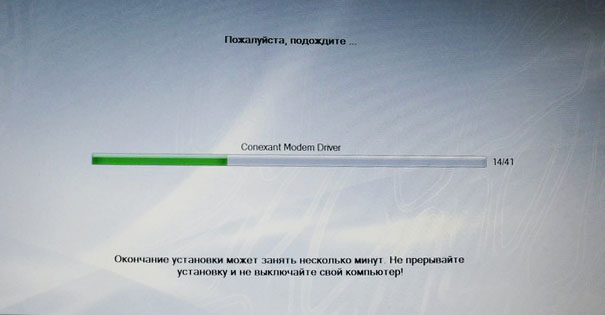
Практически всё завершено, нажимаем Далее,
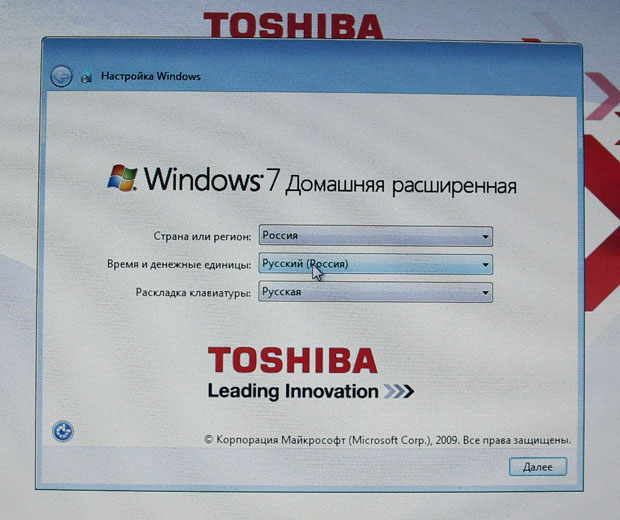
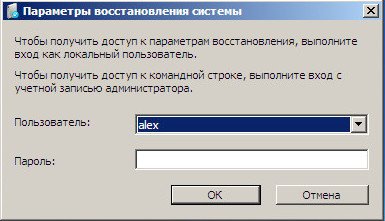
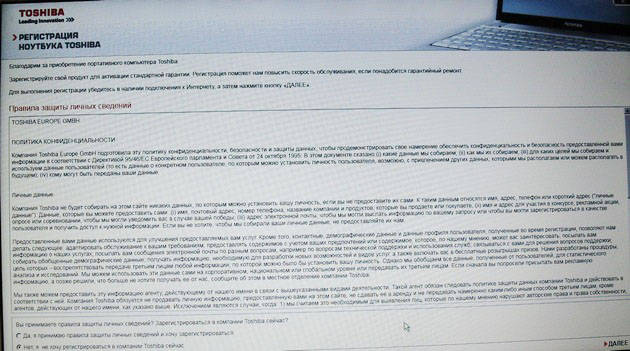
выбираем имя пользователя, пароль для своей учётной записи. Устанавливаем дату, время, они обычно правильны по умолчанию. Если хотите, можете зарегистрировать свой ноутбук для продления гарантии.
Первый запуск Windows. Вот и всё
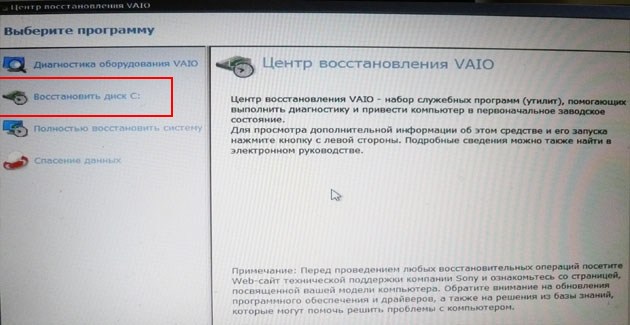
Перед нами появляется окно, в нём мы можем ознакомиться с возможностями восстановления.


Как восстановить до заводских настроек ноутбук HP
Если ноут совсем не загружается из-за системных ошибок и вы хотите восстановить его изначальные настройки, тогда, чтобы не потерять Ваши данные, можно загрузить его с любого Live CD, затем перекинуть важные файлы на переносной жёсткий диск, далее восстановить заводские настройки, так как при восстановлении заводских настроек все ваши данные с ноутбука удалятся.
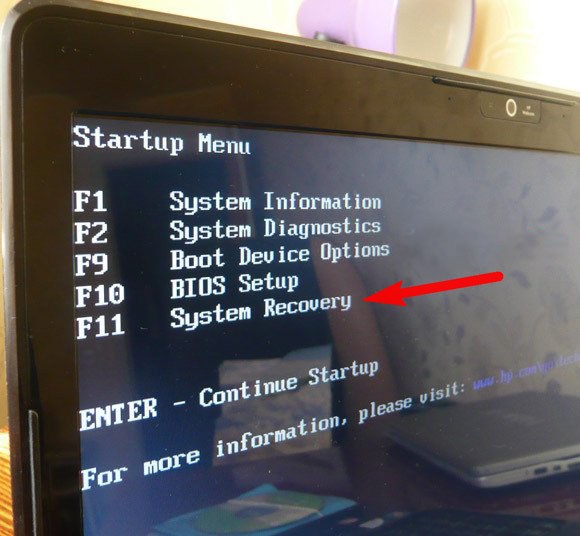
Нажимаем при включении ноутбука клавишу E sc .
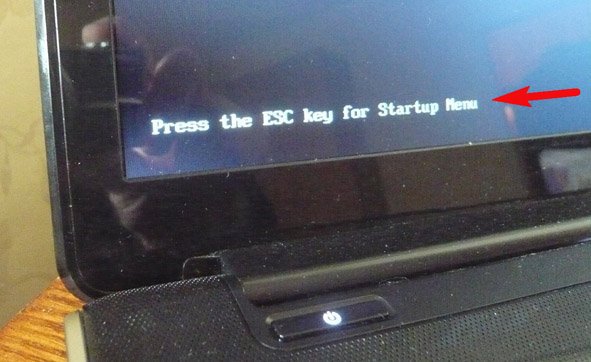
Входим в загрузочное меню, как видим, за восстановление заводских настроек отвечает клавиша F11 — System Recovery . Нажимаем клавишу F11 .
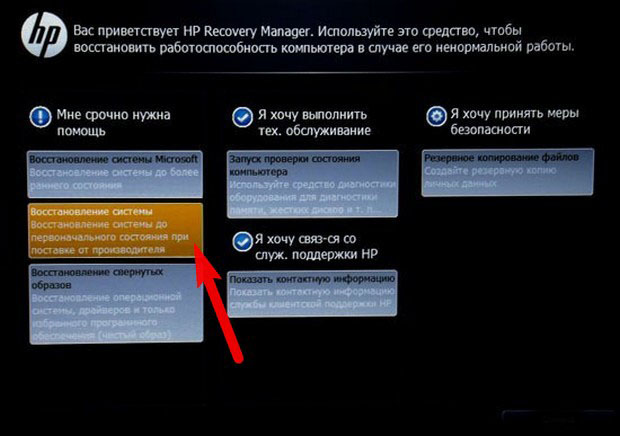
Появляется окно HP Recovery Manager . Здесь нам нужен пункт « Восстановление системы до первоначального состояния при поставке от производителя ».
Щёлкаем на « Восстановить без создания резервной копии файлов » и нажимаем Далее .
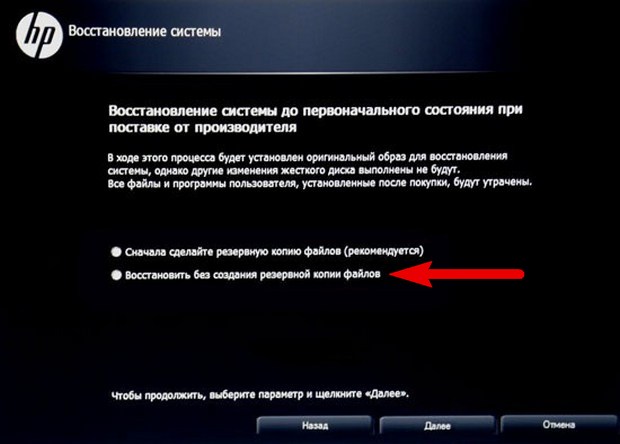
Теперь нужно отключить все внешние устройства: принтер, сканер, мышь, жмём Далее и начнётся процесс восстановления заводских настроек ноутбука HP.
Есть ли альтернатива встроенной в ноутбук программе восстановления к заводским настройкам? Да есть, это программы Acronis True Image Home и AOMEI Backupper Standard и возможностей у них намного больше.
Windows 10 Toshiba Hard Drive Deleted File Recovery
It is necessary to know the solution for Windows 10 Toshiba hard drive deleted file recovery because you may face data loss problem at any time when you are attempting to upgrade your Windows 7 or 8 to the new version, Windows 10.
Here in this article we would share some useful hd repair tools together with helpful amazing Windows 10 Toshiba hard drive deleted file recovery software.
Video — avoid disk failure or repair damaged hd with sfc or chkdsk /f/r/v
Windows 10 Toshiba Hard Drive Recovery Software Download
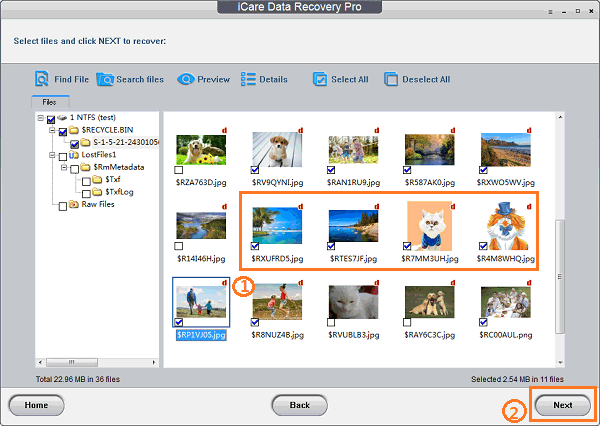
If you delete your important documents and other data while upgrading Windows 10, use iCare Data Recovery Pro. It is very simple to utilize. All you need to follow some instructions. The instructions are given below:
- The first task is to download iCare Pro.
- Install the software.
- Launch the iCare Data RecoveryВ program on the computer.
- Chose the best data recovery scan from the data recovery module.
- You will preview the deleted files on the Toshiba drives which is formatted. Select the files that once deleted and press next. Now you just recover the important documents once it was lost.
iCare Data Recovery Pro is one of the best Windows 10 Toshiba hard drive deleted file recovery software. The software is easy to install and use. This cool software has many benefits, such as:
- It can bring back deleted files or documents from any kind of hard drives especially Toshiba hard drive.
- If your Toshiba hard drive is partitioned or attacked by viruses. Don’t worry, this software can recover files even from that.
- The software is so powerful that it can recover files from the empty recycle bin.
- It can also recover the data lost by unknown reasons.В В В В В
You have already known that Windows 10 has been released a few months ago. The techno giant Microsoft adds a lot of new cool features in it. Whenever you installed this amazing Windows 10 on your PC you may delete some of your important office files, memorable videos, favorite music and many others. But don’t take too much tension because some cool programs can bring up your sweet memories and the valuable documents you lost once from your Toshiba hard drive.
The Bottom Line
The iCare Data Recovery Pro is read-only based software that will not harm to your disk when recover Windows 10 Toshiba hard drive deleted files. It can recover any kind of storage drive or media utilized on any Windows version. For Windows 10, iCare Data Recovery Pro provides you 1 GB free data recovery and GPT disk support.
It is natural to format hard drive by mistake when we upgrade our Windows. It is mainly happening due to mistake or accident. But every problem has a solution. iCare Data Recovery provides an easy solution for deleted file recovery on Windows 10 to restore Toshiba hard drive lost data.
Toshiba recovery from windows
Posted Date: 2010-08-19
Last Updated: 2012-12-07
Distribution: View Public Website
Many Toshiba computers/tablets come with the factory software recovery image stored in a special (hidden) area on the hard disk. From this special hidden system recovery image, you can restore your computer to its factory-fresh software condition by following these steps:
For Windows 7 and Prior versions
- Make sure the device is turned off («Shut-down» from the Windows Start menu)
- Remove any peripherals such an external mouse, keyboard, monitor, USB flash drive etc.
- Make sure the AC Adapter is plugged in and working.
- Press and hold down the 0 (zero) key on the keyboard while powering on the computer/tablet. Release it when the recovery warning screen appears.
- If the recovery process offers a choice of Operating Systems, select the appropriate one for you.
- A warning screen appears, stating that when the recovery is executed all data will be deleted and rewritten.
- Click Yes to continue.
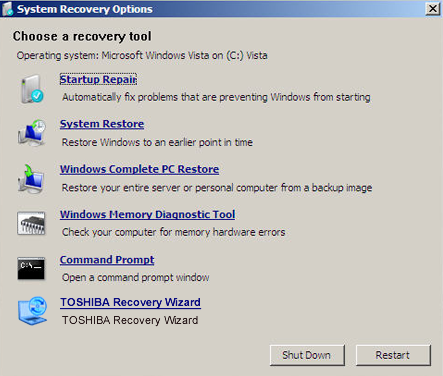
- When the Toshiba Recovery Wizard opens select «Recovery of Factory Software» or the appropriate option for your needs.
- Continue to follow the directions restarting as necessary.
For Windows 8
For devices equipped with Windows 8, «Reset» returns your device to its out-of-box, factory default conditions (removes your personal files and apps as well reset all settings to defaults) similar to a “System Recovery.” Refer to the How To: Understanding System Restore, Refresh, Reset, and, Recovery options in Windows 8 + Video knowledge base article for complete information.
For Windows 10
From a complete shutdown.
1. Hold down 0 (zero) key and then release this key just after the computer is powered on.
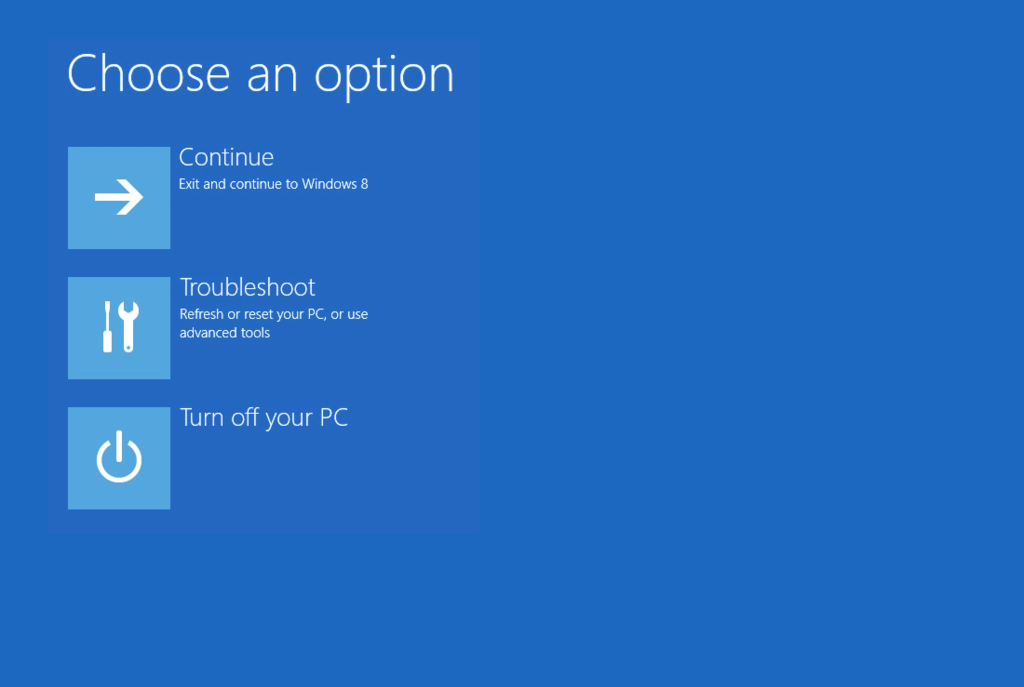
2. Select Troubleshoot -> TOSHIBA Maintenance Utility -> TOSHIBA Recovery Wizard.
3. Follow the on-screen instructions to finish the recovery
Please consult your users guide for complete instructions on System recovery options for your laptop
Please note that the process may vary slightly from machine to machine, that you may be asked to insert disks (multi-disk packages) and that the process may take one to two hours to complete. The recovery process will restart your computer several times.
As you use the recovery process you will have several options. One of these may be to create a custom size partition. Follow the directions on screen for this and other options as prompted. When in doubt, it’s usually best to accept the default, or pre-selected option.
If you would like to learn more about how to create your own recovery media Click Here
Export Control and EULA Use of any software made available for download from this system constitutes your acceptance of the Export Control Terms and the terms in the Toshiba end-user license agreement both of which you can view before downloading any such software.
Toshiba Recovery Disk – Guide for Windows XP, Vista, 7, 8
This guide is about Toshiba recovery disks for the following versions of Windows: Windows XP, Vista, 7, and 8.
A recovery disk is also known as a restore disc, repair disc, boot disc or rescue disk.
Download alternative recovery disk for Toshiba
If the recovery partition of your Toshiba computer is corrupt or damaged, download Easy Recovery Essentials.
Easy Recovery Essentials works with any Toshiba computer model and it’s compatible with the following Windows versions:

Screenshot of Easy Recovery Essentials
Burn Easy Recovery Essentials directly to a CD, DVD or a USB flash drive and use the Automated Repair function to automatically find and fix boot errors.
Note: Easy Recovery Essentials can not be used to install or reinstall Windows.
Create Toshiba recovery disks
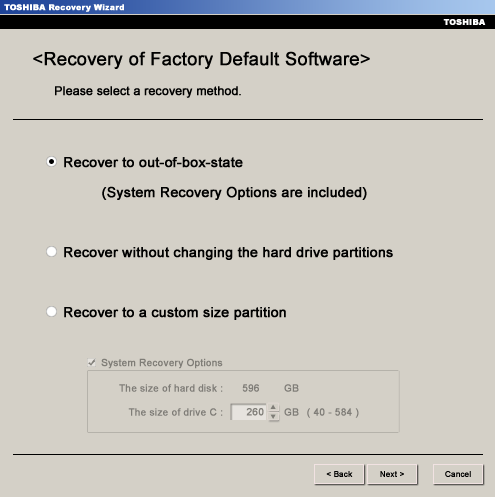
The Toshiba Recovery Wizard software presents several options to recover a computer, depending on the current setup available on your computer:
- Recovery of Factory Default Software. This option deletes all partitions available on your hard drive and start with the default factory settings
- Recover without changing the hard drive partitions. This option reformats the main drive, C:\, to recover it to the default settings while keeping the other partitions intact
- Recover to a custom size partition. This options deletes all partitions available on your hard drive
Depending on your computer model, your computer can either have the recovery partition already installed or have a recovery media already created, or both.
Newer models of Toshiba computers usually do not come with a disk, but you can create it at the first install of your system (recommended!).
Create disc for Windows XP
Toshiba computers with Windows XP come with recovery partition instead of a recovery disk (especially for computer models until mid-2007), but you can create the recovery disk using the Recovery Disc Creator software.
To create the discs using the Toshiba Recovery Disc Creator software, follow these steps:
- Open Windows XP
- Find the Recovery Disc Creator icon on your Desktop or find it in Start > All Programs > Recovery Disc Creator
Create disc for Windows Vista
Follow these steps to create the recovery disk for Windows Vista.
- Boot Windows Vista
- Go to Start, then All Programs, and then find the My Toshiba folder
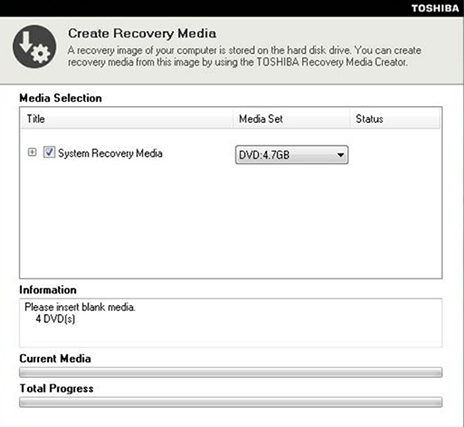
- Click on Recovery Media Creator
- Under the Media Set list, select DVD or USB for the format you want to use for creating the recovery media. Make sure the DVD is blank and the USB is formatted.
Create disc for Windows 7
To create the recovery media for Windows 7, follow these steps:
- Open Windows 7
- Go to Start
- Go to All Programs
- Go to My Toshiba folder
- Click on Recovery Media Creator. This opens the Recovery Media Creator software
- Select DVD or USB Flash from the Media Set drop down list. Selecting DVD means that you will create the recovery media on a DVD.
Create disc for Windows 8
DVD or USB flash drives are the only supported formats for a recovery media for Windows 8 using the Toshiba Recovery Media Creator.
The steps to create the disc are:
- Open Windows 8
- At the Start screen, press the Windows and C key to open the Search Charms bar
- Select Search
- Type “recovery” in the Search field
- In the search results list, click on Recovery Media Creator

If you choose to use a USB flash drive, you must format it before using it!
Restore a Toshiba computer
A Toshiba computer can be restored using the built-in recovery partition (called HDD recovery procedure) or the created recovery discs (CDs, DVDs or USBs depending on your Windows version).
Restore Windows XP with partition or disc
You can restore Windows using the recovery disc by following these steps. You can also restore it using the built-in partition (follow the next set of instructions for this).
If you don’t have a recovery media created yet and can’t boot into Windows XP, go to Download alternative recovery disk for Toshiba.
- Insert your first CD or DVD in the optical drive
- Boot Windows XP
- At the boot screen, press F12
- Wait for the boot menu to appear and then select CD/DVD and press Enter
- Wait for the system to boot to the Recovery Wizard software
- Continue with the process
You can use the recovery partition of your Toshiba computer (called Hard Drive Recovery) to restore Windows XP to its factory default settings:
- Turn off your computer
- Press and hold the 0 key available on your keyword and press the Power On button at the same time
- Wait for the Toshiba Recovery Wizard software to appear
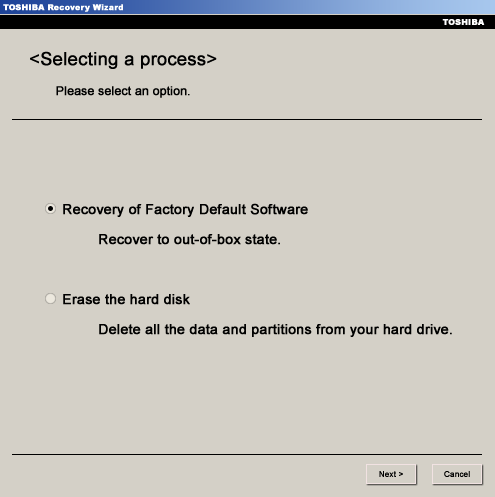
- Select from the available options: Recovery of Factory Default Software or Erase the hard disk
- Select Recovery of Factory Default Software
This procedure erases all your personal files (audio, video, pictures). Backup your files before you continue! You can use Easy Recovery Essentials’ Backup feature
Restore Windows Vista with partition or disc
You can restore Windows Vista using the HDD recovery procedure (the partition) by following these steps:
This procedure erases all your personal files! Create a backup before you continue (You can use Easy Recovery Essentials’ Backup feature).
- Power on your computer and press the F12 key or the F8 key to open the boot menu
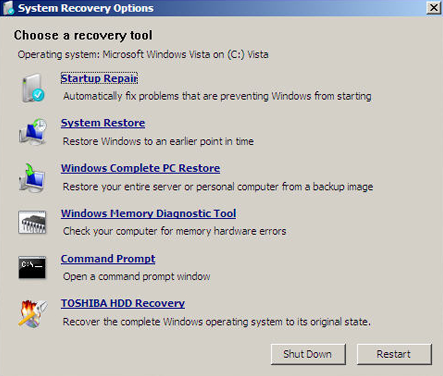
- Choose Repair your computer at the Advanced Boot Options screen
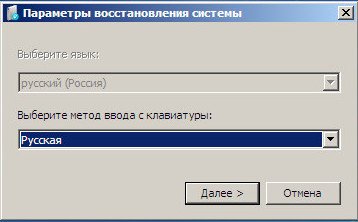
- Select a language and a keyboard language and then log in as an user with administrative rights to the system (the Administrator account)
- Select the HDD Recovery option, the last item from the list
If you have an already created media (CD, DVD or USB) to use, follow these steps:
- Insert the first DVD in the optical drive or the USB flash drive and turn on the computer
- Press the F12 key to boot from the DVD/USB
- Select DVD or USB, depending on what you used to create the media
- At the warning message, click Yes to confirm
- Select Recovery of Factory Default Software
- Click Next
- Select Recover to out-of-box-state to recover the original factory image (the factory default settings)
- Continue with the next steps to complete the process
- Click Finish to restart the computer
Restore Windows 7 with partition or disc
Using the installed partition on your Toshiba, you can restore Windows 7 using these steps:
This procedure erases all your personal files! Create a backup before you continue (You can use Easy Recovery Essentials’ Backup feature).
- Turn off your computer before you continue
- Power on your computer and press the F12 key or the F8 key to open the boot menu
- Wait for the boot menu to appear
- Choose Repair your computer

You can use the recovery DVD or USB to restore Windows 7:
- Insert the first disc in the optical drive: either the DVD or the USB
- Turn on the computer
- When the Toshiba logo appears, press the F12 key on your keyboard
- At the boot menu screen, use your arrow keys and select the DVD option or the USB flash option, if you have the recovery media as a USB flash drive
- Click Yes, at the warning message screen
- At the Selecting a process screen, select Recovery of Factory Default Software
- Click Next
- Select Recover to out-of-box-state to recover the original factory image. For details about the other options presented here, go to Create Toshiba recovery disks.
- Continue with the next steps until a message confirms that your main drive has been recovered
- Click Finish to restart the computer, when prompted
Restore Windows 8
If you can boot your computer, the Windows 8 system can be restored from within Windows 8:
- Open Windows 8
- Open the Charm Bar (press the Windows + C keys)
- Select Settings
- Select PC Settings
- Select General from the left
- Go to the Advanced startup section and select Restart now
- Wait for the Advanced startup screen to show
- Select Troubleshoot
If you can’t boot into Windows 8, follow these steps:
- Power on your computer
- Press the F12 immediately to open the Boot menu
- Select HDD Recovery
- Press Enter
- At the warning screen, select Yes
- Wait for the Advanced startup screen to show
- Select Troubleshoot
More Information
Support Links
It’s an easy-to-use and automated diagnostics disk. It’s available for Windows 8, Windows 7 and Windows Vista. It’s also available for Windows XP and Windows Server.
Read more at Windows Recovery Disks.
Applicable Systems
This Windows-related knowledgebase article applies to the following operating systems:
- Windows XP (all editions)
- Windows Vista (all editions)
- Windows 7 (all editions)
- Windows 8 (all editions)
- Windows 8.1 (all editions)
Applicable Models
This Toshiba-related knowledge base article applies to the following computer models:
- Satellite series: 1130, 1400 (PS140U), 1415 (S105), 1415 (S173), 1600 , 1700, 1800 (PS183U, PS183U), 1805, 2100CDS, 2100CDT, 220CDS, 4030CT, 4060CDT, 4080XCDT, 5105 (S501), 5205 (PS522U), 7200CT, A100 (PSAA0U, PSAA2U, PSAA5U, PSAA8U, PSAANU), A105 (PSAA0U, PSAA2U, PSAA5U, PSAA8U, PSAAKU, PSAANU), A130 (PSAD0U, PSAD6U), A135 (PSAD0U, PSAD6U), A15 (TK119/CL1680), A200 (PSAE3U, PSAF0U, PSAF3U), A205 (PSAE3U, PSAF0U, PSAF3U), A210 (PSAEGU, PSAFGU, PSAFHU), A215 (PSAEGU, PSAFGU, PSAFHU), A300 (PSAG0U, PSAG4U, PSAGCU), A300D (PSAH0U, PSAH8U), A305 (PSAG8U, PSAGCU, PSAG0U, PSAG4U), A305D (PSAH0U, PSAH8U), A35 (PSA30U), A40 (PSA40U, PSA40U), A45 (PSA40U), A50 (PSA50, PSA50U), A500 (PSAP0U, PSAP3U, PSAT0, PSAT3U, PSAT6U, PSAT9U), A500D (PSAQ0U), A505 (PSAP0U, PSAP3U, PSAT0, PSAT0U, PSAT3U, PSAT6U), A505 (PSAT9U), A505D (PSAQ0U), A55 (PSA50, PSA50U), A60, A65 (PSA60U), A65 (S1362), A660 (PSAW0U, PSAW3U), A660D (PSAX0U), A665 (PSAW0U, PSAW3U), A665D (PSAX0U), A70 (PSA70U), A75 (PSA70U), A80, A85, C650 (PSC08U, PSC12U, PSC16U, PSC2EU), C650D (PSC0YU, PSC16U), C655 (PSC08U, PSC12U, PSC16U, PSC2EU), C655D (PSC0YU, PSC16U), C670 (PSC3UU), C670D (PSC4AU), C675 (PSC3UU), C675D (PSC4AU), C850 (PSC72U), C850D (PSC9JU), C855 (PSC72U), C855D (PSC9JU), C870 (PSC8AU), C875 (PSC8AU), E200 (PSE25U), E205 (PSE25U), E300 (PSE30U), E305 (PSE30U), L20 (PSL2XU), L25 (PSL2XU), L30 (PSL33U), L300 (PSL33U, PSLB0U, PSLB8U), L300D (PSLB8U, PSLC0U, PSLC8U, PSLCJU, PSLE8U), L305 (PSL33U, PSLB0U, PSLB8U), L305D (PSLB8U, PSLC0U, PSLC8U, PSLCJU, PSLE8U), L35 (PSL33U), L350 (PSLD0U, PSLD8U), L350D (PSLB8U, PSLE0U), L355 (PSLD0U, PSLD8U, PSLE8U), L355D (PSLB8U, PSLE0U, PSLE8U), L40 (PSL40U, PSL48U), L45 (PSL40U, PSL48U), L450, L450D (PSLY5U), L455D (PSLY0U, PSLY5U), L500 (PSLU0U, PSLU6U), L500D (PSLM0U, PSLV6U), L505 (PSLL0U, PSLU0U, PSLU6U), L505D (PSLM0U, PSLV6U), L555D (PSLP0U, PSLP0U), L630 (PSK00U, PSK60U), L635 (PSK00U, PSK60U), L640 (PSK0GU), L640D (PSK0Qu), L645 (PSK0GU), L645D (PSK0QU), L650 (PSK2CU, PSK2GU), L650D (PSK2LU), L655 (PSK2CU, PSK2GU, PSK2UU), L655D (PSK2LU), L670 (PSK3AU), L670D (PSK3JU), L675 (PSK3AU), L675D (PSK3JU), L740 (PSK0YU), L745 (PSK0YU), L750 (PSK1WU), L750D (PSK32U), L755 (PSK1WU), L755D (PSK32U), L770D (PSK40U), L775 (PSK3SU), L775D (PSK40U), L855 (PSKA8U), L870D (PSKBQU), L875D (PSKBQU), M110 (PSMB0U), M115 (PSMB0U), M15 (PS630U), M30 (PSM30U), M300 (PSMD8U), M300D (PSMDYU), M305 (PSMD8U), M305D (PSMDYU), M30X, M35 (PSM30U, PSM33U), M35X, M40, M45 (PSM40U, PSM42U, PSM43U), M50 (PSM50U, PSM53U), M500D (PSMLYU), M505D (PSMLYU, S4970, PSMLYU), M55 (PSM50U, PSM53U), M640 (PSMPBU), M645 (PSMPBU), MX35X (PSA72U), NB200 (PLL20U), NB205 (PLL20U), P100 (PSPA0U, PSPAGU), P105 (PSPA0U, PSPAGU), P15 (PSP10U), P15-TK130 (CL1642-3), P15-TK131 (CL1746-1), P20 (PSP20U), P200 (PSPB0U, PSPB3U) and P200D (PSPBLU), P205 (PSPB0U, PSPB3U) and P205D (PSPBLU), P25 (PSP20U), P30 (PSP30U), P300 (PSPC0U), P305 (PSPC0U, S8820), P35 (PSP30U), P505D (PSPHJU), P740 (PSMQ1U), P745 (PSMQ1U), P750 (PSAY1U, PSAY3U), P755 (PSAY1U, PSAY3U), P770 (PSBY1U) and P770D (PSBZ1U), P775 (PSBY1U) and P775D (PSBZ1U), P850 (PSPKBU), P855 (PSPKBU), P870 (PSPLAU), P875 (PSPLAU), R10 (PSR10U), R15 (PSR10U), T110 (PST1AU), T115 (PST1AU(, U300 (PSU30U), U305 (PSU30U, PSU34U), X200 (PSPB9U), X205 (PSPB9U)
- Tecra series: 8000, 8100, A8, A8 (PTA83U)
- Qosmio series: G15R
- Portégé series: 7020CT, A600 (PPA60U), A605 (PPA60U), R830 (PT324U), R835 (PT324U)


