- Скачать: TOSHIBA Recovery Disc Creator [Vista, Предустановленное]
- Recovery для Toshiba Satellite L755 Win7 x64 x64 [2011, MULTILANG +RUS]
- Toshiba Тошиба Recovery ALL Driver & Utility Windows 7 RUS 2010 (x86/x64)
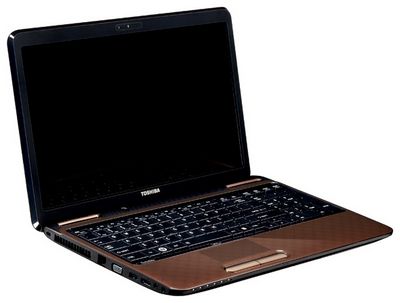
- Toshiba Satellite L755
- При комментировании запрещается/недопустимо:
- Toshiba windows recovery disk download
Скачать: TOSHIBA Recovery Disc Creator [Vista, Предустановленное]
Microsoft отстает Windows Vista, а компания Toshiba не выпускает ноутбуки уже несколько лет Windows Предустановленный вид. Эта статья представляет интерес только для людей, у которых все еще есть ноутбуки с операционными системами, которые не обновлялись с 2006. Если вы все еще используете Windows Vista, мы рекомендуем вам обновить операционную систему.
Многие люди, которые купили портативный компьютерВЭ TOSHIBA cu Windows перспектива предустановленнымЧтобы приобрести не получил ни одной DVD Recovery Disc CreatorВместо этого, в одном из разделов жесткий дискКПК находит папку (HDDRecovery) Несколько ГБ, которая содержит операционную систему, драйверы и необходимое программное обеспечение система реанимационная.
папка HDDRecovery Он не должен быть перемещен или переименован до того, как написано на двух DVD-дисков с программным обеспечением Toshiba Recovery Disc Creator. Проблема заключается в том, что некоторые пользователи удалили программу перед созданием Диск восстановленияКПК и монтажный комплект данного программного обеспечения не найден в любом месте. Даже на официальном сайте Toshiba.
После того, как я сделал это глупо (для удаления программного обеспечения, прежде чем создавать DVD-диски), я все-таки удалось догнать установочный комплект TOSHIBA Recovery Disc Creator: P
TOSHIBA Recovery Disc Creator
После загрузки и разархивировать файл выше, войти в папку и запустите TOSHIBA Recovery Disc Creator TRORDCLauncher.исполняемый. Если вас приветствует сообщение «Создание восстановления среднего невозможноУбедитесь, что папка HDDRecovery Он был перемещен из вторичного раздела HDD.
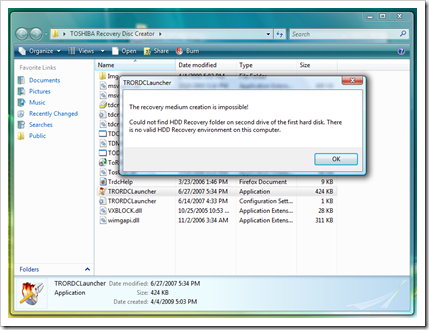
Это программное обеспечение может помочь пользователям, которые купили ноутбуки Toshiba Windows Vista Home Premium предварительно установленной. TOSHIBA Recovery Disc Creator был протестирован на портативный компьютер Toshiba A300 1QE, но вполне возможно, что это программное обеспечение совместимо на других моделях ноутбуков Toshiba.
Recovery для Toshiba Satellite L755 Win7 x64 x64 [2011, MULTILANG +RUS]
Recovery для Toshiba Satellite L755
Год/Дата Выпуска: 2011
Версия: Win7 x64
Язык интерфейса: Мультиязычный (русский присутствует)
Таблэтка: Не требуется
Системные требования: Ноутбук Toshiba Satellite L755
: Образ ISO дисков восстановления ОС Windows 7 Home Premium x64 Rus для ноутбуков Toshiba Satellite L755 включая все необходимые драйверы и утилиты. Возвращает ноутбук в предустановленное состояние заводом изготовителем.
Подходит ко всем модификациям L755.
ВНИМАНИЕ. Заранее позаботьтесь о сохранении важной информации, т.к. при восстановлении с данного диска произойдёт полное стирание информации с жесткого диска.
1. Вставить диск в привод
2. Перезагрузить компьютер
3. Выбрать загрузку с привода компакт-дисков (по F12, если кто не знает)
4. Отвечать на вопросы системы и ждать. (Этот процесс может на пару часов растянуться.)

Чтобы скачать Recovery для Toshiba Satellite L755 Win7 x64 x64 [2011, MULTILANG +RUS] бесплатно, без регистрации и платных смс вам нужно скачать специальный торрент-клиент. Он может быть любым, мы рекомендуем µTorrent. Возможно, он у вас уже стоит, тогда просто нажмите кнопку скачать по магнет-ссылке выше и следуйте дальнейшим инструкциям. Скачивать файлы таким образом удобно, быстро и безопасно.

Каждая программа, включая Recovery для Toshiba Satellite L755 Win7 x64 x64 [2011, MULTILANG +RUS] содержит в себе проверенный кейген (в народе кряк, патч) или серийник (ключ). Так же таблетка может быть уже «вшита» в софт.
Перед установкой любого взломаного софта вы должны понимать, что несете полную ответственность за свой ПК и возможный ущерб, который могут нанести крякнутые программы. Хоть мы стараемся удалять такие раздачи, но 100% гарантии нет.
Если вам понравилась программа или вы заработали на ней деньги, не поленитесь купить официальную версию. Это поможет сделать ее еще лучше + вы получите техническую поддержку и самые свежие обновления.
Toshiba Тошиба Recovery ALL Driver & Utility Windows 7 RUS 2010 (x86/x64)
Toshiba Тошиба Recovery ALL Driver & Utility Windows 7 RUS 2010 x86/x64
Год выпуска: 2010
Версия: Windows7 x86/x64
Платформа: Windows 7
Совместимость с Vista: да
Системные требования: Windows 7 и почти любой ноутбук Тошиба.
Язык интерфейса: английский + русский
Таблэтка: Не требуется
: Этот диск был мною получен (куплен, ссылка в слове выше
Разработчик: Toshiba) по программе обмен винды XP и 7. Были присланны 2 диска. Один с windows 7 а второй с автоматическими драйверами и всеми утилитами и прогами, под проктически любой тошибовский ноутбук Toshiba. Диск и дрова на 10 языках включая Русский! После установки windows 7 первый диск (в этой раздаче нет). Вставляете второй диск (эта раздача) Есть автозапуск, где вы выбираете язык, затем модель своего ноутбука, и нажимаете старт. И все, ждете конца установки ВСЕХ драйверов и утилит с прогами и перегружаетесь. )
P.S. Вот выложил первый диск из присланного комплекта с тошибовской русской Windows7 — http://yadi.sk/d/ZWhb2ojhHj6Ek
Доп. информация: Этот диск подходит к ЛЮБОМУ ноутбуку Тошиба, перечисленному в этом списке:
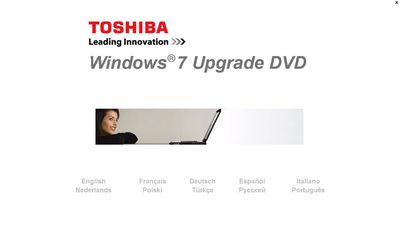
Ноутбуки Тошиба, отвечающие требованиям Обновление до WINDOWS® 7 Drivers DVD
Satellite U400 PSU44E
Satellite U400D PSU48E
Satellite A300 PSAG8E
Satellite A300D PSAH8E
Satellite L350 PSLD8E
Satellite L350D PSLE8E
Satellite L300 PSLB8E
Satellite L300D PSLC8E
Satellite P300 PSPC8E
Satellite P300D PSPD8E
Satellite A350 PSALWE
Satellite A350D PSALEE
Satellite L500/L505 PSLJ0E
Satellite L500D/L505D PSLK0E
Satellite A500 PSAM0E
Satellite A500D PSAN0E
Satellite U500 PSU52E
Satellite L550/L555 PSLN0E
Satellite L550D/L555D PSLNJE
Satellite Pro U400 PSU45E
Satellite Pro A300 PSAG9E
Satellite Pro L350 PSLD9E
Satellite Pro L300 PSLB9E
Satellite Pro L300D PSLC9E
Satellite Pro P300 PSPC9E
Satellite Pro P300D PSPD9E
Satellite Pro S300 PSSB0E
Satellite Pro S300L PSSD1E
Qosmio X300 PQX32E
Qosmio X300 PQX31E
Qosmio G50 PQG55E
Tecra A10 PTSB0E
Tecra S10 PTSB3E
Tecra M10 PTMB0E
Tecra R10 PTRB0E
Portégé R600 PPR60E
Portégé A600 PPA61E
Portégé M750 PPM75E
Portégé M800 PPM81E
Чтобы скачать Toshiba Тошиба Recovery ALL Driver & Utility Windows 7 RUS 2010 (x86/x64) бесплатно, без регистрации и платных смс вам нужно скачать специальный торрент-клиент. Он может быть любым, мы рекомендуем µTorrent. Возможно, он у вас уже стоит, тогда просто нажмите кнопку скачать по магнет-ссылке выше и следуйте дальнейшим инструкциям. Скачивать файлы таким образом удобно, быстро и безопасно.
Каждая программа, включая Toshiba Тошиба Recovery ALL Driver & Utility Windows 7 RUS 2010 (x86/x64) содержит в себе проверенный кейген (в народе кряк, патч) или серийник (ключ). Так же таблетка может быть уже «вшита» в софт.
Перед установкой любого взломаного софта вы должны понимать, что несете полную ответственность за свой ПК и возможный ущерб, который могут нанести крякнутые программы. Хоть мы стараемся удалять такие раздачи, но 100% гарантии нет.
Если вам понравилась программа или вы заработали на ней деньги, не поленитесь купить официальную версию. Это поможет сделать ее еще лучше + вы получите техническую поддержку и самые свежие обновления.
Toshiba Satellite L755
Образ ISO дисков восстановления ОС Windows 7 Home Premium x64 Rus для
ноутбуков Toshiba Satellite L755 включая все необходимые драйверы и
утилиты. Возвращает ноутбук в предустановленное состояние заводом
изготовителем.
Подходит ко всем модификациям L755.
ВНИМАНИЕ.
Заранее позаботьтесь о сохранении важной информации, т.к. при
восстановлении с данного диска произойдёт полное стирание информации с
жесткого диска.
Порядок действий:
1. Вставить диск в привод
2. Перезагрузить компьютер
3. Выбрать загрузку с привода компакт-дисков (по F12, если кто не знает)
4. Отвечать на вопросы системы и ждать. (Этот процесс может на пару часов растянуться.)
![]()
![]()
Добрый день.
Устанавливал на Toshiba Satellite L755D-A1K PSK36R.
Все стало красиво.
В изначальных заводских настройках была установлена
Windows 7 Home Basic OA CIS and GE.
На образе Windows 7 Home Premium.
ОС активировалась самостоятельно без ввода серийного номера.
Обновления пока не проверял, потом отпишусь.
Не стало два драйвера: драйвер дисплея и шины PCI.
Скачал amd-catalyst-15.7.1-with-dotnet45-win7-64bit и установил.
Рекомендую искать здесь emea.dynabook.com/support/drivers/
С дисплеем проблема решена. С шиной пока не успел.
Рассказываю как и что делал.
Открыл первый образ в UltraISO.
Второй и третий образы открывал в WinRAR. Все файлы из папок «ZZImg»
второго и третьего образа собрал в «ZZImg» первого образа.
Копировал файлы простым перетаскиванием.
Получился один образ 9ГБ.
Если есть необходимость могу залить на ресурс.
Все это сохранил прогой UltraISO и при помощи Rufus залил на флешку 16 ГБ.
Дальше ставим в ноут, загружаемся с флешки (F12) и следуем инструкциям.
![]()
При комментировании запрещается/недопустимо:
Использование нецензурных выражений, флуд.
Публикация заведомо ложной, непроверенной, клеветнической информации.
При комментировании образа, комментарий должен содержать работоспособность «образа», а не раздачи. При проблемах с раздачей обращаться к админу сайта в личном сообщении или на почту support@recovery.pateam.ru
При возникновении вопросов рекомендуется ознакомиться с разделом FAQ. Если не нашли ответ, можно задать вопрос в специальном разделе сайта. Или обратиться так же в личном сообщении к администратору сайта.
Toshiba windows recovery disk download
Posted Date: 2004-10-25
Last Updated: 2005-03-08
Distribution: View Public Website
Applicable Models
| Satellite L25-S1195 |
| Portege R200-S2062 |
| Portege R200-S214 |
| Portege R200-S234 |
| Portege S100-S1132 |
| Portege S100-S1133 |
| Portege S100-S113TD |
| Portege S100-S213TD |
| Tecra A2 |
| Tecra A3 |
| Tecra A4 |
| Tecra M3 |
| Tecra M4 |
| Tecra M4-S115TD |
| Tecra M4-S315 |
| Tecra M4-S335 |
| Tecra M4-S415 |
| Tecra M4-S435 |
| Tecra M4-S635 |
| Tecra M4-ST1112 |
| Tecra S2 |
Some Toshiba notebook computer models include the Toshiba HDD Recovery Utility, which is stored in a special partition on the hard disk drive, along with the system files used for the ‘recovery’ of the hard disk drive to its original just-from-the-factory default state (contents). «HDD» in the name of this utility stands for hard disk drive. This on-disk utility is an alternative to the Recovery CD or DVD included with most Toshiba notebook computer models. The following instructions describe how to use this utility.
NOTE: Toshiba strongly recommends that you create recovery CDs/DVDs before using your computer.
The HDD Recovery Utility allows you to:
Creating Recovery CDs/DVDs
Copying the Toshiba HDD Recovery Utility and the accompanying system files to a CD or a DVD improves the odds of being able to restore the original factory default state of your hard disk drive in the event of failure, and it allows you to reclaim the space occupied by the special recovery partition used to store the Toshiba HDD Recovery Utility on the computer’s hard disk drive.
1. Double-click the Recovery Disc Creator icon on the Windows desktop. 
This utility may also be launched by clicking Start, then All Programs, then Hard Disk Recovery Utilities.
2. Select CD, DVD, or All Files (to create Recovery media on both CDs and DVDs).

3. Select the items you want to copy by clicking the checkbox next to an item’s name – recovery files, applications (original bundled drivers and applications), or both the recovery files and applications.
5. Insert a CD or a DVD into your computer’s CD/DVD writable drive, when the utility prompts for it.
The utility will prompt for as many CDs or DVDs required to contain the selected files. If your CD or DVD drive does not support writing, contact Toshiba Customer Support to obtain Recovery CDs or DVDs for your computer.
6. Follow the on-screen prompts to complete the copy process.
For instructions on using the Recovery CDs/DVDs, see the section below titled «Hard Disk Drive Recovery using Recovery CDs or DVDs».
Using the Toshiba HDD Recovery Utility from the recovery partition
In the event of a hard disk drive failure, you may be able to restore the drive to the factory default state using the on-disk Toshiba HDD Recovery Utility (in the special partition on the hard disk drive).
You can elect to restore the entire hard disk drive to the factory default state, or to restore only the C: drive — without affecting other partitions (for example, a D: drive) — or to change the size allocated to your C: drive, and then restore it.
To recover your hard disk drive from a system failure using the utilities stored on your computer’s HDD, follow these steps:
If the computer is running, shut it down — by clicking Start, then Shut Down, then Shut Down again.

Sample TOSHIBA HDD Recovery Utility screen
Restore Original Factory Image (Recommended)
CAUTION: Restoring a hard disk drive to its factory default state deletes all partitions on the hard disk drive and all data stored within them. All of your files and information will be lost. be sure to back up all important files first.
Press 1 to restore your hard disk drive to its original factory default state. A confirmation message will appear, indicating that all data will be overwritten and lost during the restore process. Be sure to back up all important files before proceeding.
Click Yes to begin the restoration. A message will appear once the operation is finished, indicating that the HDD has been restored.
Restore Partition C: of HDD without changing current partition size
CAUTION: Restoring the C: drive to its factory default state reformats your drive. Your information on the drive will be overwritten, and lost. Be sure to back up all important files first. If you have created other partitions (for example, a D: drive) those partitions and any information on them will not be affected and will remain intact.
To restore only the C: drive:
Press 2 to restore only the «C:» drive (the letter C is traditionally used to designate the first volume on the hard disk drive) on your computer. A confirmation message will appear, indicating that all information on the drive will be lost during the restore process. Be sure to back up all important files before proceeding.
Click Yes to begin the restoration. A message will appear once the operation is finished, indicating that the HDD has been restored.
Restore Image to C: Partition with user specified size
CAUTION: Resizing and restoring your C: drive to its factory default state reformats all partitions on the HDD (for example, if you created a D: drive, it will be deleted during the restore process) and your information will be overwritten, and lost. Be sure to back up all important files first.
To resize and restore your C: drive:
1. Press 3 at the Toshiba HDD Recovery Utility screen. A confirmation message will appear, indicating that all partitions will be reformatted and all information will be lost during the restore process. Be sure to back up all important files before proceeding.
2. Click Yes to begin the restoration and to specify the size of the C: drive.
3. Click Enter to begin the restoration. A message will appear once the operation is finished, indicating that the HDD has been restored.
4. Press any key to restart the computer.
Hard Disk Drive Recovery using Recovery CDs or DVDs
In the event of a hard disk drive failure, you may wish to to run the Toshiba HDD Recovery Utility from Recovery CDs or DVDs (created per the instructions in the section above titled Creating Recovery CDs/DVDs).
You can elect to restore the entire hard disk drive to the factory default state, or to restore only the C: drive — without affecting other partitions (for example, a «D:» drive) — or to change the size allocated to your C: drive, and then restore it.

Sample TOSHIBA HDD Recovery Utility screen
Restore Original Factory Image (Recommended)
CAUTION: Restoring a hard disk drive to its factory default state deletes all partitions on the hard disk drive and all data stored within them. All of your files and information will be overwritten, and lost. Be sure to back up all important files first.
Press 1 to restore your hard disk drive to its original factory default state. A confirmation message will appear, indicating that all data will be lost during the restore process. Be sure to back up all important files before proceeding.
Click Yes to begin the restoration. A message will appear once the operation is finished, indicating that the HDD has been restored.
Restore Partition C: of HDD only
CAUTION: Restoring the C: drive to its factory default state reformats your drive and your information on the restored drive will be overwritten, and lost. be sure to back up all important files first. If you have created other partitions (for example, a D: drive) those partitions and any information on them will not be affected and will remain intact.
To restore only your C: drive:
Press 2 to restore only the «C:» drive on your computer. A confirmation message will appear, indicating that all information on the drive will be lost during the restore process. Be sure to back up all important files before proceeding.
Click Yes to begin the restoration. A message will appear once the operation is finished, indicating that the HDD has been restored.
Restore Image of entire HDD without HDD Recovery Area
This option restores your C: drive without creating the HDD Recovery Utilities partition. This gives you the option of increasing the size of your C: drive.
CAUTION: Restoring your C: drive to its factory default state without the recovery partition reformats all partitions on the hard disk drive (for example, if you created a D: drive, it will be deleted during the restore process) and your information will be overwritten, and lost. Be sure to back up all important files first.
To restore your C: drive without the recovery partition:
Press 3. A confirmation message will appear, indicating that all partitions will be reformatted and all data will be lost during the restore process. Be sure to back up all important files before proceeding.
Click Yes to begin the restoration. A message will appear once the operation is finished, indicating that the
hard disk drive has been restored to the original factory default state.
Checking the HDD Operating Status
After restoring your hard disk drive, you can check its status as follows:
Click Start, and then click Control Panel .
Double-click the Administrative Tools icon.
Double-click the Computer Management icon.
Click Disk Management.
Delete Hard Disk Recovery Utility
You can delete the hard disk drive recovery partition without losing the data stored on your C: drive.
1. Click Start, All Programs, Hard Disk Recovery Utilities, then Delete Hard Disk Recovery Partition. When the computer powers on, the Delete Hard Disk Recovery Utility warning screen displays.
Sample Delete Hard Disk Recovery Utility screen
2. Click OK to continue.
3. When the following warning screen displays, click OK to confirm.

Sample Delete Hard Disk Recovery Utility confirmation screen
Installing Drivers and Applications
The TOSHIBA Application Installer allows you to reinstall the drivers and applications that were originally bundled with your computer.
To reinstall drivers and applications:
Double-click the Toshiba Application Installer icon on the Windows desktop.  This utility may also be launched by clicking Start, then All Programs, then Hard Disk Recovery Utilities.
Click the item(s) you wish to install. To select multiple items, hold down the Ctrl key as you click your selections.
Click Install.
Export Control and EULA Use of any software made available for download from this system constitutes your acceptance of the Export Control Terms and the terms in the Toshiba end-user license agreement both of which you can view before downloading any such software.


