- Try linux before installing
- Requirements
- 2. Boot from DVD
- 3. Boot from USB flash drive
- 4. Choose your preferred language
- 5. Enjoy Ubuntu
- Finding help
- Ubuntu Documentation
- Outline
- Introduction
- Prerequisites
- Dummy headlines
- Notes about speed
- Notes about size
- Notes about bootability
- The flash hardware
- Creating a bootable Ubuntu USB flash drive from Windows
- Rufus
- balenaEtcher
- Pendrivelinux’s Universal USB Installer
- UNetbootin
- Win32 Disk Imager
- Creating a bootable Ubuntu USB flash drive from Ubuntu
- Install and run Startup Disk Creator alias usb-creator
- UNetbootin
- mkusb — dd image of iso file to USB device safely
- Creating a bootable Ubuntu USB flash drive from Mac OSX
- Test if running in UEFI mode
- Thread: Try Ubuntu (Kubuntu, Lubuntu, Xubuntu, . ) before installing it
- Try Ubuntu (Kubuntu, Lubuntu, Xubuntu, . ) before installing it
Try linux before installing
Running Ubuntu directly from either a USB stick or a DVD is a quick and easy way to experience how Ubuntu works for you, and how it works with your hardware. Most importantly, it doesn’t alter your computer’s configuration in any way, and a simple restart without the USB stick or DVD is all that’s needed to restore your machine to its previous state.
With a live Ubuntu, you can do almost anything you can from an installed Ubuntu:
- Safely browse the internet without storing any history or cookie data
- Access files and edit files stored on your computer or USB stick
- Create new office suite documents and save them remotely
- Fix broken configurations to get a computer running again
Requirements
All you need is either a USB stick or DVD with Ubuntu pre-installed. For instructions on how to create these, take a look at one of the following tutorials:
- Create a bootable USB stick on Windows, Ubuntu or macOS
- Burn a DVD on Windows, Ubuntu or macOS

2. Boot from DVD
It’s easy to boot Ubuntu from a DVD. Here’s what you need to do:
- Put the Ubuntu DVD into your optical/DVD drive.
- Restart your computer.
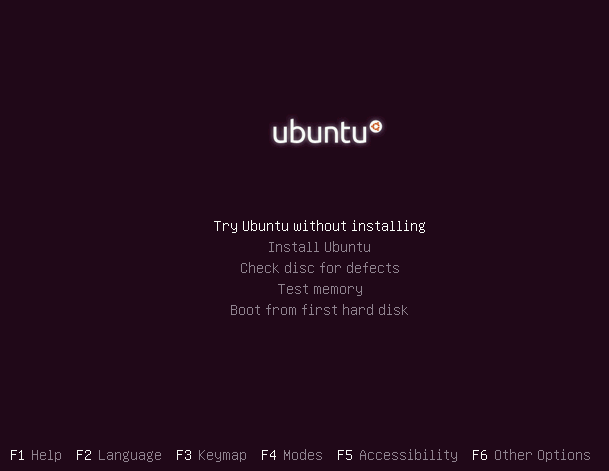
A few moments later you’ll see the language selection menu followed by Ubuntu’s boot options. Select the top entry, Try Ubuntu without installing, and press return.
If you don’t get this menu, take a look at the community DVD guide for help.
3. Boot from USB flash drive
Most computers will boot from USB automatically:
- Insert the USB flash drive
- Restart your computer
You should see the same language selection menu and boot options we saw in the previous ‘Boot from DVD’ step. Select the top entry, Try Ubuntu without installing, and press return.
If your computer doesn’t automatically boot from USB, try holding F12 when your computer first starts. With most machines, this will allow you to select the USB device from a system-specific boot menu.
F12 is the most common key for bringing up your system’s boot menu, but both Escape and F2 are typical alternatives. If you’re unsure, look for a brief message when your system starts — this will often inform you of which key to press to bring up the boot menu.
4. Choose your preferred language
After the desktop has loaded, you’ll see the welcome window. From here, you can select your language from a list on the left and choose between either installing Ubuntu directly, or trying the desktop first. Select Try Ubuntu to launch into the full desktop experience.

5. Enjoy Ubuntu
Your live desktop will appear. Have a look around, check out the new features, and enjoy the simplicity of Ubuntu’s intuitive interface.
You can still choose to install Ubuntu after passing the Welcome pane by clicking on the Install Ubuntu icon on the desktop background.

Finding help
Finally, if you get stuck, help is always at hand:
Источник
Ubuntu Documentation
Outline
The general procedure to install Ubuntu (or Ubuntu flavour, Kubuntu, Lubuntu, Xubuntu, . ) from a USB flash drive is:
Get the correct Ubuntu installation file, ‘the iso file’, via this link or Ubuntu flavour via this link. Download the iso file into your running computer (for example into the directory Downloads in the internal drive, not into the USB flash drive that you want to make into a USB boot drive).
Check with md5sum (or another checksum tool) that the download was good.
Try Ubuntu (Kubuntu, Lubuntu, Xubuntu, . ) before installing it.
See also: Installation/FromUSBStickQuick for beginners starting from Windows.
Introduction
Ubuntu can be installed from a USB flash drive. This may be necessary for most new portable computers without DVD drives and is handy for others because a USB flash drive is so convenient. Also, you can configure Ubuntu on the USB flash drive to save changes you make, unlike a read-only CD/DVD disk.
Booting from a USB flash drive created with usb-creator alias Startup Disk Creator and mkusb will behave just as if you had booted from the install CD. It will show the language selection and then the install menu, from which you can install Ubuntu onto the computer’s hard drive or launch the LiveCD environment. Other utilities, e.g. UNetbootin, may create slightly different boot drives or if on UEFI might not work at all with Debian iso files due to a bug
Note: This article uses the term «USB flash drive» alongside USB stick, USB drive, USB device, USB pendrive and thumb drive.
Prerequisites
To create a USB installation device, you will need:
a 4 GB USB flash device/drive/stick. If the iso file is smaller than 2 GB, it is possible to use a 2 GB USB device, at least with some of the methods. Files on this USB device will be erased, so backup the files you want to keep before making the device bootable. Some of the tools require that this USB device is properly formatted and mounted while other tools will overwrite whatever is on the target device. Please follow the instructions for each tool.
an Ubuntu flavour ISO file downloaded from an official web page, ubuntu.com/download or http://releases.ubuntu.com, stored in your running computer (for example in the directory Downloads in the internal drive, not in the USB flash drive that you want to make into a USB boot drive).
Check with md5sum (or another checksum tool) that the download was good. In Linux there is the tool ‘md5sum’. In Windows you can do it with Rufus: click on the circle with a tick mark (more about Rufus here.)
Dummy headlines
After a major remake of this help page the following headlines are kept here because they may be linked to from other web sites. Several other headlines further down in the page are also kept for this reason.
Notes about speed
Notes about size
Notes about bootability
The flash hardware
There is a detailed description at the sub-page /pre
Creating a bootable Ubuntu USB flash drive from Windows
There are various methods available for Windows to create a bootable Ubuntu USB flash drive.
NEVER try to use one of your hard disk drives or partitions in this process unless you really know what you are doing, as data will get erased.
Rufus
Rufus is the tool in Windows that is recommended officially by Ubuntu. A tutorial is available from here.
balenaEtcher
Pendrivelinux’s Universal USB Installer
UNetbootin
Win32 Disk Imager
There is a detailed description at /fromWindows including Rufus, balena Etcher, Universal USB Installer, Unetbootin and Win32 Disk Imager.
Creating a bootable Ubuntu USB flash drive from Ubuntu
Install and run Startup Disk Creator alias usb-creator
The Ubuntu Startup Disk Creator is dedicated to creating USB boot drives for Ubuntu and Ubuntu family flavours (Kubuntu, Lubuntu . Xubuntu).
You can find usb-creator-gtk by typing «Startup Disk Creator» (Ubuntu Desktop) or usb-creator-kde in K-Menu—>Applications—>System—>Startup Disk Creator (Kubuntu). If it is not there, then you can install it using the Ubuntu Software Center.
- Insert and mount the USB drive. Inserting the USB drive should auto-mount it.
- Start the Startup Disk Creator
- In the top pane of the Startup Disk Creator, pick the .iso file that you downloaded.
- If the .iso file isn’t listed, click «Other» to locate and select the .iso file that you downloaded.
- In the bottom pane of the Startup Disk Creator, pick the target device, the USB flash drive. If more than one choice, please check carefully, until you are sure that you will be writing to the correct device.
- After checking that you are pointing to the correct target device, the USB flash drive, you can start the action.
You must enter a password because this is a risky operation. Use the password of the current user ID (the same as for login and running tasks with 'sudo'. Password is not required when installing from a ‘live’ system (booted from a DVD disk or another USB flash drive).
The Startup Disk Creator clones the iso file, which means that you need neither erase nor format the target drive. It will be completely overwritten anyway by the cloning process. The Startup Disk Creator looks like this in Ubuntu 18.04 LTS:
Notes
NEVER try to use one of your hard disk drives or SSDs or partitions in this process unless you really know what you are doing, as data will get erased.
There are bugs that affect the Ubuntu Startup Disk Creator, when you run it in old Ubuntu versions in BIOS mode and try to create USB boot drives with other versions. In the Ubuntu Startup Disk Creator version 0.3.2 in Ubuntu 16.04 LTS, these bugs are no longer a problem, so you can install any version of the Ubuntu flavours from 16.04 LTS and newer versions.
UNetbootin
Download UNetbootin
mkusb — dd image of iso file to USB device safely
If you want to clone from a general image file to a drive, you can use mkusb. It lets you clone to any drive that is not busy, also an internal drive, and there are very obvious warnings to prevent mistakes.
- run in Debian and many linux distros that are similar to Ubuntu and Debian,
- clone from iso files of most Linux distros to create USB boot drives,
- create persistent live drives of the Ubuntu family and Debian, using all available drive space for persistence and/or data storage,
- restore a USB boot drive to a standard storage device.
There is a detailed description at /fromUbuntu including the Startup Disk Creator, UNetbootin and mkusb.
Creating a bootable Ubuntu USB flash drive from Mac OSX
There is a good wiki page about booting with UEFI, and a good tutorial thread, UEFI Installing — Tips.
Test if running in UEFI mode
You may want to test if your Ubuntu flavour is running in [U]EFI mode. An installed system and a live system too is using the directory /sys/firmware/efi, so you can run the following command line,
The following command line is more robust and also easier to understand, so you may prefer it (if you copy & paste and are not bothered by typing a long command line),
Источник
Thread: Try Ubuntu (Kubuntu, Lubuntu, Xubuntu, . ) before installing it
Thread Tools
Display
![]()
Try Ubuntu (Kubuntu, Lubuntu, Xubuntu, . ) before installing it
Editing partitions and installing operating systems are risky operations, and I recommend that you backup at least all your personal data (documents, pictures, . ) before you start. In general, it is a good idea to have a regular habit to backup the personal data. You never know, when something bad will happen to the computer, and you will need to restore the backed up data.
Try Ubuntu (and the community Ubuntu flavours) before installing
It is a good idea to try Ubuntu and some of the Ubuntu community flavours before installing into an internal drive. This can save a lot of trouble compared to installing directly.
This link contains links to all Ubuntu flavours: http://releases.ubuntu.com/
1. Run a live session booted from a CD/DVD/USB drive and select ‘Try Ubuntu without installing’
Download a desktop iso file, create a CD/DVD/USB boot drive and reboot the computer from that drive. Check that the download was successful with md5sum.
a. Basic install drive (live drive)
See instructions at these links
with instructions to burn a DVD on Ubuntu, Windows, MacOS
and instructions to create a bootable USB stick (pendrive) on Ubuntu, Windows, MacOS
CD disks can be used to install Lubuntu 14.04.1 LTS and Ubuntu mini.iso while the other iso files are too big for CD disks. (But mini.iso does not run a live session, it only installs.)
Basic install drives (live drives) are the standard tool to try Ubuntu live, and if it works well, to install Ubuntu to an internal drive.
b. Persistent live drive
It is fairly easy to create a persistent live drive with a USB pendrive using Unetbootin, mkusb, grub-n-iso or some similar dedicated tool or method as described here. There are detailed instructions at the following links to get persistence with CD/DVD and USB drives.
Persistent live drives are similar to basic live drives, and in addition can save settings, installed programs and data files, but are slower (with the same hardware). The kernel cannot be upgraded (except by upgrading to a new iso file in a ‘grub-n-iso’ pendrive).
The persistent data are stored in a file with the name or a partition with the label casper-rw (and sometimes with an additional file or partition home-rw). Several tools create persistent live drives with the file system FAT32 and a file for persistence. This limits the size to 4 GiB. Other tools, for example mkusb, create a casper-rw partition for persistence, which is limited only by the available drive space.
2. Install (a complete installed system) to a USB stick or pendrive and boot from it.
This way you can find which version and flavour that works best when installed without touching the internal drive. It is also the way to try, if you use an installer which does not offer a live session, for example from the Ubuntu mini.iso or an alternate iso file and Ubuntu Server. You find working mini.iso files for 12.04 LTS (32-bits pae (and non-pae in a subdirectory)) at this link.
It is a two step procedure: Make a CD/DVD/USB boot drive, boot from it and install into a[nother] USB pendrive. Make sure that you install the bootloader into the head of the target pendrive (not into the internal drive or the source pendrive and not into a partition). Install almost like you would do (into an internal drive), but into the pendrive. In BIOS mode it is easier, if you remove the internal drive, or you must use Something else at the partitioning window and point the bootloader into the pendrive. Otherwise it will be installed into the internal drive /dev/sda. In UEFI mode the system will install the bootloader into the internal drive unless you disconnect or unplug it. So it is a good idea to unplug the internal drive, if it is possible.
This will test a complete installed system (but in a USB pendrive). Boot from this installed system and check what works directly, and what needs tweaking (boot options, or drivers for graphics, wifi etc).
It is also a method to create a portable Ubuntu system in a USB drive. The normal installation method described above works also to create an installed system in a pendrive. It is a bit more complicated to make an installed system, that works in UEFI as well in BIOS mode. See this link,
USB pendrives have a rather bad reputation concerning lifetime, but there is evidence that they have improved, and can last quite long nowadays, at least when managed in a good way. If you intend to use an installed system in a USB pendrive, you should add the mount option noatime to the line controlling the root partition ‘/’ in the file /etc/fstab. You can also consider running the ext4 file system without journaling (but there is a tradeoff — journaling makes the file system much more reliable).
where x is the drive letter and y is the partition number of the root partition.
You can also avoid swapping. If you remove the swap partition, you should also remove or ‘comment’ (put a # character in the beginning of) the ‘swap’ line in /etc/fstab.
See also these links describing different methods to create installed systems in USB sticks or pendrives
for new or middle-aged computers:
for old or middle-aged computers:
and finally these links for old computers:
Last edited by sudodus; January 24th, 2018 at 12:14 PM . Reason: This post is updated, when necessary .
Источник


