- Try linux without installing
- Requirements
- 2. Boot from DVD
- 3. Boot from USB flash drive
- 4. Choose your preferred language
- 5. Enjoy Ubuntu
- Finding help
- Ubuntu Documentation
- Introduction
- Reasons for Using a LiveCD Session
- Other Ways to Try Ubuntu
- How-To LiveCD Ubuntu
- Preparing your LiveCD
- To create a LiveCd
- To create a LiveUsb
- To buy an Ubuntu Cd
- Using your LiveCD
- Installing Programs or Other Packages
- Making a Customised LiveCD
- Troubles with a LiveCD
- Logging in
- Security and Updating
- Setting a Password
- Text-Mode Installation
- Как попробовать линукс не устанавливая на компьютер
- Друзья и знакомые линуксоиды
- LiveCD или LiveUSB
- Wubi (ubuntu на windows)
- Виртуальная машина
- Удаленный доступ к машине с линуксом
- Cygwin
Try linux without installing
Running Ubuntu directly from either a USB stick or a DVD is a quick and easy way to experience how Ubuntu works for you, and how it works with your hardware. Most importantly, it doesn’t alter your computer’s configuration in any way, and a simple restart without the USB stick or DVD is all that’s needed to restore your machine to its previous state.
With a live Ubuntu, you can do almost anything you can from an installed Ubuntu:
- Safely browse the internet without storing any history or cookie data
- Access files and edit files stored on your computer or USB stick
- Create new office suite documents and save them remotely
- Fix broken configurations to get a computer running again
Requirements
All you need is either a USB stick or DVD with Ubuntu pre-installed. For instructions on how to create these, take a look at one of the following tutorials:
- Create a bootable USB stick on Windows, Ubuntu or macOS
- Burn a DVD on Windows, Ubuntu or macOS

2. Boot from DVD
It’s easy to boot Ubuntu from a DVD. Here’s what you need to do:
- Put the Ubuntu DVD into your optical/DVD drive.
- Restart your computer.
A few moments later you’ll see the language selection menu followed by Ubuntu’s boot options. Select the top entry, Try Ubuntu without installing, and press return.
If you don’t get this menu, take a look at the community DVD guide for help.
3. Boot from USB flash drive
Most computers will boot from USB automatically:
- Insert the USB flash drive
- Restart your computer
You should see the same language selection menu and boot options we saw in the previous ‘Boot from DVD’ step. Select the top entry, Try Ubuntu without installing, and press return.
If your computer doesn’t automatically boot from USB, try holding F12 when your computer first starts. With most machines, this will allow you to select the USB device from a system-specific boot menu.
F12 is the most common key for bringing up your system’s boot menu, but both Escape and F2 are typical alternatives. If you’re unsure, look for a brief message when your system starts — this will often inform you of which key to press to bring up the boot menu.
4. Choose your preferred language
After the desktop has loaded, you’ll see the welcome window. From here, you can select your language from a list on the left and choose between either installing Ubuntu directly, or trying the desktop first. Select Try Ubuntu to launch into the full desktop experience.

5. Enjoy Ubuntu
Your live desktop will appear. Have a look around, check out the new features, and enjoy the simplicity of Ubuntu’s intuitive interface.
You can still choose to install Ubuntu after passing the Welcome pane by clicking on the Install Ubuntu icon on the desktop background.

Finding help
Finally, if you get stuck, help is always at hand:
Источник
Ubuntu Documentation

Needs Expansion
This article is incomplete, and needs to be expanded. More info.
Introduction
A live CD can be used for a quick demo or test of Ubuntu. Try Ubuntu without any changes to your machine! Windows or whatever you use normally is unaffected after trying this and then rebooting.
The standard Ubuntu Cd can be used as a LiveCd as well as an installer. Live mode is the default option when booting from CD. Only some of the non-standard downloads (such as the «Alternate Cd») lack this functionality. Windows users might be familiar with the term ‘boot CD’ or ‘bootable CD’ or ‘Recovery/Restore Media’. A «LiveCD» is more than that because it gives the option of running a normal desktop environment with all the normal programs and some extras. A LiveCD usually finds your wired internet connection and Firefox should be able to surf the internet into here.
This guide has screen-shots of the 8.04 and 10.04 Desktop Edition of Ubuntu. However, Lubuntu, Xubuntu, Kubuntu and even unofficial Ubuntu-based distros as well as other versions all tend to have similar screens & menus.
Most distributions (versions or «distros» of Linux) have this LiveCd functionality on their installer CD, a few have a separate Cd to download. It is rare to find a distro that has no LiveCd session at all. Ubuntu tries to make their LiveCD the easiest to use. Although a LiveCD session is a good way to demo Ubuntu without making changes to a machine, a LiveCD will always be slower than a proper installation to the hard-drive. Cd-drives & Dvd-drives are physically slower than hard drives.
You can use a persistent image to keep data & settings safe after shut-down. This does go against many reasons for using a LiveCd session (rather than an installation) but it can be useful for multi-user machines, such as offices or in third world education projects.
Reasons for Using a LiveCD Session
LiveCD sessions are good to:
- give a ‘demo’ session on a machine before installing or upgrading
- checks hardware works as expected
check the look & feel of the distro
repair or preparation for awkward installations
repair/replace/install grub perhaps after (re)installing Windows
fix Windows problems on a machine that doesn’t have a dual-boot
anti-virus problems on a Windows system
resizing partitions to give Ubuntu more (or less) room
adding a new partition(s) to your hard-drive for other distros or for a new Windows
safely using a computer which seems to have poor security or lacks privacy. This is particularly good if you have a Usb stick or something to save your data and settings on (see ‘persistent image’)
Other Ways to Try Ubuntu
LiveCDs are designed for people that want to use Ubuntu on a computer for a few hours. If you want to carry a LiveCD around with you, a persistent image lets you customise your live session. If you want to use Ubuntu on a computer for a few weeks or months, Wubi lets you install Ubuntu inside Windows. If you want to use Linux on a computer permanently, dual-booting lets you install Window and Ubuntu (or which-ever distro) side-by-side on the same computer.
Because Wubi needs Windows and Ubuntu to co-operate, you have to deal with all the problems of both systems. For example, it’s not easy to completely uninstall Wubi. An experienced linux user or someone with considerable technical knowledge about Windows might find it better to try Wubi in some certain circumstances where dual-booting is infeasible or inadvisable. See the Wubi guide for more information about Wubi, particularly how to uninstall it cleanly.
Dual-booting can be daunting at first, but tends to work better once you’ve got it set up. This allows Window & Ubuntu to work without relying on the other for anything, except the boot-loader. As you get more comfortable with Ubuntu, you can just forget about your Windows partition. Reinstalling Windows is quite tricky, so it’s best to leave your Windows partition in place unless you’re absolutely sure you’ll never use Windows again.
How-To LiveCD Ubuntu
Preparing your LiveCD
You need to create, borrow, buy or request an Ubuntu CD or Usb-stick. Once you have an Ubuntu Cd or Usb it should work as an installer and as a !LiveCD or LiveUsb. There are some downloads, such as the Alternate Cd that cannot be used as !LiveCd/Usb.
To create a LiveCd
Download Ubuntu. For a live CD, avoid the «alternate CD» & the Server Edition because it has no desktop. For installing, using the alternate CD is a good idea, if installing using the standard CD does not work.
Make your own CD. Cheap «write once» CDs in packs of 10 or more are usually best. You could burn a new CD once every 6 months to get the latest version but all version are supported for 18 months and long time support releases for 3 years. You could also use the remaining CDs for trying out other distros Having a quick demo of other distros can help you understand Linux in general a LOT better a LOT faster, which helps you understand Ubuntu better.
To create a LiveUsb
The Usb stick needs to be 1Gb or more and there are 2 different pages giving advice. I prefer the first; Installation/FromUSBStick, Installation/FromImgFiles
To buy an Ubuntu Cd
The official Cannonical store, OnDisc, OSDisc or your local Ubuntu team might be able to help you find somewhere in your country from which to buy Ubuntu CDs. Also see GettingUbuntu for more information.
Using your LiveCD
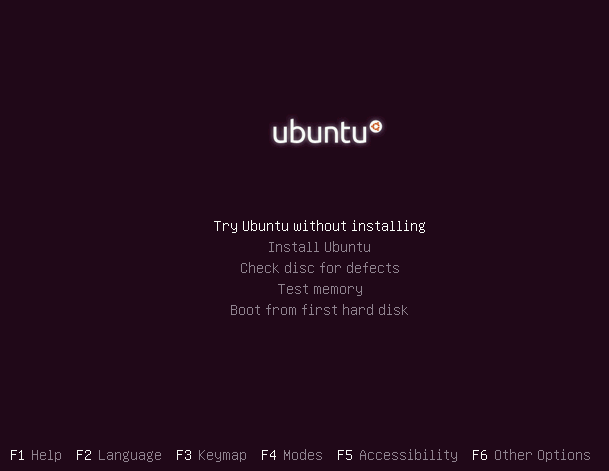
Put the Ubuntu CD into the CD/DVD-drive and reboot the computer. You should see a menu with «Try Ubuntu without any change to your computer» at the top. If you don’t get this menu, read the booting From the CD guide for more information.
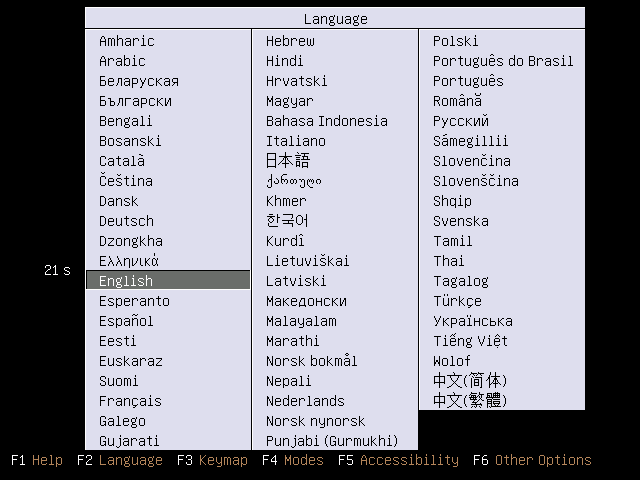
Figure 1: The first thing you will see when you boot from your Ubuntu CD
Press the up or down arrow on keyboard to get your language and then press enter
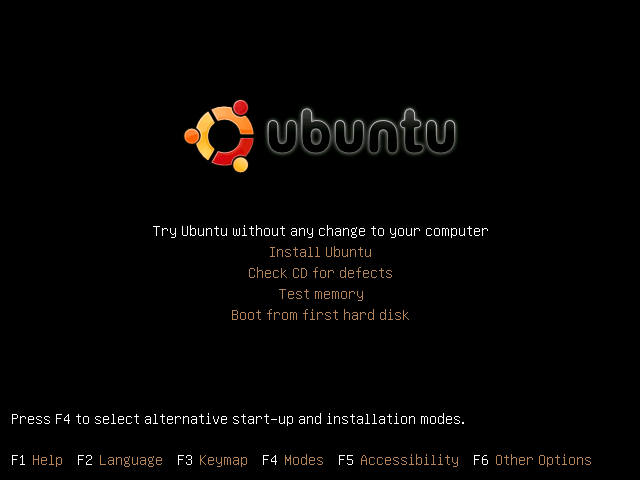
Figure 2: F6 will give you Boot Options & allows you to edit the boot-string
Choose «Try Ubuntu without any change to your computer». You should get a desktop which we call a «LiveCD session». If you don’t see a desktop, or need safe graphics mode, read the boot options for more information.
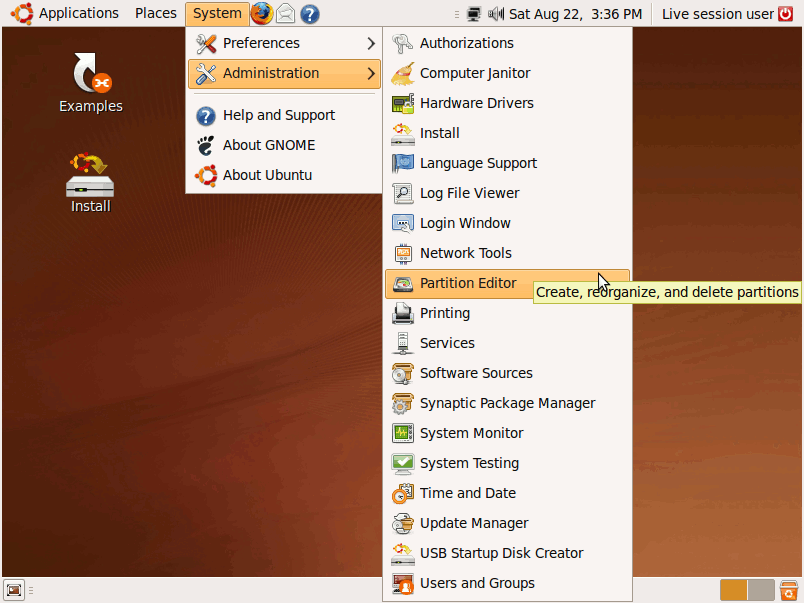
Figure 3: The LiveCD lets you manage partitions with GPartEd.
Also see the installer icon top-left
The Firefox icon on the top panel should let you surf the internet. Other normal programs are available in the menus.
After you have finished, shut the computer down and remove the CD. At this point anything you saved to the desktop or Documents folders and such will vanish — only things you saved into folders on the hard-drive will remain. This means that there won’t be any trace of your personal data (e-mails, passwords etc.) left on the machine, which can be quite useful if you don’t trust the Windows installation on the computer.
If you have troubles getting the working desktop but if it is still not behaving then try asking for help in Launchpad or use Signpost Help, or both.
Installing Programs or Other Packages
You can install programs to a LiveCD session in the normal way, although these will be forgotten as soon as you switch the machine off. For example, you might install antivirus or data-recovery tools to fix the system installed on the computer’s hard drive. Because space is limited on a LiveCD, you should limit the number of packages you install or consider using a persistent image.
Making a Customised LiveCD
If you want to make custom Ubuntu-based Live CD, you should read the LiveCD Customisation HowTo. Without even starting from an existing Ubuntu CD you can make a customised live system, see LiveCD Customisation From Scratch.
Troubles with a LiveCD
Logging in
Sometimes a LiveCD might ask you for a user-name or password. Just leave these blank and press enter (or allow it to time-out).

Figure 4: Just press enter to get past this, or let it time-out 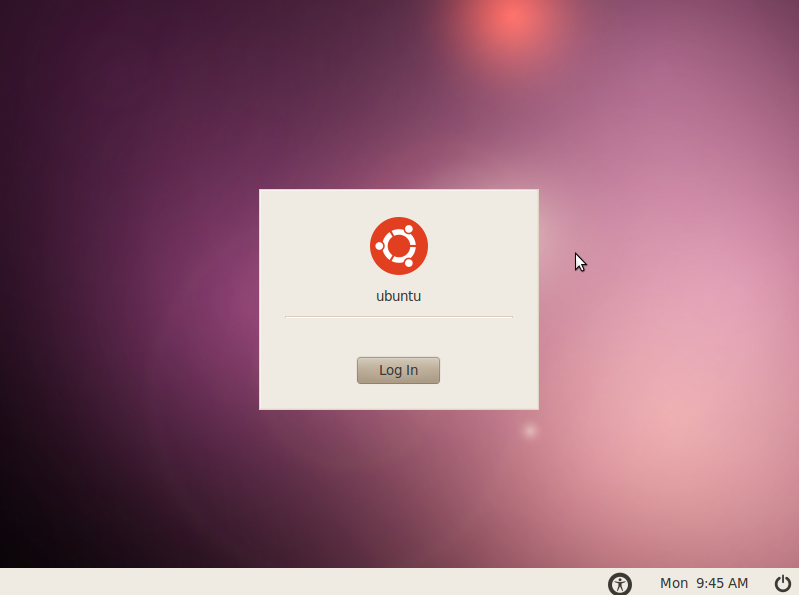
Security and Updating
While linux systems are more secure than Windows, LiveCD sessions are not meant for long-term use nor for sessions lasting several days. Because LiveCDs can’t easily be updated, they may well be vulnerable to security issues discovered in the months since their release. They also can’t protect you against scams such as phishing. If a criminal broke in to your live session, any changes he made to your session would be reset along with everything else when you reboot, although he could make permanent changes to the computer’s hard drive.
A persistent image can be updated as new security issues emerge, but also lets any damage done to your computer persist across sessions.
Setting a Password
You can set a password during a LiveCD session by opening a terminal, and typing in:
Text-Mode Installation
If your normal installation fails without giving an error message, or if you want to install on a very limited system, you can use the text-based installer instead.
Источник
Как попробовать линукс не устанавливая на компьютер
Многие пользователи боятся перехода на линукс из-за различных слухов про его сложность, глючность или неготовность для десктопов. Познакомиться с внешним видом linux и его функциональностью, проверить наличие знакомых программ (веб-браузера, почтовика, аудио- и видео- плеера, офисных пакетов…) можно и не устанавливая линукс на свой компьютер.
Эти советы подойдут и для тех, кто уже знаком с линуксом, но хочет попробовать другой дистрибутив или поиграться с новой программой, не устанавливая ее в основную систему.
Друзья и знакомые линуксоиды
Самый простой и очевидный способ знакомства с линуксом. Если у вас есть знакомые линуксоиды, попросите их показать вам эту операционную систему и объяснить что к чему. И вообще, первое время пользования линуксом очень полезно иметь под рукой человека который сможет ответить на ваши вопросы. А учитывая приверженность основной массы линуксоидов к открытому ПО и ненависть к windows/apple, вероятность получить отказ крайне мала.
LiveCD или LiveUSB
Еще один способ посмотреть на возможности линукса — записать образ livecd на диск или liveusb на флэшку и загрузиться с нее. На данный момент существует множество дистрибутивов способных работать без установки на компьютер (с загрузочной флэшки или livecd). Все популярные дистрибутивы (gentoo, ubuntu, debian…) есть в варианте для загрузочной флэшки или в виде образа livecd.
Кроме того, существует куча livecd-only дистрибутивов. Большинство из них основана на пакетной базе популярных дистрибутивов (gentoo, debian, redhat…). Некоторые из них собираются для определенной цели, например, для восстановления системы (такие дистрибутивы включают утилиты для работы с файловыми системами и прочие полезные вещи). Существуют даже загрузочные livecd для геймеров с набором различных игр.
Стоит отметить, что на компьютерах с небольшим объемом оперативной памяти livecd и liveusb дистрибутивы работают медленно. Немного ускорить работу в таких случаях можно выбрав при загрузке легкий DE (desktop environment — среда рабочего стола): openbox, lxde, xfce4; или вообще отказавшись от графики и загружая только в текстовом режиме.
Ознакомиться с полным списком live-дистрибутивов можно на сайте distrowatch.com.
Wubi (ubuntu на windows)
Wubi (Windows-based Ubuntu Installer) — официальный свободный установщик Ubuntu Linux, предназначенный для запуска в операционных системах семейства Windows, лицензированный под GPL. С помощью Wubi пользователи Windows могут устанавливать и удалять Ubuntu как обыкновенную Windows-программу.(статья на wiki)
Виртуальная машина
Очень удобен вариант с виртуальной машиной. Он позволяет запускать несколько операционных систем даже не перезагружая компьютер.
Наиболее известны следующие виртуальные машины: VirtualBox, VMware Player, Virtual PC
Инструкции по запуску операционной системы внутри виртуальной машины смотрите в документации на официальных сайтах.
Удаленный доступ к машине с линуксом
Можно попробовать раздобыть учетную запись на какой-нибудь linux-машине с возможностью подключения по ssh. Попросить друзей, админа на работе, учителя информатики в школе/институте или поискать халявы. Многие интернет-провайдеры по запросу выделяют пользователям своей сети немного места на сервере под домашнюю веб-страничку и дают доступ по ssh.
Для подключения к удаленной linux-машине по ssh из windows могу порекомендовать программу putty.
Есть еще вариант с покупкой сервера/vds/shared-хостинга с возможностью доступа по ssh. Но это для случая когда вам хочется не просто посмотреть, а сделать что-нибудь посерьезнее.
Cygwin
Если вы пользователь Windows и вам не нужна графическая linux-среда, можно воспользоваться эмулятором Cygwin. Если иксы все же нужны, можно попробовать установить порт X Window System на Windows — Cygwin/X (сам я его не пробовал и поэтому ничего конкретного сказать не могу).
Cygwin это не linux или unix. Он представляет собой инструмент для портирования ПО UNIX в Windows и реализован в виде в библиотеки, которая реализует интерфейс прикладного программирования POSIX на основе системных вызовов Win32. Кроме того, Cygwin включает в себя инструменты разработки GNU для выполнения основных задач программирования, а также и некоторые прикладные программы, эквивалентные базовым программам UNIX.
Простым языком: для запуска shell-скриптов и написания программ (есть gcc) его вполне хватит.
Источник


