- How to Type Japanese
- Installing IME and Typing Japanese on Windows
- How to Type Japanese
- How to Type Japanese in Windows 10 – Add Japanese Keyboard
- Steps to Type in Japanese in Windows 10 – Install Language Pack
- Troubleshooting – No Language Bar Icon on Taskbar
- Uninstall the Japanese Language from Windows 10
- How to Install Japanese Keyboard on Windows 10
- Install Japanese Keyboard on Windows 10
- How to Type in Japanese using English Keyboard
- How to use Japanese Physical Keyboard in Windows
How to Type Japanese
Installing IME and Typing Japanese on Windows
You need to install MS-IME to input Japanese characters on Windows.
MS-IME is a typing Japanese software provided by Microsoft.
It is already on your system as a standard accessory.
Japanese keyboard is NOT necessary.
You can type Japanese words in Hiragana, Katakana and Kanji using a keyboard of English or other languages.
If your keyboard has the English alphabet letters on the key top, you can type like Japanese people do.
Installing and Setting
First, please check if the IME is already installed on your Windows.
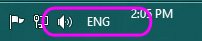
If you see «EN» (in case of Windows English version) on the taskbar
like on the right, It is the Language Bar. MS-IME is already installed.
You do not need to go through Step 1.
Step 1 — Installing MS-IME
Step 2 — How to Start Typing Japanese Mode
How do Japanese people type Japanese?
What is IME ?, What does IME do?

(Japanese keyboard is not necessary)
There are two typing methods, Romaji typing and Kana typing.
Currently, Romaji typing is more common than Kana typing among Japanese people.
Because . 
 |
| Windows 10 |
 |
| Windows 8 |
 |
| Windows 7 |
 |
| Windows VISTA |
 |
| Windows XP |
Step 3 — How to Finish Typing Japanese Mode or Remove MS-IME
Option — Setting «non-Unicode Programs»
If you cannot view Japanese characters properly
even after installing Japanese fonts, please try this option.

Go to the «Lesson 1» to practice typing Japanese
How to Type Japanese
We presented how to type in Japanese characters on Windows and MAC for those who are learning Japanese language.
You can input Japanese characters with non-Japanese software such as English email software or English Office softwares.
Japanese keyboard is NOT necessary.
Please install a typing Japanese software called IME (Input Method Editor).
Typing Japanese software MS-IME is provided for Windows by Microsoft.
It is already on your system as a standard accessory.
How to install MS-IME
How to start Japanese typing mode
How to finish Japanese typing mode
Typing Japanese software, KOTOERI is provided on MAC OS.

Typing Japanese — Level 1
Type Japanese words in Hiragana and Katakana
Here, we introduced how to type in Japanese by using MS-IME of Windows.
It is basically the same way with KOTOERI of MAC.
Kana Tables (Hiragana Katakana tables)
How to type Japanese character is based on Hiragana Katakana table.
Please check it first.
Type Japanese words in Hiragana

Type Japanese words in Katakana

How to correct a typO after converting, before Enter
Type Hiragana Katakana Long Vowels

Type Hiragana Katakana Double consonants

Type «KYA, KYU, KYO», «SHA, SHU, SHO»

Type Katakana New methods, «FA», «FI», «TI», etc.

Type short sentence in Hiragana and Katakana — Particles «WA» and «O»

How do you input  ?
?
You can input Japanese symbols by IME under the Japanese typing mode.
Typing Japanese — Level 2
Type Japanese words and sentences in Kanji
Convert Hiragana into Kanji

Choose a word you want to input from options

Type numbers with Kanji such as date or time
Type and convert word by word
Type and convert sentence at once
How to correct a typO after converting, before Enter

Type the alphabet under the Japanese mode
Expand or shorten a phrase to convert
 |  |  |
| MS-IME (Windows) | KOTOERI (MAC) |
How to Change Input Mode
MS-IME provides two input modes, Romaji Input mode and Kana Input mode.
You need to use Romaji Input mode to type Japanese with Non-Japanese keyboard.
| Romaji Input mode | A O |  | гЃ‚ гЃЉ | (A O) |
| Kana Input mode | A O | | ち ら | (Chi Ra) |
If your IME is under the Kana Input mode,
you can change it to Romaji Input mode by the following steps.
How to Type Japanese in Windows 10 – Add Japanese Keyboard
In this quick and simple post, let me show you the steps to install or add Japanese keyboard layout and type Japanese in Windows 10.
If you are learning Japanese or someone who already knows how to read and write Japanese, it might be a necessary action to type Japanese in Windows 10. For example, I started learning Japanese a few months back. As part of the learning process, I started online chat sessions with natives and fellow learners to cement my understanding of Japanese vocabulary and grammar. To type Japanese in Windows, you need to install the Japanese language pack. After that, you can select the Japanese keyboard layout to type in the Japanese language.
Though sounds simple, installing the Japanese language pack and setting up the keyboard layout can be confusing for beginners. This is especially true if you’ve never dealt with language packs. So, in this quick guide, let me show you the steps to install the Japanese keyboard layout and enable Japanese typing in Windows 10.
Steps to Type in Japanese in Windows 10 – Install Language Pack
Follow the steps below to install the Japanese language and start typing in Japanese in Windows 10.
- Open Settings with “Windows Key + I” keyboard shortcut.
- Go to “Time & Language“.

- Go to the “Language” tab.
- On the right page, click the “Add a language” button under the “Preferred Languages” section.
- Type “Japanese” in the search bar.
- Select the language and click “Next“.
- Select the optional features you want to install and click “Install“.
- Windows will now download and install the Japanese language pack and the keyboard layout.
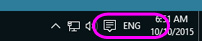
- After installing the language pack, you will see Language Bar Icon on the taskbar. It lets you change the keyboard layout with just two clicks.
- Click on the Language icon and select the “Japanese Microsoft IME” keyboard layout.
- By default, the Japanese keyboard layout is set to type in English. To change that, click on the little “A” icon appearing before to the “Language” icon.
- As soon as you click on the icon, it will change to Hiragana “あ” character signifying the ability to type in Japanese.
- You can now start typing in Japanese.


In case you are wondering, as you type in Japanese, Windows will show suggestions and relevant Kanji characters and vocabs. By selecting the suggestions, you can type Kanji characters.
If you want to keep the Japanese keyboard layout but want to type in English, click on the “あ” icon. This action will change it to English mode.
To change the keyboard layout, click on the language icon, and select the “English” keyboard layout.
Troubleshooting – No Language Bar Icon on Taskbar
If you are not seeing the Language Bar icon on the taskbar, it might be hidden. To unhide it, follow these steps.
- Open Settings.
- Go to “Personalization → Taskbar“.
- Click on “Turn system icons on or off“.
- Turn on the “Input Indicator” option.

That is it. As soon as you turn on the option, you will see the Language icon appear on the taskbar.
Uninstall the Japanese Language from Windows 10
If you no are longer using the Japanese keyboard layout and other features or if the language pack is causing problems, you can simply uninstall it from the system. Here’s how.
- Open Settings.
- Go to “Time & Language → Language“.
- On the right page, click on the “Japanese” language option.
- Click “Remove“.

That is it. As soon as you click the button, Windows will uninstall the language pack and its associated features.
That is it. I hope that helps. If you are stuck or need some help, comment below and I will try to help as much as possible.
How to Install Japanese Keyboard on Windows 10
Many users need to use a foreign language on their computer. If you are one of those, who want to install the Japanese keyboard on Windows 10, here is our guide. The process is straightforward, and there is no need to install through external sources. Once installed you will be able to switch between your native, language and the Japanese keyboard.
Install Japanese Keyboard on Windows 10
there are three ways you can do this:
- Install Japanese Keyboard using Time and Language
- Type in Japanese using native Keyboard
- Use Physical Japanese Keyboard in Windows 10
It is possible that you have an English or a native keyboard. If you are planning to use this with Japanese keyboard on your computer, make sure you know how to use it properly. Follow the steps to install Windows 10 Japanese keyboard.
- Open Settings > Language > Add a Language
- In the popup window, type Japanese and the keyboard listing will show up.
- Select it, and click Next. Be careful of the options in the next windows.
- In the Install language and features window
- Uncheck the option which says “Install Language Pack and set as my Windows Display.”
- If you plan to use Voice and handwriting for Japanese work, make sure to keep the options selected.
- Click on the install button.
Post this; it will download the packages, and install it. In the options, you will have the opportunity to download and install language packs, but we are not doing it. If you do, it will change the system-wide language to Japanese. Lastly, if you click on the language icon on the system tray, or use the Windows button + spacebar, you can switch between keyboards.
How to Type in Japanese using English Keyboard
Microsoft offers “Microsoft IME” which allows you to type in Japanese. When you click on the language option on the system tray and select Japanese, you should see the alphabet A as well. It means you are still typing in English. Click on it, and it will change to Japanese.
Right click on the icon, and you can change the keyboard to different variants. You can choose between Katakana or Hiragana to what fits best. These are Japanese syllabary for those who don’t know. The input tool also offers IME pad. On this, you can draw characters you remember, and it will recognize it for you.
Post that anywhere you type on the keyboard, it will predict and type in Japanese font. If you switch to anything else which is not text, it will change the language back to English. To configure IME, you can go to Settings > Time and Language > Select the Japanese language > Options > Microsoft IME > Options.
The options allow you to add words, configure touch keyboard, turn on cloud suggestions and so on. If you are configuring this on a touch keyboard, it’s a good idea to configure Kana 10 key input method. Usually used on smartphones, this method allows users to swipe from the key in a certain direction to produce the desired character.
You can choose between Flik and Multi-tap input or Flick input. They will help you type faster. Also, make sure to turn off Kana input. When its toggled on, the letters show as an individual letter, and it will be difficult to type long sentences.
How to use Japanese Physical Keyboard in Windows
If you have a Japanese physical keyboard, you can connect it to existing Windows Installation. Go to Settings > Time and Language > Select the Japanese language > Options > Change hardware keyboard layout.
You will have the option to switch between Japanese (106/109 keys) and English (101/12 keys) in my case. Once you are sure of your selection, click on the restart button for the keyboard to be recognized by the system.
That said, there are multiple combinations to get how you exactly want to type in Japanese.
This post showed you how to install the language and use it either with an actual Japanese keyboard or use your native keyboard to type in Japanese. Let us know if it helped.


