- Ubuntu linux installing how to install
- 2. Requirements
- 3. Boot from DVD
- 4. Boot from USB flash drive
- 5. Prepare to install Ubuntu
- 6. Allocate drive space
- 7. Begin installation
- 8. Select your location
- 9. Login details
- 10. Background installation
- 11. Installation complete
- Basic installation
- Preparing to Install
- System requirements
- Server and Desktop Differences
- Backing Up
- Preparing install media
- Booting the installer
- Using the installer
- How to Install Ubuntu Linux in the Simplest Possible Way
- How is this the simplest way of installing Ubuntu?
- Install Ubuntu by replacing Windows and other operating systems
- Step 1: Download Ubuntu
- Step 2: Create a live USB
- Step 3: Boot from the live USB
- Step 4: Install Ubuntu
Ubuntu linux installing how to install
The Ubuntu desktop is easy to use, easy to install and includes everything you need to run your organisation, school, home or enterprise. It’s also open source, secure, accessible and free to download.

In this tutorial, we’re going to install Ubuntu desktop onto your computer, using either your computer’s DVD drive or a USB flash drive.
2. Requirements
You’ll need to consider the following before starting the installation:
- Connect your laptop to a power source.
- Ensure you have at least 25 GB of free storage space, or 5 GB for a minimal installation.
- Have access to either a DVD or a USB flash drive containing the version of Ubuntu you want to install.
- Make sure you have a recent backup of your data. While it’s unlikely that anything will go wrong, you can never be too prepared.
See Installation/System Requirements for more specific details on hardware requirements. We also have several tutorials that explain how to create an Ubuntu DVD or USB flash drive.
3. Boot from DVD
It’s easy to install Ubuntu from a DVD. Here’s what you need to do:
- Put the Ubuntu DVD into your optical/DVD drive.
- Restart your computer.
As soon as your computer boots you’ll see the welcome window.

From here, you can select your language from a list on the left and choose between either installing Ubuntu directly, or trying the desktop first (if you like what you see, you can also install Ubuntu from this mode too).
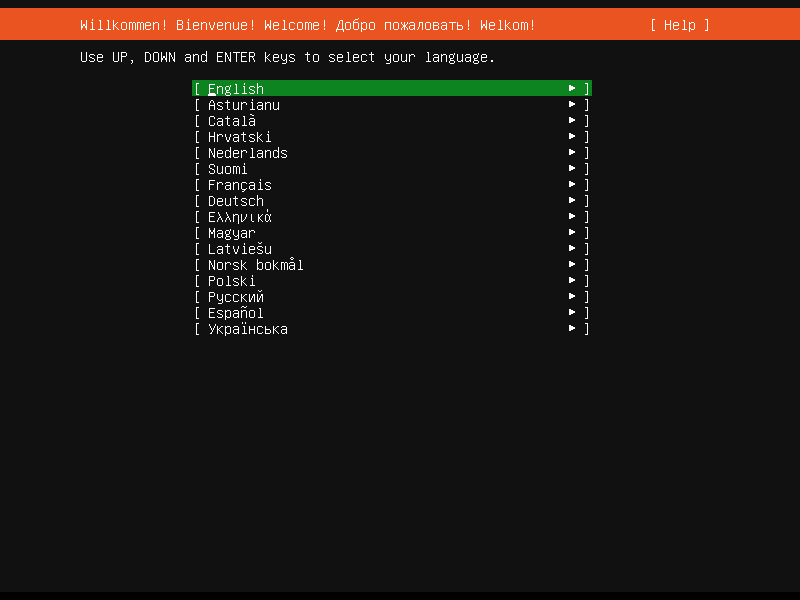
Depending on your computer’s configuration, you may instead see an alternative boot menu showing a large language selection pane. Use your mouse or cursor keys to select a language and you’ll be presented with a simple menu.

Select the second option, ‘Install Ubuntu’, and press return to launch the desktop installer automatically. Alternatively, select the first option, ‘Try Ubuntu without installing’, to test Ubuntu (as before, you can also install Ubuntu from this mode too).
A few moments later, after the desktop has loaded, you’ll see the welcome window. From here, you can select your language from a list on the left and choose between either installing Ubuntu directly, or trying the desktop first.
If you don’t get either menu, read the booting from the DVD guide for more information.
4. Boot from USB flash drive
Most computers will boot from USB automatically. Simply insert the USB flash drive and either power on your computer or restart it. You should see the same welcome window we saw in the previous ‘Install from DVD’ step, prompting you to choose your language and either install or try the Ubuntu desktop.
If your computer doesn’t automatically boot from USB, try holding F12 when your computer first starts. With most machines, this will allow you to select the USB device from a system-specific boot menu.
F12 is the most common key for bringing up your system’s boot menu, but Escape, F2 and F10 are common alternatives. If you’re unsure, look for a brief message when your system starts — this will often inform you of which key to press to bring up the boot menu.
5. Prepare to install Ubuntu
You will first be asked to select your keyboard layout. If the installer doesn’t guess the default layout correctly, use the ‘Detect Keyboard Layout’ button to run through a brief configuration procedure.
After selecting Continue you will be asked What apps would you like to install to start with? The two options are ‘Normal installation’ and ‘Minimal installation’. The first is the equivalent to the old default bundle of utilities, applications, games and media players — a great launchpad for any Linux installation. The second takes considerably less storage space and allows you to install only what you need.
Beneath the installation-type question are two checkboxes; one to enable updates while installing and another to enable third-party software.
- We advise enabling both Download updates and Install third-party software .
- Stay connected to the internet so you can get the latest updates while you install Ubuntu.
- If you are not connected to the internet, you will be asked to select a wireless network, if available. We advise you to connect during the installation so we can ensure your machine is up to date

6. Allocate drive space
Use the checkboxes to choose whether you’d like to install Ubuntu alongside another operating system, delete your existing operating system and replace it with Ubuntu, or — if you’re an advanced user — choose the ’Something else’ option.

Options related to side-by-side installation or erasing a previous installation are only offered when pre-existing installations are detected.
7. Begin installation
After configuring storage, click on the ‘Install Now’ button. A small pane will appear with an overview of the storage options you’ve chosen, with the chance to go back if the details are incorrect.
Click Continue to fix those changes in place and start the installation process.

8. Select your location
If you are connected to the internet, your location will be detected automatically. Check your location is correct and click ’Forward’ to proceed.
If you’re unsure of your time zone, type the name of a local town or city or use the map to select your location.

positive
: If you’re having problems connecting to the Internet, use the menu in the top-right-hand corner to select a network.
9. Login details
Enter your name and the installer will automatically suggest a computer name and username. These can easily be changed if you prefer. The computer name is how your computer will appear on the network, while your username will be your login and account name.
Next, enter a strong password. The installer will let you know if it’s too weak.
You can also choose to enable automatic login and home folder encryption. If your machine is portable, we recommend keeping automatic login disabled and enabling encryption. This should stop people accessing your personal files if the machine is lost or stolen.

: If you enable home folder encryption and you forget your password, you won’t be able to retrieve any personal data stored in your home folder.
10. Background installation
The installer will now complete in the background while the installation window teaches you a little about how awesome Ubuntu is. Depending on the speed of your machine and network connection, installation should only take a few minutes.

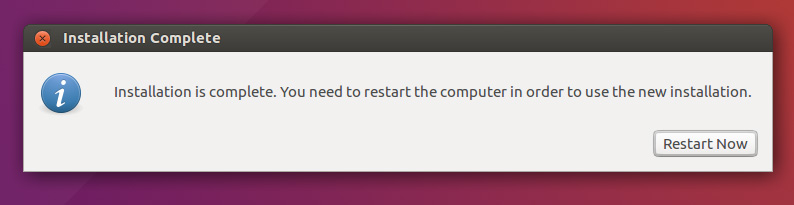
11. Installation complete
After everything has been installed and configured, a small window will appear asking you to restart your machine. Click on Restart Now and remove either the DVD or USB flash drive when prompted. If you initiated the installation while testing the desktop, you also get the option to continue testing.
Congratulations! You have successfully installed the world’s most popular Linux operating system!
Источник
Basic installation
This chapter provides an overview of installing Ubuntu 20.04 Server Edition. There is more detailed documentation on other installer topics.
Preparing to Install
This section explains various aspects to consider before starting the installation.
System requirements
Ubuntu 20.04 Server Edition provides a common, minimalist base for a variety of server applications, such as file/print services, web hosting, email hosting, etc. This version supports four 64-bit architectures:
- amd64 (Intel/AMD 64-bit)
- arm64 (64-bit ARM)
- ppc64el (POWER8 and POWER9)
- s390x (IBM Z and LinuxONE)
The recommended system requirements are:
- CPU: 1 gigahertz or better
- RAM: 1 gigabyte or more
- Disk: a minimum of 2.5 gigabytes
Server and Desktop Differences
The Ubuntu Server Edition and the Ubuntu Desktop Edition use the same apt repositories, making it just as easy to install a server application on the Desktop Edition as on the Server Edition.
One major difference is that the graphical environment used for the Desktop Edition is not installed for the Server. This includes the graphics server itself, the graphical utilities and applications, and the various user-supporting services needed by desktop users.
Backing Up
Before installing Ubuntu Server Edition you should make sure all data on the system is backed up.
If this is not the first time an operating system has been installed on your computer, it is likely you will need to re-partition your disk to make room for Ubuntu.
Any time you partition your disk, you should be prepared to lose everything on the disk should you make a mistake or something goes wrong during partitioning. The programs used in installation are quite reliable, most have seen years of use, but they also perform destructive actions.
Preparing install media
There are platform specific step-by-step examples for s390x LPAR, z/VM and ppc64el installations.
For amd64, download the install image from https://releases.ubuntu.com/20.04/.
There are many ways to boot the installer but the simplest and commonest way is to create a bootable USB stick to boot the system to be installed with (tutorials for other operating systems are also available).
Booting the installer
Plug the USB stick into the system to be installed and start it.
Most computers will automatically boot from USB or DVD, though in some cases this is disabled to improve boot times. If you don’t see the boot message and the “Welcome” screen which should appear after it, you will need to set your computer to boot from the install media.
There should be an on-screen message when the computer starts telling you what key to press for settings or a boot menu. Depending on the manufacturer, this could be Escape , F2 , F10 or F12 . Simply restart your computer and hold down this key until the boot menu appears, then select the drive with the Ubuntu install media.
After a few moments, the installer will start in its language selection screen.
Using the installer
The installer is designed to be easy to use and have sensible defaults so for a first install you can mostly just accept the defaults for the most straightforward install:
- Choose your language
- Update the installer (if offered)
- Select your keyboard layout
- Do not configure networking (the installer attempts to configure wired network interfaces via DHCP, but you can continue without networking if this fails)
- Do not configure a proxy or custom mirror unless you have to in your network
- For storage, leave “use an entire disk” checked, and choose a disk to install to, then select “Done” on the configuration screen and confirm the install
- Enter a username, hostname and password
- Just select Done on the SSH and snap screens
- You will now see log messages as the install is completed
- Select restart when this is complete, and log in using the username and password provided
There is more detailed documentation on all these options.
Источник
How to Install Ubuntu Linux in the Simplest Possible Way
Last updated April 16, 2021 By Abhishek Prakash 50 Comments
When it comes to the choosing a Linux for beginners, Ubuntu always comes on the top. I am not going to tell you why you should use Ubuntu. I am going to show you how to install Ubuntu.
There are various ways to install Ubuntu (or other Linux):
- You can install Ubuntu inside a virtualbox in Windows
- You can use Bash on Windows feature to install it inside Windows
- You can dual boot Ubuntu with Windows (so that you can choose which OS to use at the time your system boots)
- You can replace Windows with Ubuntu by wiping it altogether from your system
The method I am going to show in this tutorial is the fourth one. You wipe out the entire system and let Ubuntu be your only operating system. In my experience, this is the easiest way to install Ubuntu.
How is this the simplest way of installing Ubuntu?
You don’t have to worry about creating partitions on your own. It automatically creates an ESP partition for UEFI.
It uses the rest of the disk space in creating a single root partition. The root partition (normally) has a 2 GB of swapfile. You don’t need to create a separate swap partition and if the need be, you can increase the size of the swapfile.
The root partition also has the boot directory for grub related files. It also contains the home directory that is used for storing user related files like documents, pictures, music, videos, downloads etc.
It’s a no-brainer. You let Ubuntu do the work for you instead of wondering about creating ESP, root, Swap and Home partitions.
Best suited for you if you just want to use a single Linux distribution and no other operating system. You don’t want to switch distributions very often or if you do, you don’t have a lot of important data on it.
The procedure shown here works for Ubuntu and all other distributions based on it such as Kubuntu, Xubuntu, Lubuntu, Ubuntu Budgie, Linux Mint, Linux Lite etc. The screenshot might look a little bit different but the steps are basically the same.
Install Ubuntu by replacing Windows and other operating systems

What do you need in order to install Ubuntu:
- A USB of at least 4 GB in size. You can also use a DVD.
- Internet connection (for downloading Ubuntu and live-USB making tool, not required for installing Ubuntu)
- Optionally, you may need an external USB disk for making a backup of your important data (if any) present on the current system
If you are going to install the default Ubuntu GNOME, the system requirements are:
- A system with 2 GHz dual core processor or better
- 4 GB of RAM or more
- At least 25 GB of hard disk space
This method removes all the other operating systems along with the data present on the disk.
You may save your personal files, documents, pictures etc on an external USB disk or cloud storage if you want to use it later.
Step 1: Download Ubuntu
Before you do anything, you have to download Ubuntu. It is available as a single ISO file of around 2 GB in size. An ISO file is basically an image of disc and you need to extract this ISO on a USB disk or DVD.
You can download Ubuntu ISO from its website.
If you have slow or inconsistent internet, you can use torrent to download Ubuntu. The torrent files are located at the alternate download page (scroll down a bit).
Step 2: Create a live USB
Once you have downloaded Ubuntu’s ISO file, the next step is to create a live USB of Ubuntu.
A live USB basically allows you to boot into Ubuntu from a USB drive. You can test Ubuntu without even installing it on your system. The same live USB also allows you to install Ubuntu.
There are various free tools available for making a live USB of Ubuntu such as Etcher, Rufus, Unetbootin, Universal USB installer.
You may also watch this video to learn how to make a bootable USB of Ubuntu on Windows.
If you are already using some Linux distribution, you can use Etcher.
Step 3: Boot from the live USB
Plug in your live Ubuntu USB disk to the system.
Now, you need to make sure that your system boots from the USB disk instead of the hard disk. You can do that by moving the USB up in the boot order.
Restart your system. When you see a logo of your computer manufacturer (Dell, Acer, Lenovo etc), press F2 or F10 or F12 to access the BIOS settings.
Now, the BIOS screen could look different for your computer.
The entire idea is that you put USB (or removable media) on the top of the boot order. Save the changes and exit.
Step 4: Install Ubuntu
Now you should boot into the live Ubuntu environment. You’ll the grub screen that gives you the option to either try Ubuntu without installing or install it right away.
You may choose the first option i.e. ‘Try Ubuntu without installing’:
In around 10-20 seconds, you should be able to log in to the live Ubuntu environment. It may take some more time if you are using the slower USB 2.
Click on the Install Ubuntu icon on the desktop.

It will ask you to choose some basic configurations like language and keyboard layout. Choose the most appropriate ones for your system.
- Choose your language
You should go for the normal installation here because it will install some software like music player, video players and a few games.
If you are connected to internet, you’ll get the option to download updates while installing Ubuntu. You may uncheck it because it may increase the installation time if you have a slow internet. You can update Ubuntu later as well without any issues.
Go with normal installation
The most important screen comes at this time. If there are other operating systems installed, you may get the option to install Ubuntu along with them in dual boot.
But since your goal is to only have Ubuntu Linux on your entire system, you should go for Erase disk and install Ubuntu option.
Erase disk and install Ubuntu
When you hit the “Install Now” button, you’ll see a warning that you are about to delete the data. You already know it, don’t you?
Things are straightforward from here. You’ll be asked to choose a timezone
And then you’ll be asked to create a username, computer’s name (also known as hostname) and set a password.
Once you do that, you just have to wait and watch for like 5-10 minutes. You’ll see a slideshow of Ubuntu features in this time.


Slideshow provides basic information about using Ubuntu during installation
Once the process finishes, you’ll be asked to restart the system.
When you restart the system, you might encounter a shutdown screen that asks you to remove the installation media and press enter.
Remove the USB disk and press enter. Your system will reboot and this time, you’ll boot into Ubuntu.
That’s it. See, how easy it is to install Ubuntu. You can use this method to replace Windows with Ubuntu.
What next?
Now that you have successfully installed it, I strongly suggest reading this guide on things to do after installing Ubuntu to make your Ubuntu experience smoother.
I also recommend going through this list of Ubuntu tutorials and learn to do various common things with Ubuntu.
I hope you find this tutorial helpful in installing Ubuntu. If you have questions or suggestions, please feel free to ask it in the comment section.
Like what you read? Please share it with others.
Источник


