- 1.5 Getting Started — Installing Git
- Installing Git
- Installing on Linux
- Installing on macOS
- Installing on Windows
- Installing from Source
- Ubuntu Wiki
- SourceCode
- Obtaining the source for an Ubuntu release
- Obtaining the kernel sources for an Ubuntu release using apt-get
- Obtaining the kernel sources for an Ubuntu release using git
- Obtaining a copy
- Git Guides
- Get started with git and GitHub
- Ubuntu
- Popular repositories
- People
- Top languages
- Most used topics
- Установка Git в Ubuntu
- Установка Git с помощью пакетного менеджера
- Установка Git из исходных кодов
- Настройка Git в Ubuntu
- Выводы
1.5 Getting Started — Installing Git
Installing Git
Before you start using Git, you have to make it available on your computer. Even if it’s already installed, it’s probably a good idea to update to the latest version. You can either install it as a package or via another installer, or download the source code and compile it yourself.
This book was written using Git version 2.8.0. Though most of the commands we use should work even in ancient versions of Git, some of them might not or might act slightly differently if you’re using an older version. Since Git is quite excellent at preserving backwards compatibility, any version after 2.8 should work just fine.
Installing on Linux
If you want to install the basic Git tools on Linux via a binary installer, you can generally do so through the package management tool that comes with your distribution. If you’re on Fedora (or any closely-related RPM-based distribution, such as RHEL or CentOS), you can use dnf :
If you’re on a Debian-based distribution, such as Ubuntu, try apt :
For more options, there are instructions for installing on several different Unix distributions on the Git website, at https://git-scm.com/download/linux.
Installing on macOS
There are several ways to install Git on a Mac. The easiest is probably to install the Xcode Command Line Tools. On Mavericks (10.9) or above you can do this simply by trying to run git from the Terminal the very first time.
If you don’t have it installed already, it will prompt you to install it.
If you want a more up to date version, you can also install it via a binary installer. A macOS Git installer is maintained and available for download at the Git website, at https://git-scm.com/download/mac.
Installing on Windows
There are also a few ways to install Git on Windows. The most official build is available for download on the Git website. Just go to https://git-scm.com/download/win and the download will start automatically. Note that this is a project called Git for Windows, which is separate from Git itself; for more information on it, go to https://gitforwindows.org.
To get an automated installation you can use the Git Chocolatey package. Note that the Chocolatey package is community maintained.
Installing from Source
Some people may instead find it useful to install Git from source, because you’ll get the most recent version. The binary installers tend to be a bit behind, though as Git has matured in recent years, this has made less of a difference.
If you do want to install Git from source, you need to have the following libraries that Git depends on: autotools, curl, zlib, openssl, expat, and libiconv. For example, if you’re on a system that has dnf (such as Fedora) or apt-get (such as a Debian-based system), you can use one of these commands to install the minimal dependencies for compiling and installing the Git binaries:
In order to be able to add the documentation in various formats (doc, html, info), these additional dependencies are required:
Users of RHEL and RHEL-derivatives like CentOS and Scientific Linux will have to enable the EPEL repository to download the docbook2X package.
If you’re using a Debian-based distribution (Debian/Ubuntu/Ubuntu-derivatives), you also need the install-info package:
If you’re using a RPM-based distribution (Fedora/RHEL/RHEL-derivatives), you also need the getopt package (which is already installed on a Debian-based distro):
Additionally, if you’re using Fedora/RHEL/RHEL-derivatives, you need to do this:
due to binary name differences.
When you have all the necessary dependencies, you can go ahead and grab the latest tagged release tarball from several places. You can get it via the kernel.org site, at https://www.kernel.org/pub/software/scm/git, or the mirror on the GitHub website, at https://github.com/git/git/releases. It’s generally a little clearer what the latest version is on the GitHub page, but the kernel.org page also has release signatures if you want to verify your download.
Then, compile and install:
After this is done, you can also get Git via Git itself for updates:
Источник
Ubuntu Wiki
SourceCode
The kernel source for the Ubuntu kernel is based very closely on the upstream mainline kernel tree maintained by Linus. The Ubuntu-ness of this kernel is maintained as a git branch against the Linus tree.
Obtaining the source for an Ubuntu release
There are a number of different ways of getting the kernel sources. The two main ways will be documented here.
If you have installed a version of Ubuntu and you want to make changes to the kernel that is installed on your system, use the apt-get method (described below) to obtain the sources.
However, if you wish to get the most up to date sources for the Ubuntu release you are running and make changes to that, use the git method (described below) to obtain the sources.
Obtaining the kernel sources for an Ubuntu release using apt-get
The literal source code which generated a specific binary package may be obtained using the apt-get source
command. For example to obtain the source for the currently running kernel you can use the command below:
or failing that:
Obtaining the kernel sources for an Ubuntu release using git
The source for each release is maintained in its own git repository on Launchpad.
The git repository is listed in the Vcs-Git: header in the source package and is of the following form:
For example, the standard Cosmic kernel is available at:
There is a tree for each of the currently supported releases as well as any open development and upcoming releases:
ubuntu-kernel/ubuntu/+source/linux/+git/groovy
ubuntu-kernel/ubuntu/+source/linux/+git/focal
ubuntu-kernel/ubuntu/+source/linux/+git/bionic
Replace your intended OS series in the above, and pull the source for the kernels you need.
The distro kernel is always on the master branch in these repositories. Each release also has a master-next branch containing the commits that will go onto the master branch and become the next release for that release.
A number of releases also have other source packages which represent other related but divergent kernels for other purposes. For example, there is a specialized AWS kernel available in the linux-aws source package. (Previously these sorts of things were done in Topic Branches and some older kernels and projects still use them.)
If you cannot use the git protocol (perhaps because of a firewall), you can use the slower http protocol. For example:
Obtaining a copy
To obtain a local copy you can simply git clone the repository for the release you are interested. The git command is part of the git package.
For example to obtain the Bionic tree:
This will download several hundred megabytes of data. If you plan on working on more than one kernel release you can save space and time by downloading the upstream kernel tree. Note that once these two trees are tied together you cannot remove the virgin Linus tree without damage to the Ubuntu tree:
In each case you will end up with a new directory ubuntu- containing the source and the full history which can be manipulated using the git command from within each directory.
By default you will have the latest version of the kernel tree, the master tree. You can switch to any previously released kernel version using the release tags. To obtain a full list of the tagged versions in the release as below:
To look at the Ubuntu-5.4.0-52.57 version you can simply checkout a new branch pointing to that version:
You may then manipulate the release — for example, by adding new commits.
Kernel/SourceCode (последним исправлял пользователь apw 2010-06-21 08:20:10)
Источник
Git Guides

How to install Git on any OS
Git can be installed on the most common operating systems like Windows, Mac, and Linux. In fact, Git comes installed by default on most Mac and Linux machines!
Checking for Git
To see if you already have Git installed, open up your terminal application.
- If you’re on a Mac, look for a command prompt application called «Terminal».
- If you’re on a Windows machine, open the windows command prompt or «Git Bash».
Once you’ve opened your terminal application, type git version . The output will either tell you which version of Git is installed, or it will alert you that git is an unknown command. If it’s an unknown command, read further and find out how to install Git.
Install Git Using GitHub Desktop
Installing GitHub Desktop will also install the latest version of Git if you don’t already have it. With GitHub Desktop, you get a command line version of Git with a robust GUI. Regardless of if you have Git installed or not, GitHub Desktop offers a simple collaboration tool for Git. You can learn more here.
Install Git on Windows
- Navigate to the latest Git for Windows installer and download the latest version.
- Once the installer has started, follow the instructions as provided in the Git Setup wizard screen until the installation is complete.
- Open the windows command prompt (or Git Bash if you selected not to use the standard Git Windows Command Prompt during the Git installation).
- Type git version to verify Git was installed.
Note: git-scm is a popular and recommended resource for downloading Git for Windows. The advantage of downloading Git from git-scm is that your download automatically starts with the latest version of Git included with the recommended command prompt, Git Bash . The download source is the same Git for Windows installer as referenced in the steps above.
Install Git on Mac
Most versions of MacOS will already have Git installed, and you can activate it through the terminal with git version . However, if you don’t have Git installed for whatever reason, you can install the latest version of Git using one of several popular methods as listed below:
Install Git From an Installer
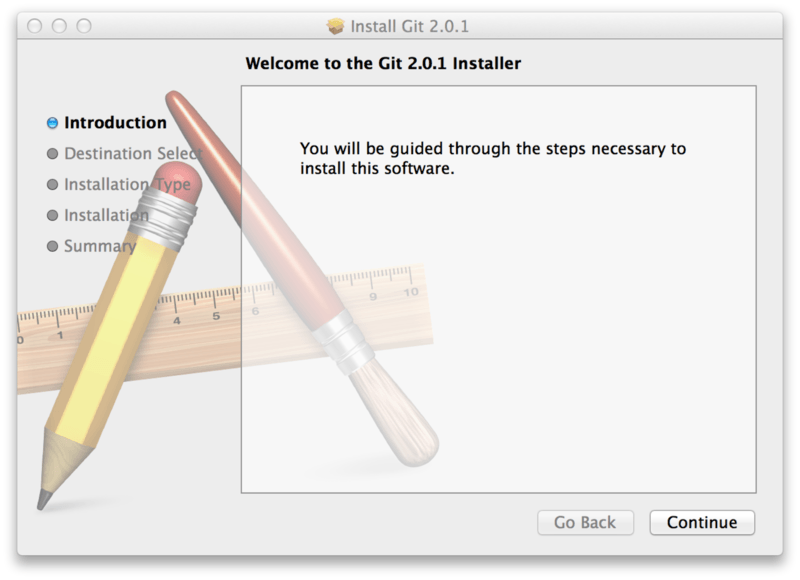
- Navigate to the latest macOS Git Installer and download the latest version.
- Once the installer has started, follow the instructions as provided until the installation is complete.
- Open the command prompt «terminal» and type git version to verify Git was installed.
Note: git-scm is a popular and recommended resource for downloading Git on a Mac. The advantage of downloading Git from git-scm is that your download automatically starts with the latest version of Git. The download source is the same macOS Git Installer as referenced in the steps above.
Install Git from Homebrew
Homebrew is a popular package manager for macOS. If you already have Homwbrew installed, you can follow the below steps to install Git:
- Open up a terminal window and install Git using the following command: brew install git .
- Once the command output has completed, you can verify the installation by typing: git version .
Install Git on Linux
Fun fact: Git was originally developed to version the Linux operating system! So, it only makes sense that it is easy to configure to run on Linux.
You can install Git on Linux through the package management tool that comes with your distribution.
- Git packages are available using apt .
- It’s a good idea to make sure you’re running the latest version. To do so, Navigate to your command prompt shell and run the following command to make sure everything is up-to-date: sudo apt-get update .
- To install Git, run the following command: sudo apt-get install git-all .
- Once the command output has completed, you can verify the installation by typing: git version .
- Git packages are available using dnf .
- To install Git, navigate to your command prompt shell and run the following command: sudo dnf install git-all .
- Once the command output has completed, you can verify the installation by typing: git version .
Note: You can download the proper Git versions and read more about how to install on specific Linux systems, like installing Git on Ubuntu or Fedora, in git-scm’s documentation.
Other Methods of Installing Git
Looking to install Git via the source code? Learn more here.
Get started with git and GitHub
Review code, manage projects, and build software alongside 40 million developers.
Источник
Ubuntu
Popular repositories
MicroK8s is a small, fast, single-package Kubernetes for developers, IoT and edge.
Easy setup of common tools for developers on Ubuntu.
Ubuntu community theme «yaru». Better than a 🌯 .
Adds KStatusNotifierItem support to the Shell
ZSys daemon and client for zfs systems
ARCHIVED. Preserved for posterity, but these examples are no longer maintained here. Please take discussion to the snapcraft forum.
MicroK8s is a small, fast, single-package Kubernetes for developers, IoT and edge.
19 Updated Oct 8, 2021
Ubuntu WSL image build and launcher code.
1 Updated Oct 8, 2021
Ubuntu community theme «yaru». Better than a 🌯 .
27 Updated Oct 8, 2021
0 Updated Oct 6, 2021
A fullcolor icon pack for Libreoffice of the awesome Yaru theme
0 Updated Oct 4, 2021
Easy setup of common tools for developers on Ubuntu.
3 Updated Oct 4, 2021
3 Updated Oct 3, 2021
Adds KStatusNotifierItem support to the Shell
0 Updated Oct 3, 2021
This repository hosts the snap info to package up the Libreoffice snap.
1 Updated Sep 29, 2021
Active Directory bridging tool suite
1 Updated Sep 29, 2021
People
Top languages
Most used topics
You can’t perform that action at this time.
You signed in with another tab or window. Reload to refresh your session. You signed out in another tab or window. Reload to refresh your session.
Источник
Установка Git в Ubuntu
Система контроля версий — это незаменимая вещь при совместной разработке программного обеспечения. Такие программы позволяют отслеживать изменения в вашем исходном коде и при необходимости восстанавливать прошлое состояние.
Одной из самых популярных систем управления версиями заслуженно считается Git. Многие проекты хранят свои файлы в репозиториях Git, а сайты GitHub и Bitbucket сделали обмен исходным кодом очень простым. В этой небольшой статье будет рассмотрена установка Git в Ubuntu. Мы рассмотрим два способа установки, а также начальную конфигурацию.
Установка Git с помощью пакетного менеджера
Самый простой способ установить Git в Ubuntu 20.04 или других версиях, это использовать пакетный менеджер apt и официальные репозитории Ubuntu. Это самый быстрый и простой метод, но вы получите не самую свежую версию.
Для установки Git с помощью пакетного менеджера. сначала обновим списки пакетов из репозиториев:
sudo apt update
Затем осталось загрузить и установить программу:
sudo apt install git

После этого программа будет установлена и вы можете переходить к ее настройке. Для просмотра версии выполните:
Установка Git из исходных кодов
Более гибкий, но в то же время самый сложный способ установки Git в Ubuntu — это сборка из исходных кодов. Процесс установки займет больше времени, но вы получите больше контроля над параметрами программы, а также сможете установить самую последнюю версию.
Перед тем, как приступить нам нужно будет скачать пакеты, от которых зависит Git. Все есть в официальном репозитории, поэтому вы можете все сделать с помощью пакетного менеджера:
sudo apt update
sudo apt install build-essential libssl-dev libcurl4-gnutls-dev libexpat1-dev gettext unzip
После того как все будет установлено вы можете скачать архив с самыми последними версиями исходного кода. Это можно сделать на странице релизов. Здесь есть как rc релизы, так и стабильные версии.

Когда выберите версию, нажмите кнопку Download zip. Или же скопируйте ссылку чтобы скачать с помощью терминала. Например, на данный момент самая последняя версия — 2.10.1. Вы можете использовать адрес файла вместе с wget, чтобы скачать исходники:
wget https://github.com/git/git/archive/v2.28.0.zip -o git.zip
Распакуйте только что загруженный файл с помощью unzip и переместитесь в каталог с файлами архива:
unzip git.zip
cd git-*
Дальше переходим к сборке программы и ее установке:
make prefix=/usr/local all
sudo make prefix=/usr/local install

После того как вы установили Git таким способом, вы можете просто ещё раз клонировать репозиторий и выполнить две последние команды для обновления. Для клонирования нужно знать URL репозитория. Например, для текущей ветки master, этот url будет выглядеть вот так:
git clone https://github.com/git/git
Затем просто соберите новую версию git с помощью тех же команд:
cd git
make prefix=/usr/local all
sudo make prefix=/usr/local install
После выполнения старая версия будет заменена новой. Причем, старые исходники сохранятся, так что в случае ошибок вы сможете восстановить старую версию. А теперь давайте рассмотрим как выполнить минимальную настройку Git, чтобы с программой можно было работать.
Настройка Git в Ubuntu
После того как установка Git Ubuntu будет завершена одним из выше перечисленных способов, вам нужно еще кое-что сделать перед тем, как вы сможете полноценно работать. Вам нужно идентифицировать себя указав имя пользователя и адрес электронной почты.
Самый простой способ это сделать — с помощью команды git config. Git использует имя пользователя и Email при каждом коммите, так что задавать их обязательно. Для этого выполните команды:
git config —global user.name «Your Name»
git config —global user.email «youremail@domain.com»
Вы можете посмотреть установленные параметры с помощью команды:
git config —list
Вся информация хранится в вашем конфигурационном файле Git, поэтому вы можете отредактировать его вручную если это необходимо с помощью текстового редактора:
[user]
name = Имя
email = youremail@domain.com
Здесь можно установить много других параметров, но именно эти два самые важные, потому что если вы попытаетесь что-то сделать когда они не установлены, то увидите предупреждение:

Выводы
Теперь вы знаете как выполняется установка Git Ubuntu 20.04. Мы рассмотрели два способа — простой и быстрый, а также сложный, но более гибкий. Если у вас остались вопросы спрашивайте в комментариях!
Источник


