- Ubuntu
- How To Install Ubuntu 20.04 LTS On VirtualBox [Windows, Linux And macOS]
- Install Ubuntu 20.04 On VirtualBox
- 1. Download VirtualBox and Ubuntu 20.04 ISO Image
- 2. Install VirtualBox And Create Ubuntu Virtual Machine
- 3. Load Ubuntu 20.04 ISO file Into Virtual Machine
- 4. Installing Ubuntu In Virtual Machine (VM)
- 5. Creating a Partitioning Scheme For Ubuntu (Optional)
- 6. General Settings and Start Installation
- 7. Setting Up Full Screen For Ubuntu Virtual Machine In VirtualBox
Ubuntu
Images for several Ubuntu flavours are available.
Latest: Ubuntu 15.04
- Ubuntu Linux 6.06.1 codename Dapper Drake
Size (compressed/ uncompressed ): 458 MBytes / 2.55 GBytes
Link: http://downloads.sourceforge.net/virtualboximage/ubuntu-6.06.1-x86-2.7z
Active user account(s) (username/password): ubuntu/reverse
Notes: from standard (GNOME) ISO image, Guest Additions not installed (HOWTO) - Ubuntu Linux 7.10 codename Gutsy Gibbon
Size (compressed/ uncompressed ): 512.4 MBytes / 2.7 GBytes
Link: http://downloads.sourceforge.net/virtualboximage/ubuntu-7.10-x86-3.7z
Active user account(s) (username/password): ubuntu/reverse
Notes: from standard (GNOME) ISO image, Guest Additions not installed (HOWTO) - Ubuntu Linux 8.04 codename Hardy Heron
Size (compressed/ uncompressed ): 503.8 MBytes / 2.67 GBytes
Link: http://downloads.sourceforge.net/virtualboximage/ubuntu-8.04-x86.7z
Active user account(s) (username/password): ubuntu/reverse
Notes: from standard (GNOME) ISO image, Guest Additions installed - Ubuntu Linux 8.10 codename Intrepid Ibex
Size (compressed/ uncompressed ): 511.6 MBytes / 2.68 GBytes
Link: http://downloads.sourceforge.net/virtualboximage/ubuntu-8.10-x86.7z
Active user account(s) (username/password): ubuntu/reverse
Notes: from standard (GNOME) ISO image, Guest Additions not installed - Ubuntu Linux 8.10 Server codename Intrepid Ibex
Size (compressed/ uncompressed ): 193.5 MBytes / 1.15 GBytes
Link: http://downloads.sourceforge.net/virtualboximage/ubuntu-8.10-server-x86.7z
Active user account(s) (username/password): ubuntu/reverse
Notes: LAMP Server and Samba Server are installed; MySQL root password is toor - Ubuntu Linux 9.04 codename Jaunty Jackalope
Size (compressed/ uncompressed ): 560.1 MBytes / 2.58 GBytes
Link: http://downloads.sourceforge.net/virtualboximage/ubuntu-9.04-x86.7z
Active user account(s) (username/password): ubuntu/reverse
Notes: Guest Additions not installed ; only .vdi is provided - Ubuntu Linux 9.10 (Alpha 1) codename Karmik Koala
Size (compressed/ uncompressed ): 519 MBytes / 2.52 GBytes
Link: http://downloads.sourceforge.net/virtualboximage/ubuntu-9.10-alpha-1-x86.7z
Active user account(s) (username/password): ubuntu/reverse
Notes: Guest Additions not installed - Ubuntu Linux 9.04 codename Jaunty Jackalopex86_64
Size (compressed/ uncompressed ): 798 MBytes / 3.60 GBytes
Link: http://downloads.sourceforge.net/virtualboximage/ubuntu_9.04_amd64.7z
Active user account(s) (username/password): ubuntu/reverse
Notes: Guest Additions installed , image courtesy of Rainer Posel - Ubuntu Linux 9.10 (Beta) codename Karmik Koala
Size (compressed/ uncompressed ): 496,4 MBytes / 2.4 GBytes
Link: http://downloads.sourceforge.net/virtualboximage/ubuntu_Karmic_beta_i386.7z
Active user account(s) (username/password): virtualbox/virtualbox
Notes: Guest Additions not installed - Ubuntu Linux 9.10 codename Karmic Koalax86
Size (compressed/ uncompressed ): 478.47 MBytes / 2.40 GBytes
Link: http://downloads.sourceforge.net/virtualboximage/ubuntu-9.10.vdi.7z
Active user account(s) (username/password): ubuntu/reverse
Notes: Guest Additions installed , image courtesy of Rainer Posel - Ubuntu Linux 10.04 codename Lucid Lynxx86
Size (compressed/ uncompressed ): 660 MBytes / 2+ GBytes
Link: https://sourceforge.net/projects/virtualboximage/files/Ubuntu Linux/10.04/Ubuntu 10.04.vdi.bz2
Active user account(s) (username/password): ubuntu/reverse
Notes: Guest Additions not installed - Ubuntu Linux 10.10 x86
Size (compressed): 893 MB
Link: https://sourceforge.net/projects/virtualboximage/files/Ubuntu Linux/10.10/Ubuntu 2010.10.vdi.bz2/download
Active user account(s) (username/password): ubuntu/reverse
Notes: Guest Additions not installed - Ubuntu Linux 11.04 x86
Size (compressed/uncompressed): 535 MB/2.7 GB
Link: http://sourceforge.net/projects/virtualboximage/files/Ubuntu%20Linux/11.04/ubuntu_11.04-x86.7z/download
Active user account(s) (username/password): ubuntu/reverse
Notes: Guest Additions not installed ; Unity works in VirtualBox 4.0.6 with Guest Additions Installed - Ubuntu Linux 11.10 x86
Size (compressed/uncompressed): 608 MB/2.9 GB
Link: http://sourceforge.net/projects/virtualboximage/files/Ubuntu%20Linux/11.10/ubuntu_11.10-x86.7z/download
Active user account(s) (username/password): ubuntu/reverse
Notes: Guest Additions installed ; Unity works in VirtualBox 4.1.4 with GA installed and 3d enabled - Ubuntu Linux 12.04 x86
Size (compressed/uncompressed): 769 MB/3.2 GB
Link: http://sourceforge.net/projects/virtualboximage/files/Ubuntu%20Linux/12.04/ubuntu_12.04-x86.7z
Active user account(s) (username/password): ubuntu/reverse
Notes: Guest Additions NOT installed ; tip: set Video RAM 64MB minimum - Ubuntu Linux 12.10 x86
Size (compressed/uncompressed): 613 MB/3.0 GB
Link: http://sourceforge.net/projects/virtualboximage/files/Ubuntu%20Linux/12.10/ubuntu-12.10-desktop-i386.7z
Active user account(s) (username/password): ubuntu/reverse
Notes: Guest Additions installed - Ubuntu Linux 13.04 x86
Size: 1.2 GB
Link: Torrent
Active user account(s) (username/password): ubuntu/reverse
MD5: d1115a72fb85872f26b526f0dca990b7
Notes: Guest Additions installed
Notes: Guest Additions installed
Size: 1.6 GB
Link: Torrent
Active user account(s) (username/password): ubuntu/reverse
Notes: Guest Additions not installed
Источник
How To Install Ubuntu 20.04 LTS On VirtualBox [Windows, Linux And macOS]
T he current long-term Ubuntu 20.04 “Focal Fossa” was released on April 23, 2020, with full-fledged new changes and features. We can now download, install, and try Ubuntu to experience one of the best Linux distributions.
To install Ubuntu on macOS, Linux or Windows, we can dual boot Ubuntu alongside any operating system. Instead of dual boot, a virtual machine is an alternate solution to install and test all new features of Ubuntu 20.04. So, let’s jump into the Ubuntu installation guide by creating a Ubuntu virtual machine.
Install Ubuntu 20.04 On VirtualBox
To understand and implement every action of installing Ubuntu, follow the step-by-step instructions given below:
1. Download VirtualBox and Ubuntu 20.04 ISO Image
The first step requires downloading a virtual machine and an Ubuntu ISO for your operating system. Here, we will download VirtualBox — free and open-source software to create virtual machines. You can also download other software like VMWare.
Go to the official VirtualBox site and download the latest version. Make sure to choose the package for your hosting systems such as Windows, macOS, or Linux.
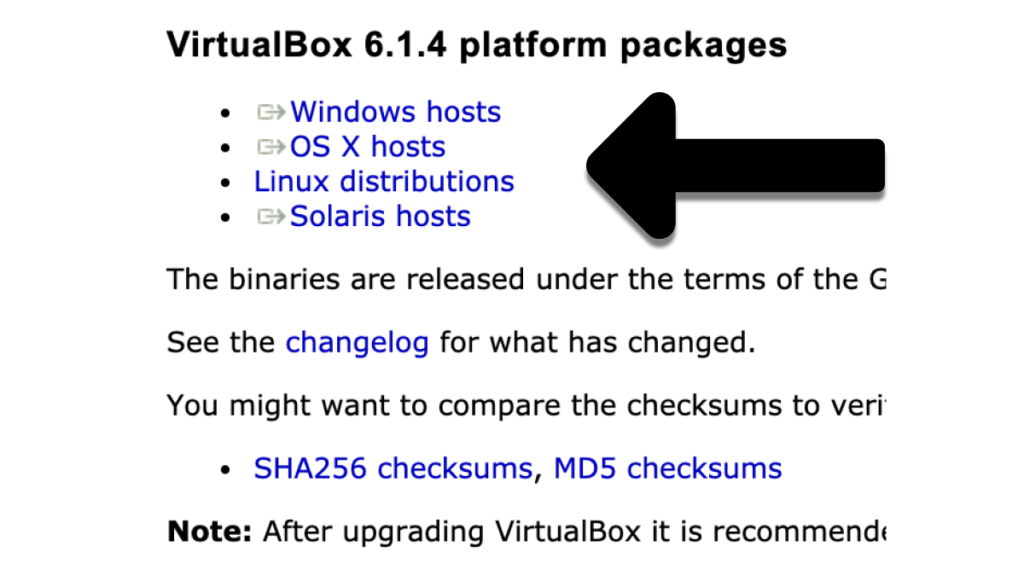 Step 1: Download VirtualBox
Next, download the ISO image of Ubuntu 20.04 LTS from the official site here.
2. Install VirtualBox And Create Ubuntu Virtual Machine
After VirtualBox and Ubuntu ISO download, we’ll create a Ubuntu virtual machine. But, before that, we also need to install VirtualBox on the current operating system.
The installation of VirtualBox follows the same process on all operating systems. Hence, whether you’re using macOS, Linux, or Windows, just open the downloaded VirtualBox package and proceed further to set up VirtualBox.
In each wizard window, you don’t have to do anything except click on the next and keep the default setting checked. The installation will finish in two minutes and you’re ready for the second part, i.e., creating a virtual machine for Ubuntu.
I hope you’ve successfully set up your VirtualBox. Now open the application and you’ll notice a symbol indicating “New.” Click on the same symbol or use keyboard shortcut CTRL+N to create a new virtual instance.
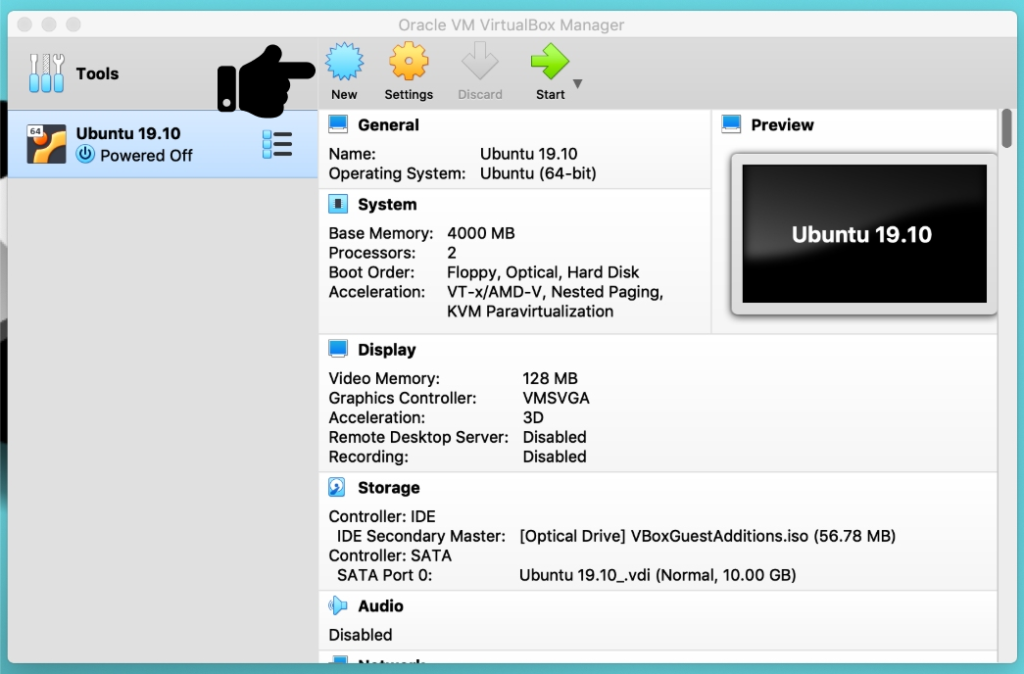 Virtualbox — Creating A New Machine
Enter a new name for your operating system in a prompt window. When you type the name, VirtualBox will automatically detect the type and version of your OS. However, you can also modify it later on.
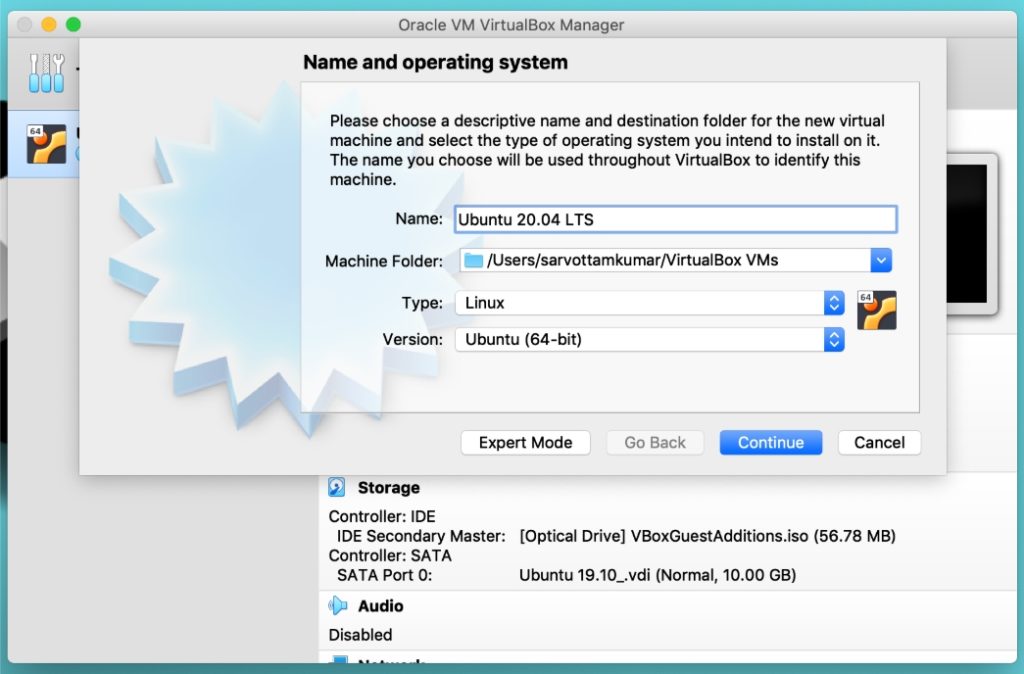 VirtualBox — Set OS Name, Type And Version
We’ll now follow the “continue” process. So, click on continue and move to the next step to select the RAM size. Here, you have to choose the base memory based on your host system RAM size. For example, if your host system has 8GB or 4GB RAM, you should select half of it (4GB or 2GB) for better performance. However, it is highly recommended to not choose less than 1GB.
Finished the memory space? We now continue to allocate space for virtual hard disks. Virtual disks act as a separate hard disk for the virtual machines residing over the host system hard disk drive.
You can also choose an already existing virtual hard disk but I would recommend creating a new disk space for Ubuntu virtual machines.
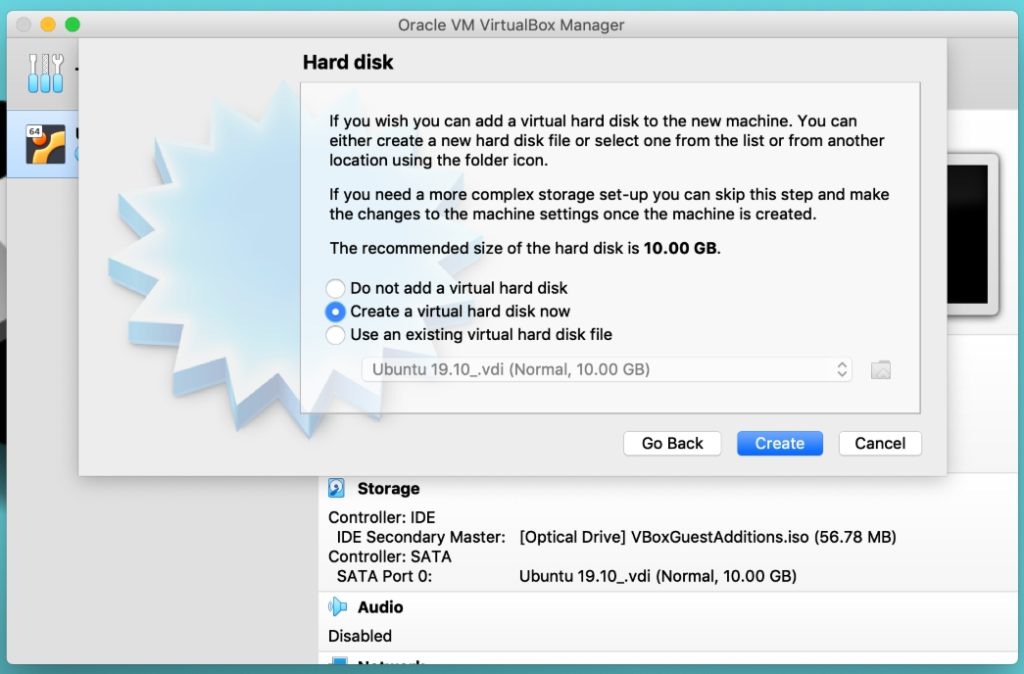 VirtualBox — Create Virtual Hard Disk
After creating a virtual disk, the next window will prompt you to select the type of file. It decides the method of storing your virtual machine in a file. I’m selecting the VDI which is VirtualBox native file format. It creates a single .VDI files and stores a whole virtual operating system.
Here comes how to decide the scalability of your virtual hard disk. In the future, if you want to increase your drive space, the dynamic allocation can allow you to do so. But if you select a fixed size, you cannot add extra space after creating a virtual machine.
Of course, we would select a “Dynamically Allocated” option to mount more space at a later stage.
 VirtualBox — Select Type Of Storage
Since we have selected the VDI file type, we now need to store that single file on our host system. Select the path you want to store and allocate the size based on your requirements. Ubuntu recommends at least 25GB of free storage for smooth running, hence, I’ll choose 30GB. If you have more space and are planning to use it for the long term, you can select more than 30GB.
Also, don’t worry about the size here; we can increase or decrease hard disk size as we’ve already selected the dynamic allocation in the above step.
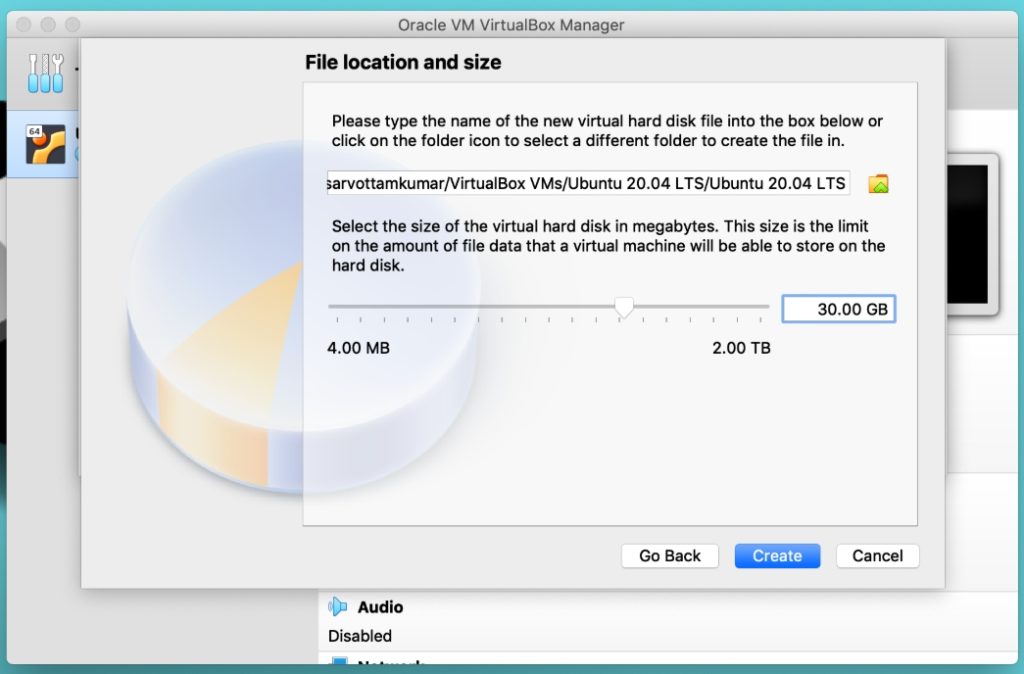 VirtualBox — Select Storage Area
Click on create and your virtual machine is now created. On the right side, you can check all the settings and system information about your machine.
 VirtualBox — Virtual machine Created
Did you write the misspelled OS name or want to rename it? Click on the settings next to the new icon and it will pop up window where you can customize all your system information. But for now, we’ll leave with the default setting.
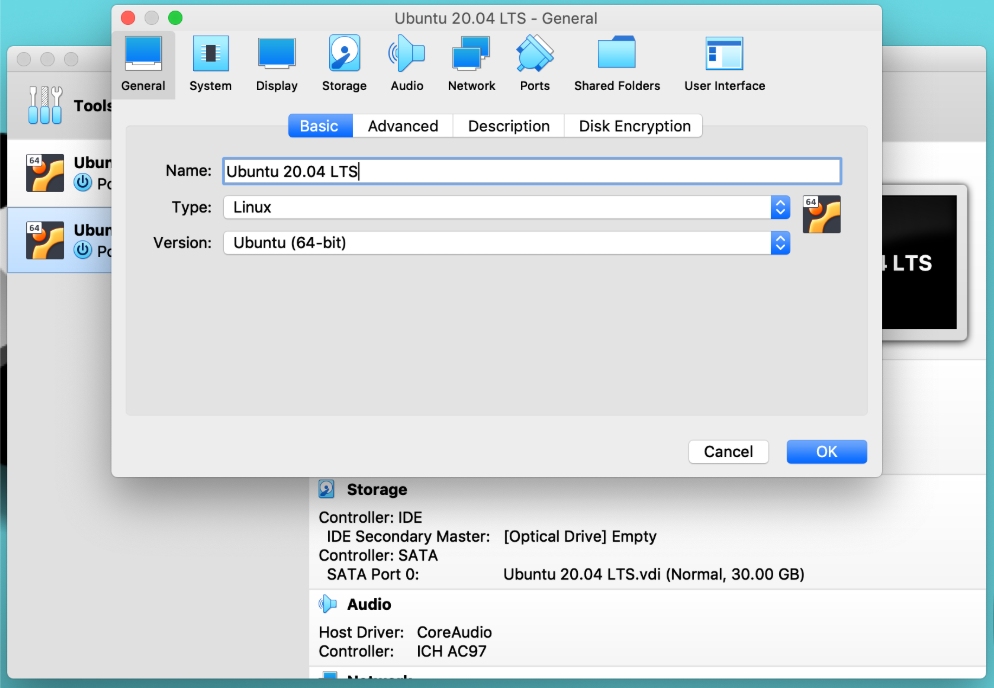 VirtualBox — Change Settings
3. Load Ubuntu 20.04 ISO file Into Virtual Machine
We’ve created a virtual machine but it still requires one more step to start installing Ubuntu in that virtual machine. So, in this step, we will load the Ubuntu ISO file.
Go to the storage section and then click on the disk icon to import the downloaded Ubuntu 20.04 image.
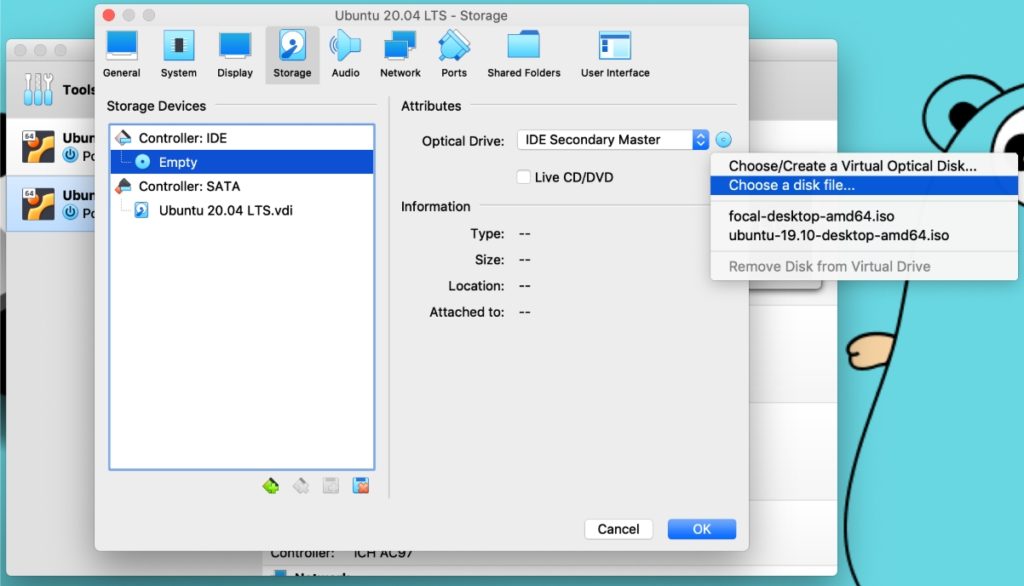 VirtualBox — Load Ubuntu ISO File
The moment you click on the “choose a disk file”, a file dialog will open. Select the Ubuntu ISO from the dialog and load it into your virtual machine. Click OK to save everything and we are now ready to start the Ubuntu installation.
4. Installing Ubuntu In Virtual Machine (VM)
We’ve now reached the final stage. So, let’s hit the start button or double click on the left side Ubuntu virtual machine to start VM.
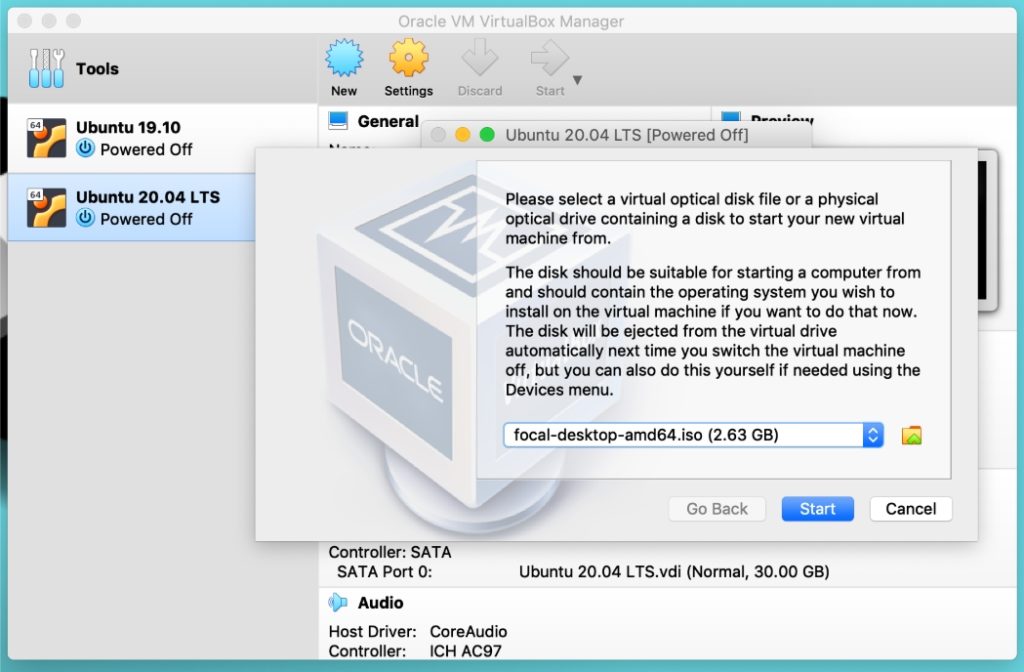 VirtualBox — Ubuntu ISO Loading After Instance Start
If you encounter the situation mentioned in the above picture, make sure it’s displaying the ISO file you’ve loaded in Step 3. This is just another method to load or change the Ubuntu ISO image. To switch to another ISO, you can click on the small folder icon and replace the current with a new one.
Now click on the start button and you’ll notice a black and white screen with an animated rolling wheel and Ubuntu logo at the bottom. It means your Ubuntu installer is about to start.
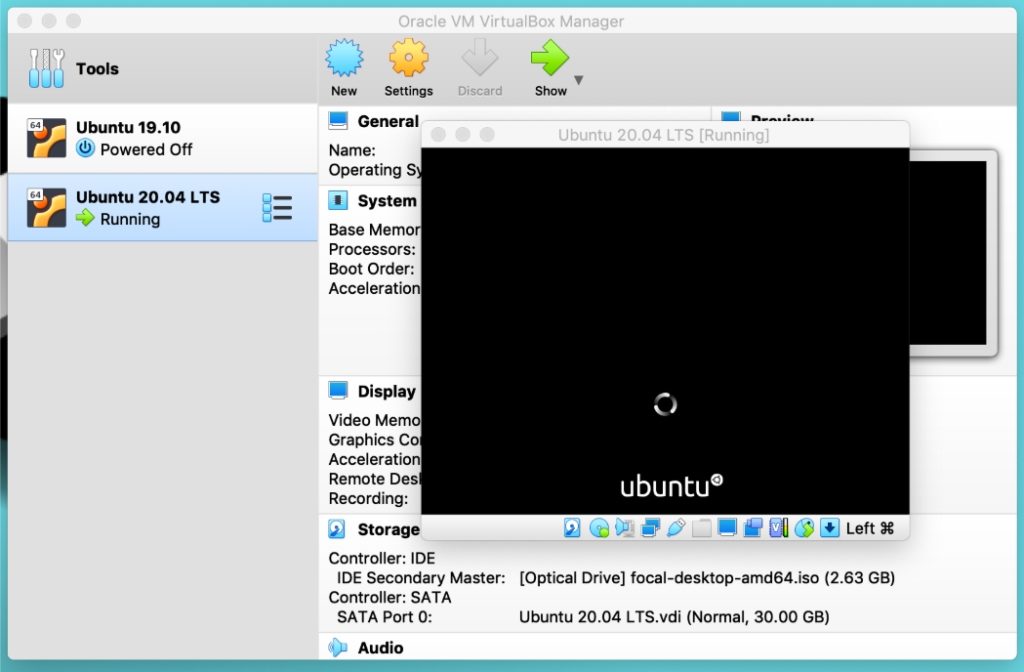 VirtualBox — Ubuntu Installation Start
After a few seconds or a minute, the Ubuntu installer will display two options to proceed further. Let me briefly explain both of them.
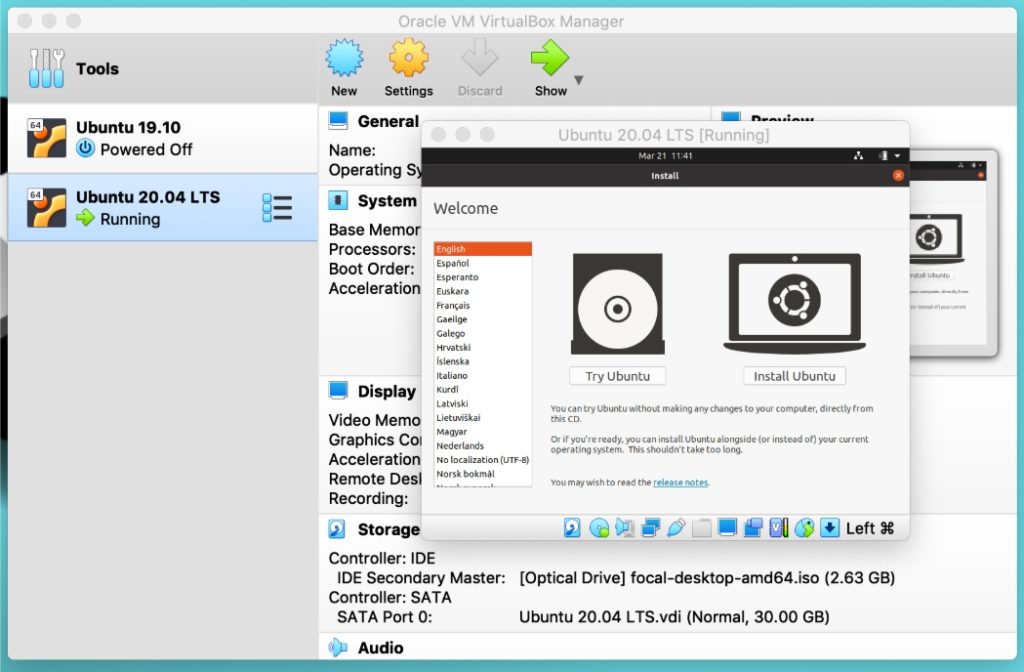 Ubuntu 20.04 Installer — Choose How To Start Installation
“Try Ubuntu” leads directly to the desktop and gives a sneak-peak of the operating system. You can choose this option if you’re planning to install Ubuntu later but just want to test for temporary. However, Ubuntu offers a launcher icon named “Install Ubuntu 20.04 LTS” to initiate the installation from inside the Desktop.
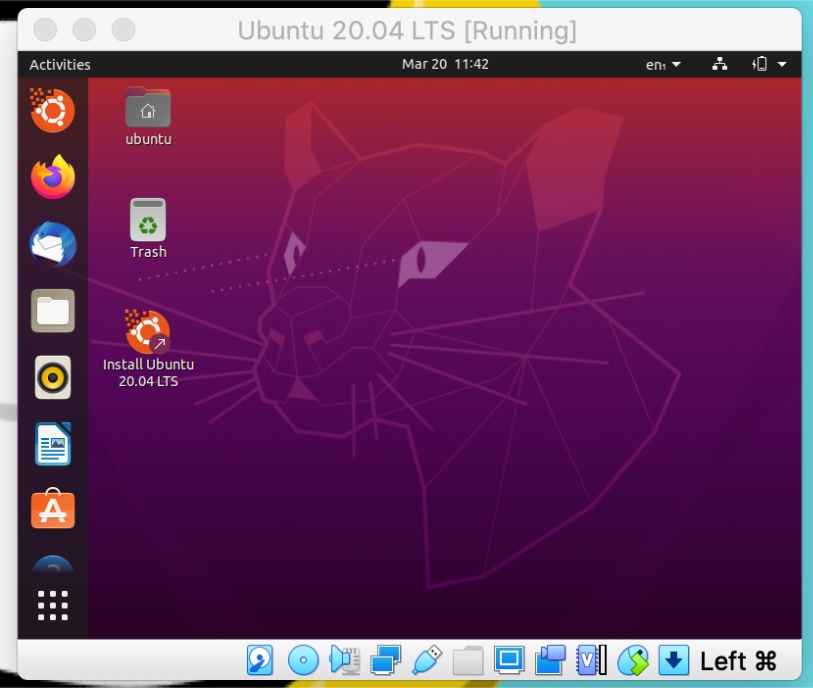 Ubuntu 20.04 LTS Desktop
On the other hand, “Install Ubuntu” follows the path for permanent installation.
So, here, we’ll choose “Install Ubuntu” and continue with the installation process. On the first screen, choose the keyboard layout of your native language.
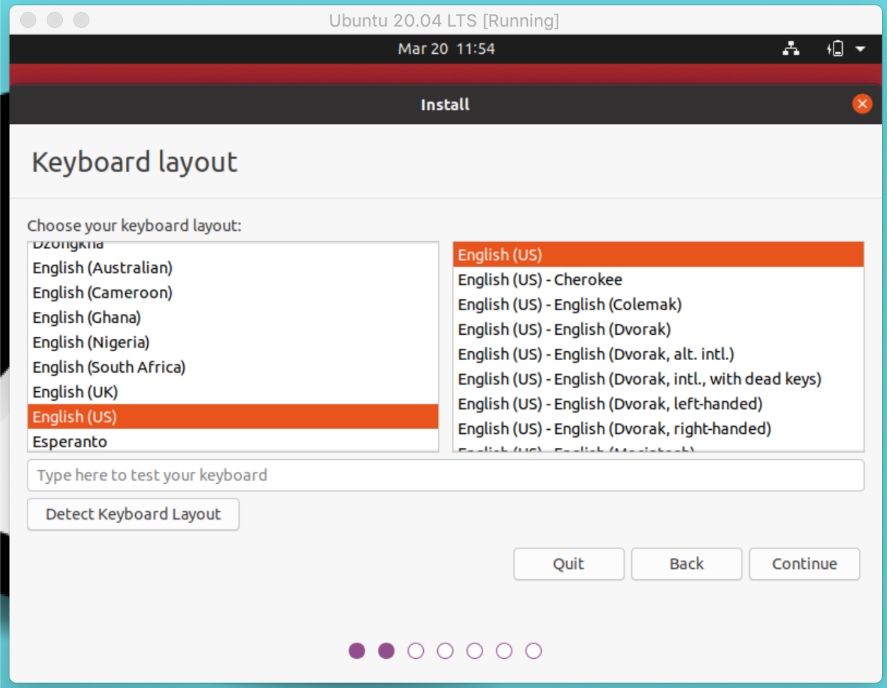 Ubuntu 20.04 LTS Installer — Choose Keyboard Layout
The next window allows you to select between the normal and minimal installation. If you’re trying Linux for the first time, I would guess you may not know what both mean. Let me explain briefly.
In the Minimal installation, you only get selected applications while normal installation includes almost all software and tools.
So, if you have enough space, I would suggest choosing normal installation to preload the games, media players, and utilities. And if you’re connected to the internet, don’t forget to check the other options. It will ease your lot of work by installing all the required drivers and media codecs during installation.
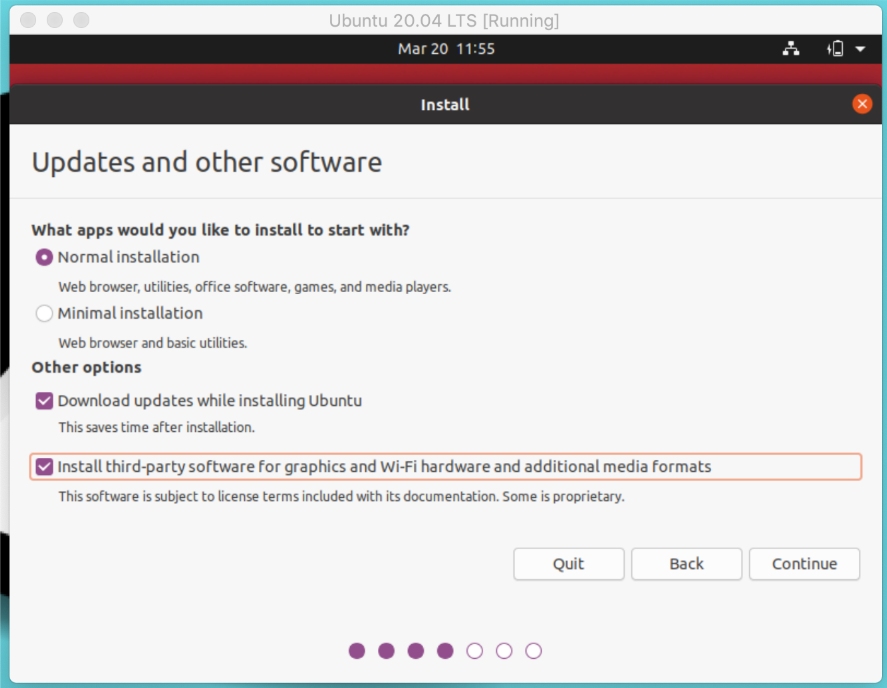 Ubuntu 20.04 LTS Installer — Choose Normal Or Minimal Installation
Here comes the main part of choosing the installation type that decides the Ubuntu disk partition. Before choosing between these options, first, I would say don’t do anything till I say to choose as I’ll explain and show you what each option does. So, just read the next paragraphs.
“Erase disk and install Ubuntu” is an easy road to follow especially if you’re a beginner. It automatically creates a partition table and hence you escape the toughest part (most people think so). Clicking on “Install Now” prompts the permission dialog to write changes on disks and create an automatic partition table.
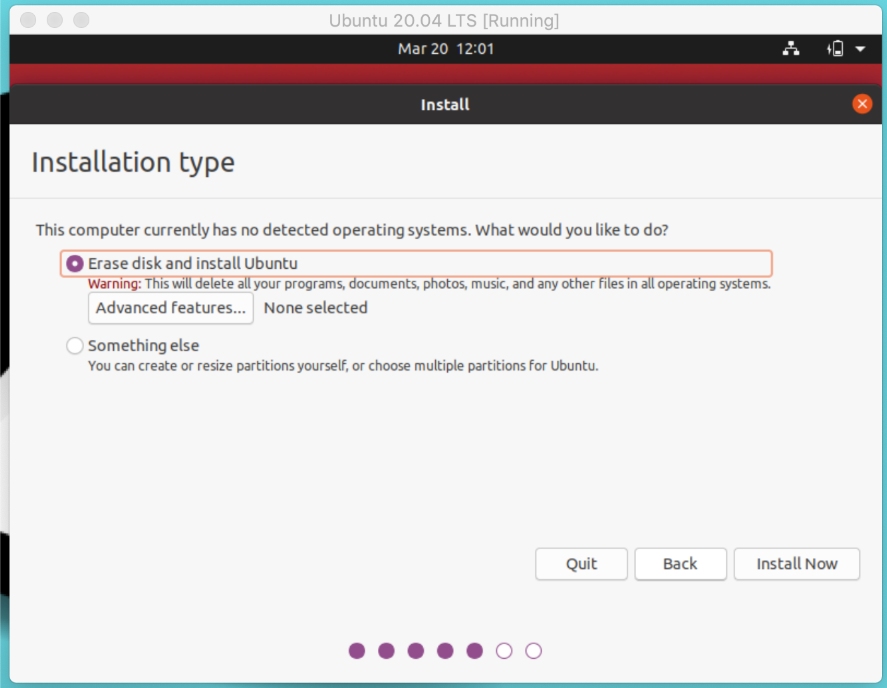 Ubuntu 20.04 LTS Installer — Choose Installation Type-2
But “Something else” can be a tough road for beginners. Choosing this option means you have to create root, home, swap partition manually. That’s the reason most people find it confusing to configure space allocation and Linux partitioning schemes.
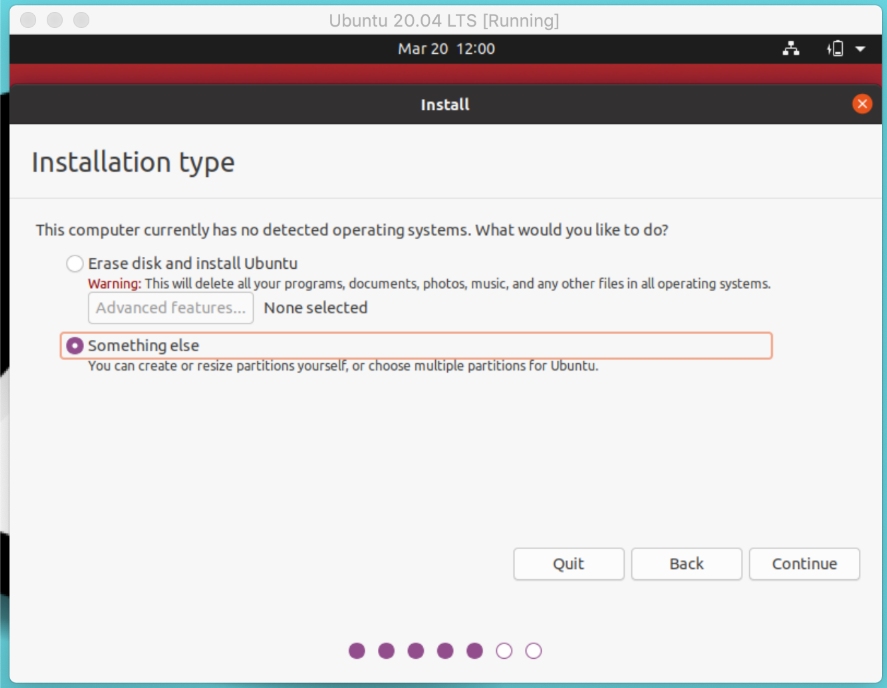 Ubuntu 20.04 LTS Installer — Choose Installation Type
So, if you’re totally a beginner, you can now choose “erase the disk” and move forward with an easy step.
But if you’re here to learn, choose “something else” and follow Step 4. “erase disk” people can skip Step 4 as it is not intended for them.
5. Creating a Partitioning Scheme For Ubuntu (Optional)
If you’ve chosen the “something else,” this step is for you. Here, we’ll create only three partitions — /root, /home, and /swap. You can also create other partitions like /mnt. But these three are the most important, so let’s create first.
Select the free space and click on the “+” to add config values. First, create a root partition with the values given in the picture.
Here, I want to clarify that for each partition, I’m selecting a standard size. You’re completely free to change the size according to yourself or follow as displayed in the picture.
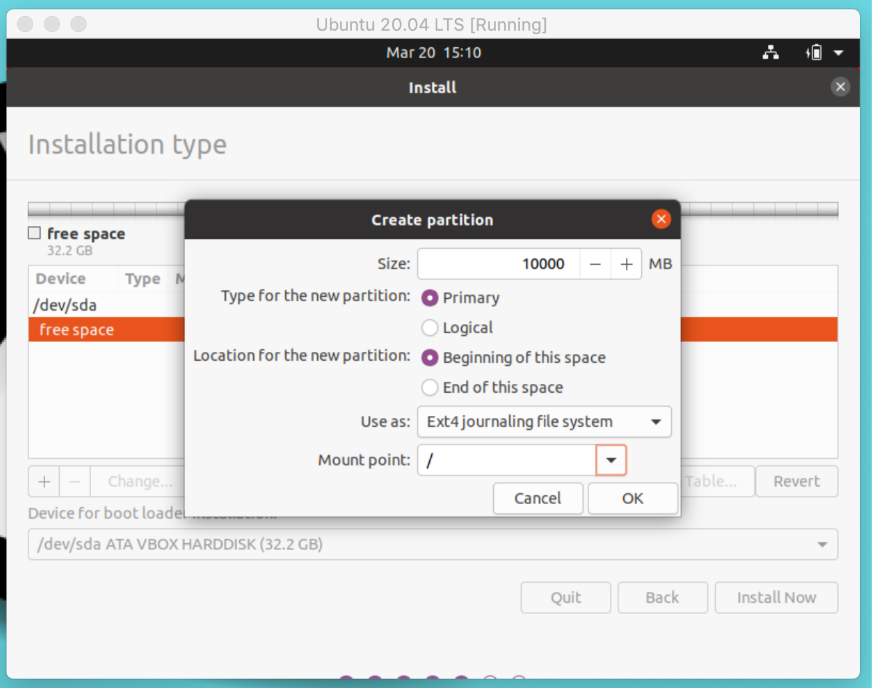 Ubuntu 20.04 LTS Installer — Create Root Partition
If you don’t know, root is a top-level directory in the Linux file system over which other partitions get mounted. Next, create a swap area that acts as a virtual RAM memory.
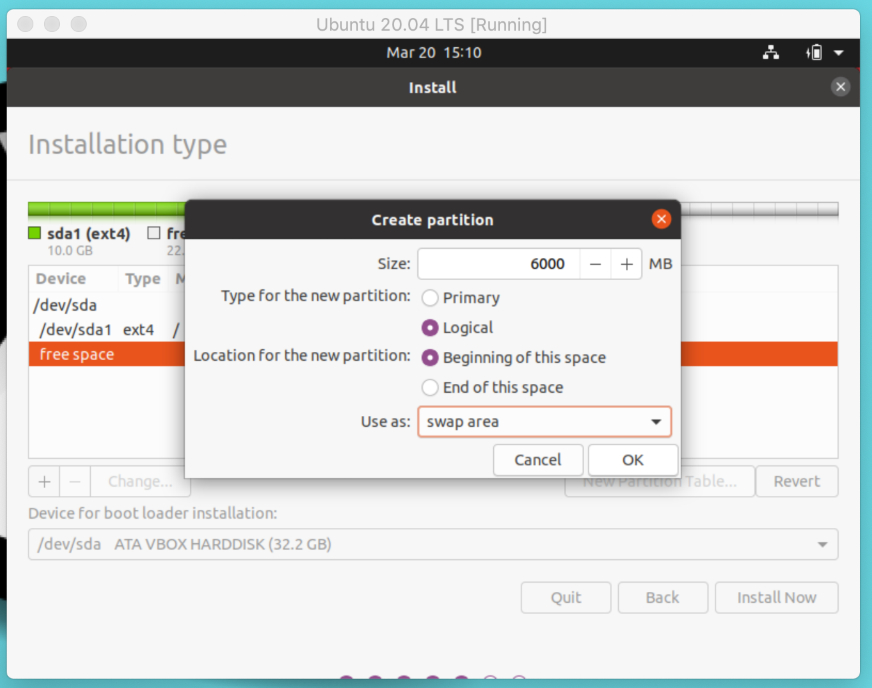 Ubuntu 20.04 LTS Installer — Create Swap Area
Finally, create a home partition which will be your personal directory to store files and folders.
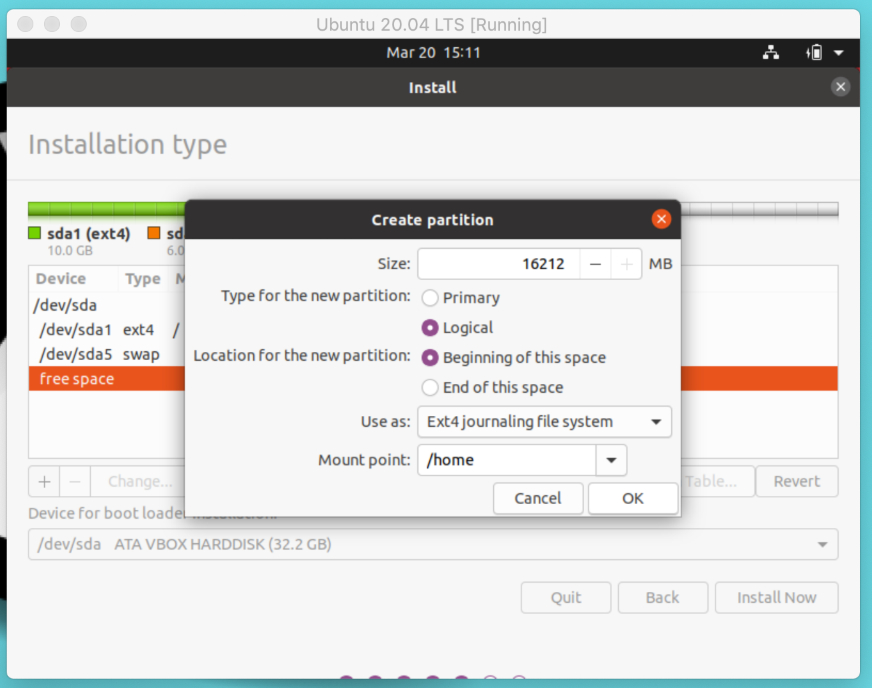 Ubuntu 20.04 LTS Installer — Create Home Partition
We’re done with the partition table. Now, click on install now and continue after writing these changes to disks.
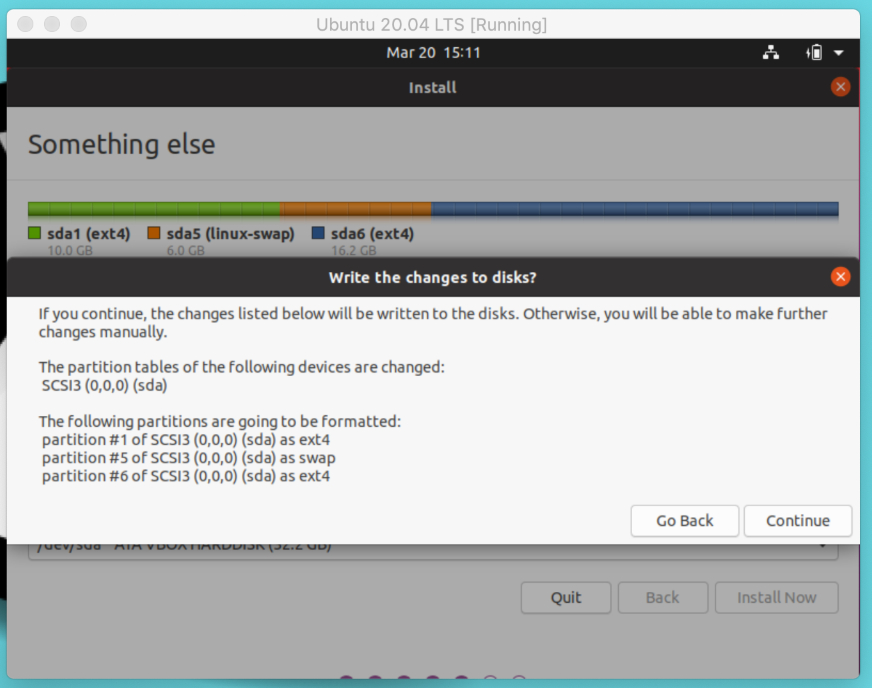 Ubuntu 20.04 LTS Installer — Write Changes To Disks
6. General Settings and Start Installation
I hope both “something else” and “erase disk” people reach this step successfully. This step involves setting up a virtual machine with basic configurations.
If you’re connected to the internet, the Ubuntu installer will automatically detect and set your location. You can change it either using a map or input field.
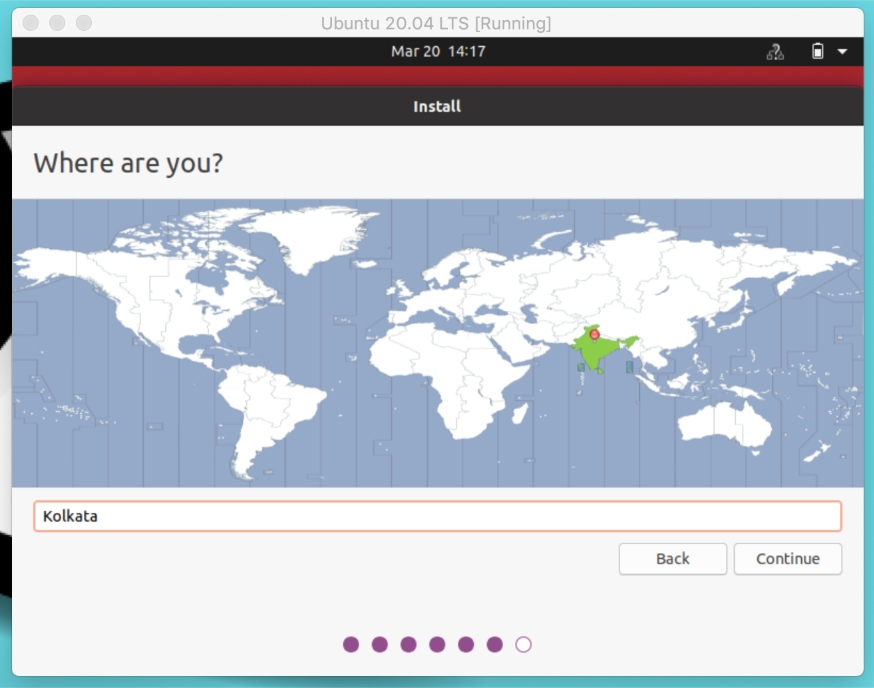 Ubuntu 20.04 LTS Installer — Choose Location
Set your username and password to login to the system. Make sure you choose a strong password with alphanumerics and symbols.
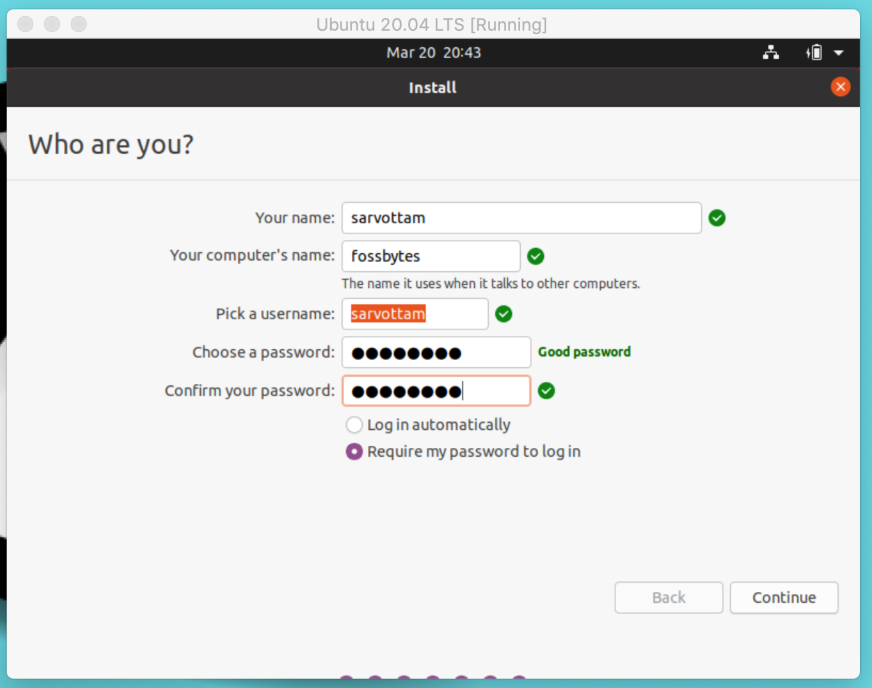 Ubuntu 20.04 LTS Installer — Set Username Password
Click on Continue and the installation will start. It may take around five minutes. Till then you can enjoy the slideshow going through all the software tools and applications.
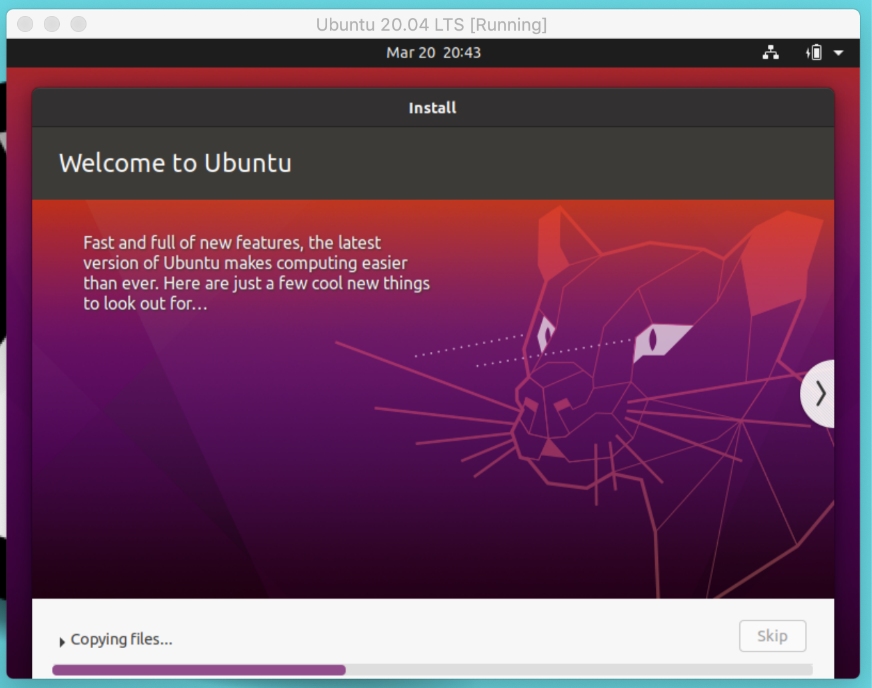 Ubuntu 20.04 LTS Installer — Installation Starts
If your installation is complete with no intermediate obstacle, a success notification will pop up. You can now restart and login to your Ubuntu virtual machine.
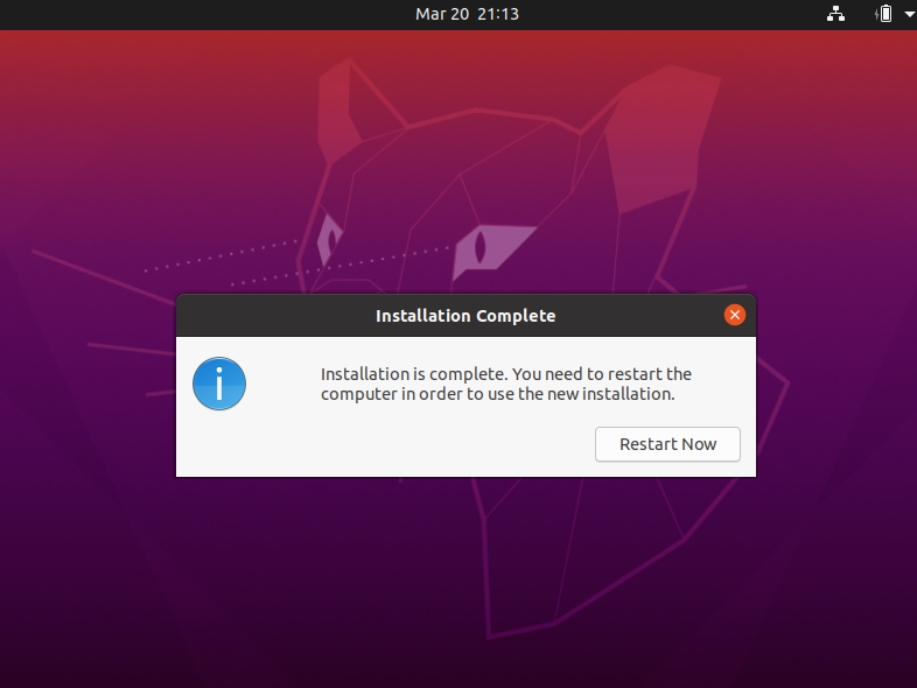 Ubuntu 20.04 LTS — Installation Finish
7. Setting Up Full Screen For Ubuntu Virtual Machine In VirtualBox
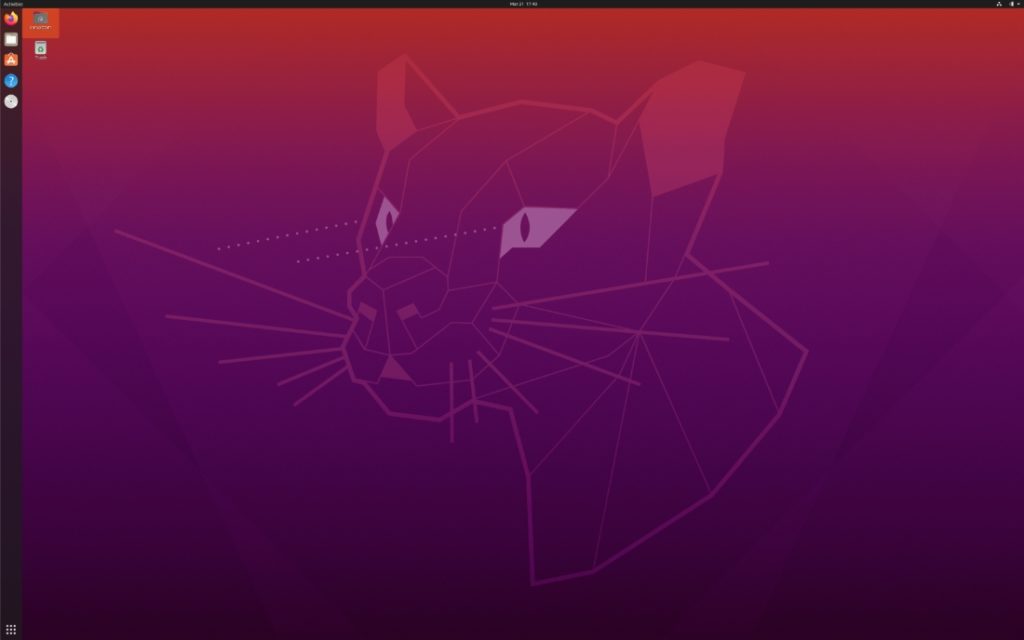
After logging in, you may notice that your Ubuntu desktop screen looks small that hides some parts of opened applications.
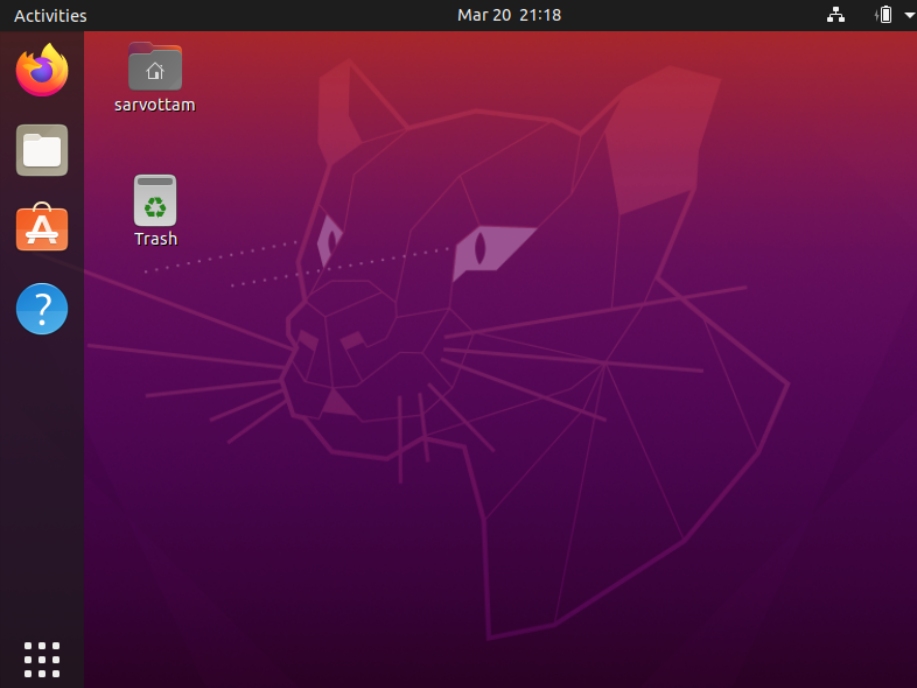 Ubuntu 20.04 LTS — Desktop
Hence, this step is dedicated to fixing the small screen problems for Ubuntu in VirtualBox.
To resolve the issue, you will need to install Guest Addition software comprised of device drivers and system apps. It basically helps the Ubuntu virtual machine to integrate closer with the host operating system and configure various settings.
To do the same, go to the Ubuntu virtual machine menu bar > devices > insert guest additions CD. Click on run to give permission to install VirtualBox Guest Addition software.
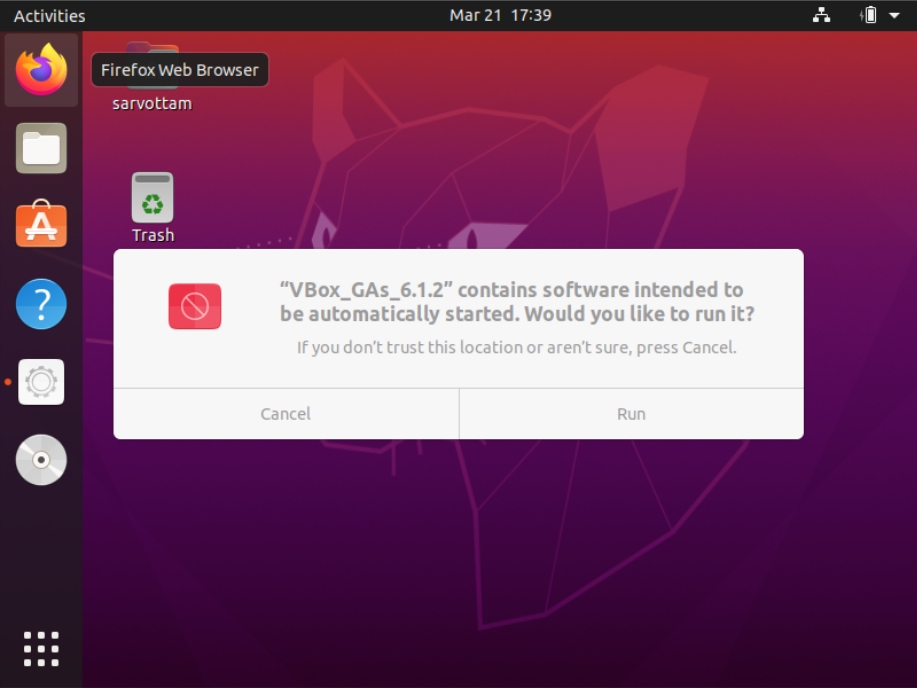 Ubuntu 20.04 LTS — Fix Screen Size In VirtualBox
This helps to mount the Guest Additions ISO file inside the virtual machine. You can now go to the menu bar > view > full screen and your desktop will switch to a large screen.
 Ubuntu 20.04 LTS — Full Screen
For further screen configuration, you can also go to Ubuntu settings and change the resolution accordingly.
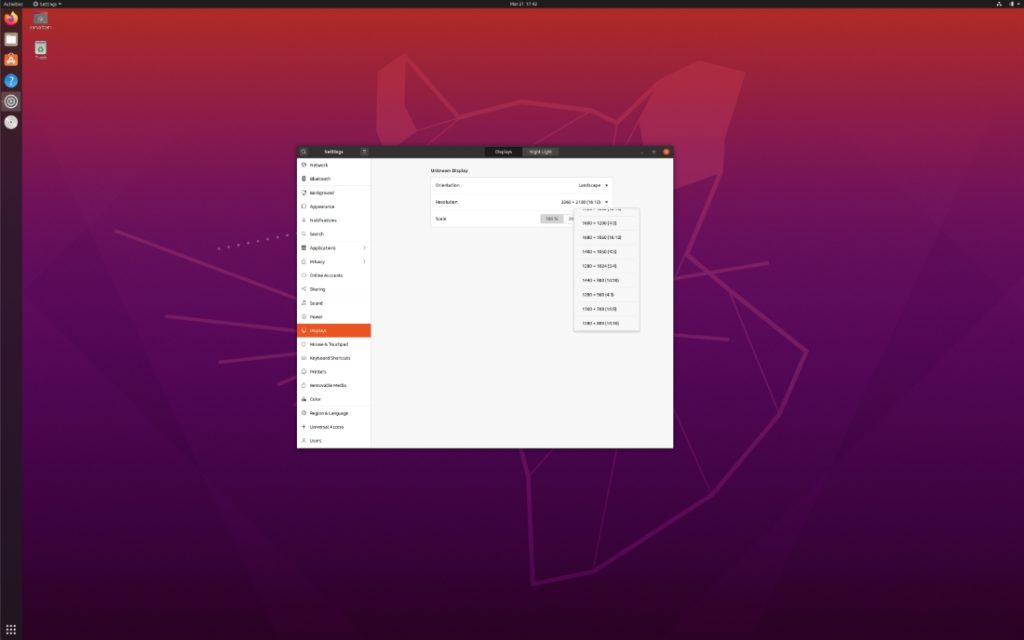 Ubuntu 20.04 LTS — Change Screen Size
Источник


