- UEFITool
- User-Friendly UEFI Tool
- Compatible with Many BIOS Image Types
- Conclusion
- Загрузочная флешка UEFI Windows 10
- Создание загрузочной флешки UEFI
- Как установить Windows 10 с помощью USB-устройства с поддержкой UEFI
- Как создать загрузочный диск Windows 10 с помощью Media Creation Tool
- Как создать загрузочный диск Windows 10 с помощью Rufus
- How to install Windows 10 from USB with UEFI support
- How to create Windows 10 UEFI boot media with Media Creation Tool
- 1. ExpressVPN: The best VPN available right now
- How to create Windows 10 UEFI boot media with Rufus
- Create install flash drive with Windows 10 ISO
- Create boot flash drive downloading Windows 10 ISO
- More Windows 10 resources
- Halo: MCC’s live service elements make it better, not worse
- Microsoft’s Surface Duo is not ‘failing up’
- Here’s what you can do if Windows 10 update KB5001330 is causing issues
- These are the best PC sticks when you’re on the move
UEFITool

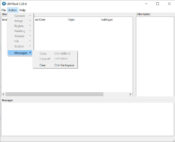
UEFITool allows you to edit your UEFI thanks to this user-friendly interface where you’ll be able to access all of the tools inside UEFI even if you’re a beginner.
With UEFITool, editing and viewing your UEFI and BIOS configurations are easy. You can import the data via image files, and you can view these configurations and edit them if you want.
Even though UEFI editing is perceived to be a job for professionals, you’ll be able to edit them with this user-friendly application that will provide you with a nice interface.
User-Friendly UEFI Tool
This tool is made in a user-friendly manner as it has an intuitive interface that will allow you to easily access your UEFI configurations. However, it’s also important to note that you’ll need to have some knowledge about the configurations inside UEFI, even if the tool is simple and easy to use.
But if you already have that, then using UEFITool will be a breeze.
It has a simple design that looks somewhat simplistic. But it’s the experience that matters, and that is on a relatively high level. Even though it’s not very visually appealing, you’ll be able to use it easily and with ease.
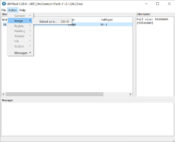
Compatible with Many BIOS Image Types
What is more, this application offers you many nice functionalities and compatibility. It is compatible with many BIOS image types, such as ROM, BIN, CAP, BIO, FD, WPH, and EFI.
These are some of the most common and standard BIOS image types. You’ll be able to open them and view them inside a structured interface where you’ll see their name and additional information about them.
In terms of the features, you’ll have access to some nice UEFI tools. You can extract the data from an image and insert items into the image itself. You may also remove the pieces you find unwanted. And when you’re done editing, you can easily export the image.
Conclusion
To conclude, UEFITool is a user-friendly tool for accessing your UEFI configurations and settings and making changes to them. It’s easy to use with a simple interface, although it still requires you to have some UEFI knowledge, too.
Загрузочная флешка UEFI Windows 10
Большинство пользователей получили Windows 10 в качестве бесплатного обновления через Windows Update, но есть те, кто предпочитает установку новой операционной системы от физического диска, как USB флэш — память.
И в этой статье я собираюсь показать вам, как создать флэшку с Windows 10, который может быть установлен на компьютерах UEFI. В случае, если вы не тот, кто действительно нуждается в установке Windows 10 из UEFI, но вы читаете эту статью только для образования, вы возможно не знакомы с термином «UEFI».
UEFI — это замена BIOS и означает, что новая прошивка, которая запускает компьютер и загружает операционную систему. И все больше и больше новых ПК с Windows выпускают с UEFI.
Создание загрузочной флешки UEFI
Вернемся теперь к созданию загрузочной флешки Windows 10 с поддержкой UEFI. Для этого действия, вам необходимо скачать Rufus (программа для записи загрузочных флешек). Rufus — является отдельной утилитой, и вам не нужно устанавливать ее, скачайте и откройте ее. Скачать программу: https://mysitem.ru/download-for-free/655-rufus-fre.html

После того, как вы открыли Rufus USB, выберите флешку на которой хотите создать образ, выберите схему GPT раздела для UEFI (размер отпуска кластера по умолчанию), убедитесь, что у вас есть «Создать загрузочный диск с помощью ISO — образ» выбран из выпадающее меню, добавить свой файл Windows 10 ISO, и нажмите кнопку Пуск. См. подробно: Как скачать Windows 10 с официального сайта Microsoft
Подождите, пока процесс не будет завершен. Теперь у вас есть полностью законная USB флэшка UEFI для установки Windows 10, она поддерживает компьютеры с загрузкой UEFI. Перезагрузите компьютер и установите систему в обычном режиме. Читайте: Как установить Windows 10 с флешки. Если у вас есть какие-либо другие связанные проблемы или вопросы, вы можете посетить для решения — раздел Windows 10.
Как установить Windows 10 с помощью USB-устройства с поддержкой UEFI
Если вы планирует выполнить чистую установку Windows 10, то для запуска процесса установки вам понадобится загрузочное USB-устройство флеш-памяти. Тем не менее, если ваш компьютер является достаточно современным, то велика вероятность, что на нем используется Unified Extensible Firmware Interface (UEFI) вместо традиционного BIOS. В этом случае вам нужно убедиться, что загрузочный носитель также поддерживает соответствующий интерфейс прошивки, в противном случае вы не сможете запустить процесс установки.
К счастью, для компьютеров UEFI доступно несколько способов создания загрузочного носителя. Например, вы можете использовать утилиту Media Creation Tool от Microsoft, которая позволяет упростить копирование установочных файлов Windows 10 на съемный диск и поддерживает как классический BIOS, так и UEFI. В качестве альтернативы вы можете воспользоваться сторонним инструментом Rufus, который может создавать загрузочные флешки специально для устройств с UEFI.
В данном руководстве приведем шаги по созданию загрузочного USB-устройства флеш-памяти с поддержкой UEFI, используя Media Creation Tool и Rufus.
Как создать загрузочный диск Windows 10 с помощью Media Creation Tool
Если вы планируете обновить или выполнить чистую установку Windows 10 на ПК с UEFI, Вы можете воспользоваться Media Creation Tool для создания совместимого загрузочного носителя. Просто подключите USB-накопитель объемом не менее 8 ГБ к вашему компьютеру и проделайте следующие шаги:
Скачайте последнюю версию инструмента Media Creation Tool:
- Дважды кликните по файлу MediaCreationToolxxxx.exe, чтобы запустить утилиту.
- Нажмите кнопку “Принять”, чтобы согласиться с условиями лицензионного соглашения Microsoft.
- Выберите опцию Создать Установочный носитель (USB-устройство флеш-памяти, DVD-диск или ISO-файл) для другого компьютера.
- Нажмите кнопку “Далее”.
- Выберите язык, архитектуру процессора и выпуск Windows 10, если значения по умолчанию не соответствуют вашим предпочтениям.
Совет. в разделе Архитектура вы можете заметить опцию “Оба”, которая предназначена для создания универсального загрузочного носителя для 32- и 64-разрядных процессоров.
- Нажмите кнопку “Далее”.
- Выберите опцию USB-устройство флеш-памяти.
- Нажмите кнопку “Далее”.
- Выберите съемный носитель, который вы хотите использовать в списке (если вы не видите свой накопитель, нажмите кнопку “Обновить список дисков”).
- Нажмите кнопку “Далее”.
После выполнения данных шагов, мастер создания носителей приступит к загрузке установочных файлов Windows 10 и создаст загрузочное USB-устройство для компьютера с UEFI или BIOS.
Как создать загрузочный диск Windows 10 с помощью Rufus
Использование Media Creation Tool — рекомендуемый метод создания загрузочного USB-устройства флеш-памяти. Тем не менее, если по какой-то причине данный вариант для вас не сработал, вы можете загрузить ISO-образ Windows 10 из другого источника и воспользоваться инструментом Rufus для создания установочного носителя с поддержкой UEFI. Просто подключите USB-накопитель объемом не менее 4 ГБ к вашему компьютеру и проделайте следующие шаги:
Скачайте последнюю версию программу Rufus.
- Дважды кликните по файлу Rufus-x.x.exe, чтобы запустить утилиту.
- В разделе Устройство выберите USB-накопитель емкостью не менее 8 ГБ.
- В разделе Метод загрузки нажмите кнопку “ВЫБРАТЬ”.
- Перейдите в папку с ISO-образом Windows 10.
- Выберите файл образа.
- Нажмите кнопку “Открыть”.
- В разделе Схема раздела выберите опцию GPT.
- В разделе Целевая система выберите опцию UEFI (non CSM).
- В разделе Новая метка тома выберите содержательное название для диска, например windows10-20h2.
- В разделе Файловая система укажите значение NTFS.
- В разделе Размер кластера оставьте значения по умолчанию.
- Нажмите кнопку Показать расширенные параметры форматирования и убедитесь, что метки “Быстрое форматирование” и “Создать расширенную метку и значок устройства” отмечены.
- Нажмите кнопку “СТАРТ”.
- Нажмите кнопку “ОК”, чтобы подтвердить, что USB-устройство флеш-памяти будет очищено.
После выполнения данных шагов, инструмент Rufus создаст загрузочный носитель Windows 10 с поддержкой UEFI.
После создания загрузочного USB-носителя с поддержкой UEFI, вы можете приступить к обновлению системы или выполнению чистой установки Windows 10.
How to install Windows 10 from USB with UEFI support
 Source: Windows Centtral
When installing a clean copy of Windows 10, usually you connect a USB media to the device to launch the «Windows Setup» wizard to continue with the installation process. However, if you have a computer with a Unified Extensible Firmware Interface (UEFI), instead of the legacy Basic Input/Output System (BIOS), it is crucial to use the appropriate media for the system firmware type.
On Windows 10, there are at least two methods to create a USB bootable media. You can use the Microsoft Media Creation Tool to download the files onto a removable storage with support for both firmware types (UEFI and legacy BIOS). Or you can use a third-party tool called «Rufus,» which makes it easy to create a USB to install Windows with support for UEFI.
In this Windows 10 guide, we will walk you through the steps to create a USB flash drive that includes support for UEFI using the Microsoft Media Creation Tool and Rufus.
How to create Windows 10 UEFI boot media with Media Creation Tool
The best way to create a bootable USB media for an in-place upgrade or clean install of Windows 10 is to use the official Media Creation Tool available through the Microsoft support website.
To create a USB install media, connect a flash drive of at least 8GB of space, and then use these steps:
Under the «Create Windows 10 installation media» section, click the Download tool now button to save the file on the device.
 Source: Windows Central
Select the Create installation media (USB flash drive, DVD, or ISO file) for another PC option.
 Source: Windows Central
(Optional) Clear the Use the recommended options for this PC option.
Source: Windows Central
Select the correct language, architecture, and edition of Windows 10 (if applicable).
Quick tip: If you plan to install Windows 10 on multiple computers running 32-bit and 64-bit architectures, use the «Architecture» drop-down menu and select the Both option.
Select the USB flash drive option.
Source: Windows Central
Select the flash drive from the list. (If the storage device is not available, click the Refresh drive list option.)
Source: Windows Central
Once you complete the steps, the Media Creation Tool will download the files and will create a bootable USB flash drive that you can use to install Windows 10 on devices with support for UEFI and BIOS.
![]()
1. ExpressVPN: The best VPN available right now
This is our top pick for anyone looking to get started with a VPN. It offers a great mix of speed, reliability, outstanding customer service, and affordability. There is a 30-day money-back guarantee, so give it a shot today.
How to create Windows 10 UEFI boot media with Rufus
Alternatively, you can use Rufus, a free third-party tool that allows you to create an installation media with support for UEFI devices. You can use the tool to create a bootable media using an existing ISO file, or you can use the option to download the files from the Microsoft servers and then create the installation media.
Create install flash drive with Windows 10 ISO
To create a bootable media using an existing Windows 10 ISO file, connect a flash drive of at least 8GB of space, and use these steps:
Under the «Download» section, click the latest release (first link) and save the file on the device.
 Source: Windows Central
Use the «Target system» drop-down menu and select the UEFI (non CSM) option.
 Source: Windows Central
Under the «Show Advanced drive properties» section do not change the default settings.
Source: Windows Central
Under the «Volume label» field, confirm a name for the drive — for example, «win10_20h2_usb.»
Source: Windows Central
After you complete the steps, Rufus will create a USB flash drive to install Windows 10 on a device using UEFI with a locally available image.
Create boot flash drive downloading Windows 10 ISO
Rufus also includes an option to download the Windows 10 ISO file directly from the Microsoft servers, which you can then use with the tool to create a bootable USB flash drive.
To create an install media of Windows 10 with Rufus, connect a USB flash drive of at least 8GB of space, and then use these steps:
Under the «Download» section, click the latest release (first link) of the tool to save the file onto your computer.
Source: Windows Central
Click the Settings button at the bottom of the page.
Source: Windows Central
Under the «Settings» section, use the «Check for updates» drop-down menu and select the Daily option.
Source: Windows Central
Under the «Boot selection» section, click the arrow button next to the «Select» option and choose the Download option.
Source: Windows Central
Use the «Language» drop-down menu and select your installation language.
Quick note: If you are in the United States, select the «English» option. Otherwise, select the «English International» option.
Use the «Architecture» drop-down menu and select the 32-bit or 64-bit option (recommended).
Quick tip: You can check the architecture of your device on Settings > System > About, under the Device specifications section.
Click the Download button.
![]() Source: Windows Central
Source: Windows Central
Use the «Target system» drop-down menu and select the UEFI (non CSM) option.
Source: Windows Central
Once you complete the steps, the tool will run the script and download the Windows 10 ISO file. After the download, you can use that ISO file to create a bootable media to install Windows 10 on a UEFI device.
When you have the USB bootable media with support for UEFI systems, you can use it to start the «Windows Setup» wizard to perform a clean installation of Windows 10 or an in-place upgrade.
However, since the «UEFI:NTFS bootloader» does not include a digital signature for secure boot, you must temporarily disable secure boot on the motherboard firmware before you can boot into the setup wizard. Usually, you would complete this task from within the Unified Extensible Firmware Interface that you can access by hitting one of the function keys (F1, F2, F3, F10, or F12), the ESC, or Delete key as soon as you start the computer.
The only caveat is that these settings will be different per manufacturer and even by computer model. So make sure to check your device manufacturer’s support website for more specific instructions. After the installation of Windows 10, you can enable the feature again.
More Windows 10 resources
For more helpful articles, coverage, and answers to common questions about Windows 10, visit the following resources:
We may earn a commission for purchases using our links. Learn more.
![]()
Halo: MCC’s live service elements make it better, not worse
Halo: The Master Chief Collection is more popular than ever, but some fans don’t agree with the live service approach 343 Industries has taken with it. Here’s why those elements are, at the end of the day, great for the game and for Halo overall.
![]()
Microsoft’s Surface Duo is not ‘failing up’
Microsoft announced this week that it was expanding Surface Duo availability to nine new commercial markets. While Surface Duo is undoubtedly a work in progress, this is not a sign of a disaster. It’s also doesn’t mean that Surface Duo is selling a ton either. Instead, the reason for the expansion is a lot more straightforward.
![]()
Here’s what you can do if Windows 10 update KB5001330 is causing issues
In this guide, we’ll show you the steps to get rid of the update KB5001330 to fix profile, gaming, and BSoD problems with the Windows 10 October 2020 Update and May 2020 Update.
![]()
These are the best PC sticks when you’re on the move
Instant computer — just add a screen. That’s the general idea behind the ultra-portable PC, but it can be hard to know which one you want. Relax, we have you covered!


