- Печенюшка
- Установка Windows 7. Setup Was unable to Create A New System Partition or locate an existing system partition
- Windows was unable to create a required installation folder [SOLVED]
- What to do if Windows was unable to create a required installation folder
- 1. Allow user full control
- 2. Configure Windows Update Settings
- 3. Windows Update Troubleshooter
- 4. R eset the Permission Settings (Windows 7)
- Setup was unable to create a new system partition or locate an existing system partition. See the Setup Log files for more information.»
- Replies (5)
- Can’t reinstall Windows «Window was unable to create required installation folder C:\$windows.
- Replies (1)
Печенюшка
Установка Windows 7. Setup Was unable to Create A New System Partition or locate an existing system partition
 Недавно столкнулся с такой особенностью во время установки Windows 7. Дело в том, что при выборе раздела или диска, на который я хотел установить Windows 7 и при нажатии кнопки «Продолжить (Next)», установщик все время писал, что не может создать раздел и отправлял меня читать LOG файл. Если быть точным, то сообщение выглядело следующим образом: Setup Was unable to Create A New System Partition or locate an existing system partition. See the Setup LOG Files for More information.
Проблема решается следующим образом. В BIOS’е есть всем известная опция — приоритет загрузки среди жестких дисков, если дисков несколько. У меня проблема была в том, что первым номером шла флэшка, жесткий диск был вторым номером и т.д. Необходимо изменить приоритет жесткого диска, на который будет устанавливаться Windows 7 – сделать его первым, выбрать загрузку с CD-ROM и все прекрасно и быстро установится.
Быть может, кому пригодится.
Вот блин-то! И правда.
Ставил сервер на материнку GA-P55-US3L (6SATA Intel-RAID + 2SATA GA-RAID)
При включенном рейде отказался ставиться Server2003 (BSOD 0A), а Server2008 выдал вышеуказанную ошибку по поводу разделов.
Не знаю точно, что помогло, но вытащил флешку, отключил на SATA0-3 Native Mode (хотя режим оставил RAID) и отключил второй рейд на GSATA — и установка пошла…
Windows was unable to create a required installation folder [SOLVED]


System Update is an important task that should be done by all Windows users on a regular basis. It is the best way to fix potential vulnerabilities in your Windows OS.
You might have encountered an error that often appears during Windows Updates and generally caused due to the lack of permissions of file or registry. The full error message you get looks like “Error: 80070005 – Windows was unable to create a required installation folder“.
If you tend to ignore the error you might have to face system slow down or even crashes. You can easily troubleshoot the issue through these simple solutions.
What to do if Windows was unable to create a required installation folder
1. Allow user full control
Folder permissions might be the reason behind the error if it’s being caused by a specific application.
You can follow the following steps to get rid of the error on your system.
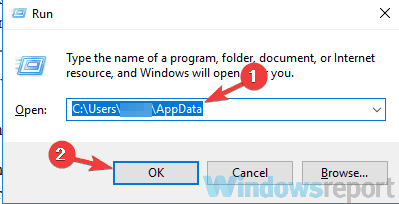
- Press Windows key + R to open the Run dialogue box.
- Now type the following command and click OK.
- C:\Users\USERNAME\AppData

- C:\Users\USERNAME\AppData
- You need to replace USERNAME with the username of your account and replace C: with the letter of your Windows installation drive.
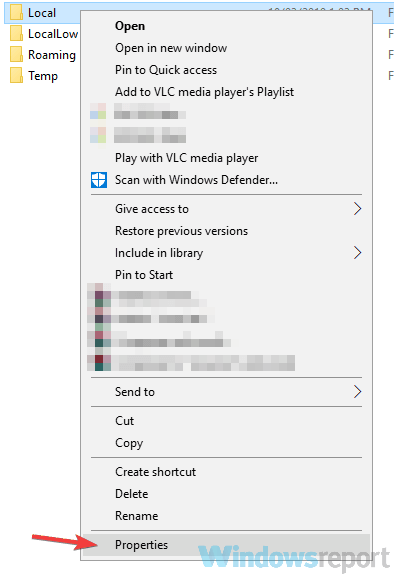
- Find the Local folder right click on it and click Properties.
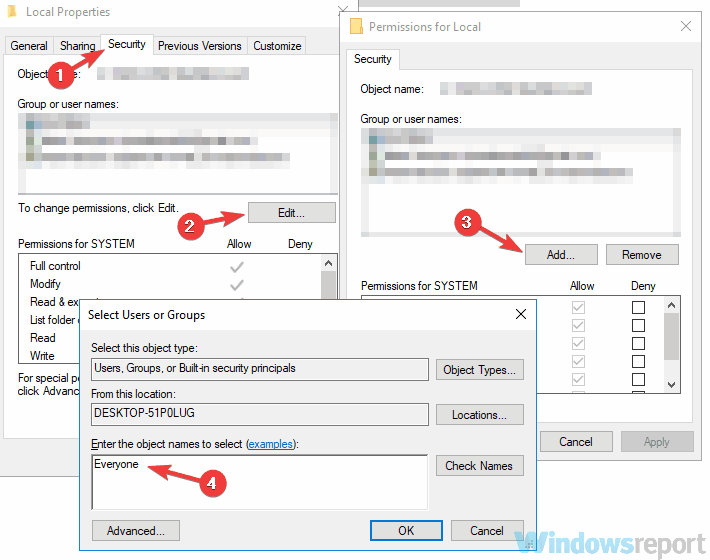
- Navigate to Security>Edit > Add and then type Everyone in the textbox provided below.
- Click the Check names button that is available on the right side and click OK.
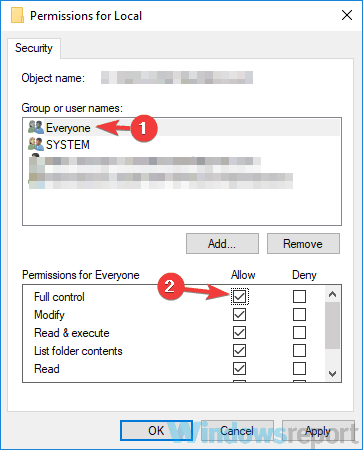
- Click Everyone and set its permissions to allowFull control.
- Now just save the changes by clicking OK.
- Finally, you have to restart the computer to apply the recent changes.
2. Configure Windows Update Settings
One of the easiest ways to fix the error is to allow automatic updates on your system. You can configure Windows Update settings by following these steps.
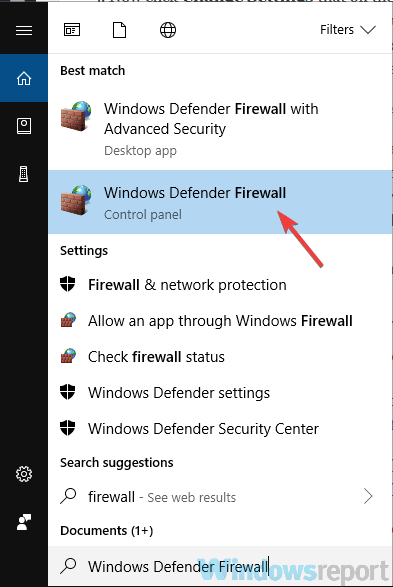
- Open the Start menu and type update in the search box.
- You will see a list search results below, click Windows Update from the list. It will open Windows Update in the Control Panel.
- Now click Change Settings that on the left-hand side.
- You will be navigated to the Choose your Windows Update Settings window. Head towards the Important updates section and select Install updates automatically (recommended).
- You can also set a schedule to install these automatic updates by clicking Updates will be automatically installed during the maintenance window.
- Finally hit the OK button to save the changes.
You might face the error if your Windows Firewall Settings are not allowing Windows Update settings to take effect. You can adjust the Windows Firewall Settings by following these steps:
- C lick the Start menu and type Firewall in the search box.
- You will see a list of search results, select Windows Firewall from the list.
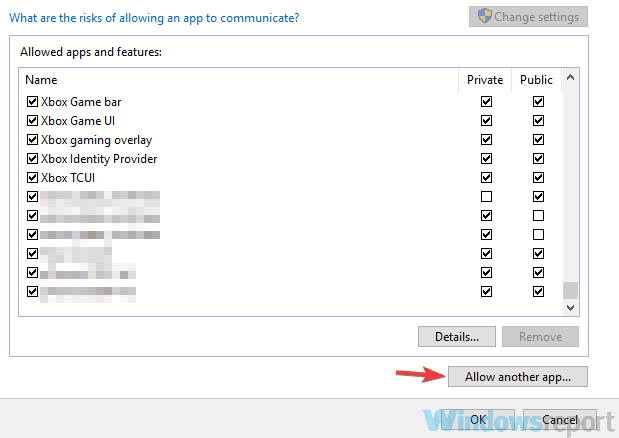
- On the left-hand side, you will find Allow a program or feature through Windows Firewall click on it and select Allow another program.
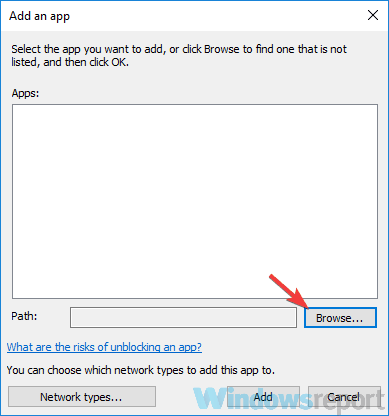
- Next, click the Browse button and you have to locate the svchost.exe file on the disk.
- After locating the file click the following buttons Open>Add.
- Now you will be able to see a new program in the list called Host Process for Windows Services.
- Finally, save the changes by clicking the OK button.
3. Windows Update Troubleshooter
Windows Update Troubleshooter is a handy tool that helps to automatically fix various issues while running Windows Updates. Microsoft offers two separate versions for Windows 7 & 8 and Windows 10. You need to download the version that is compatible with your PC.
You have to run the downloaded troubleshooter file in your PC. It will automatically perform some fixes and finally, you will have to restart your device. If required, you can again run the troubleshooter to fix some additional issues.
4. R eset the Permission Settings (Windows 7)
This solution is specifically for those who are running a Windows 7 OS. This tool is used to reset the Permission Settings on Windows machine.
- Download the subinacl.msi file on your Desktop and open the downloaded file.
- Once the installation process starts you need to select C:\Windows\System32 as the destination folder.
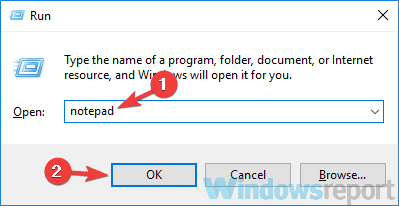
- Open Notepad by pressing Windows + R key on your keyboard and typing notepad.
- After pasting the following commands in your Notepad file and Save it on your Desktop with the name reset.bat.
- @echo off
- subinacl /subkeyreg HKEY_LOCAL_MACHINE /grant=administrators=f
- subinacl /subkeyreg HKEY_CURRENT_USER /grant=administrators=f
- subinacl /subkeyreg HKEY_CLASSES_ROOT /grant=administrators=f
- subinacl /subdirectories %SystemDrive% /grant=administrators=f
- subinacl /subkeyreg HKEY_LOCAL_MACHINE /grant=system=f
- subinacl /subkeyreg HKEY_CURRENT_USER /grant=system=f
- subinacl /subkeyreg HKEY_CLASSES_ROOT /grant=system=f
- subinacl /subdirectories %SystemDrive% /grant=system=f
- @Echo =========================
- @Echo Finished.
- @Echo =========================
- @pause
- Now head to the Desktop, right-click the reset.bat and select Run as administrator .
- It will open a window processing similar to the DOS.
- You will wait to wait for a few mins until you see the following message Finished, press any key to continue.
If the issue is not resolved yet you need to use the Built-in Administrator to run the upgrade.
- Navigate to Start button and locate Command Prompt.
- You have to right-click the Command Prompt, select Run as administrator and click Continue.
- Press the Enter key after pasting the following command net user administrator /active:yes.
- Now login to the Administrator Account by restarting your system.
- Finally, run Windows 7 Upgrade and it is expected to successfully run without any issues.
If the error still persists, you need to disable your antivirus program for a specified time period. By the end of this post, you must have resolved “Error: 80070005 – Windows was unable to create a required installation folder” by correctly following each step. Let us know in the comments section below if you still face any issues.
RELATED STORIES TO CHECK OUT:
Setup was unable to create a new system partition or locate an existing system partition. See the Setup Log files for more information.»
Replies (5)
Try the following
Boot from the Windows 8 media
Click Install Now
Accept License Agreement
When the option is displayed to select an installation type, click (Custom Advanced)
Press Shift + F10 on your keyboard
type the following commands
Next you will select the volume where you would like to install Windows 8
Type: select disk #
# represents the number the volume
create partition primary
format quick fs=ntfs
If that does not work, it likely means the hard disk is not connected properly.
If you have more than one internal storage device attached, disconnect except the target hard disk where you plan to install Windows 8.
Was this reply helpful?
Sorry this didn’t help.
Great! Thanks for your feedback.
How satisfied are you with this reply?
Thanks for your feedback, it helps us improve the site.
How satisfied are you with this reply?
Thanks for your feedback.
2 people found this reply helpful
Was this reply helpful?
Sorry this didn’t help.
Great! Thanks for your feedback.
How satisfied are you with this reply?
Thanks for your feedback, it helps us improve the site.
How satisfied are you with this reply?
Thanks for your feedback.
Was this reply helpful?
Sorry this didn’t help.
Great! Thanks for your feedback.
How satisfied are you with this reply?
Thanks for your feedback, it helps us improve the site.
How satisfied are you with this reply?
Thanks for your feedback.
Was this reply helpful?
Sorry this didn’t help.
Great! Thanks for your feedback.
How satisfied are you with this reply?
Thanks for your feedback, it helps us improve the site.
How satisfied are you with this reply?
Thanks for your feedback.
Here is possible solution:
- Boot windows installation from USB drive
- Press Shift+F10
- In console type diskpart.exe and press enter. In this program execute following:
- select disk=0. Disk 0 is your destination drive, so be careful, all information on this drive will be removed.
- create partition primary size=xxx, where xxx – is the size of new partition
- select partition=1
- active
- format fs=ntfs quick
- assign
- exit, now you have bootable drive C
- Navigate to USB flash drive, in my case: cd d:
- Copy all files from USB drive to C: drive: xcopy d: c: /e /h /k
- Go to boot folder: cd boot
- Make you C: drive bootable with following command: bootsect /nt60 c:
- Put off USB drive from computer and restart them.
- Install Windows
- Remove unnecessary menu item from bootscreen:
- Run cmd.exe as Administrator
- See boot menu list bcdedit
- Find Windows Setup and copy identifier
- Run bcdedit /delete <identifier>
- PROFIT!
6 people found this reply helpful
Was this reply helpful?
Sorry this didn’t help.
Great! Thanks for your feedback.
How satisfied are you with this reply?
Thanks for your feedback, it helps us improve the site.
Can’t reinstall Windows «Window was unable to create required installation folder C:\$windows.
Original Title: Window was unable to create required installation folder C:\$windows.
BT. An existing file or folder of this name could not be deleted. Error code: 0x80070091
I want to re-install my windows, but these error keep appearing. I already try some tips to solve this problem, just like about the ownership issues etc.
Please help my problem here please 🙁
Replies (1)
![]()
This issue might occur if the Windows is unable to delete the file or folder during the installation. Bad drive sectors or a security software might conflict while deleting the files.
- Do you have a third party security software installed on the computer?
- What is the complete folder location that shows with the error message?
Windows is trying to delete the temporary folder related to Windows installation file (windows.
BT). But, the installation fails as the folder is not getting deleted. First of all, navigate to the location (that is shown with the error message) and then try renaming the file (last file name for the complete folder location). Start the installation again and check if it helps. If not, proceed with the troubleshooting methods.
Method 1:
Let’s try removing the folder using Disk Cleanup tool. Refer to the link to delete the system file:
Refer to the section “To clean up all files on the computer”:
Note: Select the following check boxes and click OK.
•Previous Windows installation(s) –> for the Windows.old folder/files
•Temporary Windows installation files –> for the $WINDOWS.
Restart the computer and check if the same error message shows up while going through the installation. If yes, proceed to the next method.
Method 2:
Refer to the link to run Check Disk to scan and fix bad sectors on the drive:
Important: Data available on bad sectors might be lost when chkdsk tries to repair your hard disc.
Restart the Windows setup again and check if it fixes the issue.


