- Unblock all files windows
- Что такое заблокированный файл
- Как разблокировать файл в Windows 10
- Снятие блокировки файла через PowerShell
- Как заблокировать файл в Windows 10
- Пакетная разблокировка полученных из интернета файлов в Windows 10
- Unblock-File
- Syntax
- Description
- Examples
- Example 1: Unblock a file
- Example 2: Unblock multiple files
- Example 3: Find and unblock scripts
- Parameters
- Easily Unblock All Files in a Directory Using PowerShell
- The problem with blocked files
- Unblocking all files in a folder
Unblock all files windows
 Добрый день! Уважаемые читатели и гости одного из крупнейших блогов по системному администрированию Pyatilistnik.org. В прошлый раз мы с вами научились производить обновление групповой политики разными методами, как локально так и удаленно. В сегодняшней заметке я рассмотрю более обыденный вопрос, как разблокировать файл в Windows 10, что это вообще за файлы и можно ли самому создать такой заблокированный файл. Уверен, что вы хоть раз да встречались с таким.
Что такое заблокированный файл
В операционной системе Windows 10 есть компонент «Диспетчер вложений (Attachment Manager)» — он нужен, чтобы помочь защитить ваш компьютер от небезопасных вложений, которые вы можете получить с помощью сообщения электронной почты, и от небезопасных файлов, которые вы можете сохранить из Интернета посредством браузера. Если Диспетчер вложений определяет вложение, которое может быть небезопасным, то он запрещает вам открывать файл или предупреждает вас перед его открытием.
Диспетчер вложений Windows использует интерфейс прикладного программирования (API) IAttachmentExecute, чтобы найти тип файла, найти ассоциацию файла. Когда одно из этих приложений сохраняет загруженный файл на диск, отформатированный в NTFS, он обновляет метаданные для файла с зоны, из которой он был загружен. Метаданные сохраняются как
- Тип программы, которую вы используете.
- Тип файла, который вы загружаете или пытаетесь открыть
- Параметры безопасности зоны веб-содержимого, из которой вы загружаете файл (Интернет, Местная интрасеть, Надежные узлы, Опасные сайты)

Диспетчер вложений классифицирует файлы, которые вы получаете или загружаете, в зависимости от типа файла и расширения имени файла. Диспетчер вложений классифицирует типы файлов как группы с высоким, средним и низким уровнем риска.
- Высокий риск — если вложение находится в списке типов файлов с высоким риском и находится в зоне ограниченного доступа, Windows блокирует доступ пользователя к файлу. Если файл находится в зоне Интернета, Windows предлагает пользователю предупреждение системы безопасности Windows: «Windows обнаружила, что этот файл потенциально опасен. Чтобы защитить ваш компьютер, Windows заблокировала доступ к этому файлу.»
- Умеренный риск — если вложение находится в списке типов файлов с умеренным риском и относится к зоне с ограниченным доступом или из Интернета, Windows выдает пользователю предупреждение: «Не удалось проверить издателя. Вы уверены, что хотите запустить это программное обеспечение?».
- Низкий уровень риска. Если вложение находится в списке типов файлов с низким уровнем риска, Windows не будет запрашивать пользователя перед доступом к файлу, независимо от информации о зоне файла.
Поэтому если простым языком, то заблокированный файл — это файл который попал под правила проверки диспетчером вложений и был помечен, как не заслуживающий доверия в виду того, что он был получен из недоверенного источника.
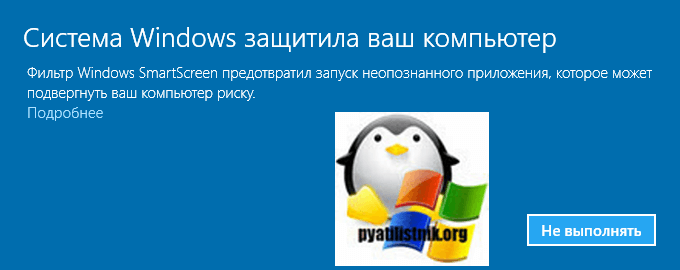
Вот вам пример оповещения от диспетчера вложений:
Если вы мой постоянный читатель, то помните что я уже сталкивался с ситуациями при которых я имел заблокированный, исполняемый файл exe. Вот два примера:
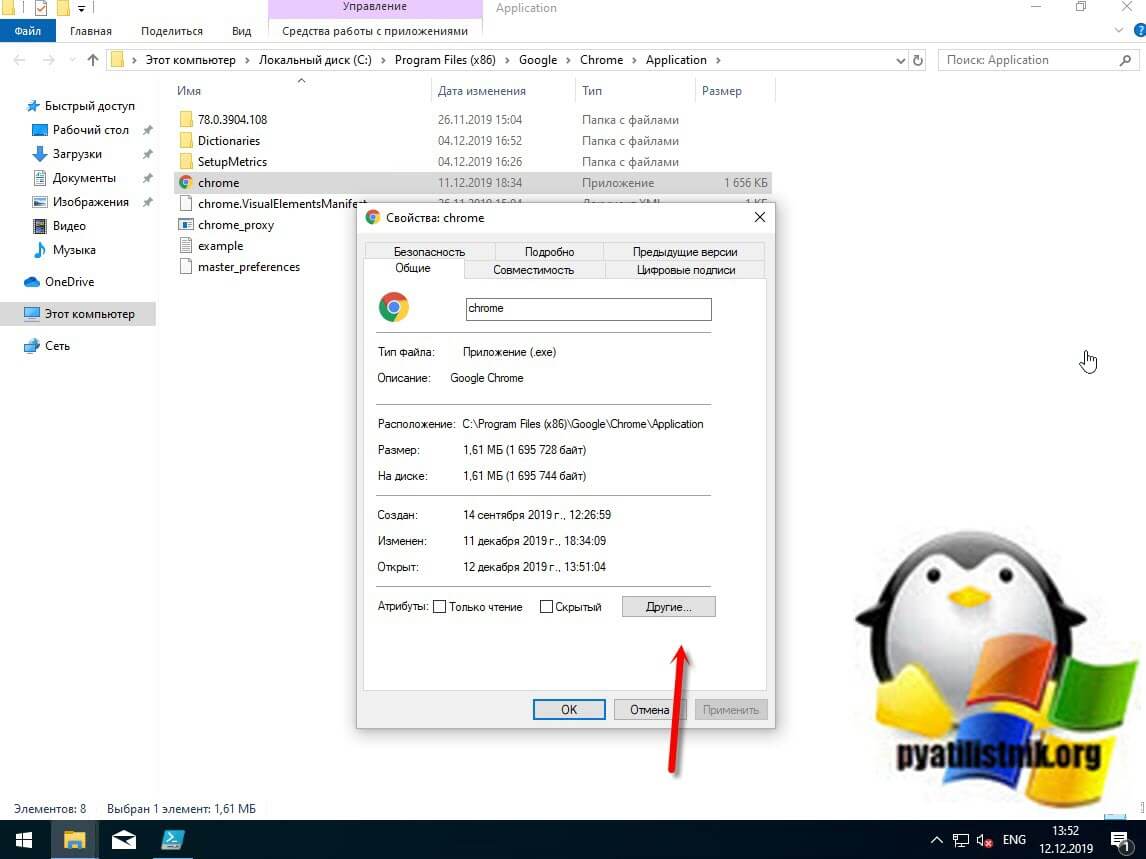
Вот так выглядит заблокированный файл, я для такой демонстрации заблокировал исполняемый файл chrome.exe запускающий браузер Google Chrome.

Как разблокировать файл в Windows 10
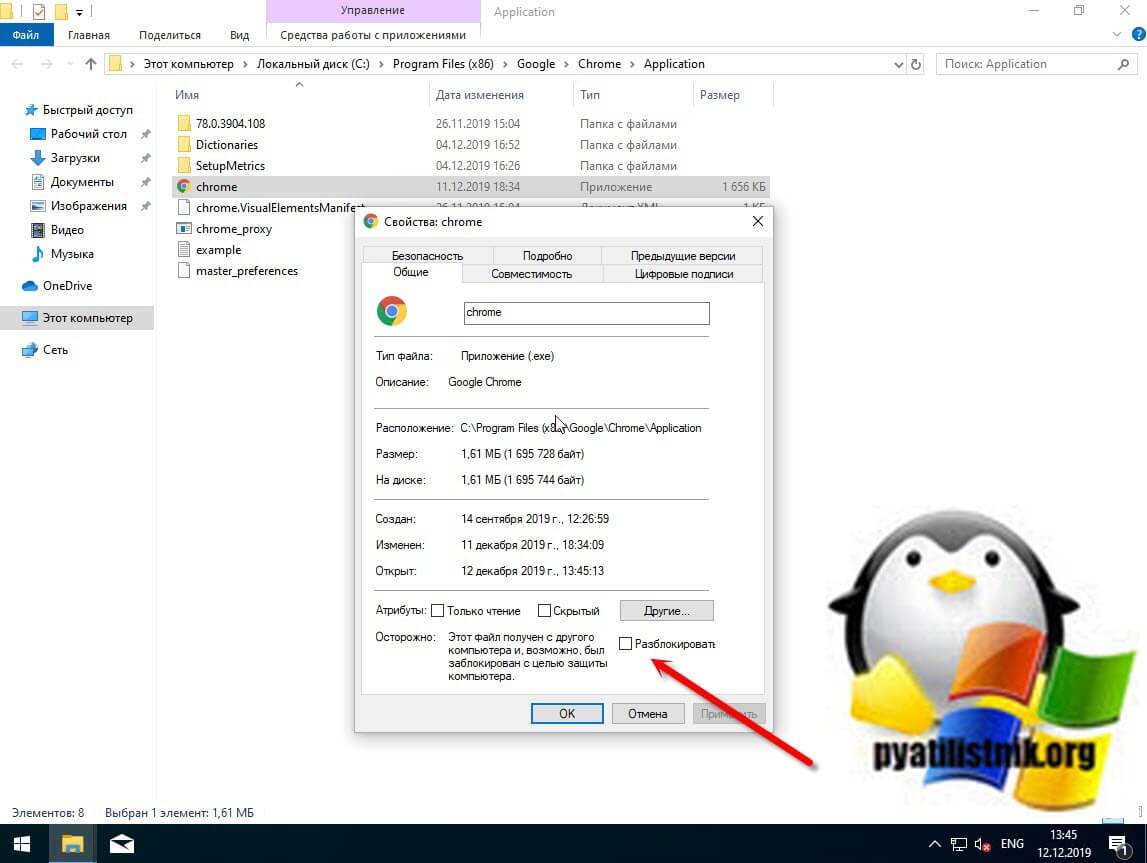
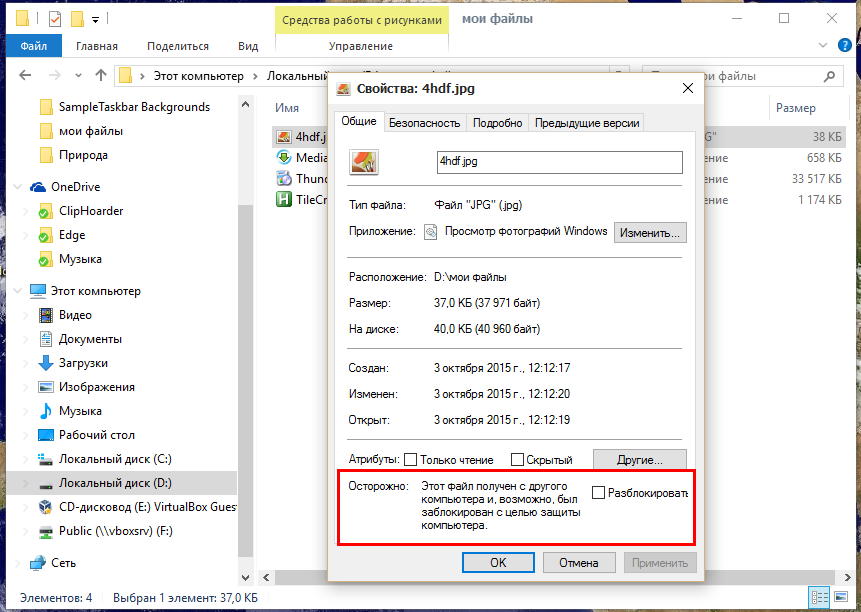
Существует минимум два метода позволяющих вам это сделать, первый, это самый простой из графического интерфейса, второй с использованием PowerShell. Я рассмотрю оба варианта. Щелкаете по заблокированному файлу правым кликом, переходите в его свойства и на вкладке «Общие» ставите птичку на против слова «Разблокировать«.
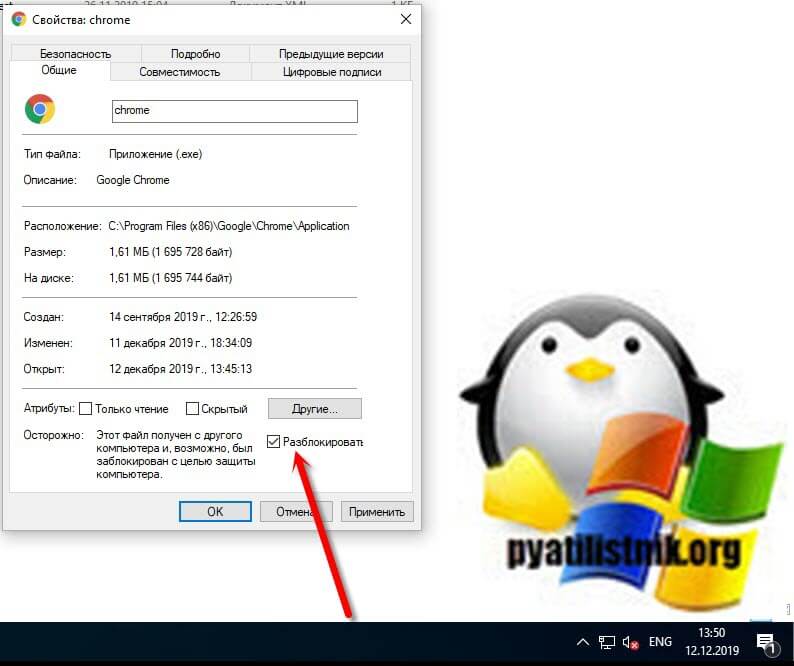
Применяем настройку, в итоге у вас пропадет поле «Разблокировать», в результате чего файл станет как проверенный и заслуживающий доверия.
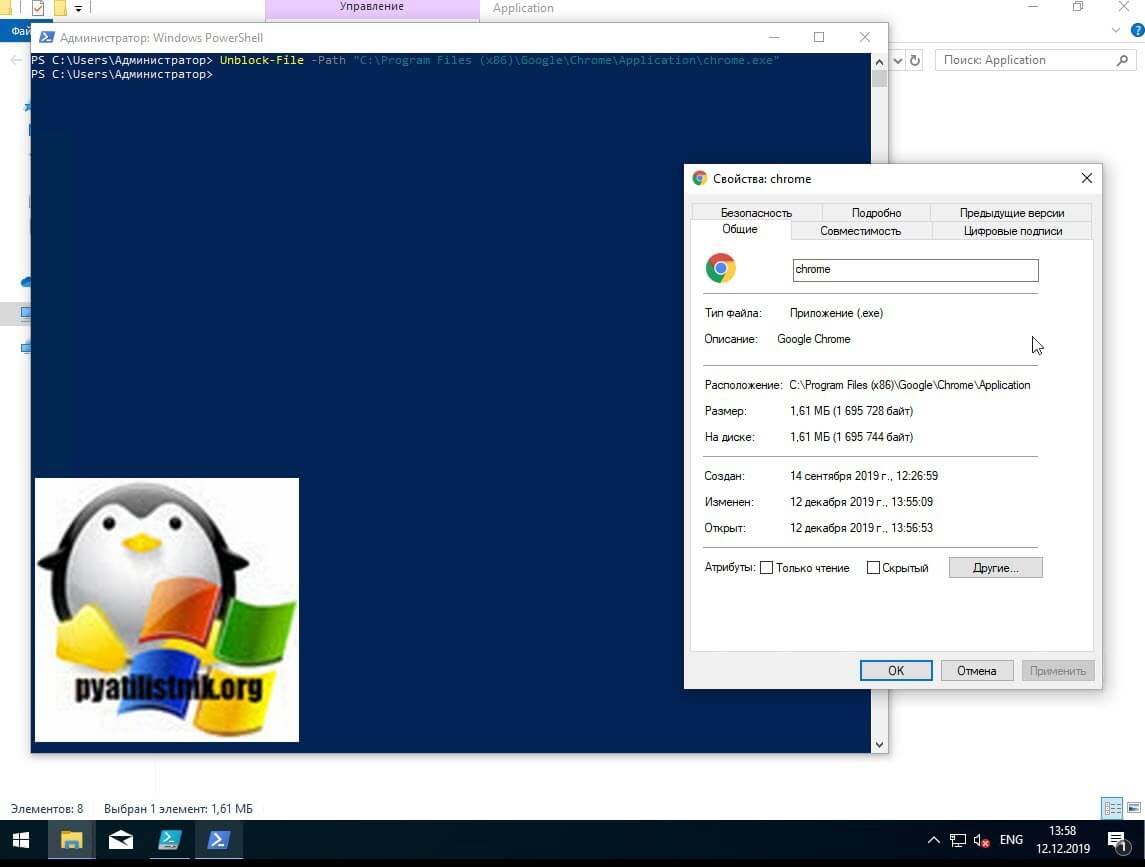
Снятие блокировки файла через PowerShell
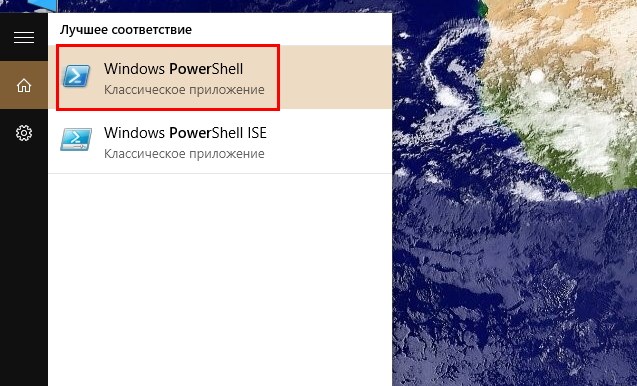
У меня для разблокировки файла есть командлет Unblock-File. Давайте я разблокирую файл chrome.exe. Для этого запустите окно PowerShell от имени администратора и введите команду:
В параметре -Path указываете полный путь до файла, если в пути есть пробелы в имени ,то заключите его в кавычки.
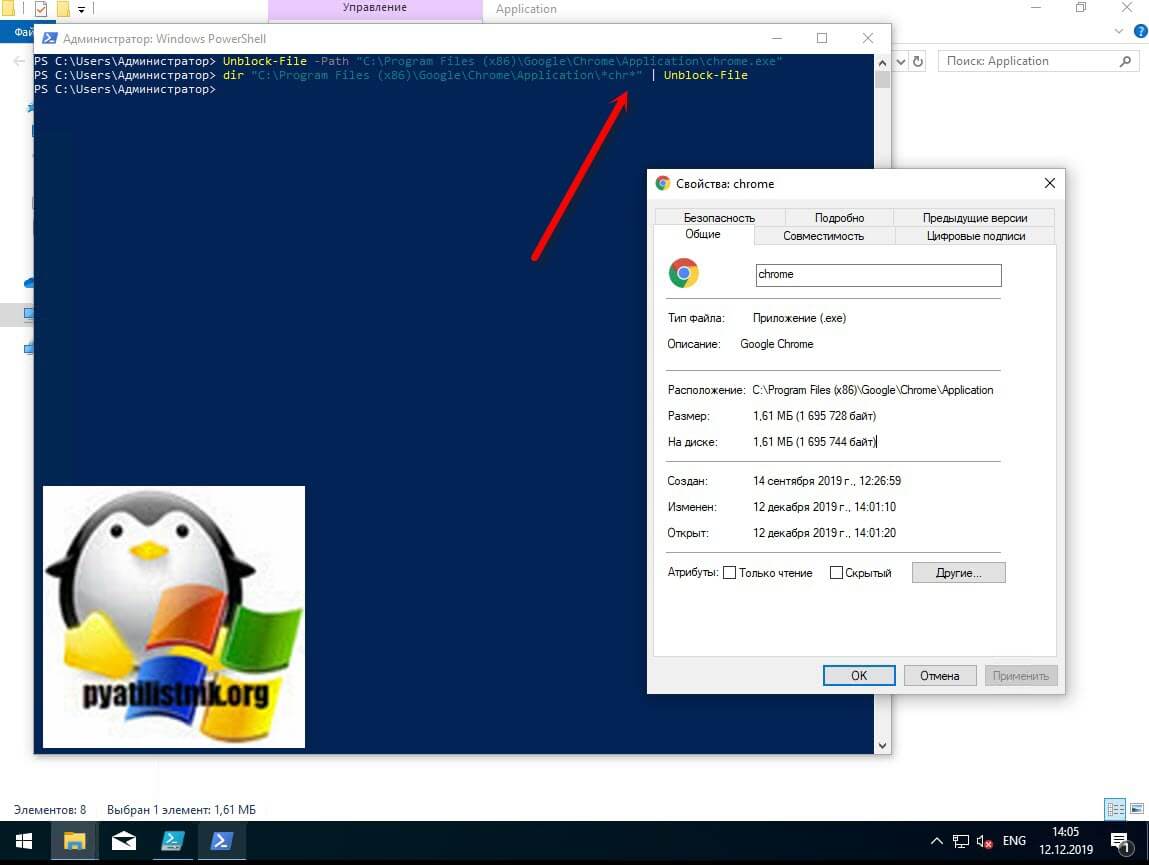
Если вам нужно разблокировать много файлов, то можно воспользоваться вот такой конструкцией:
В данном примере будут разблокированы все файлы содержащиеся в конечной папке. А вот так можно разблокировать по нужным именам:
Тут будут применены меры к файлам в имени которых есть «chr».
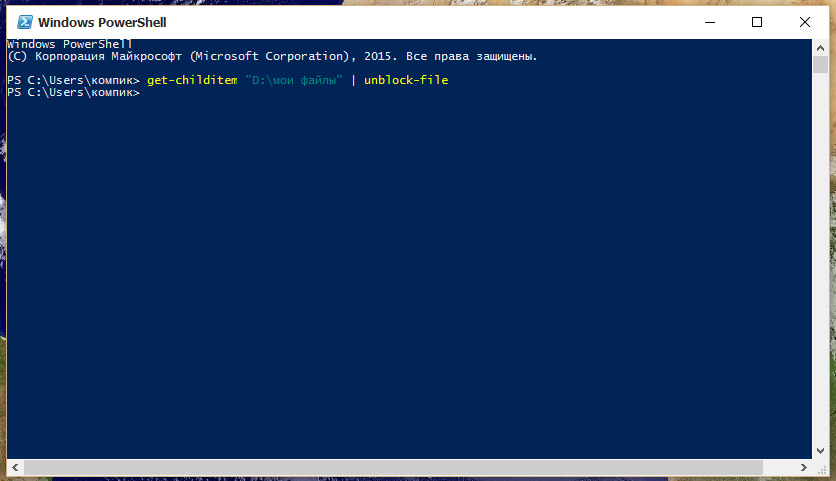
Так же можно использовать и командлет get-childitem, вот пример:
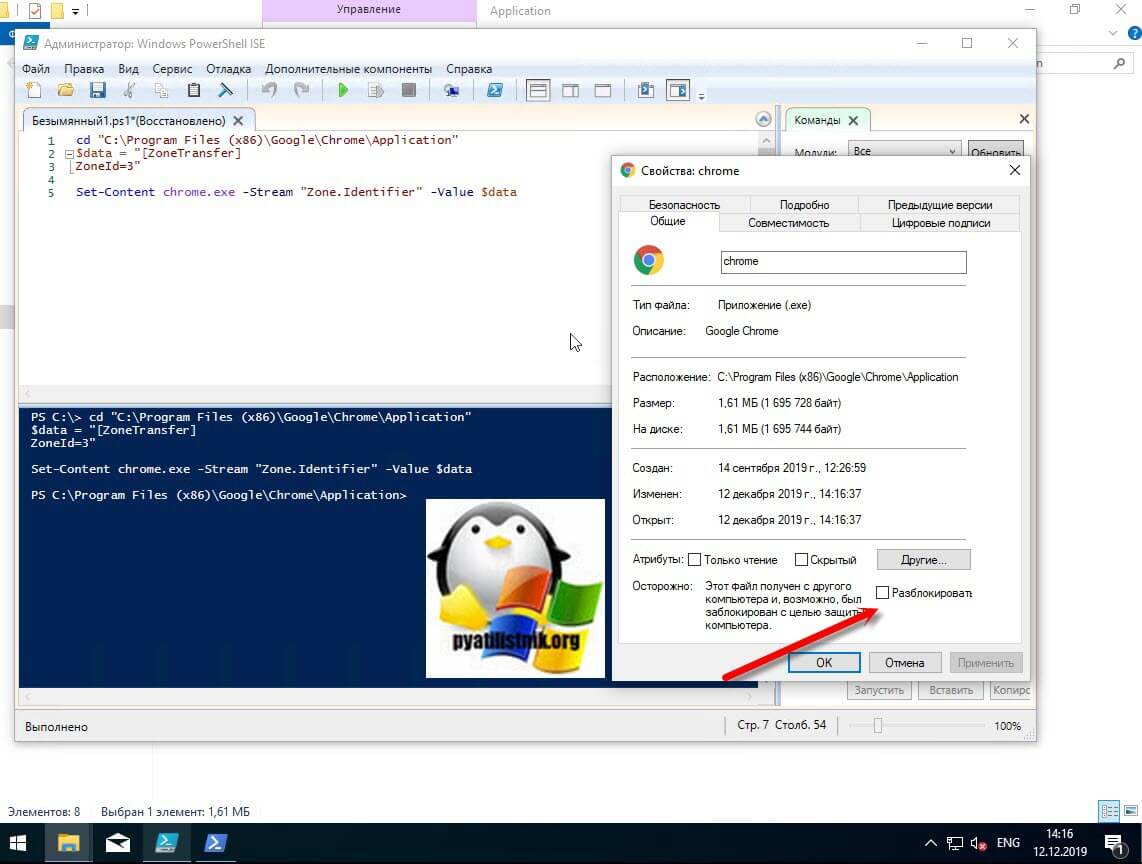
Как заблокировать файл в Windows 10
Если вы хотите сами заблокировать нужный файл, то вы можете это сделать через PowerShell. Вам нужно открыть PowerShell, перейти в расположение с файлом и выполнить код:
Set-Content chrome.exe -Stream «Zone.Identifier» -Value $data
В первой строке вам нужно подставить свой путь, в последней поменять имя на ваш файл.
На этом у меня все, мы с вами подробно разобрали, причину блокировки файлов в Windows, как это исправить и как самому его заблокировать. С вами был Иван Семин, автор и создатель IT портала Pyatilistnik.org.
Пакетная разблокировка полученных из интернета файлов в Windows 10

Е сли открыть свойства загруженного через браузер файла, то можно увидеть, что внизу окошка есть примечание «Осторожно: Этот файл получен с другого компьютера и, возможно, был заблокирован» . Открываются такие файлы обычно без проблем, но некоторые из них могут автоматически блокироваться SmartScreen . В этом случае пользователь получает сообщение «Система Windows защитила ваш компьютер…» .
Разблокировка загруженных из интернета файлов в Windows 10 выполняется почти точно так же, как в других версиях системы. Только если в более ранних редакциях для этого нужно было нажать кнопку «Разблокировать», то в Windows 10 напротив предупреждения в одноименном чекбоксе необходимо поставить галочку и применить настройку. После этого предупреждение исчезнет.
Как видите, всё очень просто. Но как быть, если нужно разблокировать не один, а несколько десятков таких файлов? Что, открывать свойства каждого из них по отдельности?
Этого делать совсем не обязательно. В Windows имеется функция пакетной разблокировки полученных из сети файлов. Чтобы ею воспользоваться, откройте консоль PowerShell.
И выполните в ней команду get-childitem «полный путь» | unblock-file , предварительно заменив содержимое кавычек полным адресом к каталогу с заблокированными файлами.
Вот и всё. С таким же успехом команду unblock-file можно использовать в Windows 8.1.
Unblock-File
Unblocks files that were downloaded from the Internet.
Syntax
Description
The Unblock-File cmdlet lets you open files that were downloaded from the Internet. It unblocks PowerShell script files that were downloaded from the Internet so you can run them, even when the PowerShell execution policy is RemoteSigned. By default, these files are blocked to protect the computer from untrusted files.
Before using the Unblock-File cmdlet, review the file and its source and verify that it is safe to open.
Internally, the Unblock-File cmdlet removes the Zone.Identifier alternate data stream, which has a value of «3» to indicate that it was downloaded from the Internet.
For more information about PowerShell execution policies, see about_Execution_Policies.
This cmdlet was introduced in Windows PowerShell 3.0.
Examples
Example 1: Unblock a file
This command unblocks the PowerShellTips.chm file.
Example 2: Unblock multiple files
This command unblocks all of the files in the C:\Downloads directory whose names include «PowerShell». Do not run a command like this one until you have verified that all files are safe.
Example 3: Find and unblock scripts
This command shows how to find and unblock PowerShell scripts.
The first command uses the Stream parameter of the Get-Item cmdlet get files with the Zone.Identifier stream.
The second command shows what happens when you run a blocked script in a PowerShell session in which the execution policy is RemoteSigned. The RemoteSigned policy prevents you from running scripts that are downloaded from the Internet unless they are digitally signed.
The third command uses the Unblock-File cmdlet to unblock the script so it can run in the session.
Parameters
Prompts you for confirmation before running the cmdlet.
| Type: | SwitchParameter |
| Aliases: | cf |
| Position: | Named |
| Default value: | False |
| Accept pipeline input: | False |
| Accept wildcard characters: | False |
Specifies the files to unblock. Unlike Path, the value of the LiteralPath parameter is used exactly as it is typed. No characters are interpreted as wildcards. If the path includes escape characters, enclose it in single quotation marks. Single quotation marks tell PowerShell not to interpret any characters as escape sequences.
| Type: | String [ ] |
| Aliases: | PSPath, LP |
| Position: | Named |
| Default value: | None |
| Accept pipeline input: | True |
| Accept wildcard characters: | False |
Specifies the files to unblock. Wildcard characters are supported.
| Type: | String [ ] |
| Position: | 0 |
| Default value: | None |
| Accept pipeline input: | False |
| Accept wildcard characters: | True |
Shows what would happen if the cmdlet runs. The cmdlet is not run.
Easily Unblock All Files in a Directory Using PowerShell

September 14th, 2012
Summary: Microsoft Scripting Guy, Ed Wilson, shows how to use Windows PowerShell to unblock all files in a directory.
Microsoft Scripting Guy, Ed Wilson, is here. Today is the day. As those of you who have been reading the Hey, Scripting Guy! Blog on a regular basis know, today is the speaker’s dinner (and scripting slumber party) for Windows PowerShell Saturday in Charlotte, North Carolina. The speaker’s dinner and slumber party take place at the house that script built, and the Scripting Wife and I are the hosts. Check the website to see if any tickets remain—they have been flying off the shelves this week. If at all possible, you do not want to miss Windows PowerShell Saturday in Charlotte because there is an all-star lineup of speakers, and with three tracks and lots of sessions to choose from, it will be a learning extravaganza. Having just returned from Redmond (or the “mother ship” as some of my more sarcastic friends refer to the Microsoft headquarters), I am definitely pumped up, psyched-out, hyped-up (or whatever enthusiastic adverb you wish to use to describe me). Teresa will have a hard time restraining me as I deliver my two presentations on Windows PowerShell cool stuff!
The problem with blocked files
So, when I was getting ready to head out to Redmond for the week, I needed to ensure I had my Hey, Scripting Guy! Blog template copied on my corporate laptop. I do not normally use this laptop to write my blog because it simplifies things if I use a machine connected to my test lab instead of having to demonstrate alternate credentials for every single command.
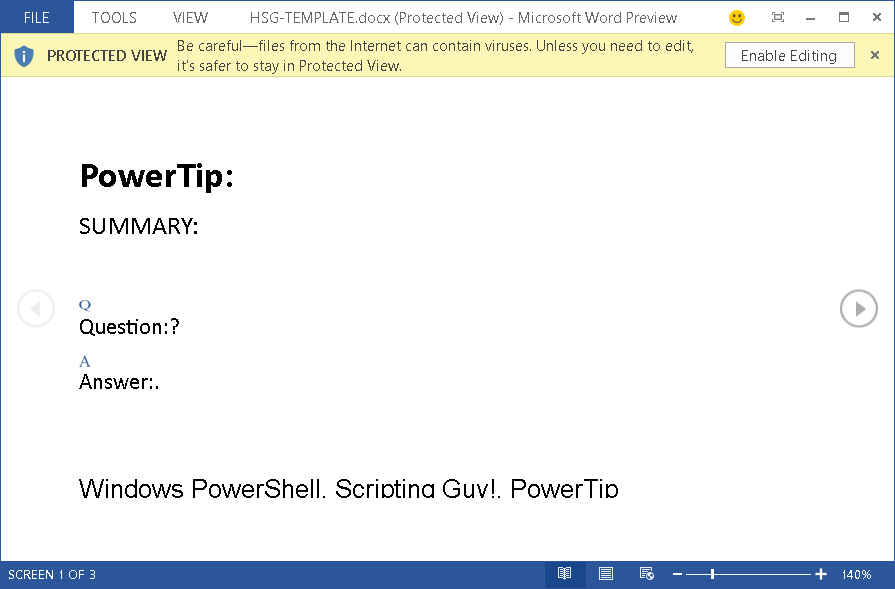
So I copied my template file to a USB drive from my lab environment computer, and pasted the template to my corporate network-joined laptop. Cool, sneaker net rules! Then I opened the file, and I was greeted with a non-working file. The Microsoft Word document had a big yellow bar across the top informing me that I am in Protected View. Well, that may be fine for reading a document, but when you are a Scripting Guy with lots of people with whom to meet, and lots of blogs to write, suffice to say, the Protected View does not work. Sure, I can click Enable Editing, but that is just annoying. This view is shown in the image that follows.
Unblocking all files in a folder
Luckily, Windows PowerShell 3.0 in Windows 8 has the Unblock-File cmdlet. In the past, I have used the Streams utility to perform this operation—in fact, I showed the Scripting Wife how to do this in Scripting Wife Learns About Unblocking Files in PowerShell. If you do not have Windows 8, you can still use the technique from that post to unblock files. It works great (even if the Scripting Wife did accuse me of breaking her computer).
To unblock all the files in a folder, I first use the Get-ChildItem cmdlet to return a list of FileInfo objects from the directory, and then I pipe them to the Unblock-File cmdlet. Because I am changing system state (modifying a potentially great number of files), I want to first ensure that the command does what I want it to do, so I use the WhatIf parameter. This is shown here. (gci is an alias for the Get-ChildItem cmdlet.)
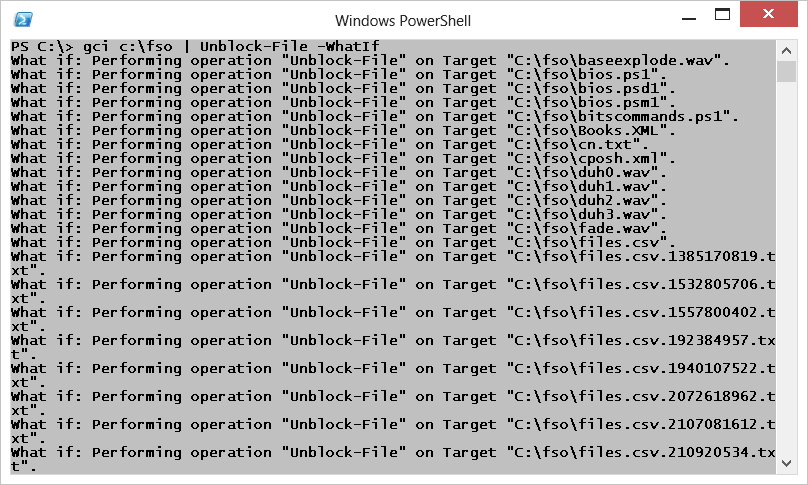
That looks like exactly what I want to accomplish, so I remove the WhatIf parameter and run the following command.
gci c:\fso | Unblock-File
Like I said, nothing returns. So I need to perform a test to see if the command worked. I open my HSG-Template.docx file, and as you can see here, the yellow blocking bar is now removed.

That is about all there is to unblocking files with Windows PowerShell 3.0. If you want to control which files to unblock, use the parameters of the Get-ChildItem cmdlet to modify the way you return files.
Join me tomorrow when I will talk about more cool Windows PowerShell stuff.


