- UNetbootin
- Features
- Using UNetbootin
- Supported Distributions
- Installing Other Distributions Using UNetbootin
- Distribution X isn’t on the list of supported distributions, will it work?
- UNetbootin isn’t able to download the distribution, what should I do?
- My USB stick isn’t booting, what should I do?
- My USB stick/hard drive isn’t detected, what should I do?
- How do I use UNetbootin from the command line?
- How does UNetbootin work, and what does it do?
- Where can I report bugs, submit patches, etc?
- Does UNetbootin have any spyware, viruses, trojans, or other malware?
- What translations are available, and how can I use them?
- Can I help translate?
- Removal Instructions (Applicable only to Hard Disk installs)
- Where’s the source code, and how can I compile or modify it?
- License
- Other open-source projects from the creators of UNetbootin
- HabitLab
- UNetbootin для Linux — обзор и установка отличного инструмента
- О UNetbootin
- Преимущества и недостатки UNetbootin
- Установка
- Видео
- Вывод
- Как пользоваться Unetbootin
- Установка Unetbootin
- Как пользоваться Unetbootin
- 1. Интерфейс
- 2. Запись локального образа
- 3. Загрузка образа из интернета
- Выводы
UNetbootin
UNetbootin allows you to create bootable Live USB drives for Ubuntu and other Linux distributions without burning a CD.
You can either let UNetbootin download one of the many distributions supported out-of-the-box for you, or supply your own Linux .iso file.
Features
UNetbootin can create a bootable Live USB drive
It loads distributions either by downloading a ISO (CD image) files for you, or by using an ISO file you’ve already downloaded.
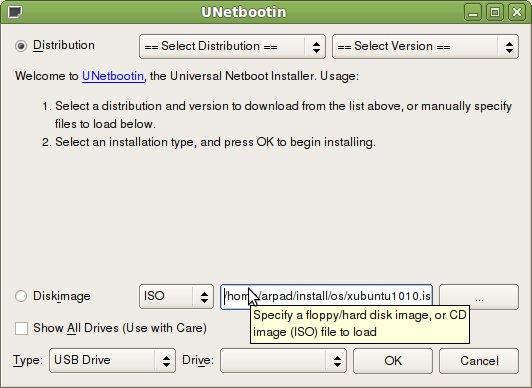
Using UNetbootin
Select an ISO file or a distribution to download, select a target drive (USB Drive or Hard Disk), then reboot once done. If your USB drive doesn’t show up, reformat it as FAT32.
If you used the «USB Drive» install mode: After rebooting, boot from the USB drive. On PCs, this usually involves pressing a button such as Esc or F12 immediately after you turn on your computer, while on Macs, you should hold the Option key before OSX boots.
If you used the «Hard Disk» install mode: After rebooting, select the UNetbootin entry from the Windows Boot Menu.
Supported Distributions
UNetbootin has built-in support for automatically downloading and loading the following distributions, though installing other distributions is also supported:
UNetbootin can also be used to load various system utilities, including:
Installing Other Distributions Using UNetbootin
Download and run UNetbootin, then select the «disk image» option and supply it with an ISO (CD image).
UNetbootin doesn’t use distribution-specific rules for making your live USB drive, so most Linux ISO files should load correctly using this option. However, not all distributions support booting from USB, and some others require extra boot options or other modifications before they can boot from USB drives, so these ISO files will not work as-is. Also, ISO files for non-Linux operating systems have a different boot mechanism, so don’t expect them to work either.
Distribution X isn’t on the list of supported distributions, will it work?
UNetbootin isn’t able to download the distribution, what should I do?
Download the ISO straight from the website, then provide it to UNetbootin via the diskimage option.
My USB stick isn’t booting, what should I do?
Reformat the USB drive as FAT32, then use UNetbootin again to put your distribution on the USB stick.
My USB stick/hard drive isn’t detected, what should I do?
Reformat the USB drive as FAT32, then use UNetbootin again. If it still isn’t showing up, use the targetdrive command line option.
How do I use UNetbootin from the command line?
How does UNetbootin work, and what does it do?
Where can I report bugs, submit patches, etc?
First, make sure you are using the latest version available on this website.
» See Github Issues to file a bug report.
» See Github Pull Requests to submit a patch.
Does UNetbootin have any spyware, viruses, trojans, or other malware?
No; though some anti-virus products may raise «Trojan.generic» warnings due to the auto-uninstall feature, these are false positives. Just make sure you obtain UNetbootin from this site, not some shady third-party source. If you’re absolutely paranoid, you can check the source code and compile it yourself.

What translations are available, and how can I use them?
A number of translations are included in the latest UNetbootin release. See the Translations Page for the status of each.
If a translation corresponding to your system’s native language has already been included into UNetbootin, it should automatically load the corresponding translation. Alternatively, you can force the language to use via the lang=es command-line option, where you substitute es with the the 2-letter ISO 639-1 code for your language.
Can I help translate?
If you’d like to help translate this website, join the project on Transifex, then edit translations either on this website or on Transifex.
If you’d like to help translate the UNetbootin program itself, please use Launchpad Translations. If you are new to Launchpad, you will first have to join the corresponding Ubuntu Translators group for the language you intend to translate. For information on using the Launchpad Translations system, see the translations help page.
Removal Instructions (Applicable only to Hard Disk installs)
If using Windows, UNetbootin should prompt you to remove it the next time you boot into Windows. Alternatively, you can remove it via Add/Remove Programs in the Control Panel.
If using Linux, re-run the UNetbootin executable (with root priveledges), and press OK when prompted to uninstall.
Removal is only required if you used the «Hard Drive» installation mode; to remove the bootloader from a USB drive, back up its contents and reformat it.
Uninstalling UNetbootin simply removes the UNetbootin entry from your boot menu; if you installed an operating system to a partition using UNetbootin, removing UNetbootin will not remove the OS.
To manually remove a Linux installation, you will have to restore the Windows bootloader using «fixmbr» from a recovery CD, and use Parted Magic to delete the Linux partition and expand the Windows partition.
Where’s the source code, and how can I compile or modify it?
Source code is on Github, though you may prefer a tarball of the latest release.
License
UNetbootin was created and written by Geza Kovacs (Github: gkovacs, Launchpad: gezakovacs, contact info).
Translators are listed on the translations page.
UNetbootin is licensed under the GNU General Public License (GPL) Version 2 or above. Site materials, documentation, screenshots, and logos are licensed as Creative Commons Attribution-Share-Alike 3.0.
Other open-source projects from the creators of UNetbootin

HabitLab
A Chrome extension to help you waste less time online (on sites like Facebook, Youtube, etc) by experimenting with different interventions (news feed blockers, comment hiders, and more) to find the ones that work best for you.
Источник
UNetbootin для Linux — обзор и установка отличного инструмента
О UNetbootin
UNetbootin (Universal Netbook Installer) — это утилита, используемая для создания Live USB-накопителей, которые могут устанавливать дистрибутивы Linux.
Это ПО использует существующий образ диска. Кроме того, существует возможность загрузки поддерживаемого дистрибутив или системную утилиту. Дополнительно, UNetboot поддерживает много дистрибутивов.
Основные особенности утилиты:
- Неразрушающая установка с использованием Syslinux.
- Широкая поддержка основных дистрибутивов Linux
- Загружает системные утилиты, такие как:
Parted Magic
SystemRescueCD
Super Grub Disk
Backtrack
Ophcrack
Gujin
Smart Boot Manager
другие - Другие ОС загружаются через предварительно загруженный образ ISO или файлы образа флешки или жесткого диска.
- Автоматически обнаруживает все съемные устройства.
- Поддерживает постоянство LiveUSB (сохранение файлов при перезагрузке; эта функция применима только к Ubuntu).
- Ребрендинг и адаптация к конкретному дистрибутиву с использованием системы плагинов или серии операторов.
Перечень дистрибутивов с встроенной поддержкой UNetbootin:
- Ubuntu
- Debian
- Linux Mint
- openSUSE
- Arch Linux
- Damn Small Linux
- Puppy Linux
- SliTaz
- gNewSense
- FreeBSD
- NetBSD
- Fedora
- PCLinuxOS
- Sabayon Linux
- Gentoo
- MEPIS
- Zenwalk
- Slax
- Dreamlinux
- Elive
- CentOS
- Mandriva
- FaunOS
- Frugalware Linux
- xPUD


Преимущества и недостатки UNetbootin
- Во-первых, поддерживает распространенные дистрибутивы для скачивания. Кроме того, инструмент предлагает простой интерфейс, в котором можно автоматически загружать практически любую ОС. Это избавляет пользователей от просмотра веб-страницы в поисках загрузки.
- Во-вторых, UNetbootin является кроссплатформенным, означает, что его можно использовать на любом компьютере. Кроме того, это универсальный инструмент, поскольку его можно рекомендовать всем, не беспокоясь о том, какую операционную систему они используют.
- В-третьих, утилита автоматически обнаруживает USB-накопители в компьютере. В результате, эта функция защищает неопытных пользователей от случайного повреждения жесткого диска.
- Во-первых, существует вероятность того, что в процессе ваш USB будет поврежден.
- Во-вторых, возникают проблемы на autorun.inf при установке нескольких дистрибутивов.
Установка
- sudo add-apt-repository ppa:gezakovacs/ppa
- Затем sudo apt-get update
- sudo dpkg —configure -a и sudo apt-get install unetbootin


Видео
Данное видео посвящено установке и записи образов на USB двумя способами.
Вывод
UNetbootin (Universal Network Installer) — это отличный инструмент, который упрощает создание загрузочных USB-дисков. Еще одна из особенностей, он взаимодействует с подавляющим большинством дистрибутивов Linux.
Надеемся что приведенная выше инструкция поможет пользователям познакомиться с замечательным инструментом. Спасибо за внимание.
Источник
Как пользоваться Unetbootin
Время от времени нам приходится записывать образы на флешку, например, для установки операционных систем, тестирования нового дистрибутива, или решения других задач. Для решения этой простой задачи существует множество программ, как для операционной системы Linux, так и для Windows и MacOS. В сегодняшней статье мы будем рассматривать утилиту Unetbootin. Она полностью кроссплатформена, и позволяет не только записывать образы на флешку, но и загружать их из интернета, что может быть очень полезно для новичков.
Программа unetbootin теряет свою популярность и ей на смену уже приходят такие утилиты, как Etcher, но она все еще используется. В этой статье мы рассмотрим как пользоваться Unetbootin, как установить утилиту и применять все ее возможности. Но начнем с установки программы.
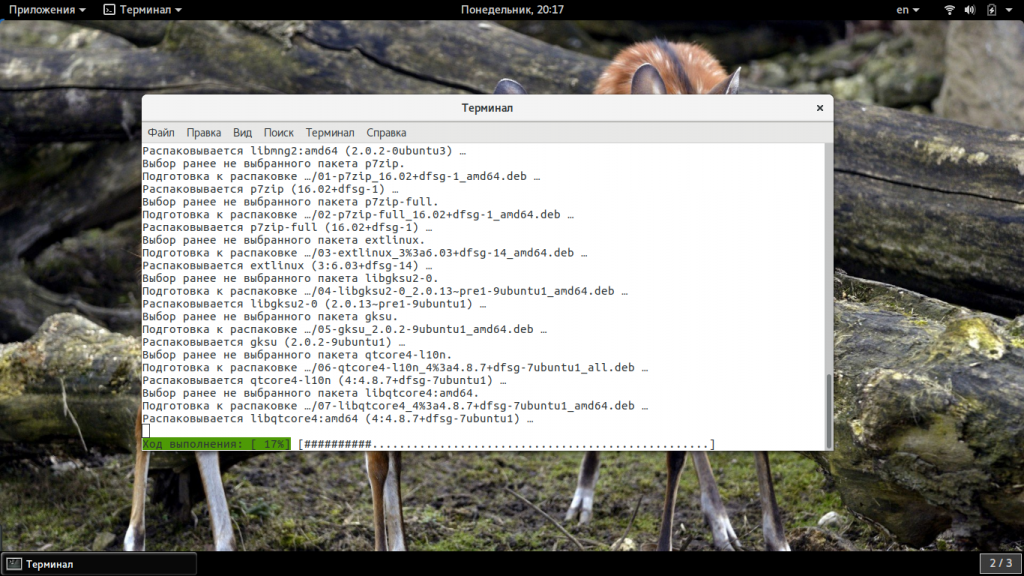
Установка Unetbootin
Вы можете найти детальные инструкции по установке и настройке программы на официальном сайте. Например, для Windows можно получить там установочный файл, а для Linux найти исходники и инструкции по установке. Например, в Ubuntu программа есть в официальных репозиториях, но там устаревшая и нерабочая версия. поэтому лучше использовать для установки официальный PPA:
sudo add-apt-repository ppa:gezakovacs/ppa
$ sudo apt update
$ sudo apt install unetbootin
После завершения установки вы можете приступать к использованию утилиты.
Как пользоваться Unetbootin
Первое, с чего стоит начать, это первый запуск и интерфейс программы.
1. Интерфейс
В Ubuntu, программу можно запустить из главного меню:
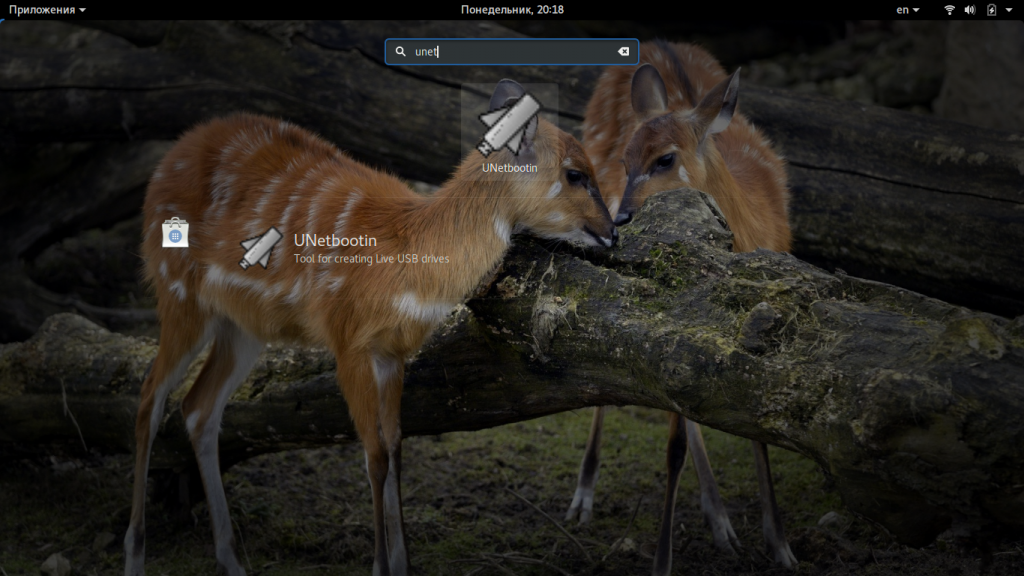 Для полноценной работы программы нужны права супрерпользователя, поэтому вам придется ввести пароль. Далее откроется такое окно. Его можно условно разделить на три части:
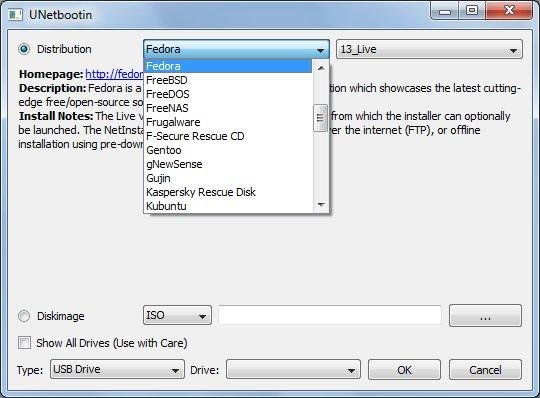
- Строки выбора дистрибутива для загрузки;
- Выбор образа дистрибутива для записи;
- Выбор устройства для записи образа.
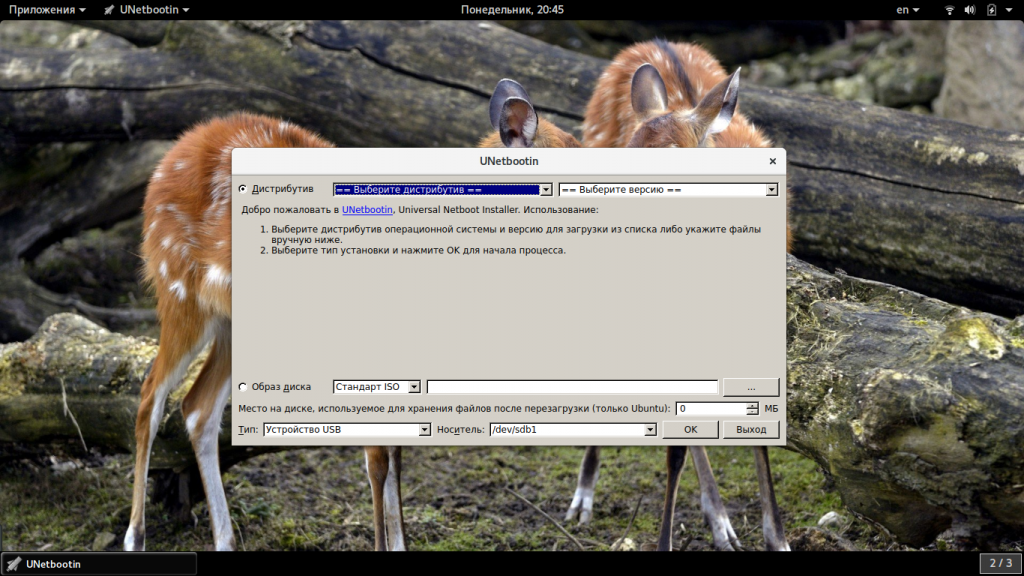 Как видите, интерфейс программы достаточно прост, на скриншотах он выглядит не очень красиво, потому что мы запускаем программу в GTK, а она рассчитана более на Qt.
2. Запись локального образа
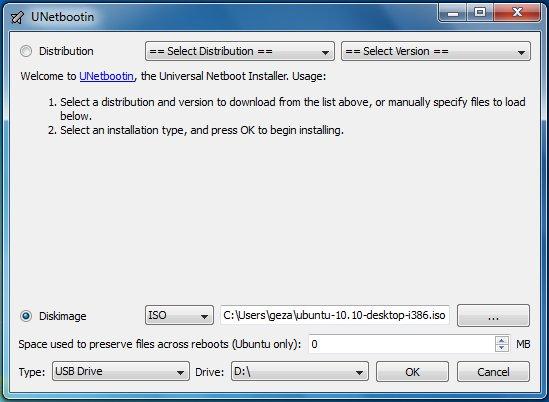
Записать образ на флешку с помощью Unetbootin очень просто. Сначала перенесите переключатель в положение образ диска:
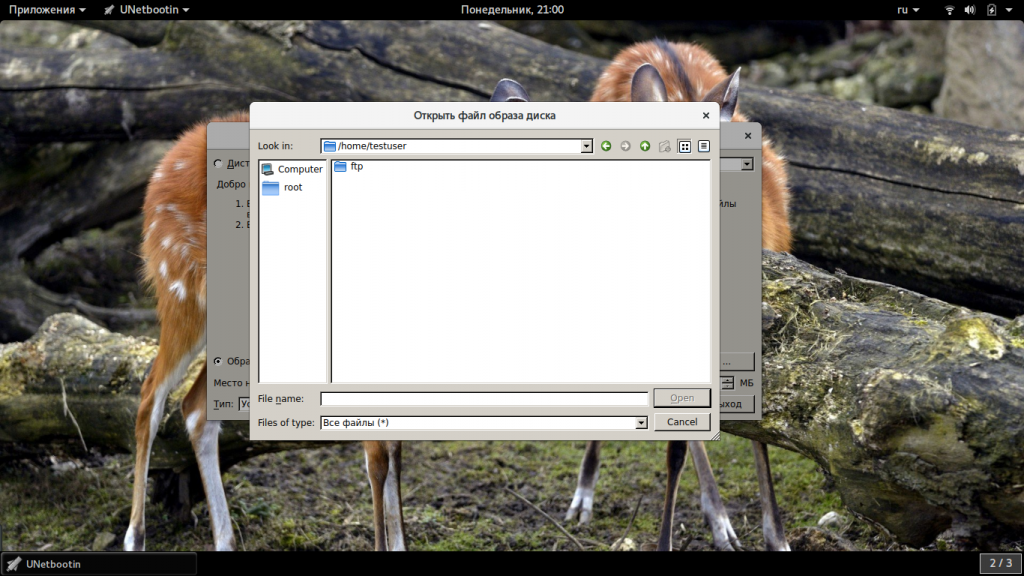
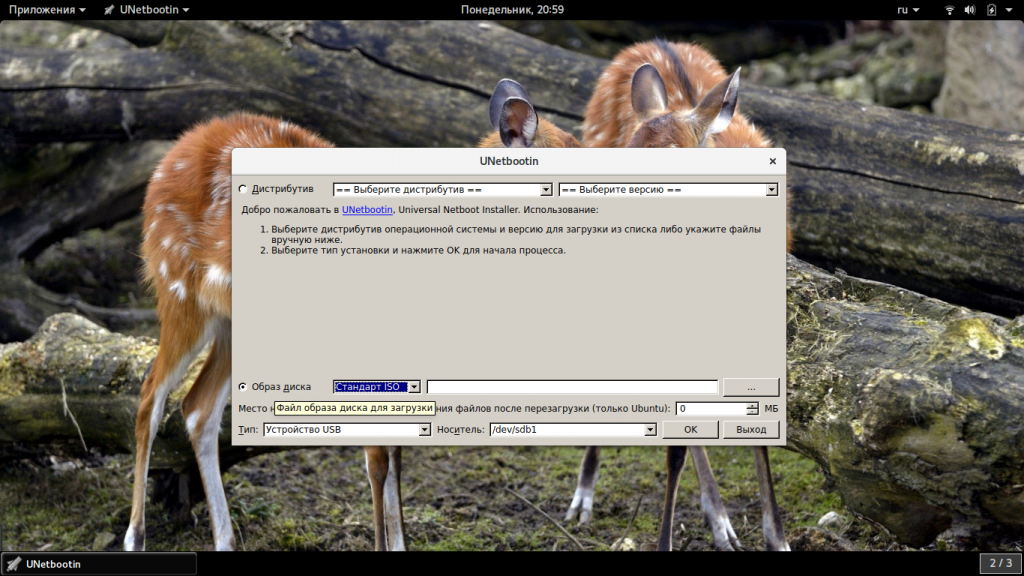 Затем выберите «Стандарт ISO». Затем кликните по троеточию и выберите образ, который хотите записать на свою флешку:
 Дальше осталось использовать самую нижнюю часть окна и выбрать флешку или жесткий диск для записи. Стоит отметить, что вы можете выбрать не только флешку, но и полноценный жесткий диск:
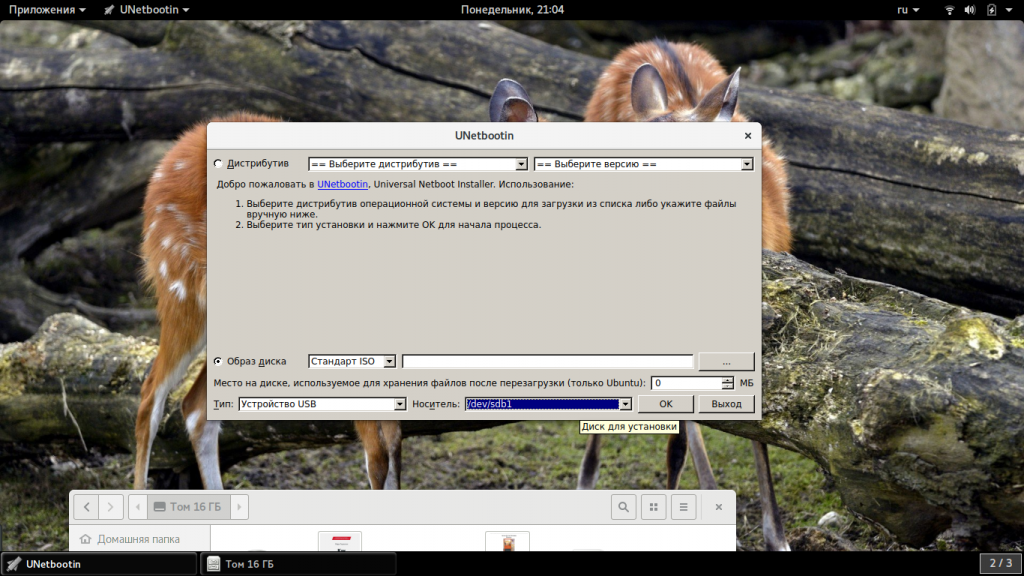 Для некоторых дистрибутивов вы можете зарезервировать место для хранения файлов после перезагрузки системы, например, в Ubuntu есть такая возможность.
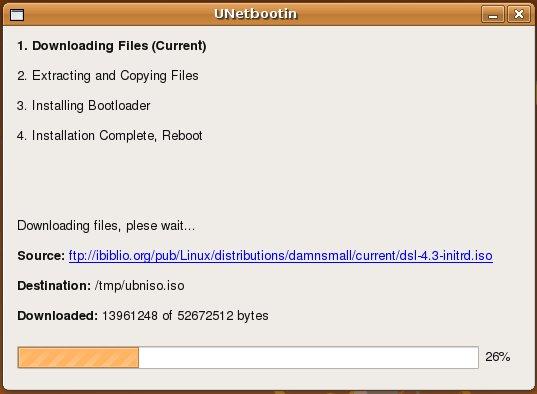
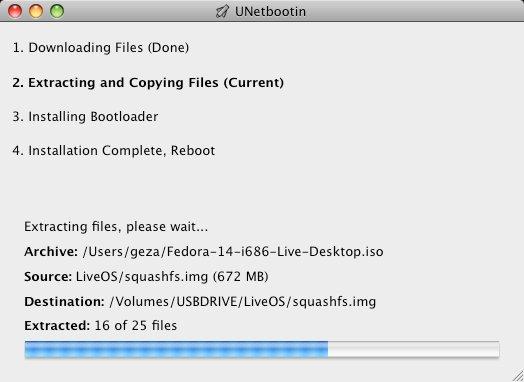
После того как вы выберите образ и все настроите, останется нажать кнопку «Ок» для начала записи. Запись может занять достаточно много времени, в зависимости от скорости работы вашей флешки и размера образа. Теперь вы знаете как создать загрузочную флешку unetbootin.
3. Загрузка образа из интернета
Если на вашей локальной машине нет необходимого образа и вы не знаете, где его скачать, но вам нужно записать тот или иной дистрибутив Linux на флешку, программа unetbootin может очень сильно помочь. Здесь есть возможность загрузки образов. Вам необходимо установить переключатель в положение «Дистрибутив», а затем выбрать нужный дистрибутив:
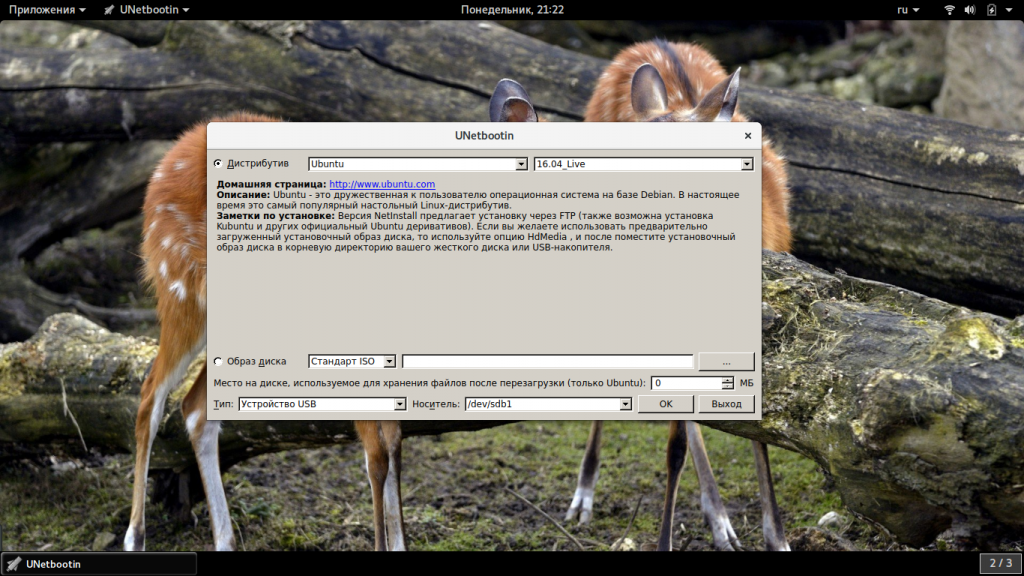 После выбора имени дистрибутива, выберите его версию. Странно, что для Ubuntu доступна только версия 16.04. Утилита постоянно разрабатывается на GitHub и там есть свежие коммиты, но почему-то список дистрибутивов не был обновлен. В остальном же, вам остается выбрать носитель и все остальное как описано выше, а затем нажать «ОК».
Выводы
Фактически, это все, что можно сделать с помощью программы. Теперь вы знаете как пользоваться Unetbootin, и на что способна эта программа. Разобраться в программе достаточно просто, и я надеюсь, что эта статья была вам полезной. Если остались вопросы, спрашивайте в комментариях!
В этом видео паказано как записать образ Windows 10 с помощью Unetbootin:
Источник


