- Unified Write Filter (UWF) feature
- Benefits
- Features
- Requirements
- Limitations
- Turn on and configure UWF
- UWF overlay
- Volumes
- Exclusions
- UWF servicing mode
- Troubleshooting UWF
- Use the Unified Write Filter (UWF) feature
- Turn on UWF on a running PC
- Install UWF on a customized Windows image
- Install the UWF feature by using Windows Configuration Designer
- Install the UWF feature by using Windows Management Instrumentation (WMI)
- Using the Unified Write Filter (UWF) on Windows 10 IoT Core
- How to Install UWF on a device running Windows 10 IoT Core
- How to include UWF in Your Custom FFU
- How to Use UWF
- Protecting a Data Volume
- Recommended Exclusions
- Servicing UWF protected devices
- Unsupported uwfmgr.exe Commands
Unified Write Filter (UWF) feature
Unified Write Filter (UWF) is an optional Windows 10 feature that helps to protect your drives by intercepting and redirecting any writes to the drive (app installations, settings changes, saved data) to a virtual overlay. The virtual overlay is a temporary location that is usually cleared during a reboot or when a guest user logs off.
Benefits
Provides a clean experience for thin clients and workspaces that have frequent guests, like school, library or hotel computers. Guests can work, change settings, and install software. After the device reboots, the next guest receives a clean experience.
Increases security and reliability for kiosks, IoT-embedded devices, or other devices where new apps are not expected to be frequently added.
Can be used to reduce wear on solid-state drives and other write-sensitive media.
UWF replaces the Windows 7 Enhanced Write Filter (EWF) and the File Based Write Filter (FBWF).
Features
UWF can protect most supported writable storage types, including physical hard disks, solid-state drives, internal USB devices, and external SATA devices. You cannot use UWF to protect external removable drives, USB devices or flash drives. Supports both master boot record (MBR) and GUID partition table (GPT) volumes.
You can use UWF to make read-only media appear to the OS as a writable volume.
You can manage UWF directly on a Windows 10 device using uwfmgr.exe, or remotely using MDM tools like Microsoft Intune using the UnifiedWriteFilter CSP or the UWF WMI.
You can update and service UWF-protected devices, either by using UWF servicing mode or by adding file and registry exclusions to specific system areas.
On Windows 10, version 1803, you can use a persistent overlay to allow data saved in the virtual overlay to remain even after a reboot.
On devices with a disk overlay, you can use freespace passthrough to access your drive’s additional free space.
UWF supports paging to increase virtual memory, if the page file exists on an unprotected volume. When paging is used together with a RAM-based overlay, the uptime of the system can be significantly increased.
Requirements
Windows 10 Enterprise, Windows 10 IoT Core, or Windows 10 IoT Enterprise.
Limitations
- FAT: fully supported.
- NTFS: fully supported. However, during device startup, NTFS file system journal files can write to a protected volume before UWF has started protecting the volume.
- Other file systems (example: exFAT): You can protect the volume, but cannot create file exclusions or do file commit operations on the volume. Writes to excluded files still influence the growth of the Overlay.
The overlay does not mirror the entire volume, but dynamically grows to keep track of redirected writes.
UWF supports up to 16 terabytes of protected volumes.
UWF does not support the use of fast startup when shutting down your device. If fast startup is turned on, shutting down the device does not clear the overlay. You can disable fast startup in Control Panel by navigating to Control Panel > All Control Panel Items > Power Options > System Settings and clearing the checkbox next to Turn on fast startup (recommended).
UWF does not support Storage Spaces.
On a computer on which UWF is enabled and used to protect drive C, you cannot permanently set the date and time to a past time. If you make such a change, the original date and time settings will be restored after the computer restarts.
To work around this issue, you must disable UWF before you change the date and time. To do this, run uwfmgr.exe filter disable.
Do not add the file that retains date and time settings («%windir%\bootstat.dat») to the write filter exclusions to work around this issue. Doing this causes Stop error 0x7E (SYSTEM_THREAD_EXCEPTION_NOT_HANDLED) to occur.
Turn on and configure UWF
UWF is an optional component and is not enabled by default in WindowsВ 10. You must turn on UWF before you can configure it.
UWF overlay
You can choose where the overlay is stored (RAM or disk), how much space is reserved, whether the overlay persists after a reboot.
To increase uptime, set up monitoring to check if your overlay is filling up. At certain levels, your device can warn users and/or reboot the device.
Volumes
A volume is a logical unit that represents an area of persistent storage to the file system that is used by the OS. A volume can correspond to a single physical storage device, such as a hard disk, but volumes can also correspond to a single partition on a physical storage device with multiple partitions, or can span across multiple physical storage devices. For example, a collection of hard disks in a RAID array can be represented as a single volume to the OS.
When you configure UWF to protect a volume, you can specify the volume by using either a drive letter or the volume device identifier. To determine the device identifier for a volume, query the DeviceID property in the Win32_Volume WMI class.
If you specify a volume using a drive letter, UWF uses loose binding to recognize the volume. By using loose binding, drive letters can be assigned to different volumes if the hardware or volume configuration changes. If you specify a volume using the volume device identifier, UWF uses tight binding to recognize the volume. By using tight binding, the device identifier is unique to the storage volume and is independent from the drive letter assigned to the volume by the file system.
Exclusions
If you want to protect a volume with UWF while excluding specific files, folders, or registry keys from being filtered by UWF, you can add them to a write filter exclusion list.
UWF servicing mode
When a device is protected with UWF, you must use UWF servicing mode commands to service the device and apply updates to an image. You can use UWF servicing mode to apply Windows updates, antimalware signature file updates, and custom software or third-party software updates.
For more information about how to use UWF servicing mode to apply software updates to your device, see Service UWF-protected devices.
Troubleshooting UWF
UWF uses Windows Event Log to log events, errors and messages related to overlay consumption, configuration changes, and servicing.
For more information about how to find event log information for troubleshooting problems with Unified Write Filter (UWF), see Troubleshooting Unified Write Filter (UWF).
Use the Unified Write Filter (UWF) feature
The Unified Write Filter (UWF) is an Windows 10 optional feature.
To use UWF, you’ll first need to install the feature.
Next, you’ll enable (and optionally configure) the feature. The first time you enable UWF on your device, UWF makes the following changes to your system to improve the performance of UWF:
- Paging files are disabled.
- System restore is disabled.
- SuperFetch is disabled.
- File indexing service is turned off.
- Fast boot is disabled.
- Defragmentation service is turned off.
- BCD setting bootstatuspolicy is set to ignoreallfailures.
After UWF is enabled, you can finally select a drive to protect and start using UWF.
You can install UWF for running PCs and devices, prepare it for customized Windows images, or manage it remotely using CSP or WMI.
Turn on UWF on a running PC
Install the feature:
Click Start, type Turn Windows features on or off.
In the Windows Features window, expand the Device Lockdown node, and check Unified Write Filter > OK.
The Windows Features window indicates Windows is searching for required files and displays a progress bar. Once found, the window indicates Windows is applying the changes. When completed, the window indicates the requested changes are completed.
Click Close to close the Windows Features window.
Enable the filter:
After you run this command, restart the computer and exit the servicing mode, the following things are disabled:
- Windows Update (by setting HKEY_LOCAL_MACHINE\SOFTWARE\Policies\Microsoft\Windows\WindowsUpdate\AU\NoAutoUpdate.)
- Windows Store Update (by setting HKEY_LOCAL_MACHINE\SOFTWARE\Policies\Microsoft\WindowsStore\AutoDownload.)
- Registry Reorganization (by setting HKEY_LOCAL_MACHINE\System\CurrentControlSet\Control\Session Manager\Configuration Manager\RegistryReorganizationLimitDays.)
- Maintenance Hour (by setting HKEY_LOCAL_MACHINE\SOFTWARE\Microsoft\Windows NT\CurrentVersion\Schedule\Maintenance\MaintenanceDisabled.)
After you run uwfmgr filter disable , restart the computer and enter the serving mode, the changes will be reverted.
Enable write protection for a drive:
Restart your computer.
Confirm that UWF is running:
Install UWF on a customized Windows image
Open a command prompt with administrator privileges.
Copy install.wim to a temporary folder on hard drive (in the following steps, we’ll assume it’s called C:\wim).
Create a new directory.
Mount the image.
Enable the feature.
Commit the change.
To activate UWF, you can use a command-line script, CSP, or WMI:
- CMD: uwfmgr filter enable , then uwfmgr.exe volume protect C:
- CSP: CurrentSession/FilterEnabled , then CurrentSession/Volume
- WMI: UWF\Filter.Enable , then UWF\Volume .
Install the UWF feature by using Windows Configuration Designer
Create a provisioning package in Windows Configuration Designer by following the instructions in Create a provisioning package.
When setting the file exclusion in Windows Configuration Designer, you do not need to specify the drive letter since that is already input via the Volume protection setting. For example, if the file being excluded is C:\testdir\test.txt , after adding a drive in Volume protection, you only need to input \testdir\test.txt to add this file exclusion.
In the Available customizations page, select Runtime settings > SMISettings and then set the value for the Unified Write Filter setting.
Once you have finished configuring the settings and building the provisioning package, you can apply the package to the image deployment time or runtime. See Apply a provisioning package for more information.
To activate UWF, you can use a command-line script, CSP, or WMI:
- CMD: uwfmgr filter enable , then uwfmgr.exe volume protect C:
- CSP: CurrentSession/FilterEnabled , then CurrentSession/Volume
- WMI: UWF\Filter.Enable , then UWF\Volume .
Install the UWF feature by using Windows Management Instrumentation (WMI)
If Windows has already been installed and you do not want to use a provisioning package, you can also configure UWF by using the Windows Management Instrumentation (WMI) providers. To turn on UWF using WMI, you can use the UWF_Filter function, specifically the UWF_Filter.Enable method. You can do this in one of the following ways:
- Use the WMI providers directly in a PowerShell script.
- Use the WMI providers directly in an application.
- Use the command line tool, uwfmgr.exe.
You must restart your device after you turn on or turn off UWF before the change takes effect.
You can change these settings after you turn on UWF if you want to. For example, you can move the page file location to an unprotected volume and re-enable paging files.
If you add UWF to your image by using SMI settings in an unattend.xml file, turning on UWF only sets the bootstatuspolicy BCD setting and turns off the defragmentation service. In this case, you must manually turn off the other features and services if you want to increase the performance of UWF.
All configuration settings for UWF are stored in the registry. UWF automatically excludes these registry entries from filtering.
UWF maintains configuration settings in the registry for the current session and for the next session after a device restart. Static configuration changes do not take effect until after a device restart, and these changes are saved in the registry entries for the next session. Dynamic configuration changes occur immediately and persist after a device restart.
Using the Unified Write Filter (UWF) on Windows 10 IoT Core
The Unified Write Filter (UWF) is a feature that protects physical storage media from data writes. UWF intercepts all write attempts to a protected volume and redirects those write attempts to a virtual overlay. This improves the reliability and stability of your device and reduces the wear on write-sensitive media, such as flash memory media like solid-state drives.
Read our documentation on the Unified Write Filter for more information.
How to Install UWF on a device running Windows 10 IoT Core
If you do not have the current version of the Windows 10 IoT Core Kits yet, download and install the Windows 10 IoT Core Packages.
Based on your device architecture, copy UWF packages ( Microsoft-IoTUAP-UnifiedWriteFilter-Package.cab and Microsoft-IoTUAP-UnifiedWriteFilter-Package_Lang_en-us.cab ) from your PC ( C:\Program Files (x86)\Windows Kits\10\MSPackages\Retail\\fre\ ) to the device (for example, with Windows file sharing).
Launch SSH or PowerShell and access your device running Windows 10 IoT Core.
From SSH or PowerShell, do the following:
- change to the directory where you have copied your files
- cd C:\
- Run these commands to install the packages to your IoT device system image:
- applyupdate –stage .\Microsoft-IoTUAP-UnifiedWriteFilter-Package.cab
- applyupdate –stage .\Microsoft-IoTUAP-UnifiedWriteFilter-Package_Lang_en-us.cab
- applyupdate –commit
The device will boot to the Update OS, install UWF features, and reboot to the MainOS.
Once the device comes back to the MainOS, the UWF feature is ready and available to use. This can be verified by typing uwfmgr.exe into your PowerShell or SSH window.
How to include UWF in Your Custom FFU
- Add IOT_UNIFIED_WRITE_FILTER feature ID to the OEM Input file
- Create the image\FFU. Read Create a basic image for instructions.
How to Use UWF
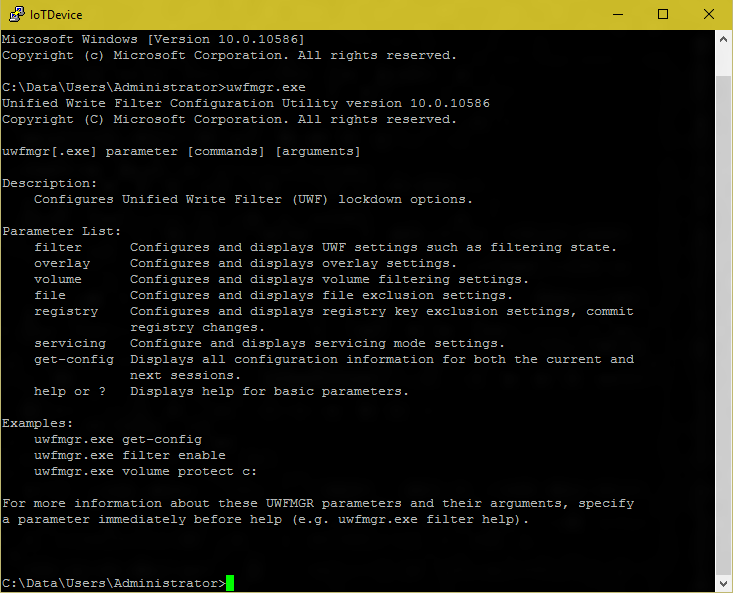
UWF can be configured using the uwfmgr.exe tool via a PowerShell or SSH session. Read uwfmgr.exe tool for the available options with an exception of some commands listed below that are not supported in IoT Core. Review the default settings of the Overlay configurations and adapt them per your requirements.
UWF can also be configured via MDM channel using Unified Write Filter CSP.
For example, the following combinations of commands enable uwfmgr and configure to protect the C drive
uwfmgr.exe filter enable Enables the write filter
uwfmgr.exe volume protect c: Protects the Volume C
shutdown /r /t 0 Restarts the device to make the write filter settings effective
Reboot is required to make all the uwfmgr settings effective.
Protecting a Data Volume
Data volume in IoT Core can be protected using the GUID for the volume. The GUID for the available volumes can be found through the following command
dir /AL
uwfmgr.exe volume protect \\?\Volume

Recommended Exclusions
When protecting the data volume, we recommend that you add exceptions for the servicing and logging folders that are accessed by Windows OS Services.
To add the exclusions: uwfmgr.exe file Add-Exclusion
Servicing UWF protected devices
Starting Windows 10 IoT Core Release 1709, version 16299, the main OS volume (C:) can be protected with UWF and serviced automatically without any special steps.
The following steps are required to service UWF protected devices with protected data volumes.
- uwfmgr.exe filter disable Disable UWF
- shutdown /r /t 0 Reboot device to disable UWF
- Enable Servicing (using provisioning package or MDM to set Update policy)
- Note that the device will automatically reboot to perform the servicing updates
- uwfmgr.exe filter enable Enable UWF
- shutdown /r /t 0 Reboot device to enable UWF
Unsupported uwfmgr.exe Commands
UWF Servicing Mode is not supported in IoT Core.


