- Install PyCharm
- System requirements
- Install using the Toolbox App
- Install the Toolbox App
- Install the Toolbox App
- Install the Toolbox App
- Standalone installation
- Install using tar archives
- Install using snap packages
- Silent installation on Windows
- Silent configuration file
- How to uninstall pycharm-community-2017.1.4 from Ubuntu 16.04 LTS?
- calele
- Attachments
- atanere
- calele
- atanere
- 3 способа установить PyCharm в Linux Ubuntu
- Основные особенности
- Как установить на Ubuntu
- Способ №1
- Как удалить PyCharm
- Способ №2 — установка с помощью umake
- Удаление
- Способ №3 — установка в Ubuntu и Linux Mint с помощью PPA
- Удаление
Install PyCharm
PyCharm is a cross-platform IDE that provides consistent experience on the Windows, macOS, and Linux operating systems.
PyCharm is available in three editions: Professional , Community , and Edu . The Community and Edu editions are open-source projects and they are free, but they have fewer features. PyCharm Edu provides courses and helps you learn programming with Python. The Professional edition is commercial, and provides an outstanding set of tools and features. For details, see the editions comparison matrix.
System requirements
| Requirement | Minimum | Recommended |
|---|---|---|
| RAM | 4 GB of free RAM | 8 GB of total system RAM |
| CPU | Any modern CPU | Multi-core CPU. PyCharm supports multithreading for different operations and processes making it faster the more CPU cores it can use. |
| Disk space | 2.5 GB and another 1 GB for caches | SSD drive with at least 5 GB of free space |
| Monitor resolution | 1024×768 | 1920×1080 |
| Operating system | Latest 64-bit version of Windows, macOS, or Linux (for example, Debian, Ubuntu, or RHEL) |
You do not need to install Java to run PyCharm because JetBrains Runtime is bundled with the IDE (based on JRE 11).
Python 2: version 2.7
Python 3: from the version 3.6 up to the version 3.10
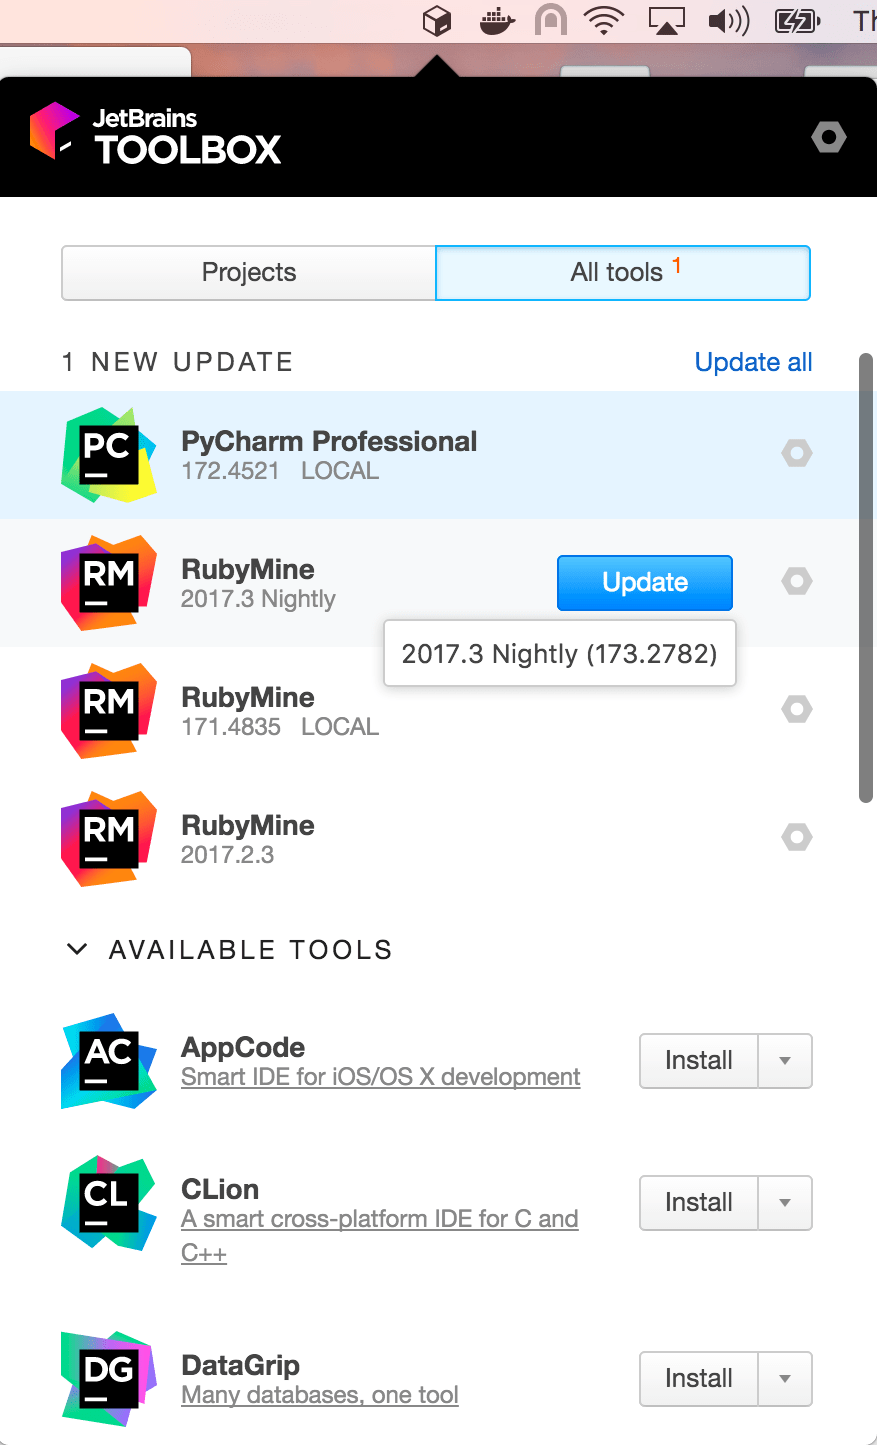
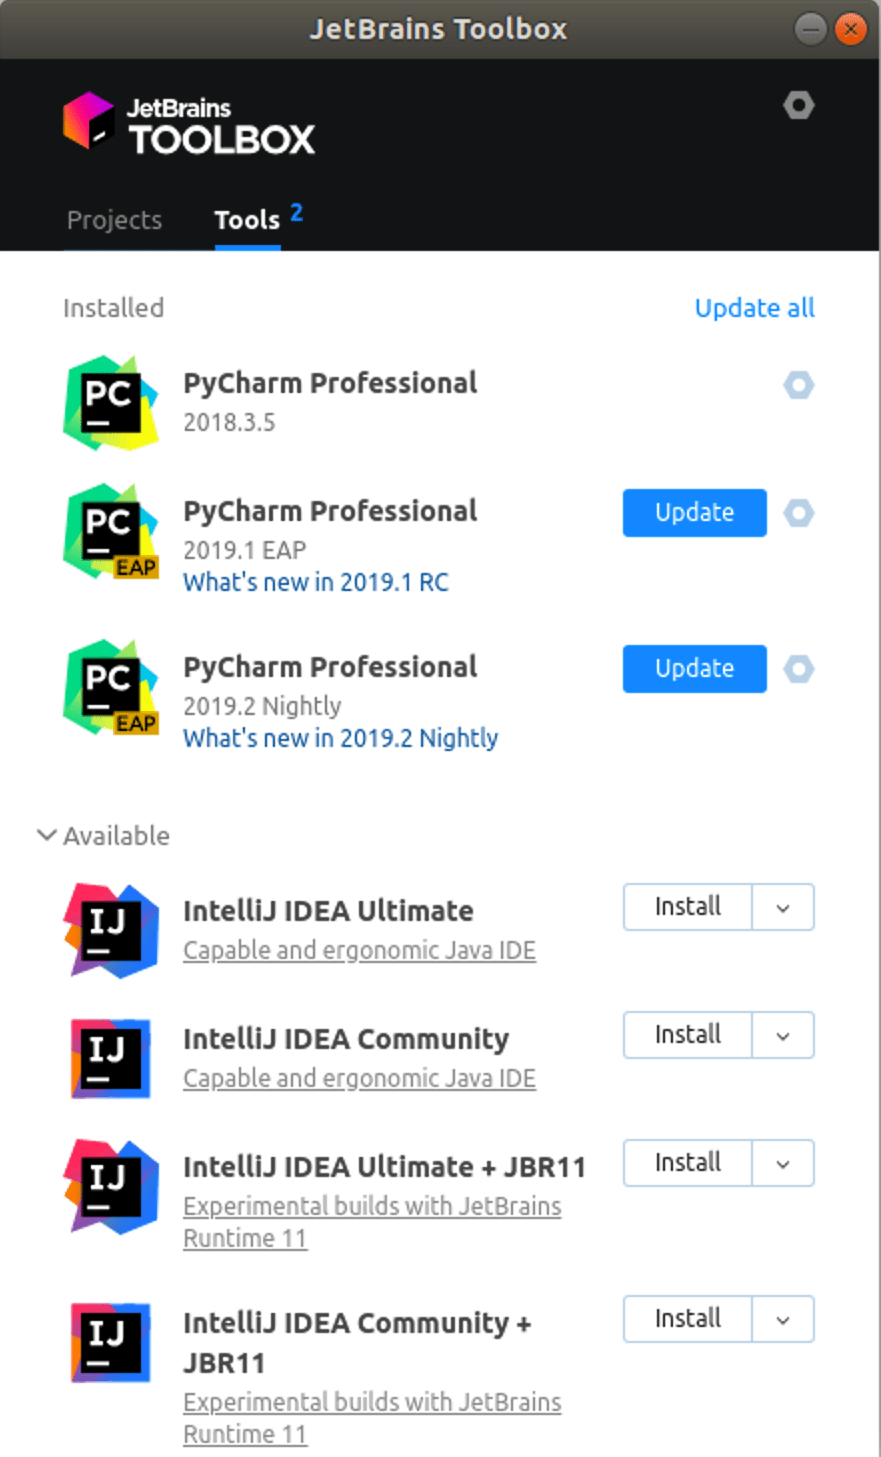
Install using the Toolbox App
The JetBrains Toolbox App is the recommended tool to install JetBrains products. Use it to install and manage different products or several versions of the same product, including Early Access Program (EAP) and Nightly releases, update and roll back when necessary, and easily remove any tool. The Toolbox App maintains a list of all your projects to quickly open any project in the right IDE and version.
Install the Toolbox App
Download the installer .exe from the Toolbox App web page.
Run the installer and follow the wizard steps.
After you run the Toolbox App, click its icon in the notification area and select which product and version you want to install.

Log in to your JetBrains Account from the Toolbox App and it will automatically activate the available licenses for any IDE that you install.
Install the Toolbox App
Download the disk image .dmg from the Toolbox App web page.
There are separate disk images for Intel and Apple Silicon processors.
Mount the image and drag the JetBrains Toolbox app to the Applications folder.
After you run the Toolbox App, click its icon in the main menu and select which product and version you want to install.
Log in to your JetBrains Account from the Toolbox App and it will automatically activate the available licenses for any IDE that you install.
Install the Toolbox App
Download the tarball .tar.gz from the Toolbox App web page.
Extract the tarball to a directory that supports file execution.
For example, if the downloaded version is 1.17.7391, you can extract it to the recommended /opt directory using the following command:
Execute the jetbrains-toolbox binary from the extracted directory to run the Toolbox App and select which product and version you want to install. After you run the Toolbox App for the first time, it will automatically add the Toolbox App icon to the main menu.
Log in to your JetBrains Account from the Toolbox App and it will automatically activate the available licenses for any IDE that you install.
You can use this shell script that automatically downloads the tarball with the latest version of the Toolbox App, extracts it to the recommended /opt directory, and creates a symbolic link in the /usr/local/bin directory.
Standalone installation
Install PyCharm manually to manage the location of every instance and all the configuration files. For example, if you have a policy that requires specific install locations.
To verify the integrity of the installer, use the SHA checksum linked from the Download page.
Run the installer and follow the wizard steps.
Mind the following options in the installation wizard
64-bit launcher : Adds a launching icon to the Desktop.
Open Folder as Project : Adds an option to the folder context menu that will allow opening the selected directory as a PyCharm project.
.py : Establishes an association with Python files to open them in PyCharm.
Add launchers dir to the PATH : Allows running this PyCharm instance from the Console without specifying the path to it.
To run PyCharm, find it in the Windows Start menu or use the desktop shortcut. You can also run the launcher batch script or executable in the installation directory under bin .
There are separate disk images for Intel and Apple Silicon processors.
To verify the integrity of the downloaded disk image, use the SHA checksum linked from the Download page.
Mount the image and drag the PyCharm app to the Applications folder.
Run the PyCharm app from the Applications directory, Launchpad, or Spotlight.
Install using tar archives
Unpack the pycharm-*.tar.gz file to a different folder, if your current Download folder doesn’t support file execution:
The recommended installation location according to the filesystem hierarchy standard (FHS) is /opt . To install PyCharm into this directory, enter the following command:
To verify integrity of the downloaded archive, use the SHA checksum linked from the Download page.
Switch to the bin subdirectory:
Run pycharm.sh from the bin subdirectory.
Install using snap packages
For Ubuntu 16.04 and later, you can use snap packages to install PyCharm.
PyCharm is distributed via two channels:
The stable channel includes only stable versions. To install the latest stable release of PyCharm, run the following command:
The —classic option is required because the PyCharm snap requires full access to the system, like a traditionally packaged application.
The edge channel includes EAP builds. To install the latest EAP build of PyCharm, run the following command:
Run pycharm-professional , pycharm-community , or pycharm-educational in the Terminal.
To create a desktop entry, do one of the following:
On the Welcome screen, click Configure | Create Desktop Entry
From the main menu, click Tools | Create Desktop Entry
When you run PyCharm for the first time, some steps are required to complete the installation, customize your instance, and start working with the IDE.
For information about the location of the default IDE directories with user-specific files, see Directories used by the IDE.
Silent installation on Windows
Silent installation is performed without any user interface. It can be used by network administrators to install PyCharm on a number of machines and avoid interrupting other users.
To perform silent install, run the installer with the following switches:
/S : Enable silent install
/CONFIG : Specify the path to the silent configuration file
/D : Specify the path to the installation directory
This parameter must be the last in the command line and it should not contain any quotes even if the path contains blank spaces.
To check for issues during the installation process, add the /LOG switch with the log file path and name between the /S and /D parameters. The installer will generate the specified log file. For example:
Silent configuration file
The silent configuration file defines the options for installing PyCharm. With the default options, silent installation is performed only for the current user: mode=user . If you want to install PyCharm for all users, change the value of the installation mode option to mode=admin and run the installer as an administrator.
The default silent configuration file is unique for each JetBrains product. You can modify it to enable or disable various installation options as necessary.
It is possible to perform silent installation without the configuration file. In this case, omit the /CONFIG switch and run the installer as an administrator. Without the silent configuration file, the installer will ignore all additional options: it will not create desktop shortcuts, add associations, or update the PATH variable. However, it will still create a shortcut in the Start menu under JetBrains .
Источник
How to uninstall pycharm-community-2017.1.4 from Ubuntu 16.04 LTS?

calele
New Member
Hello everyone so I have been hard at work learning Linux and also learning Python, but a few days ago I came across a command that lets me verify if a file I want to download is legit by verifying its SHA checksum. Long story short I want to remove Pycharm completely and than re-install it verifying the checksum prior to. So the following are commands that I tried so far with no result:
sudo apt-get remove pycharm-community-2017.1.4
sudo apt-get remove pycharm
rm pycharm
Please any guidance I can get will be greatly appreciated, by the way I included a .txt file with the results of my attempts at removing Pycharm.
Very Respectfully,
calele
Attachments

atanere
Well-Known Member
Hello everyone so I have been hard at work learning Linux and also learning Python, but a few days ago I came across a command that lets me verify if a file I want to download is legit by verifying its SHA checksum. Long story short I want to remove Pycharm completely and than re-install it verifying the checksum prior to. So the following are commands that I tried so far with no result:
sudo apt-get remove pycharm-community-2017.1.4
sudo apt-get remove pycharm
rm pycharm
Please any guidance I can get will be greatly appreciated, by the way I included a .txt file with the results of my attempts at removing Pycharm.
Very Respectfully,
calele
Hi @calele and welcome! It seems like your question doesn’t make a good poll since you’ve already stated that neither command works!
If you installed via Synaptic, you should be able to emove it via Synaptic also. If not, see if this works:
This snippet (for a slightly older version) was found here. And if it does work, as the link recommends, you should remove the PPA by going to System Settings -> Software & Updates -> Other Software tab.
Hope that works for you.
calele
New Member
Hi @calele and welcome! It seems like your question doesn’t make a good poll since you’ve already stated that neither command works!
If you installed via Synaptic, you should be able to emove it via Synaptic also. If not, see if this works:
This snippet (for a slightly older version) was found here. And if it does work, as the link recommends, you should remove the PPA by going to System Settings -> Software & Updates -> Other Software tab.
Hope that works for you.
atanere
Well-Known Member
Yes, Linux is different from Windows. but better! You’ve actually done the right thing to uninstall software most of the time (sudo apt-get remove package-name) so don’t let this episode discourage you. Remember that there are many ways to install software, so there are also many ways to uninstall. We just need to figure this out.
But also, before going further, your first post indicates you only want to uninstall so you can check the SHA256 checksum, and then you plan to reinstall. If the program is working for you, I would skip this and just keep enjoying the program. If you still have the original file you downloaded, go ahead and check the SHA256 checksum to be sure. But in the future it is a good idea to check SHA256 sums or MD5 sums to help ensure your downloads are not corrupted.
If at all possible, can you remember how you installed it? You seem to know the exact version of pycharm-community but there is also a professional version (just «pycharm») that costs money, but it has a free trial. Did you install both? I downloaded the community edition and was in the form of a zipped tarball. pycharm-community-2017.1.5.tar.gz, and after unzipping it I find a «Install-Linux-tar.txt» file with instructions how to install it.
So, here is something to try. It should generate a list of where all the pycharm files are stored:
One of the nice things about Linux over Windows is that there is no «Registry» that needs cleaning up. So for programs that do not uninstall normally (with apt-get remove). it is okay in Linux to just delete all the files of a program to remove it from the system. In fact, this link describes this very method to remove pycharm from Ubuntu. except do not follow those directions because the pycharm file locations has changed.
Hope this helps. I think you’re fine to leave it alone as long as the program is working okay for you.
Источник
3 способа установить PyCharm в Linux Ubuntu
PyCharm — это популярная IDE (интегрированная среда разработки) для языка Python. В ней есть графический отладчик, анализатор кода, встроенный тестировщик, а также интеграция с системами контроля версий. PyCharm поддерживает веб-разработку на Django. В нем есть кроссплатформенные функции для Linux, Windows и macOS.
Основные особенности
- Помощь в написании кода и анализ с автоматическим завершением кода, подсвечиванием синтаксиса и ошибок
- Навигация по всему проекту и коду
- Рефакторинг Python
- Поддержка веб-фреймворков
- Интеграция контроля версий
Как установить на Ubuntu
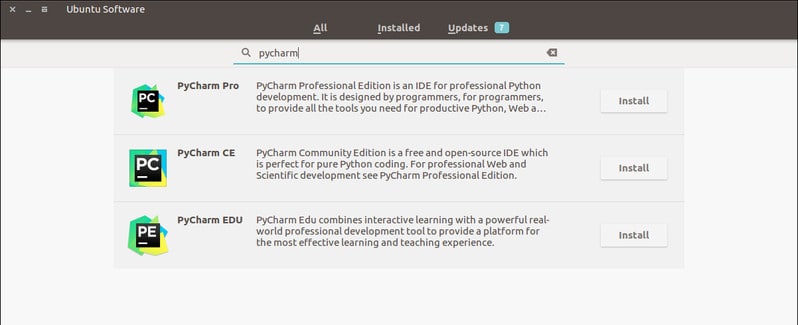
Способ №1
Можно воспользоваться центром приложений Ubuntu. Установка через него происходит в формате пакетов Snap.
Или использовать следующую команду в командной строек:
Для Pro-версии нужно просто заменить pycharm-community на pycharm-professional .
Как удалить PyCharm
Можно удалить приложение прямо из центра приложений Ubuntu или использовать следующую команду:
Способ №2 — установка с помощью umake
Umake — это отличный инструмент командной строки, который помогает разработчикам устанавливать важные IDE. IDE — один из встроенных инструментов разработки в umake. Для установки PyCharm с помощью umake нужно, чтобы он был установлен в системе. Обычно он доступен по умолчанию, но если его нет, используйте следующую команду для установки umake с помощью PPA:
После этого установите PyCharm Community Edition:
Для PyCharm Professioanl воспользуйтесь следующей командой:
Удаление
Способ №3 — установка в Ubuntu и Linux Mint с помощью PPA
Теперь о том, как установить PyCharm в Ubuntu или другие ОС, основанные на Linux, с помощью неофициальных PPA. Прежде всего нужно убедиться, что в системе есть Java.
Добавьте неофициальные PPA:
Установите Community Edition:
Или Professional Edition:
Удаление
Удалите Community Edition:
Или Professioanl Edition:
Удалите PPA из списка источников:
Примечание: упомянутые здесь функции не являются всеобъемлющими. Они основаны либо на инструкциях с официальных сайтов, либо на личном опыте.
Источник


