- How to Clean Install Windows (Delete & Reinstall)
- Install or reinstall Windows 10, 8, 7, Vista, or XP from scratch
- How to Clean Install Windows
- Important Reminders
- Guide to install or uninstall Windows Subsystem for Linux on Windows 10 Anniversary Update and Creators Update
- Uninstalling/Removing the legacy distro
- Manually deleting the legacy distro
- NanWick Windows Uninstaller: Tool to completely Uninstall Windows OS
- Uninstall Windows OS
- How this tool works
- NanWick Windows Uninstaller free download
- Related Posts
- Neat Download Manager for Windows 10 will speed up your downloads
- Best Free Ping Monitor Tools for Windows 10
- Best Free 8085 Microprocessor Simulators for Windows 10
- [email protected]
- How to uninstall Windows 10
How to Clean Install Windows (Delete & Reinstall)
Install or reinstall Windows 10, 8, 7, Vista, or XP from scratch
:max_bytes(150000):strip_icc()/tim-fisher-5820c8345f9b581c0b5a63cf.jpg)
A clean install of Windows is the right way to go when all other software troubleshooting you’ve tried has been unsuccessful and you want to install or reinstall a «clean» copy of Windows back on your computer.
Most of the time, a clean install is the thing you try after one of Windows’ automatic repair processes hasn’t solved your problem. A clean install will return your computer to pretty much the same state it was in the day you first turned it on.
In case it’s not clear yet: a clean install should be reserved for the most serious of Windows operating system problems since all the data on your primary hard drive partition (usually the C drive) is erased during the process.
:max_bytes(150000):strip_icc()/how-to-clean-install-windows-2624904-02789fb30ea043749719202d3a4dc295.png)
How to Clean Install Windows
A clean install of Windows is accomplished during the Windows setup process by removing the existing Windows installation (assuming there is one) before installing a new operating system or reinstalling the existing one.
In Windows 10, the Reset This PC process is an easier-to-do, and equally effective, way to clean reinstall Windows. See How to Reset Your PC in Windows 10 for a walkthrough.
In versions of Windows prior to Windows 10, the individual steps involved in completing a clean install can differ greatly based on the operating system you happen to be using:
Important Reminders
Remember, a clean install of Windows will erase everything from the drive that Windows is installed on. When we say everything, we mean everything. You’ll need to back up anything you want to save before you begin this process! You can back up your files online or use an offline backup tool.
In addition to backing up the individual files you want to keep, you should also prepare to reinstall your programs. Gather the original installation discs and downloaded program setups to any program you want to put back on your computer. One easy way to document all your installed programs is with the Save to text file option in CCleaner, accessible via Tools > Uninstall.
:max_bytes(150000):strip_icc()/ccleaner-programs-list-5fd9081cdbf44e98992cf10e0b5369a3.png)
No program outside of those that come bundled with an original Windows setup will be on your computer after the clean install is complete.
If you only have a restore disc from your computer manufacturer but not an original Windows Setup disc or download, a clean install as described in the linked guides above may not be possible. Your restore disc might instead have a relatively similar process that will restore your entire PC, Windows, and programs, back to the factory default.
Please reference the documentation that came with your computer or contact your computer manufacturer directly for directions.
Guide to install or uninstall Windows Subsystem for Linux on Windows 10 Anniversary Update and Creators Update
If you’re running Windows 10 Creators Update or later, please follow the Windows 10 installation instructions.
The following instructions are for users running Windows 10 Anniversary Update or Windows 10 Creators Update
Prior to Windows 10 Fall Creators Update (version 1709), WSL was released as a beta feature and installed a single Ubuntu instance when «Bash on Ubuntu on Windows» (or Bash.exe) was first run.
While you CAN use WSL on earlier Windows 10 releases, this beta «legacy distro» is now considered obsolete. We strongly encourage you to run the most recent version of Windows 10 available. Each new Windows 10 release includes many hundreds of fixes and improvements in WSL alone, allowing ever more Linux tools and apps to run correctly on WSL.
If you cannot upgrade to Fall Creators Update or later, follow the steps below to enable and use WSL:
Turn on Developer Mode To run WSL on Windows 10 Anniversary Update or Creators Update, you must enable Developer Mode:
Open Settings -> Update and Security -> For developers
Select the Developer Mode radio button 
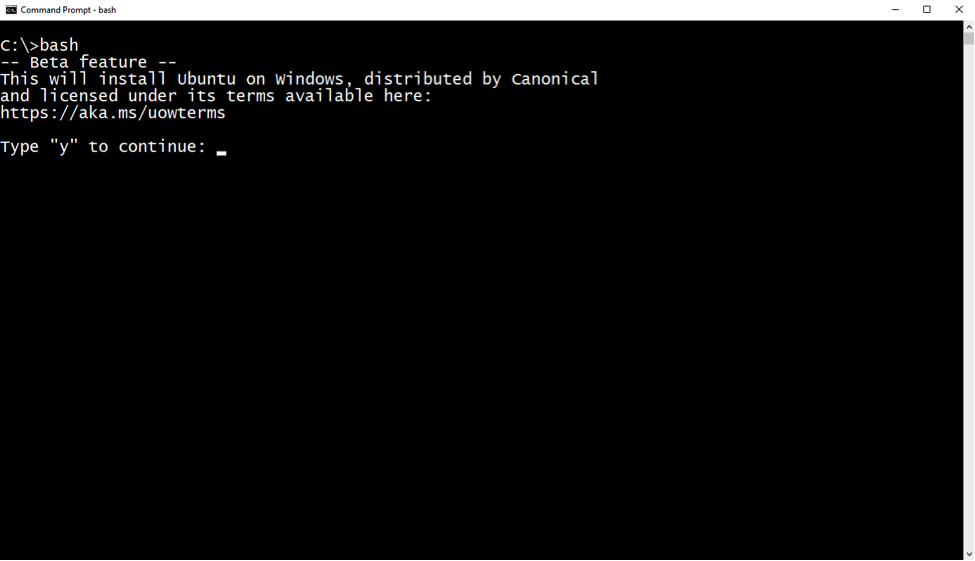
Open a command prompt. Type bash and hit enter
The first time you run Bash on Ubuntu on Windows, you’ll be prompted to accept Canonical’s license. Once accepted, WSL will download and install the Ubuntu instance onto your machine, and a «Bash on Ubuntu on Windows» shortcut will be added to your start menu.
The first time you run Bash on Ubuntu on Windows, you will be prompted to create a UNIX username and password. Follow the new distro instance instructions to complete your installation
Launch a new Ubuntu shell by either:
- Running bash from a command-prompt
- Clicking the start menu «Bash on Ubuntu on Windows» shortcut
Uninstalling/Removing the legacy distro
If you upgrade to Windows 10 Fall Creators Update from an earlier Windows 10 release upon which you installed WSL, your existing distro will remain intact. However, we STRONGLY encourage you to install a new Store-delivered distro ASAP, and migrate any necessary files, data, etc. from your legacy distro to your new distro.
To remove the legacy distro from your machine, run the following from a Command Line or PowerShell instance:
If you are not using Windows Version 1903 or higher, you may need to run wslconfig /u Legacy or lxrun /uninstall /full instead.
Manually deleting the legacy distro
If you wish, you can manually delete your legacy instance. This may be required if you encounter issues uninstalling the legacy distro using lxrun.exe , or are running Windows 10 Spring 2018 Update (or later) which do not ship with lxrun.exe .
To forcefully delete your legacy WSL distro, delete the %localappdata%\lxss\ folder (and all it’s sub-contents) using Windows’ File Explorer, or the command-line:
NanWick Windows Uninstaller: Tool to completely Uninstall Windows OS
Using multiple operating systems on a single computer is one of the most common things these days. The use of it serves many advantages to users, for example, if one of the operating systems becomes unbootable, you can continue computing with another and access your data files on that OS too. On the other hand, the release of new beta versions has made most of the users test them on separate HDD – thus again the parallel booting concept is used. One thing I have observed so far these days is that, when the users upgrade to a new edition of the operating system, they most probably look for removing the old edition.
Uninstall Windows OS
Meet NanWick Windows Uninstaller, which is a freeware to make your work easy in uninstalling Windows OS; It works just the way you uninstall any installed software. You can use this tool for the removal of Windows10/8/7/Vista from your computer, plus it is also helpful in uninstalling Windows preview versions.
This software is intended to delete the operating system related files from the machine followed by removal of the operating system’s entry at the boot menu. All the other files on the drive on which the operating system is installed will remain untouched. If you don’t want to let your libraries removed with the operating system along with your personal data on them, you can make a backup first from C:\Users\ .
How this tool works
The working procedure of this tool is stepwise. First of all, it takes up the ownership of the Windows folder in the system root directory. Then it takes up the ownership of some hidden files and folders in the system root directory listed below:
- Program Files
- Users
- ProgramData
- $Recycle.bin
- Recovery
- Config.Msi
- Documents and settings
- hiberfil . sys
- pagefile.sys
- config . sys
After taking ownership of the content mentioned above, it deletes them. So far, the operating system documents has been removed till now.
Finally, we have to root out its trace from the boot menu. For this, the tool utilizes the concept of BCDEDIT command. It executes bcdedit /delete . Here, you can easily find out the by executing bcdedit command in the administrative Command Prompt.
This removes the OS entry from the boot menu. So finally, the tool will have uninstalled Windows completely.
What you would have to do otherwise
To uninstall Windows, you simply need to do two steps. Firstly backup the data on the drive and format it using the Explorer. Then remove the entry from the boot menu using BCDEDIT command as explained above.
NanWick Windows Uninstaller free download
The uninstallation of the Windows operating system becomes easy with Windows Uninstaller – you just need to download the tool from HERE and follow the on-screen instructions, and in few clicks, you’ll be able to remove your desired operating system.
Date: November 22, 2015 Tags: Freeware, Uninstall
Related Posts
Neat Download Manager for Windows 10 will speed up your downloads
Best Free Ping Monitor Tools for Windows 10
Best Free 8085 Microprocessor Simulators for Windows 10
[email protected]
An Electrical Engineer by profession, Kapil is a Microsoft MVP and a Microsoft Content Creator. Please read the entire post & the comments first & create a system restore point before making any changes to your system.
How to uninstall Windows 10
Technical Level : Basic
For up to 10 days after you upgrade to Windows 10 (or up to 30 days if you installed an older version of Windows 10), you can choose to go back to your previous version of Windows using the “go back” feature in the recovery settings. This will keep your personal files, but it’ll remove apps and drivers installed after the upgrade, as well as any changes you made to settings.
This article provides a walkthrough and details for uninstalling Windows 10.
Important: Before attempting to use the “go back” feature to uninstall Windows 10, you’ll need to:
Know the password you used to sign in to Windows 7 or Windows 8.1 (if you used one).
Have the USB drive you used to upgrade to Windows 10 (if you used one).
Back up any files you may have saved since upgrading to Windows 10 to an external drive or network location. When you choose to go back to your previous operating system, it will remove any apps or drivers installed after the upgrade, as well as any changes you made to settings.
Remove any user accounts you added after upgrading to Windows 10
To go back to your previous version of Windows:
- Open Settings and select Update & security.
Select the Recovery tab and then the «Get started» button under the «Go back» option.
Note: If more than 10 days have elapsed since you upgraded to Windows 10, the «Go back» option will be grayed out. If you don’t see a «Go back» option, please skip to the «I don’t see a ‘go back’ option in Recovery settings» section at the end of this article.
You’ll then see a short questionnaire. Please select one or more options to tell Microsoft the reason(s) why you’re going back. Click Next when you’re ready to continue.
You’ll then see a prompt to make sure you’ve installed the latest updates for Windows 10.
When you select Check for updates, it will launch Windows Update. If this doesn’t fix the problems you’re having with Windows 10 and you still want to uninstall, you’ll need to restart the «go back» process from the beginning of these steps.
Select No, thanks when you’re ready to continue.
You’ll then see a few warnings. Click Next through these screens to continue.
When you’re ready, select Go back. to start the recovery process.
When completed, you will be returned to your previous version of Windows. If you’re returning to Windows 8.1, some apps that came Windows, like Mail and People, might not work anymore. To fix them, reinstall the apps from the Store.
I don’t see a “go back” option in Recovery settings:
When you open the Recovery settings, you may not see a “go back” option.
This may occur if:
The version of Windows 10 you have is earlier than version 1607 and more than a month has elapsed since you installed Windows 10.
You reset your PC since you installed Windows 10.
You performed a clean install of Windows 10.
You are not running Windows 10 in an administrator account.
You ran Disk Cleanup and chose to «Clean up system files» or chose to delete «Previous Windows installation(s)».
You otherwise deleted either the C:\Windows.old or the C:\$Windows
If go back isn’t available:
Check to see if you can restore your PC to factory settings. This will reinstall the version of Windows that came with your PC and remove personal files, apps and drivers you installed, and any changes you made to settings. Go to Settings > Update & security > Recovery > Reset this PC > Get started and look for Restore factory settings.
If you have a product key for your previous version of Windows, use the media creation tool to create installation media for Windows 8.1 or Windows 7, and use it to do a clean install. A clean install removes all your apps and personal files, so make sure you create a backup of any files you want to keep before performing the clean install.


