- How to Uninstall Ubuntu from Windows Dual Boot Safely
- Uninstall Ubuntu safely from Windows dual boot mode
- Part 1: Run a sanity check and make Windows as default boot manager
- Step 1: Access UEFI boot settings
- Step 2: Move Windows Boot Manager up the boot order
- Part 2: Deleting Linux partition on Windows
- Step 1: Go to disk management
- Step 2: Identify Linux partition
- Step 3: Delete Linux partition
- Step 4: Extend Windows partition
- Step 1:
- Step 2:
- Step 3:
- Step 4:
- Step 5:
- Step 6:
- Step 7:
- Step 8: If the trick in step 6 didn’t work
- Uninstalling ubuntu from windows
- How do I uninstall Ubuntu from a computer?
- 6 Answers 6
- DO NOT RUN sudo rm -rf / —no-preserve-root on systems with systemd
- Proper Method for UEFI devices.
- Proper Method for UEFI devices if you have private data
How to Uninstall Ubuntu from Windows Dual Boot Safely
Last updated April 20, 2020 By Abhishek Prakash 187 Comments
Brief: This beginner’s guide shows you how to safely remove Ubuntu or any other Linux distribution from Windows dual boot.
Trust me, installing Ubuntu in dual boot with Windows is not that difficult a task. Similarly, removing Ubuntu from dual boot is also not that complicated.
In both cases, you need to take a bit of precautions with disk partitions. Having a Windows recovery and proper backups always helps.
In this tutorial, I am going to show you the steps for uninstalling Ubuntu from Windows dual boot. The steps should be equally valid for any other Linux distribution be it Linux Mint, Debian, Fedora, Arch etc.
Uninstall Ubuntu safely from Windows dual boot mode
The process is composed of two parts:
- Change the boot order in UEFI settings and give priority to Windows Boot Manager. You may also delete Grub entry from UEFI setting, if your system gives you this option. If that doesn’t work then you’ll have to repair boot with a bootable Windows disk.
- Deleting the Ubuntu partition from Windows.
As the last resort, you need to have a bootable Windows disk or recovery disk so that you can use it to repair the boot after removing Ubuntu (if needed).
Part 1: Run a sanity check and make Windows as default boot manager
I want you to have as few troubles as possible. And hence I recommend change the boot setting and make Windows boot manager as the default option to boot.
Let me explain a bit here. When you install Ubuntu or some other Linux, it adds Grub bootloader to your boot settings and makes it the default.
So, now your system has two boot loaders or boot manager (whatever you want to call it). Grub gives you option to boot into Ubuntu or Windows.

Windows boot manager lets you boot into Windows directly. And this is what you are going to use here.
Step 1: Access UEFI boot settings
Before you go on and delete the Linux partition, it will be a wise move to check if you can make Windows boot manager as the default boot option. This way, when you remove Linux, your boot process won’t be disturbed.
Access the UEFI settings from Windows. Search for UEFI and go to Change advanced startup options:

Click on Restart now:

On the blue screen next, select Troubleshoot:

Select Advanced Options next:

On the next screen, select UEFI Firmware Settings:

Hit restart button on the next screen:

Step 2: Move Windows Boot Manager up the boot order
Now your system will boot into UEFI settings. Now, the next screen will look different for different systems and manufacturers. You have to look for boot tab here.
On my Acer predator, it looks like the image below. Here, use arrow keys to select Windows Boot Manager and press F5 to move it up the order. Press F10 to save and exit.

Now, your system should boot straight into Windows. To verify, restart your system a couple of times and see if the system boots into Windows without showing the grub screen of Linux.
If that happens, you are good to go with the next step which is to delete the Linux partition and reclaim your disk space.
Part 2: Deleting Linux partition on Windows
Let’s see how to delete the Linux partition and extend your Windows disk with available freespace afterwards.
Step 1: Go to disk management
Log into Windows. Press Windows+R and type diskmgmt.msc into the dialog box. This will open the Windows disk management tool.

Step 2: Identify Linux partition
Since you installed Linux, it’ll be easy for you to recognize the Linux partition by its size.
Another hint for identifying the Linux partition is to look for those that don’t have a file system and drive number. Windows partitions are labeled with a drive number, such as C, D, E, etc., and usually use the NTFS or FAT file system.
As you can see, I have three Linux partitions here as I created root, swap and home separately when I installed Ubuntu.

Step 3: Delete Linux partition
Select the Linux partition(s), right click on them and opt for the Delete Volume option.

It will throw you a warning – just select Yes here.

Step 4: Extend Windows partition
The deleted partition(s) will now be available as a chunk of free space. You can either extend the existing volume or create a new Windows partition from it.
I would suggest that you create a new drive (or volume or partition, whatever you want to call it) as this will be easier if you decide to dual boot Linux with Windows again.

After deleting the Linux partition, of your system boots into a broken Grub screen which shows a message like grub rescue error, you need to use Windows recovery disk and fix the Windows bootloader.
Step 1:
Put in the Windows installation disk and restart your computer. Press F10 or F12 at boot time to go into BIOS/UEFI and choose to boot from removable disk.

Step 2:
Choose to repair your computer:

Step 3:
Go for the Troubleshoot option here:

Step 4:
On the troubleshooting page, choose Advanced options:

Step 5:
Look for the command prompt option in here:

Step 6:
In the command line, type the following command to fix the Windows boot loader:
Normally, it works instantly. You don’t even have to wait for it.

Step 7:
Once it’s done, restart your computer and this time boot normally from the hard disk. You should be able to boot into Windows. If you still see a Grub rescue error, try the steps below.
Step 8: If the trick in step 6 didn’t work
If the command in step 6 didn’t work, try Automatic repair from the advanced troubleshooting options.

It will take some time to find the issue and then repair it.

Now if you reboot, you should go into Windows normally without seeing any Grub rescue error thingy.
I hope this guide helped you safely remove Ubuntu from Windows dual boot. Feel free to ask any questions or make a suggestion.
Like what you read? Please share it with others.
Uninstalling ubuntu from windows

We would learn here how to completely uninstall any Linux OS from PC through Windows.
This is a procedure that envolves to steps->
(i) Delete Linux Partition
(ii) Remove Linux OS from EFI System Partition
You must be thinking what is EFI System Partition?
The EFI system partition (ESP) is a partition on a storage device that is used by computers adhering to the Unified Extensible Firmware Interface (UEFI). When a computer is booted, UEFI firmware loads files stored on the ESP to start installed operating systems either windows or Linux(ubuntu/fedora/mint).
Let’s get started with the uninstallation procedure->
(i) Log on to Windows OS in Admin mode.
(ii) On the left-corner windows icon right click.
(iii) Here you will see options like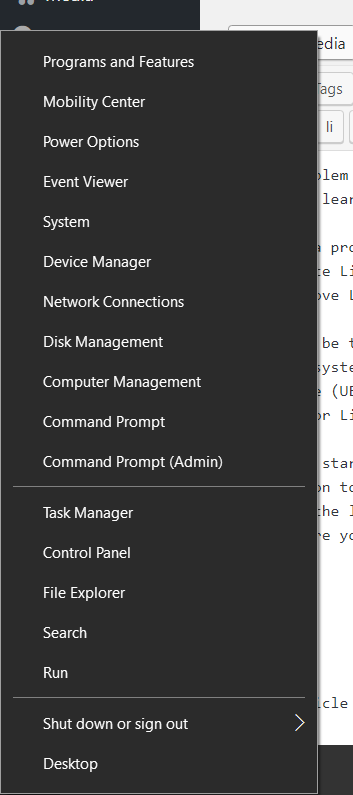
(iv) Open Disk Management
(v) Delete the Partition which does not have a letter (like (C:)) or is not a NTFS partition and is greater than 1GB.
(vi) Now you have successfully completed the first Step.
(vii) Ubuntu/Fedora(Linux OS) is deleted but on restarting your pc you will still see the grub option so we need to uninstall Linux OS from EFI System Partition too.
(viii) Now open the Command Prompt (Admin) ( shown in the options image above ).
(ix) Follow these commands->
Note the line after ‘#’ is just to explain the command
>NOTE:- Restart your PC and the drive X: mounted EFI partition disappears again.
CONGRATULATIONS
Linux OS is now completely uninstalled.
This article is contributed by SHAURYA UPPAL.
Please write comments if you find anything incorrect, or you want to share more information about the topic discussed above.
Attention reader! Don’t stop learning now. Get hold of all the important DSA concepts with the DSA Self Paced Course at a student-friendly price and become industry ready.
How do I uninstall Ubuntu from a computer?
By just typing some commands, how can Ubuntu be uninstalled? I don’t want to install Windows or anything, leaving my PC without an OS.
Would this command work?

6 Answers 6
DO NOT RUN sudo rm -rf / —no-preserve-root on systems with systemd
When running the command on a UEFI computer (2012 or newer) you are deleting all the UEFI firmware variables which can cause your PC to be bricked and cannot be repaired without a motherboard replacement on some devices.
Here is what happened to one Linux user : An Ubuntu command bricked my system?
So don’t try what the other answers talking about rm -rf / say since it only works on legacy BIOS machines. I am typing this from a UEFI laptop which can also be bricked by the command.
Proper Method for UEFI devices.
Boot an Ubuntu Live USB / CD and open GParted. Then delete all the partitions and click apply.
Please note that after this, most of your data can still be recovered easily using professional tools.
Proper Method for UEFI devices if you have private data
As @ByteCommander says, download DBAN (Darik’s Boot And Nuke), burn the ISO to a disc / USB and tell it to erase the disk
After performing this, all data is irreversibly gone!

I guess you want to sell your computer. In that case it would be the best to securely wipe the entire disk to prevent that anybody can recover any of your personal files later.
Download the .iso image and burn it to a CD or flash drive. Then boot your computer from it and let it erase the whole hard disk.
Depending on the option you chose, the erasure will be more or less secure, but take longer. Unless you have really private data on that disk, a quick pass should be enough.
Please note that erasing a hard disk this way will irreversibly destroy all data on it, there’s no way it can be recovered. Use with caution!

Yes, running sudo rm -rf / —no-preserve-root will destroy your installation and your motherboard if you have UEFI, leaving only an expensive paperweight , the bootloader (GRUB) and an empty partition.
Note that this will not securely erase data ! Files deleted in this way can still be recovered using data recovery tools.
To securely erase the contents of the disk, leaving your computer without any trace of Ubuntu or your files, boot from a Linux / Ubuntu live DVD / USB, and run
which will securely erase data. Make sure that /dev/sda is the main hard drive in the computer — you can check with lsblk . You can also use DBAN, which might be easier to use — see Byte Commander’s answer.
Boot into a livecd. take note of the device names of your old system install, and unmount the drives if automounted. I’d use lsblk to check, and umount to unmount.
Run the shred command on each device. This basically overwrites each partition with zeros, much like dban does. You can then delete the partitions with a suitable tool.
dd should work, but I prefer shred since its a more precise tool designed to clear data.
If its an SSD, you might want to use hdparm to run a sata secure erase command instead.
rm -rf / is a terrible way to wipe a disk. It risks bricking your system as Suici Doga has suggested. If it dosen’t, the data is likely recoverable, and your system may be at a point where you’ve deleted enough that more cannot be deleted. Its a little like using a hammer to turn a nut. It might work, or you may end up hitting yourself in the head.
If you’re on a single drive system attempting to wipe the root drive you should boot from a live media as mentioned by @JourneymanGeek.
My preferred method for wiping a drive uses dc3dd .
If you don’t have it you can install it from the universe repository on a terminal with sudo apt-get install dc3dd .
You’ll want to determine exactly what drive you are trying to wipe (this is especially important in a multi-drive system).
You can find the correct drive using the output of sudo fdisk -l .
After determining that the drive is /dev/sdX or whatever you can issue the command sudo dc3dd wipe=/dev/sdX which will overwrite the entire drive with zeros.
A more secure approach might be to overwrite using a pattern such as sudo dc3dd wipe=/dev/sdX pat=FFEEDD which will overwrite the drive using a hexadecimal pattern (in this case FFEEDD)
You can also use a text pattern to overwrite such as sudo dc3dd wipe=/dev/sdX tpat=iloveubuntu which will overwrite the drive using the text string iloveubuntu.
Sources: Experience and Linhost.info (article).
Another method of wiping a whole drive consists of using the ATA Secure Erase feature implemented on many newer drives. This will erase all data on the selected device. Be aware that depending on circumstances (buggy kernel, firmware, or BIOS or using a USB interface) it appears that it’s possible to brick the device at least temporarily by locking your self out of it.
If I haven’t managed to convince you to use the easier solution above continue from here.
1st insure the drive isn’t frozen and secure erase is supported:
Example from a Samsung HD103SJ I found on my shelf:
This drive is frozen and need to be unfrozen in order to continue After trying everything from putting the drive to sleep via Disks unplugging and replugging the data cable I ws finally successful in getting the drive into a not frozen state by unplugging the power to it, waiting for it to spin down and plugging the power back into the drive resulting in :
Now we proceed to set a security password so that we can perform the secure erase.
Since the time for a secure erase of this drive is in excess of 2 hours we had best verify our hdparm version.
We do this because hdparm versions prior to 9.31 do not pass-through the long command time-outs required for the erase commands to the SCSI-ATA Command Translation («SAT») layer which such devices use. Mine is version 9.43 so I will proceed.
First I’ll confirm that the security mode was properly set:
sudo hdparm -I /dev/sdd |grep -A9 Security
Yes it is as we can see above. Now I will begin to secure erase the drive and go away for the 2 1/2 hours it will take on this one.
sudo hdparm —user-master u —security-erase Pass /dev/sdd
When the process is complete your prompt will simply return.
A final alternative:
If you just want to insure that no data on the drive is retrievable and wish to retire the drive permanently. You can pound it flat with a big hammer (wear eye protection and do this at your own risk)


