- Publishing Builds
- Further information on building games with Unity
- Windows standalone Player build binaries
- Rebuilding the game executable
- Start creating with Unity
- First-time users
- Returning users
- New users: Your journey begins here
- Pick a Microgame
- Personalize with Mods
- Share your playable game
- Terms
- How to Build/Export Your Game in Unity to Windows
- Introduction: How to Build/Export Your Game in Unity to Windows
- Step 1: Preparing Your Game for Building
- Step 2: Building Your Game
- Step 3: Exporting Your Game
- Universal Windows Platform (UWP) build settings
- Building UWP applications with Unity
- UWP Build Settings
Publishing Builds
The Build Settings window contains all the settings and options you need to publish your build to a variety of platforms. From this window you can create a Development Build A development build includes debug symbols and enables the Profiler. More info
See in Glossary to test your application, as well as publishing a final build. To adjust the publishing settings for your application’s build go to File > Build Settings.
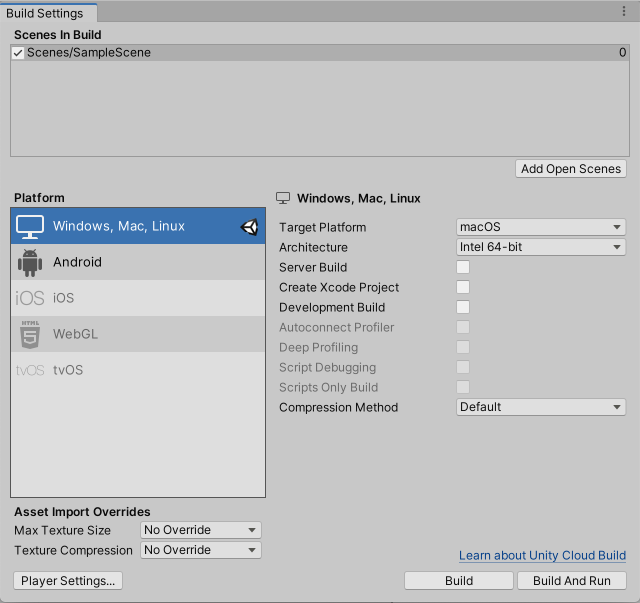 The Build Settings window
Use the Scenes A Scene contains the environments and menus of your game. Think of each unique Scene file as a unique level. In each Scene, you place your environments, obstacles, and decorations, essentially designing and building your game in pieces. More info
See in Glossary in Build panel to manage which Scenes Unity includes in the build. You can use the Platform section of the window to select which platform you want to build to, and adjust specific settings such as the Compression A method of storing data that reduces the amount of storage space it requires. See Texture Compression, Animation Compression, Audio Compression, Build Compression.
See in Glossary Method. These options vary depending on the Platform you select. For more information, see the documentation on Build Settings
Select the Build or Build And Run button to begin the build process.
You can choose a name and save location for your application through the Save dialog that appears. Note: depending on the platform you build to, Unity might only prompt you to choose a folder.
When you select the Save button, Unity builds your application. If you are unsure where to save your build, consider making a subfolder inside your root folder to hold your builds. You cannot save the build into the Assets folder.
Further information on building games with Unity
To learn more about constructing Scenes, see documentation on Creating Scenes.
To learn more about scripting, see documentation on Scripting.
To learn more about creating art and importing assets, see documentation on Assets Workflow.
To interact with Unity users and developers, see the Unity Forums.
Windows standalone Player build binaries
When you build a Unity project to the Windows standalone platform Unity produces the following files (where ‘ProjectName’ is the name of your project):
ProjectName.exe — The project executable. This contains the program entry point which calls into the Unity engine when launched.
UnityPlayer.dll — this DLL contains all the native Unity engine code. It is also signed using the Unity Technologies certificate, allowing easy verification that the engine was not tampered with.
*.pdb files — Symbol files for debugging. Unity copies these to the build directory if you enable Copy PDB files in the Build Settings window.
WinPixEventRuntime.dll — This DLL enables Windows PIX profiler support. Unity only creates this file if you check the Development Build A development build includes debug symbols and enables the Profiler. More info
See in Glossary checkbox in the Build Settings window.
ProjectName_Data folder — This folder contains all the data needed to run your project.
Rebuilding the game executable
Unity creates the source code for ProjectName.exe in this folder: Editor\Data\PlaybackEngines\WindowsStandaloneSupport\Source\WindowsPlayer.
To modify the executable, or ship code which you built yourself (if you want to sign it, for example), you must rebuild the executable and place it in your built game directory.
To build your executable outside of Unity, you need Visual Studio 2015 or 2017 with ‘Common Tools for Visual C++’’ and Windows support for C++ installed.
2017–07–19 Page published
Windows standalone Player build binaries changed in 2017.2 NewIn20172
Windows XP support in Standalone Player removed in 2018.1
Start creating with Unity
Unity is available for download on Windows or Mac OSX. You must be on a laptop or desktop computer to download Unity.
First-time users
Download Unity with this fun, guided learning path to create your first game today!
Returning users
Already have experience creating with Unity and want to download the standard Unity installer instead?
New users: Your journey begins here
How to start creating with Unity in three easy steps:
Make and share your first LEGO® Microgame
Pick a Microgame
Microgames are game-ready templates that are designed to help you personalize and share your first game in as little as 30 minutes!
To guide you on your way, each Microgame comes with five simple In-Editor Tutorials that will quickly have you modifying your game. You’ll change colors, add objects, and create a build of your playable game so you can share it with your friends. Get even more guidance at Your First Game Jam, a free live-streamed event for new users hosted by expert game dev YouTubers who will show you tons of cool tips and tricks that will take your Microgame (and Unity skills) to the next level.
Choose from a LEGO® Microgame, Karting, Platformer, or FPS. Empty 3D is available if you don’t want to use a Microgame template.
Check out the Welcome to the Creative Mods tutorials on Unity Learn
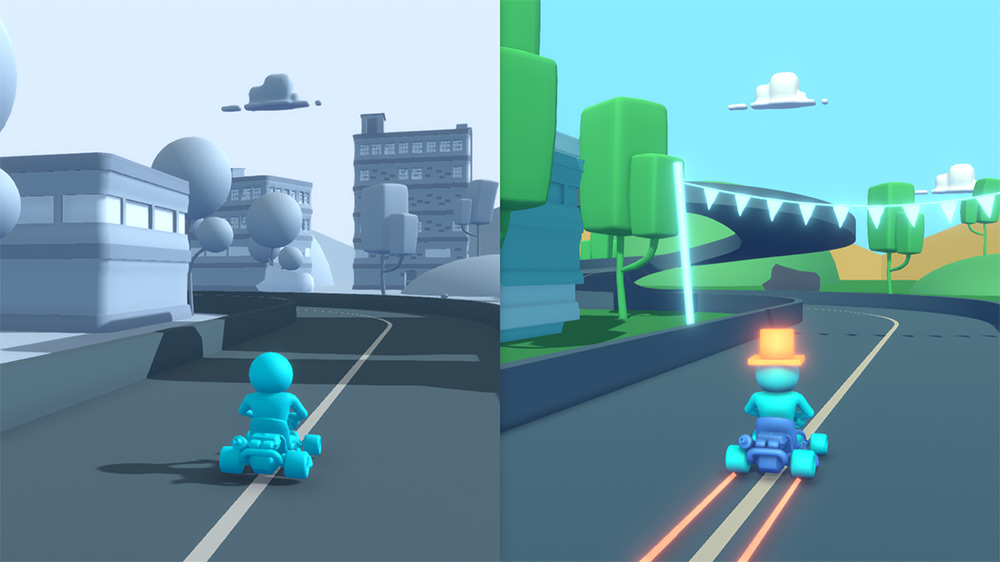
Personalize with Mods
Take the fun of game creation to a whole new level! Through mini-adventures we call Creative Mods, you will be able to easily add your own unique style and ideas to your game.
Each Creative Mod is fast, fun, and sometimes a little crazy, and they take about 10 minutes to complete.


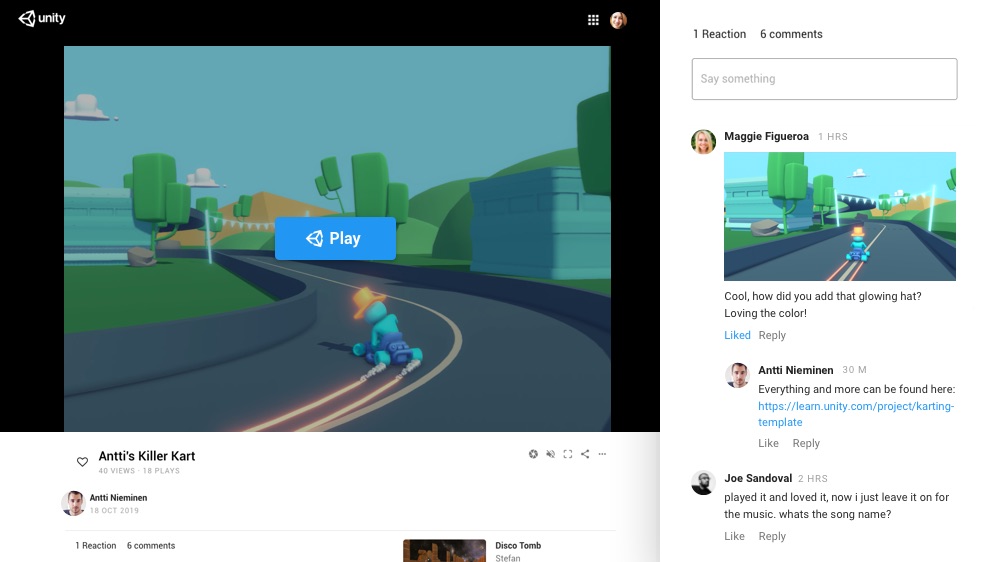
Friends and family can easily play your game, like it, and leave comments.
Share your playable game
Show off your new skills! After you’ve added your personal touches to your game, share it with friends and family. In just a few steps, you’ll have a playable version of your game on the web that you can share with anyone!
Terms
By downloading Unity, I confirm that I am eligible to use Unity Personal or Student Plan per the Terms of Service, as I or my company meet the following criteria:
- Do not make more than $100k in annual gross revenues, regardless of whether Unity Personal is being used for commercial purposes, or for an internal project or prototyping.
- Have not raised funds in excess of $100K.
- Not currently using Unity Plus or Pro Plans.
- Have read and acknowledged Unity’s Privacy Policy
Agree and downloadAgree and downloadAgree and download
Ready to build a Unity Microgame? Get started on a laptop or personal computer.
How to Build/Export Your Game in Unity to Windows

Introduction: How to Build/Export Your Game in Unity to Windows
In this instructable, I will be showing you how to export your own game made on Unity. The process is fairly simple, but make sure you follow along so you don’t miss anything! I learned this method by watching the Youtuber Brackeys, so if you need some more detail, or want a method to export to mac, head over to his channel. Before we start, make sure you are happy with your game. Maybe run through it one last time to make sure you didn’t miss anything.
Step 1: Preparing Your Game for Building
The first thing we need to do is open Unity and edit some settings to prepare your game for building. Once Unity is opened, go to Edit > Project Settings > Quality. A menu should open with a bunch of different rendering settings. This bit is a bit hard to explain on here, so if you would like to edit these settings go to
After you have edited the rendering settings we need to edit the player settings. For this go to Edit > Project Settings > Player. Another menu should pop up (like the one shown above), which has resolution settings, Icon settings, etc. The first you’ll want to do is give your company and your product a name. This can be anything, but I would suggest making the product name something to do with the game itself. Once you have done that, you will want to create your own Icon. This can be done on photoshop or any other photo editing software, and maybe a bit challenging, but is a good skill to learn nonetheless. You can also make a custom cursor if you would like. Once you have done all that you will want to open the «Resolution and Presentation tab,» which is found just underneath. You can edit these setting according to how you want your game to be presented. For example, you can choose whether you want the game to open to full screen or windowed. Don’t worry about the other settings below that tab as they will only matter if your game is big.
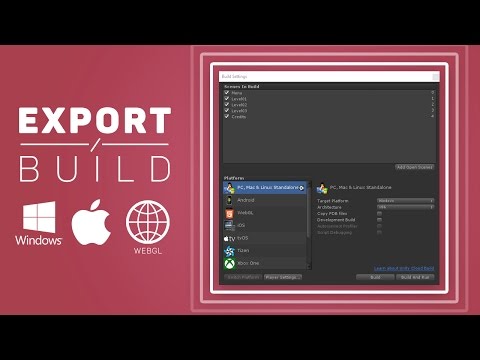
Step 2: Building Your Game
Now you will want to build your game. To do this, head to File > Build Settings. This is where you choose what platform you want to export to. For this tutorial, we are exporting to Windows, but it is possible to export to many other platforms as well. Make sure you have all the scenes you want in your build settings menu, and then click on «PC, Mac & Linex Standalone». Then choose Windows, where it says «Target Platform» and choose x86 where it says «Architecture». Now click «Build». It should pop up with File Explorer, and this is where you choose a folder to build to. But to stay organized we will make some new folders. First, make a new folder and call it «Builds», go into that folder and make another new folder called «Windows». Inside this folder, you will want to make a new folder called «x86». Open this folder and go down to where it says «File name» and enter the name of your game with «x86» at the end. Then click «save» and Unity will build your project and open the game location in File Explorer.
Step 3: Exporting Your Game
After you have built the game and Unity has opened the file location, you will find your game, which is playable now if you click on it and a .Data folder. At this point, you can either use some third party software to create an installer for your game, or you can make it a zip folder, send it to your friends and ask them to unzip it. If you would like to make an installer, head over to Brackeys on Youtube, but for now we are going to make it into a zip folder, which is really easy. All you need to do is select the .exe file and the .data folder, right click go to Send To > Compressed (Zipped) folder. This will create a zip folder that you can distribute via something like Mediafire or Dropbox.
And you’re done! If you followed along correctly you should have just successfully built and exported your first game on Unity. Once again I’d like to thank Brackeys the Youtuber, for teaching me how to do this in the first place.
Universal Windows Platform (UWP) build settings
To create a build for UWP, go to Build Settings (menu: File > Build Settings). In the Platform list, select Universal Windows Platform An IAP feature that supports Microsoft’s In App Purchase simulator, which allows you to test IAP purchase flows on devices before publishing your application. More info
See in Glossary , then select the Switch Platform button.
Note: Universal Windows Platform only shows in the Platform list if you’re using Unity on a Windows computer.
Unity doesn’t support Windows Phone development.
Building UWP applications with Unity
The main workflow when building a game or application for UWP using Unity is as follows:
When you click Build in the Build Settings window:
Unity generates and exports a Visual Studio Project.
Open the generated Project’s .sln file in Visual Studio.
Use Visual Studio to build your final application.
When you click Build And Run, Unity builds an app executable that can run independently.
UWP Build Settings
Use these settings to configure how Unity builds your application.
| Setting | Function | |
|---|---|---|
| Target Device | Choose from the following options to build your app for any device, or select a specific device: Any device, PC, Mobile, or HoloLens. | |
| Architecture | Select the type of CPU to build for (only applies to Build And Run). | |
| x64 | 64-bit CPU. | |
| x86 | 32-bit CPU. | |
| ARM | 32-bit ARM CPU. | |
| ARM64 | 64-bit ARM CPU. | |
| Build Type | Select the type of Visual Studio project or build to generate. | |
| XAML Project | Visual Studio project that integrates Unity within a full XAML environment. This results in some performance loss, but lets you use XAML elements in your application. | |
| D3D Project | Visual Studio project that integrates Unity in a basic app window. This results in the best performance. | |
| Executable Only | Hosts the project in a pre-built executable for rapid iteration. This setting has the quickest iteration speed because it doesn’t require you to build the generated project in Visual Studio. It offers the same performance as D3D Project builds. | |
| Target SDK Version | The Windows 10 SDK installed on the local PC to build the application against. This setting is only relevant when calling Windows 10 APIs directly from scripts. Note: Unity requires the base Windows 10 SDK version 10.0.10240.0 or higher for building UWP apps, and doesn’t support Windows 8/8.1 SDKs. | |
| Minimum Platform Version | Minimum Windows 10 release version required to run the app. Note: This setting is only relevant if you’re using Windows features or APIs that aren’t available in the base Windows 10 version (10.0.10240). | |
| Visual Studio Version | Target a specific Visual Studio release if you have multiple versions installed. | |
| Build and Run on | Select the target device or transport to deploy and launch the app during Build And Run. | |
| Local Machine | Deploys and launches the app on the local PC. | |
| USB Device | Deploys and launches the app on a remote device over a USB connection. | |
| Remote Device (via Device Portal) | Deploys and launches the app to a connected device over the Device Portal transport. To deploy over the Device Portal, you must enter the connection and authentication information in these additional fields: — Device Portal Address (required) For more information, see documentation on Windows Device Portal deployment. | |
| Build Configuration | Select the build type (only applies to Build And Run). Note: These build configurations are the same as those available in the Visual Studio project that Unity generates. | |
| Debug | Produces a build that contains additional code you can use for debugging, and enables the Profiler A window that helps you to optimize your game. It shows how much time is spent in the various areas of your game. For example, it can report the percentage of time spent rendering, animating or in your game logic. More info See in Glossary for your build. | |
| Release | Produces a build that has debug code stripped out, and enables the Profiler for your build. | |
| Master | Produces a build that is fully optimized for release. | |
| Copy References | Disable this setting to allow the generated solution to reference Unity files from Unity’s installation folder instead of copying them to the build folder. This can save up to 10 GB of disk space, but you can’t copy the build folder to another PC. Unity also builds your application faster when you disable this setting. | |
| Copy PDB files | Enable this setting to include Microsoft program database (PDB) files in the built Standalone Player. PDB files contain debugging information for your application, but might increase the size of your Player. For more information, see documentation on Windows debugging. | |
| Development Build A development build includes debug symbols and enables the Profiler. More info See in Glossary | A development build includes scripting debug symbols. When you select the Development Build setting, you can also select the Autoconnect Profiler, Script Debugging, and Scripts Only Build setting. It also enables the DEVELOPMENT_BUILD #define. For more information about #define directives, see documentation on Platform dependent compilation. | |
| Autoconnect Profiler | Automatically connect the Profiler to the build. Only available if you enable the Development Build setting. For more information on the Profiler, see Profiler overview. | |
| Deep Profiling | When you enable Deep Profiling, Unity profiles all of your script code and records all function calls. This is useful to pinpoint performance issues with your game code. However, it uses a lot of memory and might not work with very complex scripts A piece of code that allows you to create your own Components, trigger game events, modify Component properties over time and respond to user input in any way you like. More info See in Glossary . For more information, see documentation on deep profiling. | |
| Script Debugging | Attach script debuggers to the Player remotely. Only available if you enable the Development Build setting. | |
| Scripts Only Build | Enable this setting to build just the scripts in the current Project. Only available if you enable the Development Build setting. Once enabled, Unity only rebuilds the scripts in your application, and leaves data files from a previously executed build intact. It significantly improves iteration times if you only change the code in your application. | |


