- EasyCapViewer for Mac
- Description
- Free Download
- features
- changelog
- A lightweight, low latency, high performance driver application that was developed in order to provide Mac OS X support for the EasyCap DC60/002 device
- Debut Video Capture Software 4+
- NCH Software
- Screenshots
- Description
- Using EasyCAP to Grab VHS and Consoles on the Mac
- Cap Made Easy
- Configuring EasyCAP
- Recording
- Conclusion
- One More Gadget
- EasyCAP for Mac OS with USB 2.0 Audio/Video Capture is finally here
- Quick Camera 4+
- Simon Guest
- Screenshots
- Description
- What’s New
- Ratings and Reviews
- QUESTION
- Developer Response ,
- Simple interface for a USB microscope
- Perfect Job!
- App Privacy
- Data Not Collected
EasyCapViewer for Mac
Description
Free Download
features
changelog
A lightweight, low latency, high performance driver application that was developed in order to provide Mac OS X support for the EasyCap DC60/002 device
EasyCapViewer is a lightweight tool that was developed in order to help you use your EasyCap DC60/002 device on the Mac platform.
EasyCapViewer includes full support for audio as well as video rendering, complete with low latency features.
Furthermore, EasyCapViewer adds support for multiple formats such as SECAM, NTSC and PAL, while also working with S-Video and Composite input.
In addition, EasyCapViewer also allows you to record movies in the popular MOV format, as well as adjust brightness, color, tint and contrast.
Beside that, it includes multiple de-interlacing options suitable for customizing the selected video files. EasyCapViewer uses OpenGL display in order to provide the best performance for the available videos.
Moreover, it includes complete support for anamorphic widescreen as well as other aspect ratios. If needed, you can also crop any of the available videos.
In the Configure Device window you can enter the desired format, deinterlace option and the available source. You can also choose to customize the contrast, color, and tint values if you want to.
In the same window you can change the audio source, with an option to upconvert from mono, if available, based on the chosen input file. You can also choose to customize the current volume, if needed.
Recording with EasyCapViewer is also very easy, you just need to select Start Recording from the file menu and then start the recording process. If the recorded video occasionally stutters, you can use the Motion JPEG codec and lower the video quality.
Источник
Debut Video Capture Software 4+
NCH Software
-
- 3.1 • 17 Ratings
-
- Free
- Offers In-App Purchases
Screenshots
![]()
![]()
![]()
![]()
![]()
Description
Debut Video Capture Software
Debut Video Capture Software for Mac is a screen recording app that allows you to easily record and capture video from any webcam, recording device, or screen. Whether creating a professional video recording for work or a video for personal use, Debut Screen Recorder has an array of production features that will help to create a flawless screen recording. Some of these features include:
+ Saving videos in many file formats, including: avi, flv, mp4, mpg, wmv, mov, and more
+ Capturing video from a webcam, network IP camera, and other video input devices
+ Enjoy camera overlay options
+ Adding text options and timestamps
+ Adjustable color settings, resolution, and frame rate
+ Pulling individual still-frames from video recording
+ Highlighting mouse option to show the location of the cursor
+ Selecting from a wide variety of video effects such as time lapse.
Debut for Mac OS X is the perfect screen recorder to capture your videos regardless of the project or its size.
Some Product Applications:
— Streaming online videos
— How-To videos
— Video conferences
— Process documentation
Источник
Using EasyCAP to Grab VHS and Consoles on the Mac

The EasyCAP video-grabbing gizmo is cheap to buy, almost everywhere and adds a really useful functionality to your computer. Better yet, it works perfectly on Yosemite to allow you to capture game consoles, VHS video, DV tapes, etc., directly into your Mac using MP4.
The EasyCAP DC60 is a cheap old school video capturing device which is perfect for capturing old school video sources. If you have a ton of old video tapes or have some old video game consoles you want to grab walkthrough videos from, this is one of the very best cost-effective ways to do that.
In this article we show you how to get set up and a few tips on how to configure the sound and video for the best performance. For this test we will be using an old Ms Pac Man video game we found in the drawer.

Cap Made Easy
The EasyCAP is a USB device with video and audio input sockets to capture and store video on your computer. First, you need to go get the driver for Mac OS X, and that can be obtained here.
Installing the hardware is easy; just plug it into an available USB slot. This needs to be a powered slot, so no dumb USB 1.0 hubs will do. Install and run the driver from the downloaded file, and if you haven’t plugged your EasyCAP into the computer, you will be advised to do so.
Now all you have to do is plug the yellow composite Video Out of your device to the yellow video plug on the EasyCAP.

Configuring EasyCAP
If it were that simple, then you could get started right away, but there are a couple of extra steps before you can play and record. First, you have to set the video standard. This test was conducted in a PAL country, the UK, but your mileage may vary.

If you get a weird picture which seems black and white, fuzzy and weirdly offset on the screen, then it’s likely your video standard is not right. You will spot the right one, even if you don’t know what your local standard is; just select one after the other and the screen will pop into colour when you have the right one.

The next thing to set is the deinterlace. Old time video signals were interlaced, which doubled the amount of lines available by interlacing two frames and flicking rapidly between them. The downside to this was that it made the screen flicker. These days we use progressive scan. You can combine the two images for smooth (ish) progressive images using the deinterlace setting. This is just trial and error on a case-by-case basis. Just try each one to see which is the best fit.

Finally, on the video side, you have to choose the source. This is effectively a choice between composite and SVHS or S-video. S-video is a small 4 pin DIN connector, and you will only find these on certain video cards and S-VHS recorders, so for the most part you will be using the yellow composite video in.

Sound is a separate issue. You can plug the sound into the white lead for mono or the white and red leads for stereo, but this didn’t work too well with the little Ms Pac Man for some reason, so in the end we added a small USB sound card like this one and a phono to a 3.5 inch jack converter like this one, and it worked perfectly. The cheap audio on the Ms Pac Man was really high, so we had to adjust the audio input which is available in the “Settings -> Sound” section of the Mac Settings app.
Recording
Once you have a decent level on the sound, and you have the picture coming into the EasyCAP clearly and with the correct TV standard, you can record your video.
Select “File -> Start Recording” (Command + S), and you will be asked where you want to store the recording and what format to record in. MP4 is better for the Mac, so that was our choice. To stop the recording select “File -> Stop Recording.”

There are other display options on the menu such as Fullscreen and aspect ratios. If you really want to squash the image and play it on full screen on 16:9, feel free to do so, but bear in mind what we said in our recent piece on aspect ratios.

Conclusion
This is the cheapest and quickest way to grab Standard Definition video into a Mac. To grab HD video from a game console requires a lot more hardware, but perhaps we’ll go into that some other time.
If you have any tips involving the capture of SD video, then please feel free to share them in the comments below.
Phil South has been writing about tech subjects for over 30 years. Starting out with Your Sinclair magazine in the 80s, and then MacUser and Computer Shopper. He’s designed user interfaces for groundbreaking music software, been the technical editor on film making and visual effects books for Elsevier, and helped create the MTE YouTube Channel. He lives and works in South Wales, UK.
Источник
One More Gadget
EasyCAP for Mac OS with USB 2.0 Audio/Video Capture is finally here
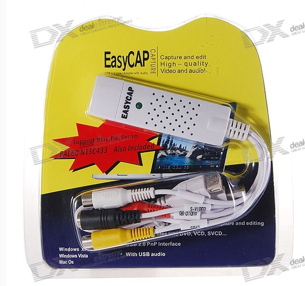
Well, it’s finally arrived. An EasyCAP (Easy CAP) for Mac OS with USB 2.0 Audio/Video Capture/Surveillance Dongle for under $26 bucks.
Everything works pretty much like the original, (which I reviewed here) however all of those with a Mac OS simply plug and play! So, yah. Enjoy…In the meantime I guess you could always spend your free time on chopping veggies?
Here are the features in perfect Engrish:
– EasyCAP USB 2.0 1 channel DVR capture dongle is the safety system of ideal design for home/office/shop guard or baby care purpose; users can do their own security by easy installation. It is the costeffective solution to replace commercial VCR tape recorder, which also supports stable digitize video record and easy manages the recorded data via index of date and time. That’s it, make your life more safety and easier.
– Supports NTSC, PAL, SECAM Video format including PAL60,NTSC433
– Supports high quality video resolution
– Capture & edit high quality video & audio (No sound card needed)
– Include Professional and easy to learn & used video editor software: Ulead Video Studio 8.0 SE DVD
– Plug & play
– Applying to internet conference / net-meeting
– Complies With Universal Serial Bus Specification Rev. 2.0
– Input: S-Video/Audio L+R/CVBS (Composite Video Broadcast Signal)
– Support Windows 2000/XP/Vista, Linux(V4L), MacOS
– USB bus powered
– USB extension cable included
*Update!
There’s a piece of software out there called the EasyCap Viewer. It works great with the original EZCap Viewer DC60 for Mac OSX. So save yourself some money and get the original EasyCap and download the free EasyCap viewer.
Источник
Quick Camera 4+
Simon Guest
Screenshots
![]()
![]()
![]()
![]()
Description
Quick Camera is a utility to display the output from any supported USB web cameras. Quick Camera can be used for video conferences or presentations where you need to show an external device to your audience via the USB camera.
Quick Camera supports mirroring (normal and reversed, both vertical and horizontal), can be rotated, resized to any size, and the window can be placed in the foreground.
What’s New
— Added option to fix the aspect ratio when resizing the window
— Added support for full screen
Ratings and Reviews
QUESTION
I used to use this app often, and it was good! It did exactly what it says it does, and my my work flow eaiser. I was happy with it.
ALTHOUGH, I recently began doing this again, and was dissapointed to be met with a error message as soon as I opened the app saying
«Unfortunately there was an error when trying to acsess the camera. Try again or acsess a differnt one.»
I don’t understand, when I go to the preferneces the facetime camera is already selected, which is the only camera and the same camera im useing and have always used. Any idea what could have cause this error? I liek the app, but i can’t use it now 🙂 please let me know! thankyou
Developer Response ,
Thank you for your question. If you are using Catalina, please check your security settings. Go to System Preferences / Security & Privacy / Camera — and make sure that Quick Camera has access to the camera.
Simple interface for a USB microscope
I bought a simple USB microscope. Quick Camera gives you the image on the screen. No fuss. It used to require a screen capture to save an image. Now image save is an option.
Only 4 stars because there are no preferences to set a file name prefix. Save always brings up a dialog. For microscopy it is often the case you want to do a bunch of rapid images. A single keypress should be allowed to get pics one after another. A C format string with variables for time, sequece, next number, etc. would be a good addition.
Perfect Job!
I was thinking yesterday — wouldn’t it be cool to have an app that could show the camera? And there I found this amazing little tool. Does everything really well. Even allows us to mirror the display. Extremely happy and will be using this a lot.
Only thing I noticed is that it is best to start this up before other camera applications, to make sure that you can capture the camera stream that you want.
Oh also, I was looking for a way to make this app float on top and couldn’t find any. After some head scratching I realized that it was already floating on top when I had it in borderless mode.
One feature that would be nice is to be able to resize the window in proportion to the video content, in other words, without black bars on either the top or sides. But that’s a small thing to work around.
App Privacy
The developer, Simon Guest , indicated that the app’s privacy practices may include handling of data as described below. For more information, see the developer’s privacy policy.
Data Not Collected
The developer does not collect any data from this app.
Privacy practices may vary, for example, based on the features you use or your age. Learn More
Источник


