- VirtualBox не видит USB в Ubuntu
- Давайте еще раз
- Выводы
- How to Enable USB in VirtualBox
- How to Install the VirtualBox Extension Pack
- Enabling USB Access to User
- Enabling USB Support in VirtualBox
- If You Appreciate What We Do Here On TecMint, You Should Consider:
- How to Boot a USB Flash Drive in VirtualBox
- Make VirtualBox Boot from a USB Flash Drive (Windows Host)
- Getting Persistence to work in VirtualBox (Windows)
- Make VirtualBox Boot from a USB Flash Drive (Linux Host)
- Make VirtualBox Boot from a USB Flash Drive (Mac OS X)
- How to Access USB from VirtualBox Guest OS
- Step 1: Install Virtualbox Extension Pack
- Step 2: Add Your User to vboxusers Group
- Step 3: Enable USB Controller and Add New USB filter
- Step 4: Access USB from VirtualBox
- How to Boot VM From USB Stick
- Wrapping Up
VirtualBox не видит USB в Ubuntu
Для начала нужно проверить настройки VirtualBOX, и версии расширения. Это важная часть процесса.
Для решения проблемы группы используйте команды sudo addgroup vboxusers и sudo adduser USERNAME vboxusers, где USERNAME — ваше имя пользователя. Сделайте обе эти вещи на хосте. Перезагрузите устройство, чтобы это вступило в силу.
Обратите внимание, что vboxsf, который вы указали в своих группах, фактически является типом файловой системы, используемым командой mount.
Загрузите правильный пакет расширения с этой страницы и при появлении запроса откройте его с помощью Virtualbox.
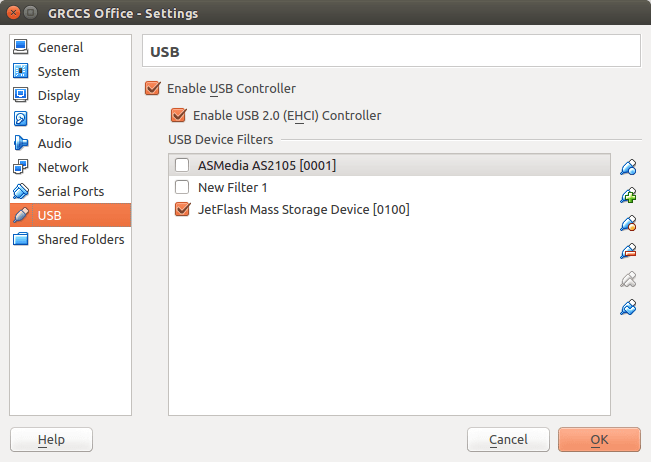
Последним шагом является настройка поддержки USB на вашей виртуальной машине, открытие настроек виртуальной машины в виртуальном боксе с отключением виртуальной машины, выбор USB и включение USB 2.0, а также добавление и активация фильтров по мере необходимости. Смотри ниже:
Примечание. В недавнем прошлом контроллеры USB 3.0 (XHCI) не поддерживались, но эта функциональность была добавлена в Virtual Box 5.0
Дополнительная информация доступна в официальной документации. Если это не сортирует ее для вас, напишите мне, и я расширю ее.
Чтобы добавить пользователя в группу, выполните следующие действия:
sudo usermod -aG vboxusers «Username»
Получено сообщение об ошибке:
usermod: group ‘vboxusers’ does not exist
Мои группы следующие:
karl adm cdrom sudo dip plugdev lpadmin sambashare vboxsf
Я использую VirtualBox 5.0.14, Ubuntu 17.04, гостевые дополнения 5.0.14 и расширение 5.0.14. Я вижу свое USB-устройство в моей операционной системе нормально. То есть все работает.
То есть если VirtualBox не видит USB в Ubuntu вам нужно проверить такие настройки как:
- Установленные расширения
- Группа vboxuser
Сохранение этих настроек
Давайте еще раз
Сначала вам нужно убедится, что у вас есть пакет расширения Virtualbox, это позволяет использовать usb 2.0. usb 3.0 еще не поддерживается.
Добавили себя в группу vboxuser:
Войдите в систему, чтобы изменения вступили в силу.
Включите контроллер USB 2.0 (EHCI) в настройках для вас VM
Выводы
Если программа VirtualBox не видит USB в Ubuntu, то на это может быть несколько причин, которые мы перечислили в списке выше. Они соответственно и являются полным и быстрым решением этой ошибки.
Информация была для вас полезной? — Поделитесь ею с другими на своей странице в социальных сетях.
Если вы нашли ошибку, пожалуйста, выделите фрагмент текста и нажмите Ctrl+Enter.
Источник
How to Enable USB in VirtualBox
If your data center depends on VirtualBox and your virtual machines depend on the USB device, you’ve perhaps noticed that USB doesn’t support by default unless you’ve manually enabled it.
In this article, we will explain to you how to enable USB support on Virtualbox. The current version of VirtualBox 6.0 comes with support for USB 3.0, and to take advantage of it, you need to install the latest version of VirtualBox Extension Pack.
This tutorial presumes that you already installed VirtualBox on your Linux and VirtualBox guest additions on your virtual machines. If you haven’t, you can install it using the following articles.
How to Install the VirtualBox Extension Pack
To install the latest version of Extension Pack, head over to the Virtualbox Downloads page and grab the file for All supported platforms.
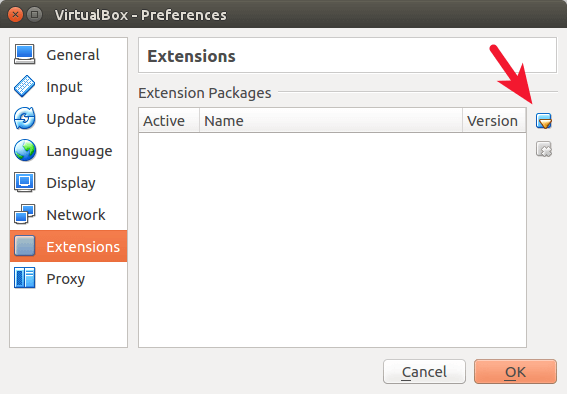
1. Once you’ve downloaded, open up VirtualBox –> Click File –> Preferences in the Menu.
![]() VirtualBox Preferences
VirtualBox Preferences
2. Next, click on the Extension tab and then click the + sign.
![]() Virtualbox Extension
Virtualbox Extension
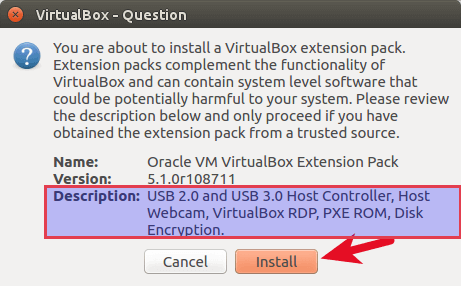
3. Select the downloaded Extension Pack and install it as shown.
![]() Install Virtualbox Extension Pack
Install Virtualbox Extension Pack
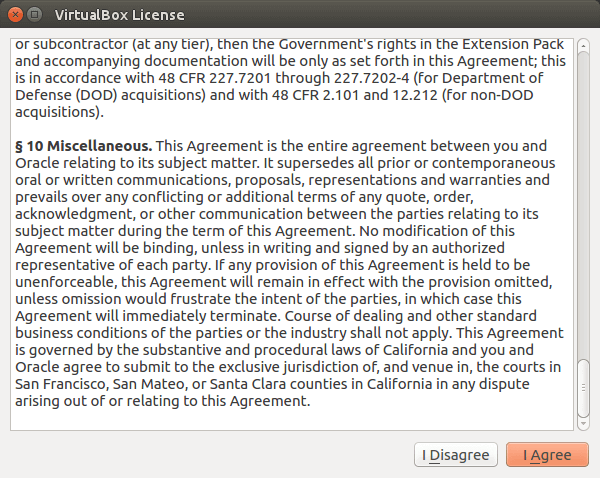
4. Scroll through the Virtualbox License and then click I Agree button to install it.
![]() Virtualbox License Agreement
Virtualbox License Agreement
5. Enter your sudo password and allow the installation to finish.
![]() Installing Virtualbox Extension Pack
Installing Virtualbox Extension Pack ![]() Installed Virtualbox Extension Pack
Installed Virtualbox Extension Pack
Enabling USB Access to User
To allow a user to access the USB subsystem, you need to add the user (running VirtualBox) to the vboxusers group using the following command.
Where USERNAME is the name of the user running the VirtualBox.
![]() Add User to vboxusers Group
Add User to vboxusers Group
Once the command runs successfully, logout and log back into the system.
Enabling USB Support in VirtualBox
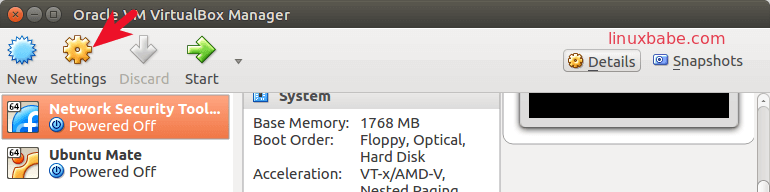
Start up VirtualBox, right-click on the virtual machine that needs access to a USB device, and click Settings.
![]() VirtualBox VM Settings
VirtualBox VM Settings
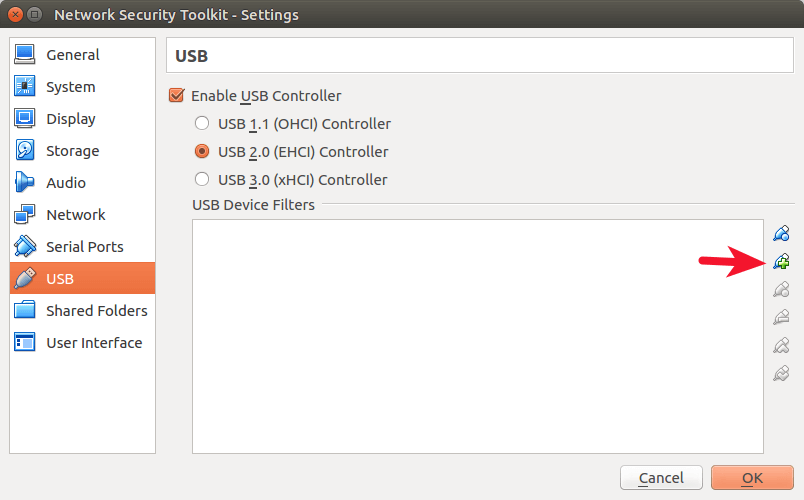
In the virtual machine’s Setting tab, click on USB to see the available USB devices. Click on the + sign to add a new device.
![]() Enable USB Support in VM
Enable USB Support in VM
Once USB device added, start up the virtual machine to have access to the data on the USB device. If you want to enable more USB devices, go back into the Settings –> USB and add the devices.
If You Appreciate What We Do Here On TecMint, You Should Consider:
TecMint is the fastest growing and most trusted community site for any kind of Linux Articles, Guides and Books on the web. Millions of people visit TecMint! to search or browse the thousands of published articles available FREELY to all.
If you like what you are reading, please consider buying us a coffee ( or 2 ) as a token of appreciation.

We are thankful for your never ending support.
Источник
How to Boot a USB Flash Drive in VirtualBox
Last updated: August 20, 2021
How to Boot a USB Flash Drive in VirtualBox. This process will allow you to run your Portable Linux from the Flash Drive or external hard drive while still running from within a Windows, Linux, or Mac OS X Host. By default VirtualBox does not support USB Booting. However, you can make the VM Virtual Machine USB Boot by creating and mapping a virtual machine (.vmdk file) to the USB Drive. Essentially creating a VirtualBox Bootable USB.
VirtualBox Website: Project Homepage
- Windows Host
- Linux Host
- Mac OS X Host
Make VirtualBox Boot from a USB Flash Drive (Windows Host)
- Download and run VirtualBox (Installing to the default path).
- You’ll need to use the command line to perform steps 3-6,
To open a command prompt;
1.) From the Windows ‘⌕ Type here to search’ box, type cmd.exe
2.) Then click Run as administrator - At the command prompt, type diskmgmt.msc and press Enter to open the Windows Disk Management Tool.
Then, Identify your USB Disk #
Now, back at the command line, type
VBoxManage internalcommands createrawvmdk -filename «%USERPROFILE%»\.VirtualBox\usb.vmdk -rawdisk \\.\PhysicalDrive #
If all goes well, VirtualBox should now be emulating, booting, and running your USB device from within Windows.
Getting Persistence to work in VirtualBox (Windows)
At first the USB flash drive might not work exactly like it does when booted natively. Things like Ubuntu’s casper persistent feature won’t work. Some distributions might not even boot, or will boot with errors. This is because the volumes on the device are mounted by Windows, preventing VirtualBox from gaining full access. In order to fix these issues, you can use a tool called LockDismount. Then simply run the tool (using the following steps), prior to starting the Virtual Machine that is tied to your USB.
1. Download the LockDismount tool
2. Launch the tool right before starting your VirtualBox VM
3. Select your USB from the drop-list, then Press Lock it!
(optionally you can check Force Dismount)
Now your flash drive should be able to boot in VirtualBox exactly as it does when booted natively on a physical machine. 😉
Make VirtualBox Boot from a USB Flash Drive (Linux Host)
The following process to boot a USB flash drive in VirtualBox was performed from a running Ubuntu Operating environment. This method should also work for Debian and other Ubuntu Linux based Operating systems.
- Open a Terminal and type sudo apt install virtualbox
(note which device is your USB drive I.E. /dev/sd x )
Replacing x with your actual device letter found from step 2, type
sudo vboxmanage internalcommands createrawvmdk -filename
/usb.vmdk -rawdisk /dev/sd x
If all went smoothly, you should now be able to boot a USB flash drive from VirtualBox on the Linux Host.
Make VirtualBox Boot from a USB Flash Drive (Mac OS X)
- Download and install VirtualBox for OS X Hosts via the .dmg file.
- Open a Terminal and type diskutil list
(make note of which disk is your USB drive I.E. /dev/disk#)
Replacing # with the disk number of your USB drive, type
vboxmanage internalcommands createrawvmdk -filename
Next, Proceed to create a New Virtual Machine.
When prompted for a Virtual Hard Disk, tick use existing hard disk.
Then, browse to your Home directory and select usb.vmdk.
You should now be able to boot a USB flash drive in VirtualBox on the Mac OS X host, while retaining the ability to boot from the drive natively as well.
Notes: When first attempting to boot a USB Flash Drive in VirtualBox from within Windows, you may receive an Error similar to this:
Failed to get device handle and/or partition ID for 0000000001e92d20
(hPartitionDevice=0000000000000cd5, Last=0xc0000002/1)
(VERR_NEM_VM_CREATE_FAILED).
In which case, you need to set hypervisor launch type to off. To do this;
- Open a command prompt as an Administrator. I.E; (Win Key + X) and then press A.
- Type or Copy and Paste the following command string into the terminal, then press Enter.
bcdedit /set hypervisorlaunchtype off
Источник
How to Access USB from VirtualBox Guest OS
There are times when you need to access USB from VirtualBox. For instance, you installed Kali Linux in VirtualBox and a USB wireless network adapter is required to do penetration testing. This simple tutorial will show you how to easily access your USB thumb drive, USB hard disk, or USB wireless network adapter in your Virtualbox guest OS.
It’s assumed that you have already set up VirtualBox on your host OS.
Step 1: Install Virtualbox Extension Pack
Shut down your guest OS.
VirtualBox by default only supports USB 1.x devices. VirtualBox extension pack includes support for USB 2.0 and USB 3.0 devices, VirtualBox RDP and PXE boot for Intel cards. You must install the extension pack with the same version as your installed version of VirtualBox.
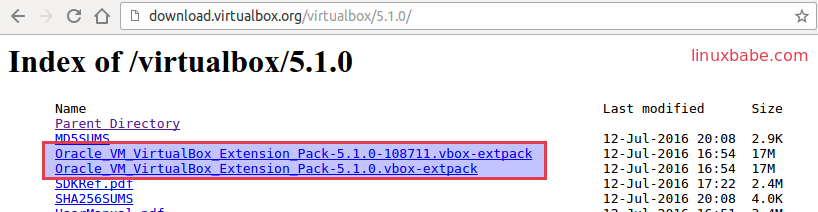
To check the version of your VirtualBox, open VirtualBox manager, then go to Help > About VirtualBox . Once you know the version number, go to http://download.virtualbox.org/virtualbox/ in your web browser to download VirtualBox extension pack which ends with .vbox-extpack extension.
Once downloaded, in VirtualBox manager go to File > Preferences > Extensions. Click the add button to add VirtualBox extensions pack from your hard disk.
Once you choose the extension pack, click Install button to install it. You can see what functionalities it adds to your virtual machine in the description.
Then click Agree to accept VirtualBox license.
So now Virtualbox USB support is enhanced.
Step 2: Add Your User to vboxusers Group
In order for VirtualBox to see your USB devices, your user must be in the vboxusers group. Open up a terminal window (Ctrl+Alt+T), then run this command. Replace your-username with your real username. (I assume your host OS is a Linux distro such as Ubuntu, instead of Windows).
Now log out and log back in so the changes can take effect. To check which groups your user account belongs to, run:
Step 3: Enable USB Controller and Add New USB filter
Click settings for your virtual machine.
Select USB on the left pane. Then choose USB 2.0 controller or USB 3.0 controller. Note that you can only enable one type of controller. Next, insert your USB device to your host machine and click the add button to add new USB filter.
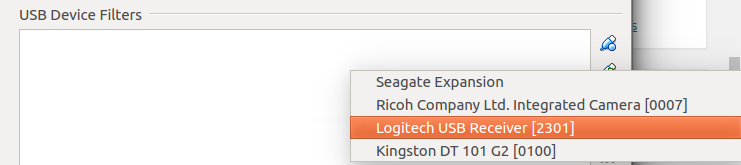
Choose your USB device and Click OK.
Step 4: Access USB from VirtualBox
Now boot up your virtual machine and you will see your USB device in the guest OS. It should be noted that your host OS won’t be able to see the USB device while it’s being used by VirtualBox.
To unmount USB device from guest OS, select devices > USB and uncheck your USB device.
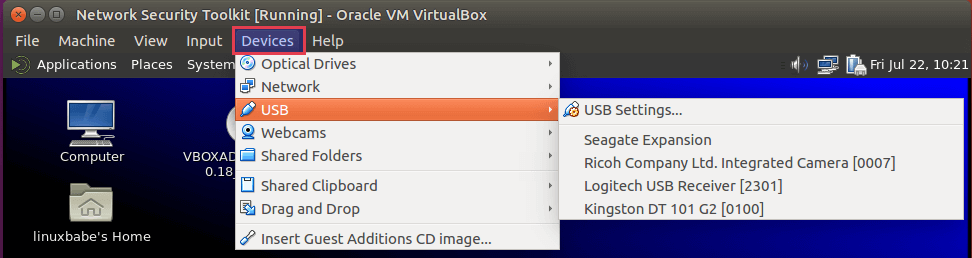
To mount USB in VirtualBox again, simply select your USB drive in the list.
How to Boot VM From USB Stick
Let’s say you created a bootable USB stick and you want to boot your VirtualBox VM from the USB stick. Virtualbox allows your VM to access raw hard disk, by creating a special VMDK image. I assume your host OS is Linux.
First, find the device name of your USB stick.
Mine is /dev/sdb . Then run the following command to create a VMDK image file /tmp/usb.vmdk .
Change the ownership of this file. Replace username with your real username.
Then add your user account to the disk group, so you can access raw hard disk.
Log out and log back in for the changes to take effect. Then open Virtualbox and attach the raw disk ( /tmp/usb.vmdk ) to your VM.
Wrapping Up
Does this post helped you access USB drive in VirtualBox guest OS? Let me know in the comments section below. As always, if you found this post useful, subscribe to our free newsletter or follow us on Google+, Twitter or like our Facebook page.
Источник


