- Get started with Node.js web frameworks on Windows
- Prerequisites
- Get started with Next.js
- Welcome to Next.js!
- This is my new Next.js app!
- This is my new Next.js app! . Save this change and notice that a «Failed to compile» error will display in your browser, and in your terminal, letting your know that a closing tag for
- is expected. Replace the
- Get started with Nuxt.js
- Get started with Gatsby.js
- Hi people
- Hi (Your Name)!
- Hi (Your Name)! . Save this change and notice that a «Failed to compile» error will display in your browser, and in your terminal, letting your know that a closing tag for
- Set up your Node.js development environment directly on Windows
- Install nvm-windows, node.js, and npm
- Alternative version managers
- Install your favorite code editor
- Install Git (optional)
Get started with Node.js web frameworks on Windows
A step-by-step guide to help you get started using Node.js web frameworks on Windows, including Next.js, Nuxt.js, and Gatsby.
Prerequisites
This guide assumes that you’ve already completed the steps to set up your Node.js development environment with WSL 2, including:
- Install Windows 10 Insider Preview build 18932 or later.
- Enable the WSL 2 feature on Windows.
- Install a Linux distribution (Ubuntu 18.04 for our examples). You can check this with: wsl lsb_release -a
- Ensure your Ubuntu 18.04 distribution is running in WSL 2 mode. (WSL can run distributions in both v1 or v2 mode.) You can check this by opening PowerShell and entering: wsl -l -v
- Using PowerShell, set Ubuntu 18.04 as your default distribution, with: wsl -s ubuntu 18.04
Get started with Next.js
Next.js is a framework for creating server-rendered JavaScript apps based on React.js, Node.js, Webpack and Babel.js. It is basically a project boilerplate for React, crafted with attention to best practices, that allows you to create «universal» web apps in a simple, consistent way, with hardly any configuration. These «universal» server-rendered web apps are also sometimes called “isomorphic”, meaning that code is shared between the client and server.
To create a Next.js project, which includes installing next, react, and react-dom:
Open your WSL terminal (ie. Ubuntu 18.04).
Create a new project folder: mkdir NextProjects and enter that directory: cd NextProjects .
Install Next.js and create a project (replacing ‘my-next-app’ with whatever you’d like to call your app): npm create next-app my-next-app .
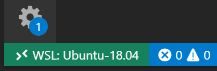
Once the package has been installed, change directories into your new app folder, cd my-next-app , then use code . to open your Next.js project in VS Code. This will allow you to look at the Next.js framework that has been created for your app. Notice that VS Code opened your app in a WSL-Remote environment (as indicated in the green tab on the bottom-left of your VS Code window). This means that while you are using VS Code for editing on the Windows OS, it is still running your app on the Linux OS.
There are 3 commands you need to know once Next.js is installed:
- npm run dev for running a development instance with hot-reloading, file watching and task re-running.
- npm run build for compiling your project.
- npm start for starting your app in production mode.
Open the WSL terminal integrated in VS Code (View > Terminal). Make sure that the terminal path is pointed to your project directory (ie.
/NextProjects/my-next-app$ ). Then try running a development instance of your new Next.js app using: npm run dev
The local development server will start and once your project pages are done building, your terminal will display «compiled successfully — ready on http://localhost:3000». Select this localhost link to open your new Next.js app in a web browser.

Open the pages/index.js file in your VS Code editor. Find the page title
Welcome to Next.js!
This is my new Next.js app!
Let’s see how Next.js handles errors. Remove the
This is my new Next.js app! . Save this change and notice that a «Failed to compile» error will display in your browser, and in your terminal, letting your know that a closing tag for
is expected. Replace the
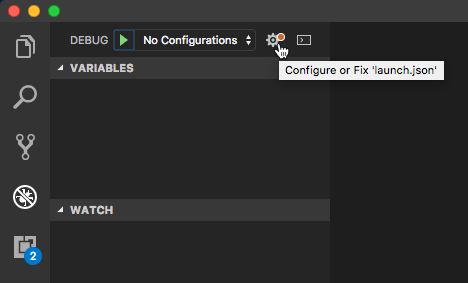
You can use VS Code’s debugger with your Next.js app by selecting the F5 key, or by going to View > Debug (Ctrl+Shift+D) and View > Debug Console (Ctrl+Shift+Y) in the menu bar. If you select the gear icon in the Debug window, a launch configuration ( launch.json ) file will be created for you to save debugging setup details. To learn more, see VS Code Debugging.
To learn more about Next.js, see the Next.js docs.
Get started with Nuxt.js
Nuxt.js is a framework for creating server-rendered JavaScript apps based on Vue.js, Node.js, Webpack and Babel.js. It was inspired by Next.js. It is basically a project boilerplate for Vue. Just like Next.js, it is crafted with attention to best practices and allows you to create «universal» web apps in a simple, consistent way, with hardly any configuration. These «universal» server-rendered web apps are also sometimes called “isomorphic”, meaning that code is shared between the client and server.
To create a Nuxt.js project, which will include answering a series of questions about what sort of integrated server-side framework, UI framework, testing framework, mode, modules, and linter you would like to install:
Open your WSL terminal (ie. Ubuntu 18.04).
Create a new project folder: mkdir NuxtProjects and enter that directory: cd NuxtProjects .
Install Nuxt.js and create a project (replacing ‘my-nuxt-app’ with whatever you’d like to call your app): npm create nuxt-app my-nuxt-app
The Nuxt.js installer will now ask you the following questions:
- Project Name: my-nuxtjs-app
- Project description: Description of my Nuxt.js app.
- Author name: I use my GitHub alias.
- Choose the package manager: Yarn or Npm — we use NPM for our examples.
- Choose UI framework: None, Ant Design Vue, Bootstrap Vue, etc. Let’s choose Vuetify for this example, but the Vue Community created a nice summary comparing these UI frameworks to help you choose the best fit for your project.
- Choose custom server frameworks: None, AdonisJs, Express, Fastify, etc. Let’s choose None for this example, but you can find a 2019-2020 server framework comparison on the Dev.to site.
- Choose Nuxt.js modules (use spacebar to select modules or just enter if you don’t want any): Axios (for simplifying HTTP requests) or PWA support (for adding a service-worker, manifest.json file, etc). Let’s not add a module for this example.
- Choose linting tools: ESLint, Prettier, Lint staged files. Let’s choose ESLint (a tool for analyzing your code and warning you of potential errors).
- Choose a test framework: None, Jest, AVA. Let’s choose None as we won’t cover testing in this quickstart.
- Choose rendering mode: Universal (SSR) or Single Page App (SPA). Let’s choose Universal (SSR) for our example, but the Nuxt.js docs point out some of the differences — SSR requiring a Node.js server running to server-render your app and SPA for static hosting.
- Choose development tools: jsconfig.json (recommended for VS Code so Intellisense code completion works)
Once your project is created, cd my-nuxtjs-app to enter your Nuxt.js project directory, then enter code . to open the project in the VS Code WSL-Remote environment.
There are 3 commands you need to know once Nuxt.js is installed:
- npm run dev for running a development instance with hot-reloading, file watching and task re-running.
- npm run build for compiling your project.
- npm start for starting your app in production mode.
Open the WSL terminal integrated in VS Code (View > Terminal). Make sure that the terminal path is pointed to your project directory (ie.
/NuxtProjects/my-nuxt-app$ ). Then try running a development instance of your new Nuxt.js app using: npm run dev
The local development server will start (displaying some kind of cool progress bars for the client and server compiles). Once your project is done building, your terminal will display «Compiled successfully» along with how much time it took to compile. Point your web browser to http://localhost:3000 to open your new Nuxt.js app.

Open the pages/index.vue file in your VS Code editor. Find the page title Welcome to the Vuetify + Nuxt.js template and change it to This is my new Nuxt.js app! . With your web browser still open to localhost:3000, save your change and notice the hot-reloading feature automatically compile and update your change in the browser.
Let’s see how Nuxt.js handles errors. Remove the closing tag so that your title code now looks like this: This is my new Nuxt.js app! . Save this change and notice that a compiling error will display in your browser, and in your terminal, letting your know that a closing tag for is missing, along with the line numbers where the error can be found in your code. Replace the closing tag, save, and the page will reload.
You can use VS Code’s debugger with your Nuxt.js app by selecting the F5 key, or by going to View > Debug (Ctrl+Shift+D) and View > Debug Console (Ctrl+Shift+Y) in the menu bar. If you select the gear icon in the Debug window, a launch configuration ( launch.json ) file will be created for you to save debugging setup details. To learn more, see VS Code Debugging.
To learn more about Nuxt.js, see the Nuxt.js guide.
Get started with Gatsby.js
Gatsby.js is a static site generator framework based on React.js, as opposed to being server-rendered like Next.js and Nuxt.js. A static site generator generates static HTML on build time. It doesn’t require a server. Next.js and Nuxt.js generate HTML on runtime (each time a new request comes in). They do require a server to run. Gatsby also dictates how to handle data in your app (with GraphQL), whereas Next.js and Nuxt.js leave that decision up to you.
To create a Gatsby.js project:
Open your WSL terminal (ie. Ubuntu 18.04).
Create a new project folder: mkdir GatsbyProjects and enter that directory: cd GatsbyProjects
Use npm to install the Gatsby CLI: npm install -g gatsby-cli . Once installed, check the version with gatsby —version .
Create your Gatsby.js project: gatsby new my-gatsby-app
Once the package has been installed, change directories into your new app folder, cd my-gatsby-app , then use code . to open your Gatsby project in VS Code. This will allow you to look at the Gatsby.js framework that has been created for your app using VS Code’s File Explorer. Notice that VS Code opened your app in a WSL-Remote environment (as indicated in the green tab on the bottom-left of your VS Code window). This means that while you are using VS Code for editing on the Windows OS, it is still running your app on the Linux OS.
There are 3 commands you need to know once Gatsby is installed:
- gatsby develop for running a development instance with hot-reloading.
- gatsby build for creating a production build.
- gatsby serve for starting your app in production mode.
Open the WSL terminal integrated in VS Code (View > Terminal). Make sure that the terminal path is pointed to your project directory (ie.
/GatsbyProjects/my-gatsby-app$ ). Then try running a development instance of your new app using: gatsby develop
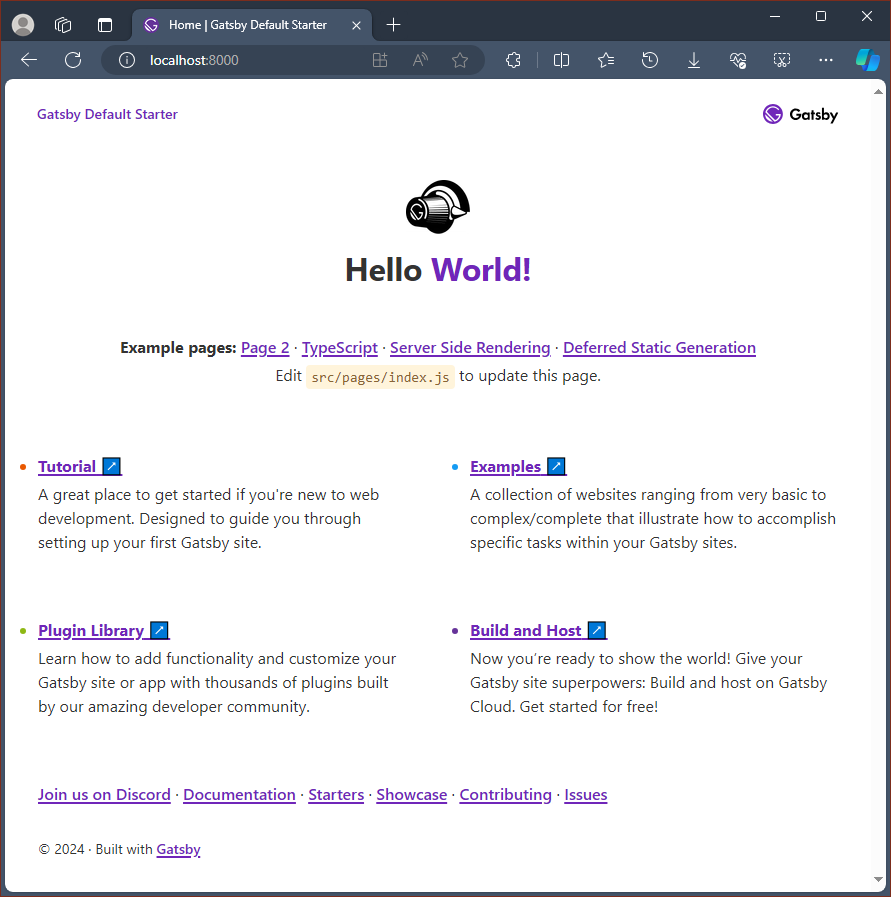
Once your new Gatsby project finishes compiling, your terminal will display that «You can now view gatsby-starter-default in the browser. http://localhost:8000/.» Select this localhost link to view your new project built in a web browser.
You’ll notice that your terminal output also let’s you know that you can «View GraphiQL, an in-browser IDE, to explore your site’s data and schema: http://localhost:8000/___graphql.» GraphQL consolidates your APIs into a self-documenting IDE (GraphiQL) built into Gatsby. In addition to exploring your site’s data and schema, you can perform GraphQL operations such as queries, mutations, and subscriptions. For more info, see Introducing GraphiQL.
Open the src/pages/index.js file in your VS Code editor. Find the page title
Hi people
Hi (Your Name)!
Let’s see how Next.js handles errors. Remove the
Hi (Your Name)! . Save this change and notice that a «Failed to compile» error will display in your browser, and in your terminal, letting your know that a closing tag for
Set up your Node.js development environment directly on Windows
The following is a step-by-step guide to get you started using Node.js in a native Windows development environment.
Install nvm-windows, node.js, and npm
There are multiple ways to install Node.js. We recommend using a version manager as versions change very quickly. You will likely need to switch between multiple versions based on the needs of different projects you’re working on. Node Version Manager, more commonly called nvm, is the most popular way to install multiple versions of Node.js, but is only available for Mac/Linux and not supported on Windows. Instead, we will walk through the steps to install nvm-windows and then use it to install Node.js and Node Package Manager (npm). There are alternative version managers to consider as well covered in the next section.
It is always recommended to remove any existing installations of Node.js or npm from your operating system before installing a version manager as the different types of installation can lead to strange and confusing conflicts. This includes deleting any existing nodejs installation directories (e.g., «C:\Program Files\nodejs») that might remain. NVM’s generated symlink will not overwrite an existing (even empty) installation directory. For help with removing previous installations, see How to completely remove node.js from Windows.)
Open the windows-nvm repository in your internet browser and select the Download Now link.
Download the nvm-setup.zip file for the most recent release.
Once downloaded, open the zip file, then open the nvm-setup.exe file.
The Setup-NVM-for-Windows installation wizard will walk you through the setup steps, including choosing the directory where both nvm-windows and Node.js will be installed.

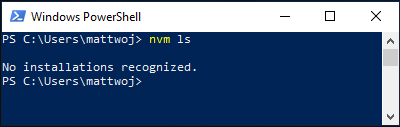
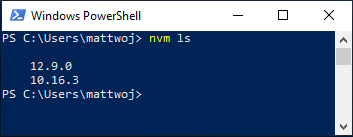
Once the installation is complete. Open PowerShell and try using windows-nvm to list which versions of Node are currently installed (should be none at this point): nvm ls
Install the current release of Node.js (for testing the newest feature improvements, but more likely to have issues than the LTS version): nvm install latest
Install the latest stable LTS release of Node.js (recommended) by first looking up what the current LTS version number is with: nvm list available , then installing the LTS version number with: nvm install (replacing with the number, ie: nvm install 12.14.0 ).
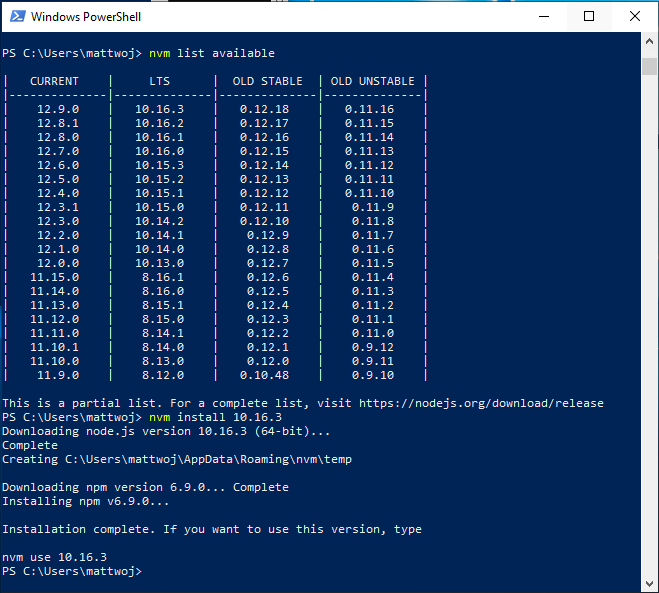
List what versions of Node are installed: nvm ls . now you should see the two versions that you just installed listed.
After installing the Node.js version numbers you need, select the version that you would like to use by entering: nvm use (replacing with the number, ie: nvm use 12.9.0 ).
To change the version of Node.js you would like to use for a project, create a new project directory mkdir NodeTest , and enter the directory cd NodeTest , then enter nvm use replacing with the version number you’d like to use (ie v10.16.3`).
Verify which version of npm is installed with: npm —version , this version number will automatically change to whichever npm version is associated with your current version of Node.js.
Alternative version managers
While windows-nvm is currently the most popular version manager for node, there are alternatives to consider:
nvs (Node Version Switcher) is a cross-platform nvm alternative with the ability to integrate with VS Code.
Volta is a new version manager from the LinkedIn team that claims improved speed and cross-platform support.
To install Volta as your version manager (rather than windows-nvm), go to the Windows Installation section of their Getting Started guide, then download and run their Windows installer, following the setup instructions.
You must ensure that Developer Mode is enabled on your Windows machine before installing Volta.
To learn more about using Volta to install multiple versions of Node.js on Windows, see the Volta Docs.
Install your favorite code editor
We recommend you install VS Code, as well as the Node.js Extension Pack, for developing with Node.js on Windows. Install them all or pick and choose which seem the most useful to you.
To install the Node.js extension pack:
- Open the Extensions window (Ctrl+Shift+X) in VS Code.
- In the search box at the top of the Extensions window, enter: «Node Extension Pack» (or the name of whatever extension you are looking for).
- Select Install. Once installed, your extension will appear in the «Enabled» folder of your Extensions window. You can disable, uninstall, or configure settings by selecting the gear icon next to the description of your new extension.
A few additional extensions you may want to consider include:
- Debugger for Chrome: Once you finish developing on the server side with Node.js, you’ll need to develop and test the client side. This extension integrates your VS Code editor with your Chrome browser debugging service, making things a bit more efficient.
- Keymaps from other editors: These extensions can help your environment feel right at home if you’re transitioning from another text editor (like Atom, Sublime, Vim, eMacs, Notepad++, etc).
- Settings Sync: Enables you to synchronize your VS Code settings across different installations using GitHub. If you work on different machines, this helps keep your environment consistent across them.
Install Git (optional)
If you plan to collaborate with others, or host your project on an open-source site (like GitHub), VS Code supports version control with Git. The Source Control tab in VS Code tracks all of your changes and has common Git commands (add, commit, push, pull) built right into the UI. You first need to install Git to power the Source Control panel.
Download and install Git for Windows from the git-scm website.
An Install Wizard is included that will ask you a series of questions about settings for your Git installation. We recommend using all of the default settings, unless you have a specific reason for changing something.
If you’ve never worked with Git before, GitHub Guides can help you get started.


