- Ubuntu Documentation
- Outline
- Introduction
- Prerequisites
- Dummy headlines
- Notes about speed
- Notes about size
- Notes about bootability
- The flash hardware
- Creating a bootable Ubuntu USB flash drive from Windows
- Rufus
- balenaEtcher
- Pendrivelinux’s Universal USB Installer
- UNetbootin
- Win32 Disk Imager
- Creating a bootable Ubuntu USB flash drive from Ubuntu
- Install and run Startup Disk Creator alias usb-creator
- UNetbootin
- mkusb — dd image of iso file to USB device safely
- Creating a bootable Ubuntu USB flash drive from Mac OSX
- Test if running in UEFI mode
- Запуск Linux с USB-накопителя: вы делаете это правильно?
- Выберите правильную флешку
- Записать Live ISO на USB
- Включить постоянные данные
- Сделать полную установку на USB
- Linux любит USB
Ubuntu Documentation
Outline
The general procedure to install Ubuntu (or Ubuntu flavour, Kubuntu, Lubuntu, Xubuntu, . ) from a USB flash drive is:
Get the correct Ubuntu installation file, ‘the iso file’, via this link or Ubuntu flavour via this link. Download the iso file into your running computer (for example into the directory Downloads in the internal drive, not into the USB flash drive that you want to make into a USB boot drive).
Check with md5sum (or another checksum tool) that the download was good.
Try Ubuntu (Kubuntu, Lubuntu, Xubuntu, . ) before installing it.
See also: Installation/FromUSBStickQuick for beginners starting from Windows.
Introduction
Ubuntu can be installed from a USB flash drive. This may be necessary for most new portable computers without DVD drives and is handy for others because a USB flash drive is so convenient. Also, you can configure Ubuntu on the USB flash drive to save changes you make, unlike a read-only CD/DVD disk.
Booting from a USB flash drive created with usb-creator alias Startup Disk Creator and mkusb will behave just as if you had booted from the install CD. It will show the language selection and then the install menu, from which you can install Ubuntu onto the computer’s hard drive or launch the LiveCD environment. Other utilities, e.g. UNetbootin, may create slightly different boot drives or if on UEFI might not work at all with Debian iso files due to a bug
Note: This article uses the term «USB flash drive» alongside USB stick, USB drive, USB device, USB pendrive and thumb drive.
Prerequisites
To create a USB installation device, you will need:
a 4 GB USB flash device/drive/stick. If the iso file is smaller than 2 GB, it is possible to use a 2 GB USB device, at least with some of the methods. Files on this USB device will be erased, so backup the files you want to keep before making the device bootable. Some of the tools require that this USB device is properly formatted and mounted while other tools will overwrite whatever is on the target device. Please follow the instructions for each tool.
an Ubuntu flavour ISO file downloaded from an official web page, ubuntu.com/download or http://releases.ubuntu.com, stored in your running computer (for example in the directory Downloads in the internal drive, not in the USB flash drive that you want to make into a USB boot drive).
Check with md5sum (or another checksum tool) that the download was good. In Linux there is the tool ‘md5sum’. In Windows you can do it with Rufus: click on the circle with a tick mark (more about Rufus here.)
Dummy headlines
After a major remake of this help page the following headlines are kept here because they may be linked to from other web sites. Several other headlines further down in the page are also kept for this reason.
Notes about speed
Notes about size
Notes about bootability
The flash hardware
There is a detailed description at the sub-page /pre
Creating a bootable Ubuntu USB flash drive from Windows
There are various methods available for Windows to create a bootable Ubuntu USB flash drive.
NEVER try to use one of your hard disk drives or partitions in this process unless you really know what you are doing, as data will get erased.
Rufus
Rufus is the tool in Windows that is recommended officially by Ubuntu. A tutorial is available from here.
balenaEtcher
Pendrivelinux’s Universal USB Installer
UNetbootin
Win32 Disk Imager
There is a detailed description at /fromWindows including Rufus, balena Etcher, Universal USB Installer, Unetbootin and Win32 Disk Imager.
Creating a bootable Ubuntu USB flash drive from Ubuntu
Install and run Startup Disk Creator alias usb-creator
The Ubuntu Startup Disk Creator is dedicated to creating USB boot drives for Ubuntu and Ubuntu family flavours (Kubuntu, Lubuntu . Xubuntu).
You can find usb-creator-gtk by typing «Startup Disk Creator» (Ubuntu Desktop) or usb-creator-kde in K-Menu—>Applications—>System—>Startup Disk Creator (Kubuntu). If it is not there, then you can install it using the Ubuntu Software Center.
- Insert and mount the USB drive. Inserting the USB drive should auto-mount it.
- Start the Startup Disk Creator
- In the top pane of the Startup Disk Creator, pick the .iso file that you downloaded.
- If the .iso file isn’t listed, click «Other» to locate and select the .iso file that you downloaded.
- In the bottom pane of the Startup Disk Creator, pick the target device, the USB flash drive. If more than one choice, please check carefully, until you are sure that you will be writing to the correct device.
- After checking that you are pointing to the correct target device, the USB flash drive, you can start the action.
You must enter a password because this is a risky operation. Use the password of the current user ID (the same as for login and running tasks with 'sudo'. Password is not required when installing from a ‘live’ system (booted from a DVD disk or another USB flash drive).
The Startup Disk Creator clones the iso file, which means that you need neither erase nor format the target drive. It will be completely overwritten anyway by the cloning process. The Startup Disk Creator looks like this in Ubuntu 18.04 LTS:
Notes
NEVER try to use one of your hard disk drives or SSDs or partitions in this process unless you really know what you are doing, as data will get erased.
There are bugs that affect the Ubuntu Startup Disk Creator, when you run it in old Ubuntu versions in BIOS mode and try to create USB boot drives with other versions. In the Ubuntu Startup Disk Creator version 0.3.2 in Ubuntu 16.04 LTS, these bugs are no longer a problem, so you can install any version of the Ubuntu flavours from 16.04 LTS and newer versions.
UNetbootin
Download UNetbootin
mkusb — dd image of iso file to USB device safely
If you want to clone from a general image file to a drive, you can use mkusb. It lets you clone to any drive that is not busy, also an internal drive, and there are very obvious warnings to prevent mistakes.
- run in Debian and many linux distros that are similar to Ubuntu and Debian,
- clone from iso files of most Linux distros to create USB boot drives,
- create persistent live drives of the Ubuntu family and Debian, using all available drive space for persistence and/or data storage,
- restore a USB boot drive to a standard storage device.
There is a detailed description at /fromUbuntu including the Startup Disk Creator, UNetbootin and mkusb.
Creating a bootable Ubuntu USB flash drive from Mac OSX
There is a good wiki page about booting with UEFI, and a good tutorial thread, UEFI Installing — Tips.
Test if running in UEFI mode
You may want to test if your Ubuntu flavour is running in [U]EFI mode. An installed system and a live system too is using the directory /sys/firmware/efi, so you can run the following command line,
The following command line is more robust and also easier to understand, so you may prefer it (if you copy & paste and are not bothered by typing a long command line),
Источник
Запуск Linux с USB-накопителя: вы делаете это правильно?

Наверняка вы слышали о предварительном просмотре дистрибутивов Linux с USB-накопителей, без необходимости установки его на ПК. Но знаете ли вы, что вы также можете сохранять свои данные между сессиями, всё так же работая с USB-накопителя или вовсе сделать на него полноценную установку Linux? Это может повысить вашу производительность в разы, особенно если вы работаете удаленно или не можете позволить себе собственный ПК.
Короче говоря, мы говорим о превращении Linux в ультрапортативную платформу: запуск Linux с USB-устройства флэш-памяти. Вот три варианта ношения Linux в вашем кармане. Узнайте, какой метод лучше для вас.
Выберите правильную флешку
Если вы намерены превратить данную возможность в рабочий вариант и хранить на ней помимо самой ОС важные данные, прежде чем начать, стоит подумать о покупке новой флешки. У старых USB-флешек срок их службы значительно ниже нежели у современных, а поскольку у флэш-памяти имеет ограниченное число циклов чтения/записи, имеет смысл задуматься о покупке.
— СТАТЬИ ПО ТЕМЕ —
Кроме того, вы должны учитывать оборудование, к которому вы будете подключать USB-накопитель. Поддерживает ли он USB 3.0? Если это так, вы получите значительное преимущество в скорости, по сравнению с USB 2.0.
Чтобы проверить, имеет ли конечный компьютер USB 3.0, посмотрите на его USB-порты. Если в них есть синий пластик, а не черный, скорее всего имеет. Это хороший способ определить есть ли в ПК USB 3.0 визуально. Однако не все производители придерживаются данной нормы, поэтому посмотрите спецификации ПК.
Записать Live ISO на USB
Стало действительно легко взять ISO-образ вашего любимого дистрибутива Linux и записать его на любой USB-накопитель соответствующего размера. Оттуда вы можете загрузить систему Linux на любом компьютере, который поддерживает загрузку с USB-носителя. Существует множество инструментов, которые могут записать ISO для вас, и этот метод совместим практически с любым дистрибутивом Linux.
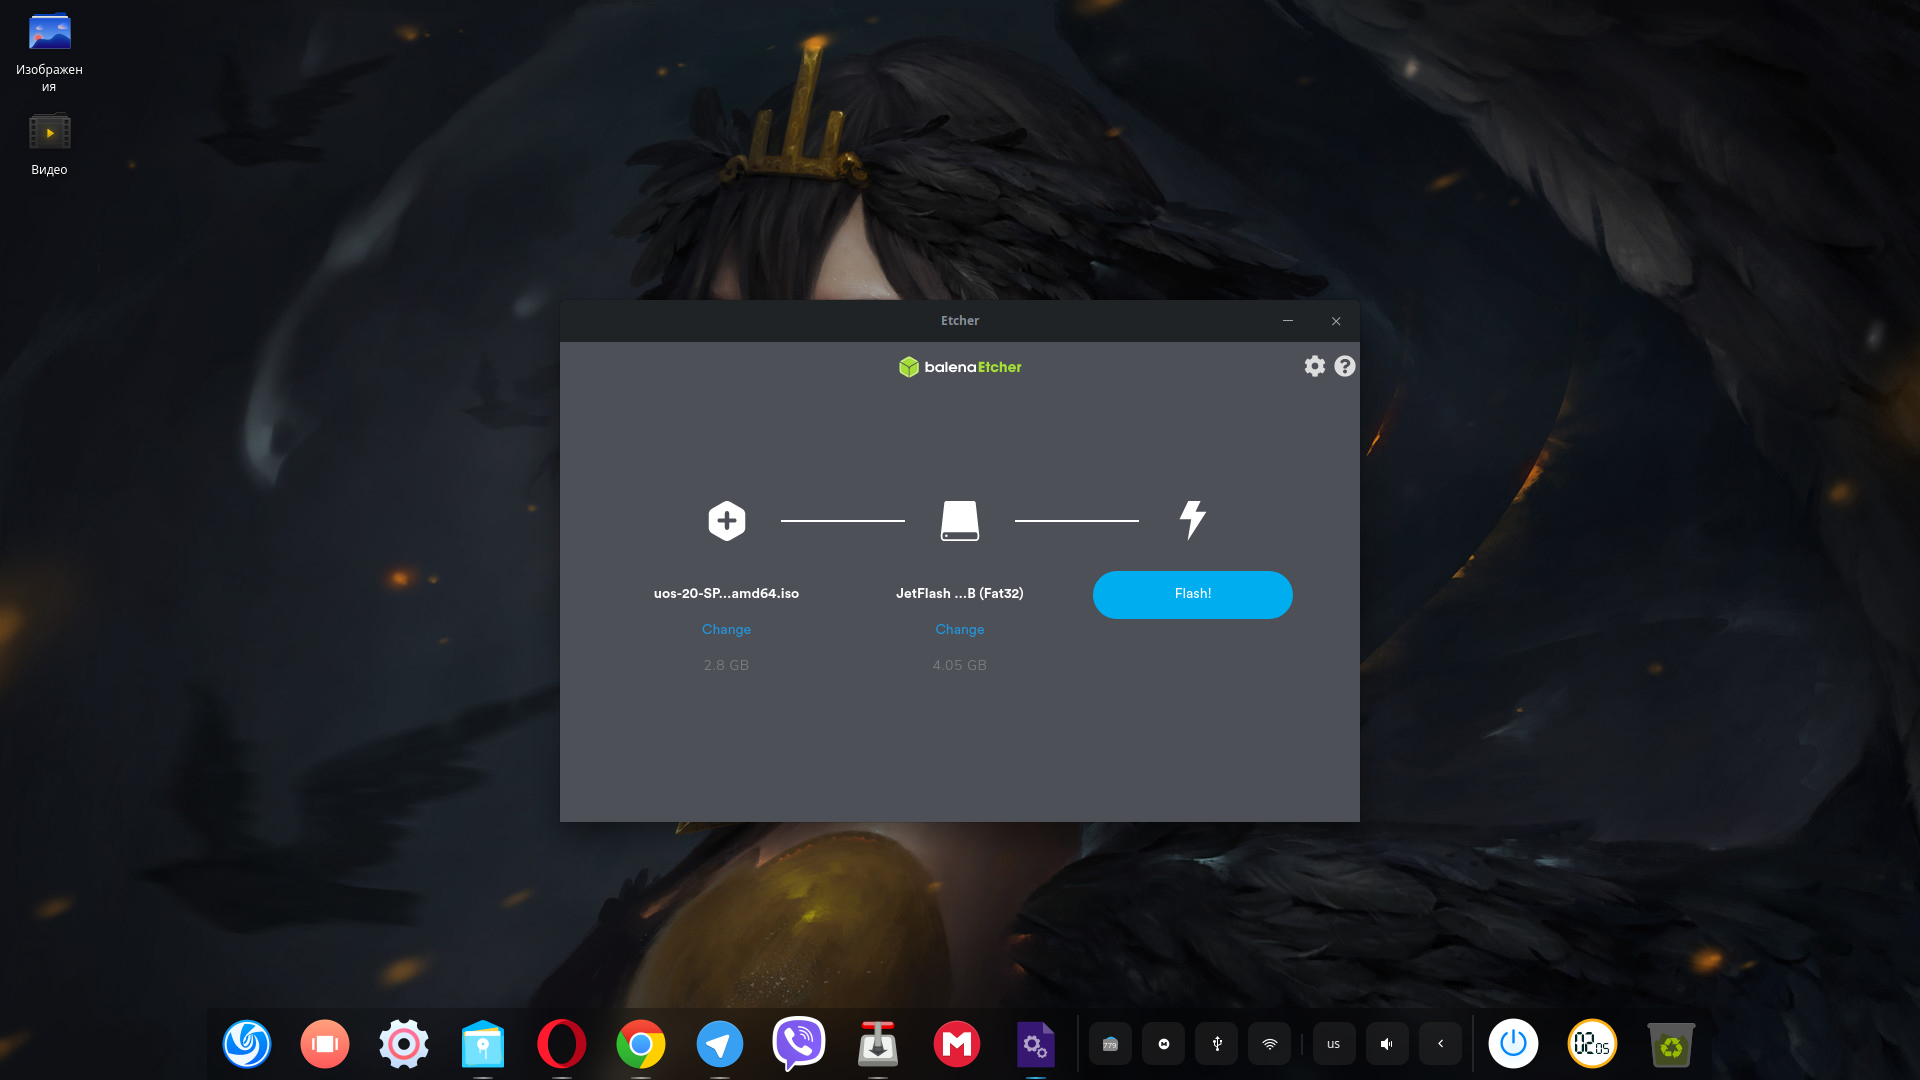
Одним из вариантов является balenaEtcher, бесплатный инструмент с открытым исходным кодом, доступный для Linux, macOS и Windows. В то время как запись ISO не так сложна, как кажется, Etcher так же прост, как выглядит.
Однако недостатком этого подхода является то, что вы потеряете все свои данные, как только выключите или перезагрузите компьютер, на котором работаете. В среде Live все данные хранятся в оперативной памяти и ни одна из них не записывается на USB-накопитель; следовательно, ничего не сохраняется при выключении системы.
Если вы хотите, чтобы в вашем кармане была настроенная среда Linux, это не то, что вам нужно. Тем не менее, если вы хотите использовать диск в качестве способа выполнения защищенного обмена данными (например, банковские операции или любые действия, требующие использования TOR) и убедиться, что нигде не хранится конфиденциальная информация, это, безусловно, неплохой вариант.
Скачать: Etcher
Включить постоянные данные

В зависимости от вашего дистрибутива, у вас может быть возможность включить постоянные данные на вашем USB-накопителе. Это здорово: он позволяет вам написать относительно компактный файл ISO для загрузки и вы можете сохранить ваши дополнительно установленные приложения и сохраненные документы.
Чтобы сделать это, вам понадобится совместимая программа для выполнения установки. Одним из вариантов является Rufus, приложение для Windows, которое поддерживает создание живых USB-накопителей Linux с постоянным хранилищем. Если вы уже используете Linux, вы можете попробовать mkusb. Инструмент будет работать с дистрибутивами на основе Ubuntu и Debian, а также на некоторых других.
Наличие постоянных данных идеально, если вы используете большое количество систем с USB-накопителем, так как живая среда будет определять, какое оборудование доступно при каждой загрузке. Таким образом, преимущество этого сценарии заключается в том, что вы можете сэкономить свои ресурсы, использовать меньше места на диске и получить максимальную поддержку для любого подключаемого оборудования.
Недостатки: вы автоматически загружаете учетную запись живого пользователя, которая не защищена паролем. Кроме того, вы должны быть осторожны с обновлениями программного обеспечения, так как более новые ядра могут сломать загрузчик.
Скачать: Rufus (для Windows)
Скачать: mkusb (для Linux)
Сделать полную установку на USB

Наконец, вы можете сделать полную установку на USB-накопитель. Вам потребуется использовать диск или другой USB-накопитель для установочного носителя, но этот метод буквально позволяет вам иметь полную систему Linux в вашем кармане – такую же гибкую, как любая другая традиционная установка.
Преимущества очевидны: вы сами настраиваете свою систему так, как вам нравится. Но есть и пара минусов.
Во-первых, для такого типа установки вам понадобится USB-накопитель большего размера. Конечно, это не такая большая проблема, как раньше, да и дистрибутивы бывают разные, но её стоит учитывать.
— СТАТЬИ ПО ТЕМЕ —
Во-вторых, поскольку система считает, что она установлена нормально, она будет склонна вносить изменения, которые идеально подходят для оборудования, с которым вы в данный момент работаете, но не обязательно для оборудования, с которым вы столкнетесь в будущем.
В первую очередь это касается использования проприетарных драйверов. Для максимальной совместимости не используйте их. Открытые драйверы достаточно хороши для большинства сценариев.
Linux любит USB
Linux всегда был очень гибким, так что он может удовлетворить любые потребности. А тот факт, что здесь нет никаких лицензий, означает, что запустить Linux на USB-накопителе довольно просто, в отличие от Windows и macOS.
Теперь, когда вы знаете, какие у вас есть варианты, будет очень легко решить, какое решение лучше всего подходит для ваших нужд. А чтобы помочь вам с выбором дистрибутива, мы собрали лучшие дистрибутивы Linux для установки на USB-накопитель.
Источник


