- System Restore Point in Windows 10
- Working With Windows 10 Restore Points
- How to Create a Computer Restore Point Windows 10
- Create a Restore Point Manually
- Adjust Automatic Creation of System Restore Points
- How to Delete a Windows 10 Restore Point
- Deleting All Restore Points But The Latest
- Deleting All Restore Points Including The Latest
- How to Recover The Windows 10 From a Restore Point
- Where Are Restore Point Files Kept?
- A System Restore Point Won’t Generate. What Should I Do?
- How to Recover The Windows 10 From a Restore Point Using The Command Prompt
- How to Recover Restore Points Which Have Been Deleted?
- Restore points
- References
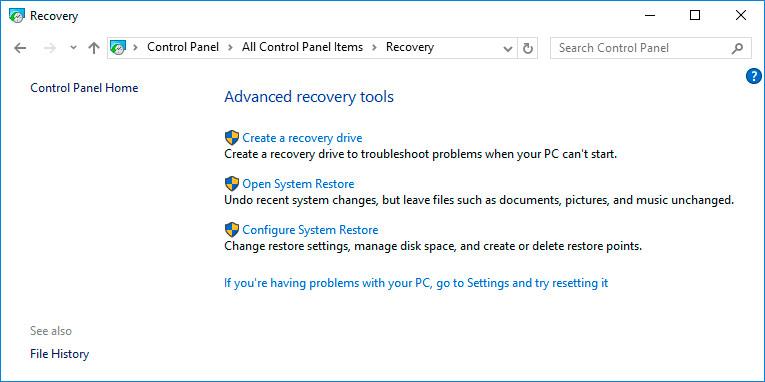
- Recovery options in Windows 10
System Restore Point in Windows 10
Read about creating and deleting a restore point, or using it to restore Windows 10. With the help of a restore point you can recover Windows 10 system files as well as restore operability of the operating system, correct errors that suddenly appeared or restore the system back to the condition at the time of creating the restore point.
By default, Windows creates a new restore point when some changes are made to the computer, a driver or an application is installed etc.

Working With Windows 10 Restore Points
How to Create a Computer Restore Point Windows 10
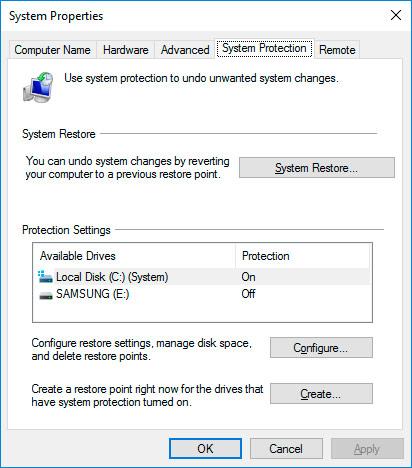
Create a Restore Point Manually
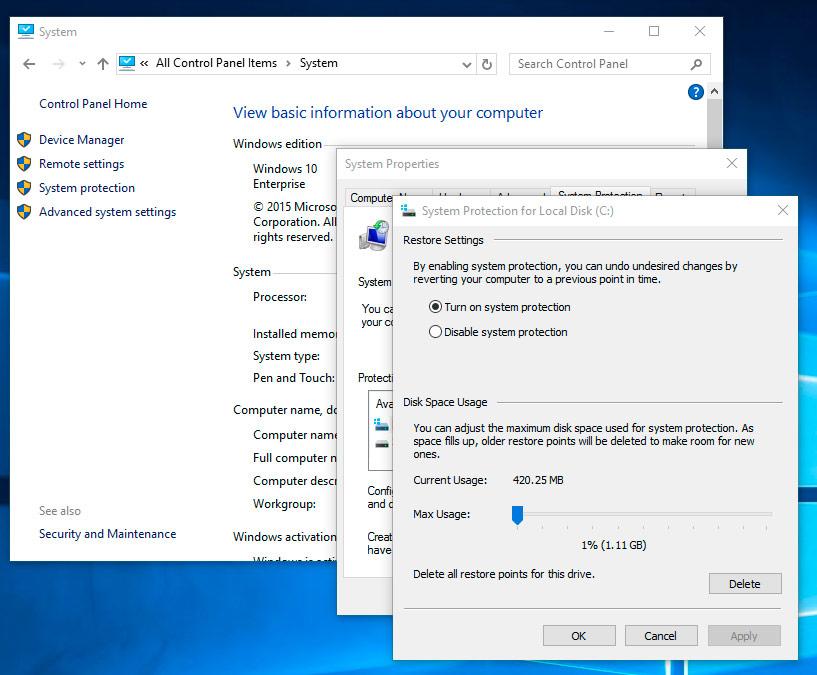
Open Control Panel and go to Recovery / Configure System Restore.
Click Create in the System Properties window that opens.
Add a description in the following window to identify the restore point. The current date and time of creating a restore point are added automatically.
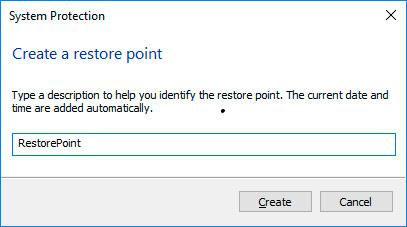
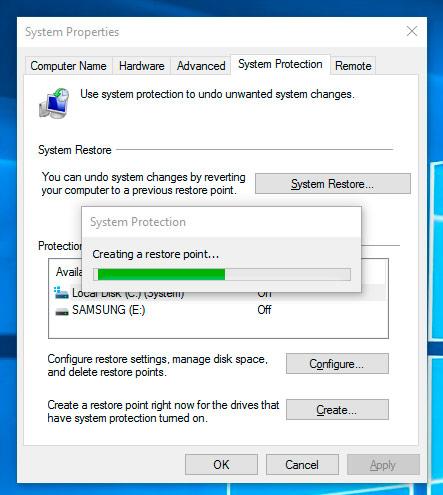
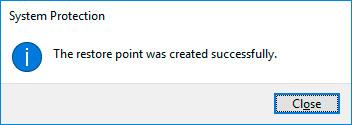
Click Create and wait for the process of creating system restore point to be over.
Adjust Automatic Creation of System Restore Points
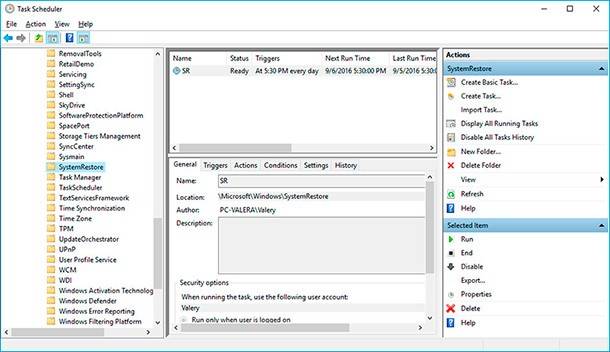
- Start Control Panel / Administrative Tools / Task Scheduler.
- In the left window, select Task Scheduler Library / Microsoft / Windows / System Restore.
- Right-click on SR file in the upper window in the middle of the screen and select Properties.
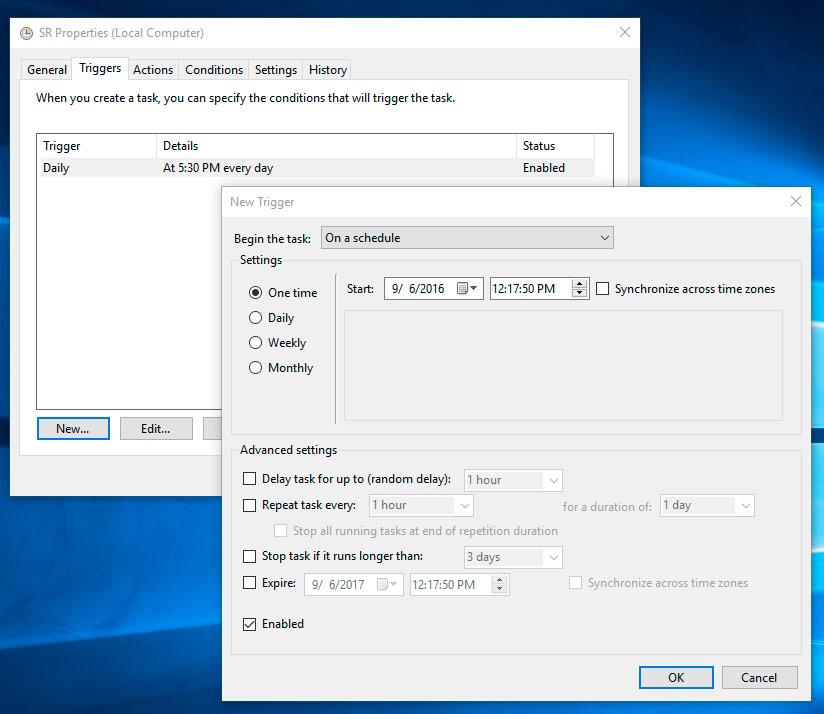
- Select the Triggers tab in the window that opens.
- Click Create and set the required time parameters to create a restore point.
How to Delete a Windows 10 Restore Point
The operating system saves restore points Windows 10 onto the hard disk. A certain part of its volume is allocated for this purpose; older restore points are deleted to make room for new ones as the free space in this area grows less.
The following functions are available for working with restore points:
Deleting All Restore Points But The Latest
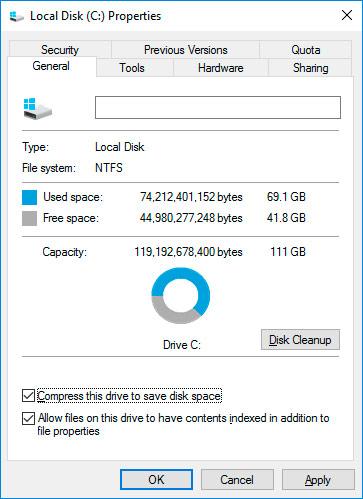
- Right-click on the disk where restore points are saved and select Properties / General / Disk Cleanup.
- Wait until the disk cleanup preparation process is complete. Click “Clean Up System Files” and wait until the disk cleanup preparation process is complete again.
Click Disk Cleanup, and then in the tab More Options, select System Restore and Shadow Copies.
Deleting All Restore Points Including The Latest
- Open Control Panel / System Properties / System Protection.
Select Configure in the System Protection tab (in the window System Properties).
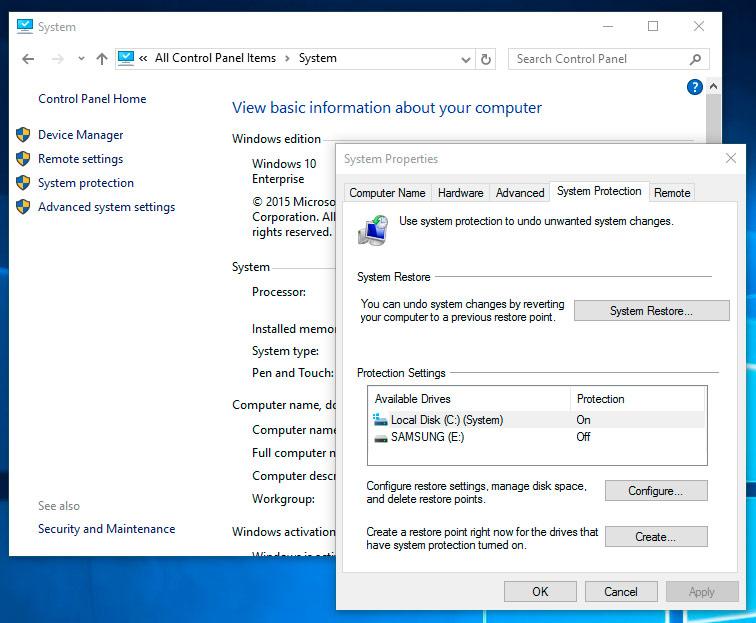
Click Delete next to «Delete all restore points for this drive».
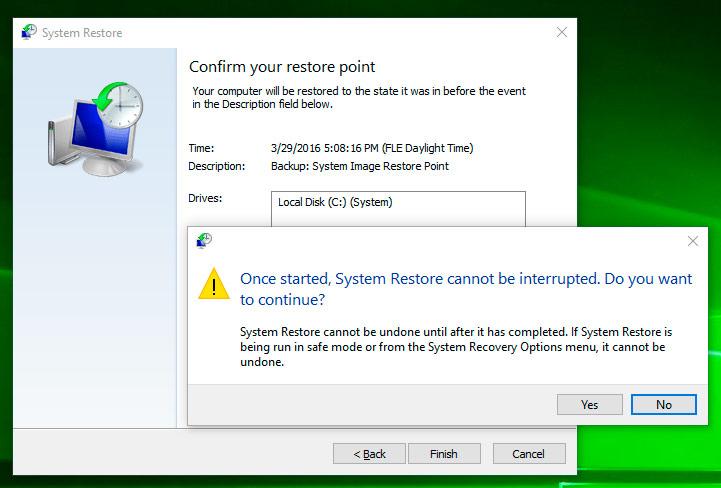
How to Recover The Windows 10 From a Restore Point
Attention: recovering your Windows 10 from a restore point affects only system and software settings of the operating system. Using the restore point will delete all programs that have been installed after such restore point was created, but it will not recover files deleted previously.
To recover Windows from a restore point do the following:
Open Control Panel / Recovery / Open System Restore and click Next.
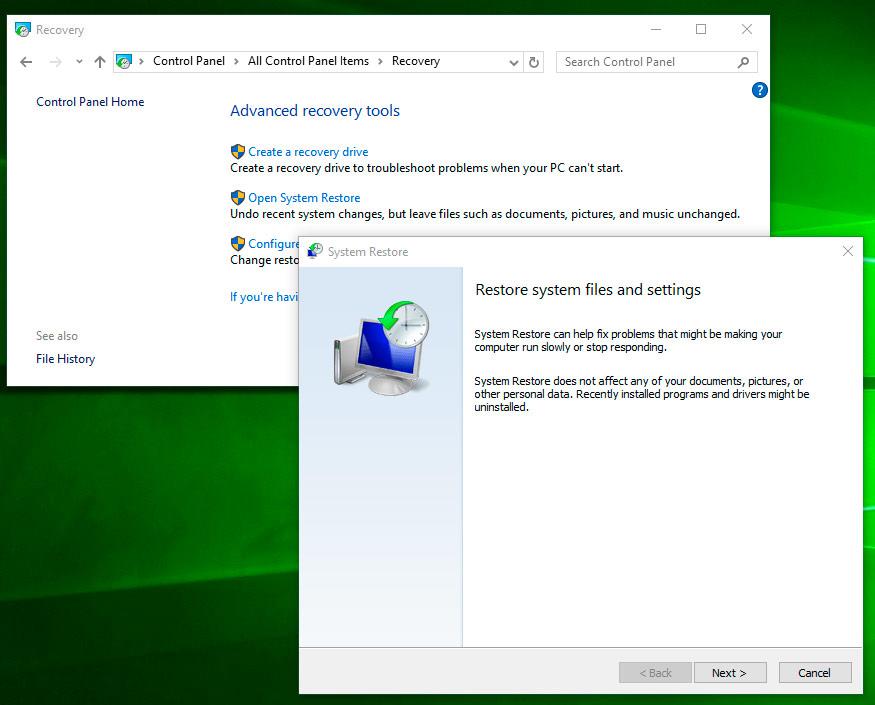
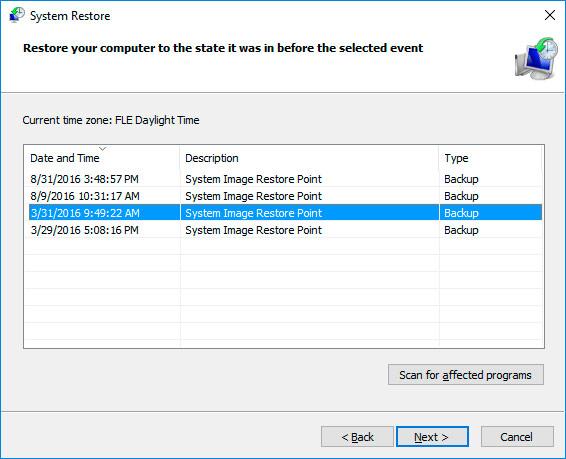
Select a restore point from the list and click Next.
Confirm that you want to start system restore from the restore point and the process will start.
Where Are Restore Point Files Kept?
You can see all available restore points in Control Panel / Recovery / Open System Restore.
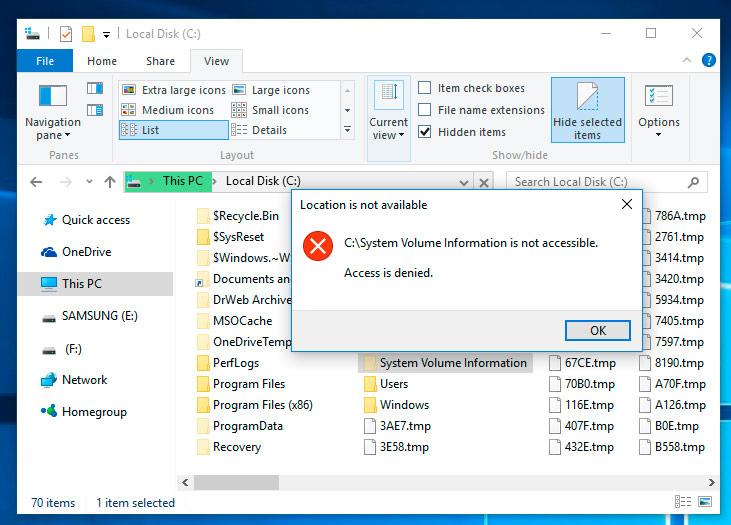
Physically, the system restore point files are located in the root directory of your system drive (as a rule, it is C:), in the folder System Volume Information. However, by default users don’t have access to this folder. To go to this directory, you should first make it visible, and then get special rights.
Open Control Panel / Recovery / File Explorer Options / Folder Views.
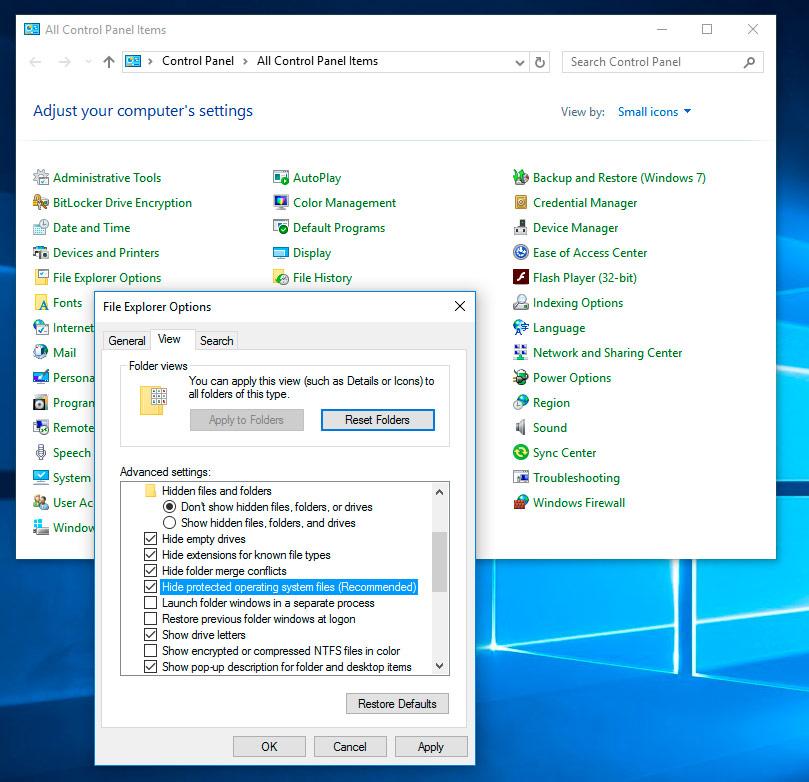
Uncheck the box next to «Hide protected operating system files» and click Apply. As you do it, the folder System Volume Information will appear in the root directory of disk C:, but access will be denied.
To get access to the folder System Volume Information do the following:
Right-click on the folder and select Properties / Security / Advanced.
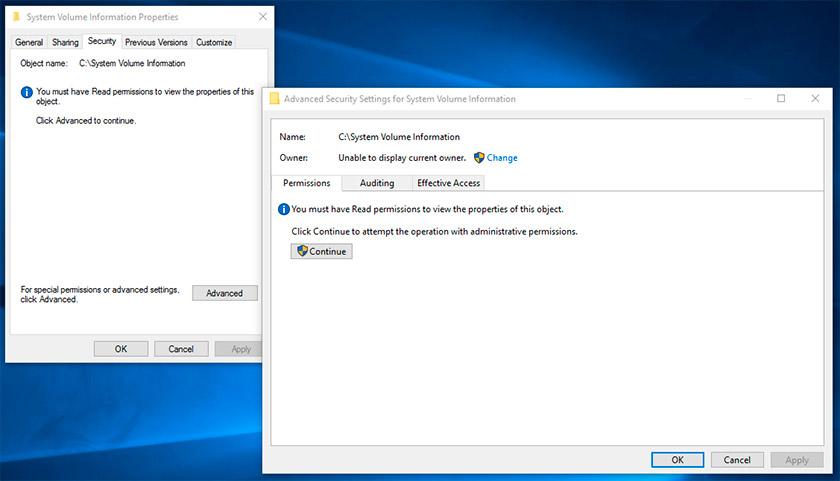
Click Continue to get access permission to Windows system folder which contains system restore point files.
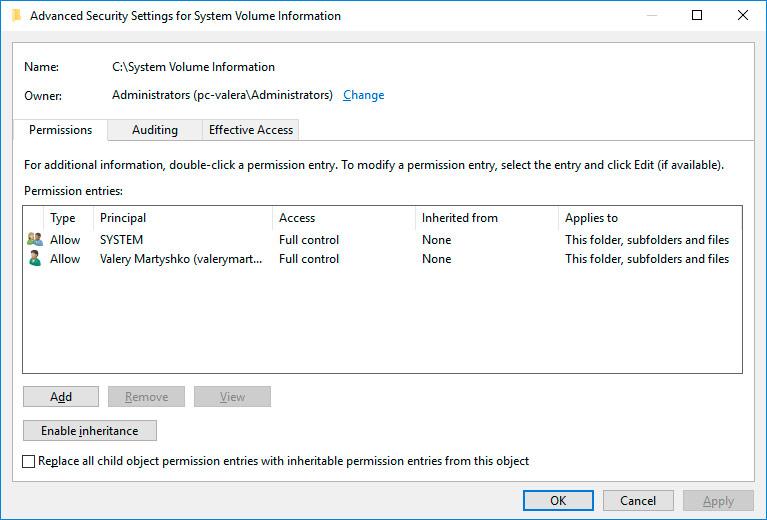
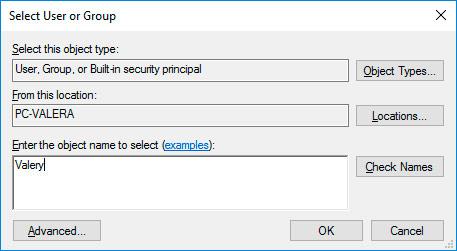
Click Add and enter the name of the user which should be granted access rights. Click OK.
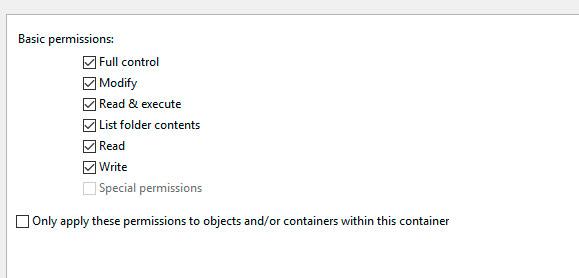
Check the box in Basic permissions next to «Full control» and click OK.
Now your user account appears in the Permissions list and you have access to the folder System Volume Information.
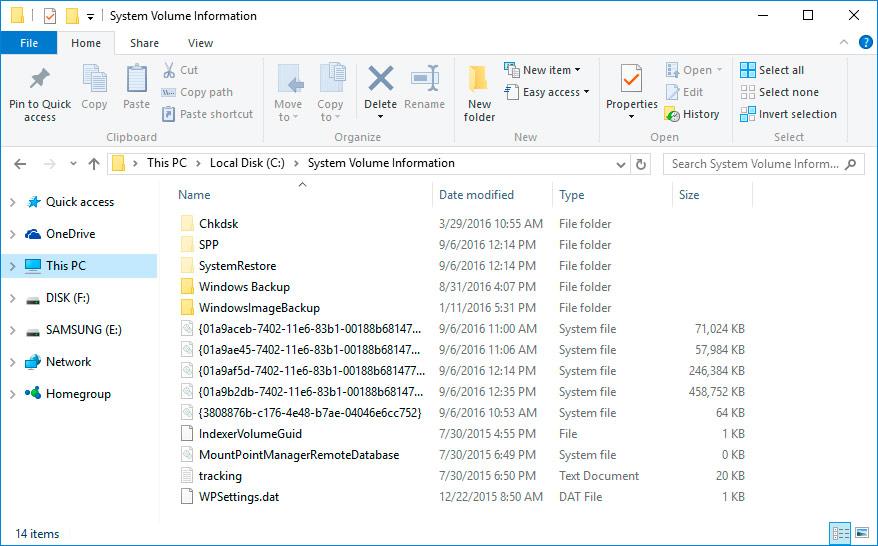
Files and folders in this location cannot be deleted manually because they are protected by the system. If you want to clean up the directory System Volume Information, use standard tools allowing you to delete Windows restore points.
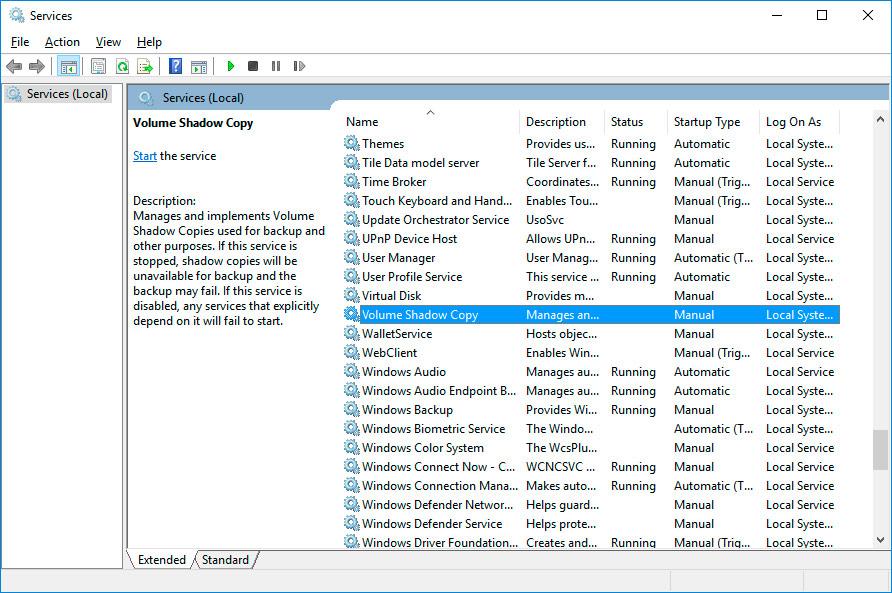
A System Restore Point Won’t Generate. What Should I Do?
Check the status of the Windows service «Volume Shadow Copy». To do it, here is the way:
- Open Control Panel / Administrative Tools / Services.
- Find the service «Volume Shadow Copy».
- Start or activate it; set its startup type as «Automatic» if necessary.
System restore points may not be created on a computer where two operating systems are installed, or when the operating system is damaged by malware or viruses.
How to Recover The Windows 10 From a Restore Point Using The Command Prompt
If there are problems with starting your Windows 10 in the ordinary mode, you can bring your system back to normal by launching a restore point from the Command Prompt.
Load Windows in «Safe Mode with Command Prompt»: while the operating system is loading, press F8 and select the corresponding line in Windows Advanced Options Menu.
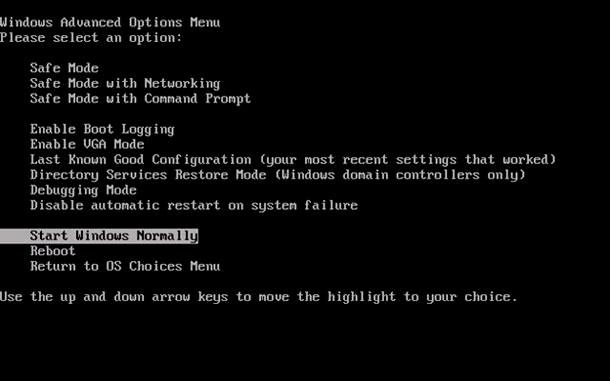
Select the necessary restore point and click Next.
How to Recover Restore Points Which Have Been Deleted?
The operating system saves restore points Windows 10 onto the hard disk. A certain part of its volume is allocated for this purpose; older restore points are deleted to make room for new ones as the free space in this area grows less.
Restore points can also be deleted manually – see above to learn more about it.
Often, recovering Windows results in loss of important files. Restoring Windows with a restore point, rollback to a previous version of the operating system, resetting the computer, errors in backup software, damaged or overwritten system files, file system errors or HDD bad sectors are only some of the things to cause deletion of data.
Windows recovery will restore operability of the operating system but it can result in loss of user files. It is not always possible to restore Windows operability without a clean installation of the operating system which can also cause loss of files.
Download for free and scan your computer with Hetman Partition Recovery. Learn about the program functions and step-by-step guide.
Have you recovered your Windows 10 operating system from a restore point? Leave your feedback and ask questions in your comments.

Author: Vladimir Artiukh, Technical Writer
Vladimir Artiukh is a technical writer for Hetman Software, as well as the voice and face of their English-speaking YouTube channel, Hetman Software: Data Recovery for Windows. He handles tutorials, how-tos, and detailed reviews on how the company’s tools work with all kinds of data storage devices. Read more
Restore points
Restore points are created to let users select a previous system state. Each restore point contains the required information to restore the system to the selected state. Restore points are created before key changes are made to the system.
System Restore automatically manages the disk space that is allocated for restore points. It purges the oldest restore points to make room for new ones. System Restore allocates space based on the size of the hard disk and the version of Windows that the computer runs, as shown in the following table.
| Windows version | HardВ disk size | System Restore space |
|---|---|---|
| Windows 7 and later versions | > 64 GB | Up to five percent of total disk space or a maximum of 10 GB, whichever is less |
| ≤ 64 GB | Up to three percent of total disk space | |
| Windows Vista | Up to 15 percent of the total disk space or a maximum of 30 percent of available disk space, whichever is less | |
| Windows XP | >4 GB | Up to 12 percent of total disk space To change the maximum storage limit in WindowsВ XP, use the System item in Control Panel. |
| Advanced options >More recovery options >Startup settings, and then select Restart now. In the list of startup settings, select Disable driver signature enforcement. You may have to use the F7 key to select this setting. These steps restore the computer to its «R1» state. To recover from the failed restart To recover from the failed restart and roll back the restore process, follow these steps:
These steps return the computer to the state that it was in before you started the restore process. To restore Windows to a restore point by using WinRE To start the System Restore wizard on an affected computer, use WinRE instead of the Settings dialog box. To do this, follow these steps:
ReferencesFor more information about how to use WinRE, see the following articles: Recovery options in Windows 10If you’re having problems with your PC, the following table can help you decide which recovery option to use. See this section Your PC isn’t working well and you recently installed an update. Your PC isn’t working well and it’s been a while since you installed an app, driver, or update. Your PC won’t start, you haven’t created a recovery drive, and resetting your PC didn’t work. Your PC won’t start and you haven’t created a recovery drive. Your PC won’t start and you’ve created a recovery drive. You want to reinstall your previous operating system. Your PC isn’t working well and you recently installed an app. Click one of the recovery options below and follow the steps to try to get things working again. If you’ve recently installed a Windows update, uninstall the update to try to resolve the issue. Select the Start button, then select Settings > Update & Security > Windows Update > View your update history > Uninstall updates. Right-click the update you want to remove, and then select Uninstall. Important: If you’ve encrypted your device, you’ll need your BitLocker key to reset your PC If you don’t know your BitLocker key, see Find my BitLocker recovery key. Resetting reinstalls Windows 10, but lets you choose whether to keep your files or remove them, and then reinstalls Windows. You can reset your PC from Settings, the sign-in screen, or by using a recovery drive or installation media. Reset your PC from Settings Select the Start button, then select Settings > Update & Security > Recovery . Under Reset this PC, select Get started and then choose from the options and/or settings in the table below. Keep my files > Change settings > Preinstalled apps On Reinstalls Windows 10 and keeps your personal files. Removes apps and drivers you installed. Removes changes you made to settings. Restores any apps your PC manufacturer installed if your PC came with Windows 10. Keep my files > Change settings > Preinstalled apps Off Reinstalls Windows 10 and keeps your personal files. Removes apps and drivers you installed. Removes changes you made to settings. Removes any apps your PC manufacturer installed. Reinstalls Windows 10 and removes your personal files. Removes apps and drivers you installed. Removes changes you made to settings. Removes any apps your PC manufacturer installed. (If your PC came with Windows 10, apps from your PC manufacturer will be reinstalled.) Note: Remove everything > Change settings gives you two options. Data erasure On removes files and cleans the drive. If you’re planning to donate, recycle, or sell your PC, use this option. This might take an hour or two, but it makes it harder for other people to recover files you’ve removed. Data erasure Off just removes files. It takes less time, but is less secure. Reset your PC from the sign-in screen If you can’t open Settings, you can reset your PC from the sign-in screen. Here’s how: Press Windows logo key + L to get to the sign-in screen, and then restart your PC by pressing the Shift key while you select the Power button > Restart in the lower-right corner of the screen. Your PC will restart in the Windows Recovery Environment (WinRE) environment. On the Choose an option screen, select Troubleshoot > Reset this PC, and then choose one of the options in the previous table.
Connect the installation media you created to your PC and reinstall Windows 10. Open File Explorer and select the drive with the installation media. From the root directory of the drive, double-click setup.exe, and then select Yes when asked if you’d like to allow the app to make changes to your device. Select Change what to keep. Select one of the following options, and then select Next: Keep personal files and apps – This will preserve your personal data, apps, and settings. Keep personal files only – This will preserve your personal data and settings, but all your apps will be removed. Keep nothing – This will remove all personal data, settings, and apps. Warning: You cannot undo a reinstallation of Windows 10. Be sure to back up your files first if you choose the Keep nothing option. To finish, select Install to start reinstalling Windows 10 on your PC. Your PC will restart several times during the resinstallation. Important: If you’ve encrypted your device, you’ll need your BitLocker key to use a recovery drive to restore or reset your PC If you don’t know your BitLocker key, see Find my BitLocker recovery key. If your PC won’t start and you haven’t created a recovery drive, download installation media and use it to restore from a system restore point or reset your PC. Download the Windows 10 media creation tool and then run it. Select Create installation media for another PC. Choose a language, edition, and architecture (64-bit or 32-bit). Follow the steps to create installation media, and then select Finish. Connect the installation media you created to your nonfunctional PC, and then turn it on. On the initial setup screen, enter your language and other preferences, and then select Next. If you don’t see the setup screen, your PC might not be set up to boot from a drive. Check your PC manufacturer’s website for info on how to change your PC’s boot order, and then try again. Select Repair your computer. On the Choose an option screen, select Troubleshoot. From there, you can: Restore from a system restore point by selecting Advanced options > System Restore. This will remove recently installed apps, drivers, and updates that might be causing your PC problems. Restoring from a restore point won’t affect your personal files. Important: If you’ve encrypted your device, you’ll need your BitLocker key to use a recovery drive to restore or reset your PC If you don’t know your BitLocker key, see Find my BitLocker recovery key. If your PC won’t start, you can use a recovery drive to restore from a system restore point or recover your PC. For info on how to create a recovery drive on a working PC, see Create a recovery drive. Note: If you are using a Surface, see Creating and using a USB recovery drive for Surface to download and create a USB recovery image specifically for your Surface device. To restore or recover using the recovery drive: Connect the recovery drive and turn on your PC. Press Windows logo key + L to get to the sign-in screen, and then restart your PC by pressing the Shift key while you select the Power button> Restart in the lower-right corner of the screen. Your PC will restart in the Windows Recovery Environment (WinRE) environment. On the Choose an option screen, select Troubleshoot, and then select one of the following two options. (If you don’t see the Choose your option screen, your PC might not be set up to boot from a drive. Check your PC manufacturer’s website for info on how to change your PC’s boot order.) To restore from a system restore point, select Advanced Options > System Restore. This won’t affect your personal files, but it will remove recently installed apps, drivers, and updates that might be causing your PC problems. To reinstall Windows 10, select Advanced Options > Recover from a drive. This will remove your personal files, apps and drivers you installed, and changes you made to settings. For a limited time after upgrading to Windows 10, you’ll be able to go back to your previous version of Windows by selecting the Start button, then select Settings > Update & Security > Recovery and then selecting Get started under Go back to the previous version of Windows 10. This will keep your personal files, but it’ll remove apps and drivers installed after the upgrade, as well as any changes you made to settings. In most cases, you’ll have 10 days to go back. To go back, you’ll need to: Keep everything in the windows.old and $windows. bt folders after the upgrade. Remove any user accounts you added after the upgrade. Know the password you used to sign in to Windows 7 or Windows 8.1 (if you used one). Have the USB drive you used to upgrade to Windows 10 (if you used one). Note: If you go back to Windows 8.1, some apps that came with Windows, like Mail and People, might not work anymore. To fix the apps, reinstall them from the Microsoft Store. Note: The option in Settings to go back to your previous version of Windows is only available for a limited time after upgrading. Info for Windows Insiders If you’re an Insider and the current preview build isn’t working for you, select the Start button, then select Settings > Update & Security > Recovery . Under Go back to the previous version of Windows 10, select Get Started. This won’t remove your personal files, but it’ll remove recently installed apps and drivers, and change settings back to their defaults. Going back to an earlier build won’t remove you from the Insider Program. When the next preview build is ready, it’ll be installed on your PC. This option takes your PC back to an earlier point in time, called a system restore point. Restore points are generated when you install a new app or driver, and when you create a restore point manually. Restoring won’t affect your personal files, but it will remove apps, drivers, and updates installed after the restore point was made. In the search box on the taskbar, type control panel,andthen choose it from the list of results In the Control Panel search box, type recovery. Select Recovery > Open System Restore. In the Restore system files and setting box, select Next. Select the restore point that you want to use in the list of results, and then select Scan for affected programs. If you don’t see the restore point that you want to use, select the Show more restore points check box to see more restore points. If you’re not seeing any restore points, it might be because system protection isn’t turned on. Here’s how to check: In the search box on the taskbar, type control panel,andthen choose it from the list of results. In the Control Panel search box, type recovery. Select Recovery > Configure System Restore > Configure and see if the Turn on system protection option is selected. If the Turn on system protection option is not selected, system protection isn’t turned on and there aren’t any restore points. In this scenario, you won’t be able to recovery your PC using a system restore point and will need to use one of the other recovery options listed on this page. If the Turn on system protection option is selected, continue with step 6. You’ll see a list of items that will be deleted if you remove this restore point. If you’re OK with the deletions, select Close> Next > Finish. |


