- Installing Darknet on Windows
- Context
- Requirements
- The First Step is OpenCV
- The Second Step is CUDA
- The Third Step is getting CuDNN
- The Fourth Step is getting vcpkg
- Final Step is getting and installing Darknet
- Once this finishes executing then your darknet repository should be installed. Congratulations!
- Как зайти в Даркнет через Tor Browser
- Подробности
- Шаг №1: Установка Tor Browser
- Шаг №2: Поиск скрытых интернет-сайтов
- Скачать Тор Браузер
- Обзор Tor Browser
- Особенности
- Анонимность
- Мощная основа
- Без ограничений
- Удобство
- Портативность
Installing Darknet on Windows

Context
What is Darknet? For those who aren’t familiar, Darknet is an open-source framework that supports Object Detection and Image Classification tasks in the form of Convolutional Neural Networks. Darknet is mainly known for its implementation of the YOLO algorithm (You Only Look Once), which has demonstrated state of the art performance when it comes to real-time object detection.

Chances are if you want to create real-time object detection models on your webcam or video recording, you might want to consider using the YOLOv3 algorithm that is located in this framework. That being said, onto the main purpose of this article.
As anyone who owns a Windows PC knows, it can be a pain to set up applications and development environments. I wanted to provide some advice from my personal experience trying to install Darknet on my Windows 10 laptop.
First and foremost, PLEASE INSTALL APPLICATIONS IN THE CORRECT ORDER. I am speaking from experience when I say that it can be a nightmare if you don’t follow this golden rule. Also, this is my recommendation for installing darknet and it may or may not work for you. Full disclaimer.
The original GitHub repository for Darknet is here; however, we will be using AlexeyAB’s version which is an exact copy of Darknet with additional Windows support.
Requirements

I will assume that you have a GPU that has a compute compatibility version greater than 3.0. (Check if your GPU is good at this link.)
The First Step is OpenCV
OpenCV was a nightmare for me but hopefully, it won’t be a pain for you. I used this tutorial to get OpenCV4. I will give a brief walkthrough and some advice.
Before downloading Visual Studio 2017, check if your PC has Visual Studio 2019 already installed. This will affect your 2017 installation since the Microsoft Visual C++ Redistributable for 2017 will not be downloaded due to the presence of more recent Redistributables on your PC. (The 2019 ones). So my advice is to uninstall Visual Studio 2019 and verify whether the 2019 Redistributables are still present in your PC’s Programs and Features. If it is then kindly uninstalling 2019’s x86 and x64 versions will fix this.

Remember to add CMake to your system PATH. If you forget to do so, you can add
Likewise, if you forget to add Anaconda to your System Path, simply add
The code provided in the tutorial is only available from signing up for the author’s newsletters. So when you see the popup below, please click “Download Code” and sign up. You don’t pay anything and you can honestly unsubscribe after you get what you need. I don’t know the author nor am I trying to promote his newsletter, however, it is a massive timesaver.

I tried for 2 days with a different installation guide so trust me when I say it’s a lifesaver. Once you tested that OpenCV4 is working, congratulations you passed the hardest part of the installation!
The Second Step is CUDA
I will make your life very simple. Click this link and select Download. Of course, if you have Windows 7 or 8 then change the Version.

Once you run the installer, just keep clicking Next and verify that you do not encounter the screen below while installing.

If it did then you need to uninstall Visual Studio 2017 and redownload. If you did not encounter the message above and CUDA was successfully installed then you can move on to the next part!
The Third Step is getting CuDNN
To download CuDNN please click this link. You will need to register for an Nvidia Developer account before getting CuDNN. Once you register, agree to the terms and conditions and click the installer as shown in the screenshot below.

Once the file has been downloaded, extract the contents directly to your C drive. Once you have finished extracting, verify that the Cuda folder exists in your C drive as shown below.

After that open up your environment variables, and add C:\cuda\bin as a new entry to your System Path. Congratulations you have installed the major requirements!!
The Fourth Step is getting vcpkg
The link to get the vcpkg library manager is here.
You can download the zip file for vcpkg as shown below.

Once downloaded, extract the contents to a location of your choice. After that, open up a Command Prompt and navigate to the vcpkg folder. Once in, run the command:
After this bat file is finished its execution, run the command below:
After running these commands successfully, please open your Environment variables and Click “New” in the System Variables section.

Name the new variable, VCPKG_ROOT and make it point the location of the vcpkg folder.
Also, define another system variable named VCPKG_DEFAULT_TRIPLET and set its value to x64-windows.
Open a Powershell window and type the commands below to prepare vcpkg for the darknet installation.
Final Step is getting and installing Darknet
The moment we all were waiting for is finally here! Navigate to this link for the darknet code. Once you download and extract it to a location of your choice, open a Powershell window in Administrator mode.
Navigate to the location of the darknet folder and before you can build it, you must ensure that you can execute Powershell scripts.
Run the command below to verify your execution permission level.
If this returns unrestricted then you are good to run the final command, however, if it is not then run the command below.
Select “A” or “Y” and then run the final command.
Once this finishes executing then your darknet repository should be installed. Congratulations!
Don’t forget to run the command below and type “A”.
To test darknet, simply running the command below should yield some output without any errors.
Once again this isn’t a one size fits all solution, however, if it does work for you then I am very happy that I could help. If it doesn’t then please refer to this link to try installing darknet with Cmake-GUI instead.
To see the various possibilities for training available to this darknet framework, please refer to this link.
Thank you for reading all the way up to this point and hope this guide helped you to get darknet installed on your PC. Take care for now!
Как зайти в Даркнет через Tor Browser
Темная сторона интернета, Даркнет, Deep Web – названий много, но суть одна. За ними кроются те веб-ресурсы, которые затруднительно открыть через браузер Chrome (и ему подобные) и практически невозможно отыскать с помощью Google, Yandex и прочих поисковых систем. Звучит пугающе и интригующе одновременно, не правда ли? Многие люди загружают Тор с целью попасть туда. Но далеко не всем понятно, что для этого нужно сделать. Так давайте же разберемся, как зайти в Даркнет через Tor.
Подробности
В действительности на «темной стороне» можно найти что угодно. Но размещенные там сайты вовсе не обязательно должны быть какими-то незаконными или неэтичными, хотя такие, безусловно, присутствуют. Для попадания туда от пользователя требуется только две вещи:
- Наличие установленного на компьютере или ноутбуке интернет-обозревателя Тор.
- Знание ссылки на веб-ресурс, размещенный в «Дип Вебе».
То есть никаких тайных манипуляций, ввода многостраничного кода и прочих странных действий выполнять не нужно. В данной статье мы сначала разберем процедуру инсталляции анонимного браузера, а потом способы для нахождения спрятанных ресурсов.
Шаг №1: Установка Tor Browser
Чтобы попасть на темную сторону интернета, нужно использовать специальный браузер. В принципе можно для этих целей настроить какой-нибудь условный Chrome или Mozilla Firefox. Но гораздо проще и безопаснее будет все же Тор. Для его инсталляции выполните следующие шаги:
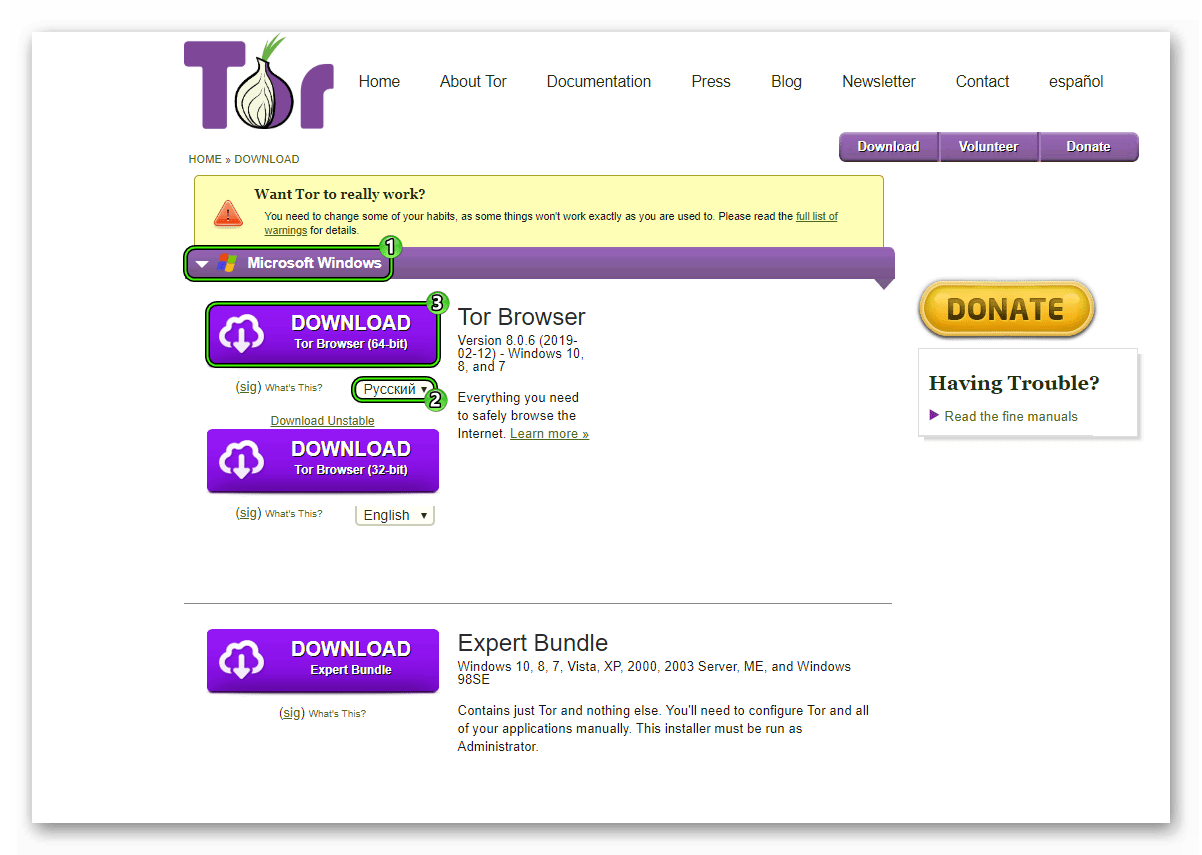
- Посетите страницу https://www.torproject.org/download/download.html.en официального сайта проекта.
- Откройте блок, содержащий информацию о нужной версии операционной системы.
- Выберите русский язык в соответствующем пункте (изначально он подписан как English).
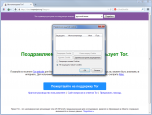
- Сохраните предложенный файл, нажав на Download. Например, для 64-разрядной Windows это выглядит так:

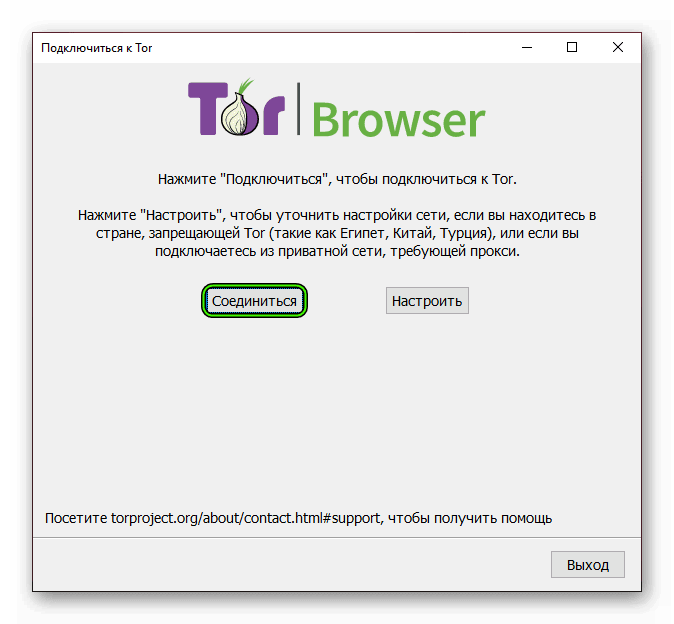
- Откройте его.
- Следуя подсказкам на экране, завершите процедуру установки.
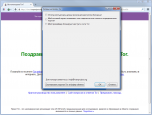
- В приветственном окошке браузера нажмите на «Соединиться».
Шаг №2: Поиск скрытых интернет-сайтов
Теперь у вас есть все необходимое для доступа в Дарк Веб. Ссылки на соответствующие интернет-ресурсы выглядят следующим образом:
xxx.onion, где (xxx – основная часть URL-адреса, а onion – псевдо-домен верхнего уровня, у обычных ресурсов заместо него идет ru, com, org, net и так далее).
В качестве примера откройте ссылку rougmnvswfsmd4dq.onion, которая ведет на страницу с детальной статистикой Тора (Метрика). Просто скопируйте ее из нашей статьи, вставьте в адресную строку анонимного браузера и нажмите Enter на клавиатуре.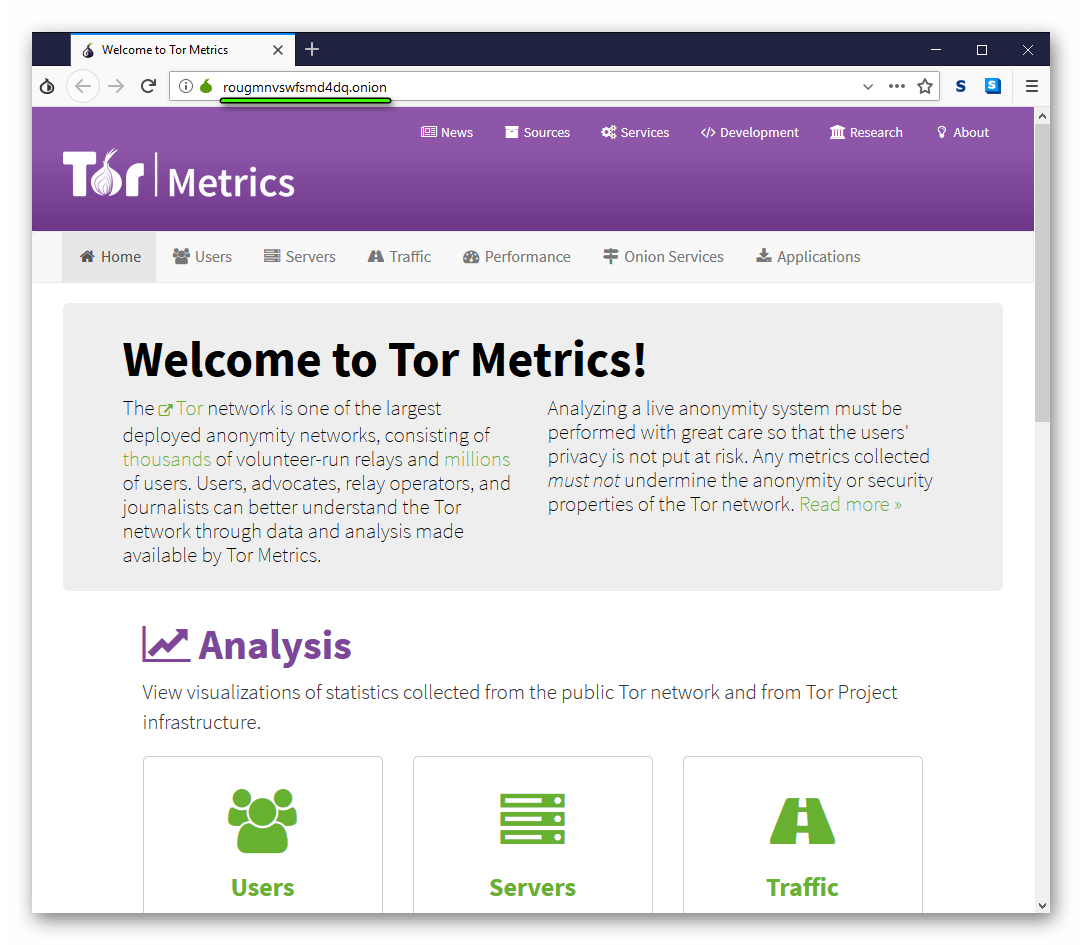 На загрузившемся сайте вы найдете подробную информацию по сетевому трафику, пользователям, серверам и другим важным статистическим аспектам.
А для удобного поиска onion-сайтов в Tor предусмотрено множество поисковиков. Мы рекомендуем обратить внимание на эти проекты:
- Ahmia – msydqstlz2kzerdg.onion
- Not Evil – hss3uro2hsxfogfq.onion
- TORCH – xmh57jrzrnw6insl.onion
Подробности про них вы можете узнать в нашей статье «Поисковики для Тор браузера».
Скачать Тор Браузер
Обзор Tor Browser

Выбор всех пользователей, которые желают скрыть свое местоположение при пребывании в Сети. Тор Браузер скачивается бесплатно на русском языке, и его последняя версия доступна для Windows 7, 10, 8. Создатели этого обозревателя придерживаются принципов свободы доступа и анонимности каждого пользователя. Браузер использует так называемую «луковую маршрутизацию» — весь трафик программы проходит в зашифрованном виде через систему промежуточных узлов, находящихся в разных странах. К конечному сайту хостинг-провайдера обращается один из серверов в цепочке, а не компьютер пользователя. Еще одно преимущество такого метода – он позволяет обойти блокировки сайтов, установленные Интернет-провайдером. С помощью специальной консоли всегда можно посмотреть «цепочку безопасности». В ней отображаются все промежуточные узлы, которые были задействованы при открытии страницы.
Программа базируется на основе браузера Firefox, визуально эти два обозревателя практически не отличаются – в Tor Browser применяется привычная структура меню с многовкладочным интерфейсом и стандартным расположением блоков закладок и настроек. Основные отличия защищенного браузера – по умолчанию используется защищенная поисковая система DuckDuckGo, отключены плагины и другие надстройки, которые могут повлиять на безопасность. При желании их можно активировать.
В связи с использованием дополнительных узлов скорость отображения страниц в браузере несколько ниже, чем в обозревателях со стандартными методами защиты.
Особенности
Новая русская версия браузера для анонимного просмотра web-страниц. В программе используется специальная система промежуточных мостов Tor. Она пропускает через себя весь трафик и тем самым скрывает истинное местоположение конечного пользователя. Tor Browser базируется на основе обозревателя Mozilla Firefox, поэтому содержит привычный интерфейс и другие его преимущества.
Анонимность
Никто никогда не определит местоположение конечного пользователя
Мощная основа
Браузер является преднастроенной версией Mozilla Firefox, способного обрабатывать современные страницы
Без ограничений
Благодаря использованию промежуточного сервера вы сможете открывать web-сайты, запрещенные на уровне провайдера
Удобство
Интерфейс программы выполнен в классическом стиле, он позволяет применять стили оформления
Портативность
Обозреватель не требует инсталляции и не оставляет следов пребывания в системных папках


