- drm317 / gist:3e2a9ce4ba1288c4fbaab1e534d71133
- How to download and install prebuilt OpenJDK packages
- JDK 9 & Later
- JDK 8
- Debian, Ubuntu, etc.
- Fedora, Oracle Linux, Red Hat Enterprise Linux, etc.
- JDK 7
- Debian, Ubuntu, etc.
- Fedora, Oracle Linux, Red Hat Enterprise Linux, etc.
- JDK 6
- Debian, Ubuntu, etc.
- Fedora, Oracle Linux, Red Hat Enterprise Linux, etc.
- BSD Port
- Install the Microsoft Build of OpenJDK
- ZIP and TAR.GZ packages
- Native installers
- Install on Windows
- Install on macOS
- Uninstall on macOS
- Install on Ubuntu 18.04+
- Install on Debian 9
- Install on Debian 10
- Install on CentOS 7 (RPM)
- Set Microsoft Build of OpenJDK as the default on Linux
- Provide feedback on the Microsoft Build of OpenJDK
- Solarian Programmer
- My programming ramblings
- Installing Java OpenJDK on macOS Catalina
- Posted on September 28, 2018 by Paul
- How To Install OpenJDK 14 On Mac
- System Checks
- Download OpenJDK 14
- Install JDK
- Switch JDK
- Getting started with Java — Hello World
- Summary
drm317 / gist:3e2a9ce4ba1288c4fbaab1e534d71133
OpenJDK 11+ on MacOS X
Manually downloading, extracting and configuring the installation of OpenJDK 11+ is a high-maintenance exercise. Particularly if you need to install and switch between multiple versions of the JDK.
The following options for installing OpenJDK 11+ and switching between versions make the job easier..
Install with Jabba
Jabba is a Java version manager inspired by nvm (Node.js) written in Go.
- Install Jabba if you don’t have it already
- The list of available JDK can be displayed
- OpenJDK 11 can be installed with
- Switch to a specific version with
Jabba automatically manages JAVA_HOME and PATH settings. It installs JDKs to
Install with SDKMAN
SDKMAN is a tool for running multiple development kits on a machine. It can manage the installation and switching of Java versions.
- Install SDKMAN if you don’t have it already
Follow the instructions on-screen.
Next, run the following
- The different available versions of Java can be listed
- Install the OpenJDK 11 with
- Make OpenJDK 11 the default version
or switch to a different version for a particular session
Install with Homebrew
Before 3rd October 2018 the Oracle Java JDK was available via Homebrew. It has now been updated to OpenJDK.
- Install Homebrew if you don’t have it already. Ensure it is updated
- Add the casks tap
- Search for installable versions
- Verify the details of the version that will be installed
- Install a specific version java8 , java10 or the latest java
The AdoptOpenJDK is also available from Homebrew Cask
The installation directory is /Library/Java/JavaVirtualMachines/ which is the traditional location on MacOSX
To find the locations of installed JDKs
or for a specific version
Note the upper and lowercase ‘v’.
The /Library/Java/JavaVirtualMachines/openjdk-11.jdk/Contents/Home utility can be to change versions manually or add aliases for a particular shell. The following can be added to .bash_profile or .profile
The aliases can be used to change versions on the fly
Источник
How to download and install prebuilt OpenJDK packages
JDK 9 & Later
Oracle’s OpenJDK JDK binaries for Windows, macOS, and Linux are available on release-specific pages of jdk.java.net as .tar.gz or .zip archives.
As an example, the archives for JDK 13 may be found on jdk.java.net/13 and may be extracted on the command line using
depending on the archive type.
JDK 8
Debian, Ubuntu, etc.
On the command line, type:
The openjdk-8-jre package contains just the Java Runtime Environment. If you want to develop Java programs then please install the openjdk-8-jdk package.
Fedora, Oracle Linux, Red Hat Enterprise Linux, etc.
On the command line, type:
The java-1.8.0-openjdk package contains just the Java Runtime Environment. If you want to develop Java programs then install the java-1.8.0-openjdk-devel package.
JDK 7
Debian, Ubuntu, etc.
On the command line, type:
The openjdk-7-jre package contains just the Java Runtime Environment. If you want to develop Java programs then install the openjdk-7-jdk package.
Fedora, Oracle Linux, Red Hat Enterprise Linux, etc.
On the command line, type:
The java-1.7.0-openjdk package contains just the Java Runtime Environment. If you want to develop Java programs then install the java-1.7.0-openjdk-devel package.
JDK 6
Debian, Ubuntu, etc.
On the command line, type:
The openjdk-6-jre package contains just the Java Runtime Environment. If you want to develop Java programs then install the openjdk-6-jdk package.
Fedora, Oracle Linux, Red Hat Enterprise Linux, etc.
On the command line, type:
The java-1.6.0-openjdk package contains just the Java Runtime Environment. If you want to develop Java programs then install the java-1.6.0-openjdk-devel package.
BSD Port
For a list of pointers to packages of the BSD Port for DragonFly BSD, FreeBSD, Mac OS X, NetBSD and OpenBSD, please see the BSD porting Project’s wiki page.
Источник
Install the Microsoft Build of OpenJDK
This article describes how to install the Microsoft Build of OpenJDK.
ZIP and TAR.GZ packages
For Windows, Linux, and macOS, we produce ZIP (Windows) and TAR.GZ (Linux/macOS) packages. To install, extract one of these packages in a folder of your choice, then set the JAVA_HOME environment variable to that folder.
Alternately, you can use native installers for your OS of choice, as described in the next section.
Native installers
For Windows, we produce an MSI installer with a graphical interface. For macOS, we produce a PKG installer with similar features. These installers will automatically make the JDK tools available in your PATH .
For Linux, we produce DEB and RPM packages to be used with apt and rpm .
The following sections provide instructions for these installers.
Install on Windows
To install on any version of Windows, you can use the MSI packages or the ZIP package. If you’re on Windows 10, you can use the Windows Package Manager from your Windows Terminal.
To install with the Windows Package Manager, first install winget, and then open the Windows Terminal.
Next, use the following command to search for the Microsoft Build of OpenJDK packages:
You’ll see output similar to the following:
You can now install the package by referencing the Id shown above, using the following command:
This command produces an output similar to the following:
Install on macOS
Packages for macOS are available through Homebrew or as standalone downloads in PKG or TAR.GZ formats.
To install the latest version with Homebrew:
This command produces a output similar to the following:
To install other versions with Homebrew you need to tap the cask-versions repo first:
To install on macOS with the TAR.GZ package, just extract the file into a location. The JDK will be inside /jdk- /Contents/Home .
To install using the PKG installer, open the installer and follow the instructions. By default, the JDK will be installed at /Library/Java/JavaVirtualMachines/microsoft-17.jdk/Contents/Home .
Uninstall on macOS
To uninstall the Microsoft Build of OpenJDK installed through Homebrew or PKG, use the following commands:
To uninstall the package installed through the TAR.GZ package, simply delete the folder.
Install on Ubuntu 18.04+
To install on Ubuntu 18.04 and later versions, open a terminal and run the following commands:
After the repository is added, install the Microsoft Build of OpenJDK by running the following commands:
Note: you may have to update your default JDK, see here for details.
Install on Debian 9
To install on Debian 9, open a terminal and run the following commands:
After the repository is added, run the following commands:
Note: you may have to update your default JDK, see here for details.
Install on Debian 10
To install on Debian 10, open a terminal and run the following commands:
After the repository is added, run the following commands:
Note: you may have to update your default JDK, see here for details.
Install on CentOS 7 (RPM)
To install on CentOS 7, open a terminal and run the following command:
After the repository is added, run the following command:
Note: you may have to update your default JDK, see here for details.
Set Microsoft Build of OpenJDK as the default on Linux
If you have several versions of OpenJDK installed on your system, use the following command to set the Microsoft Build of OpenJDK as the default:
For CentOS, you can use the command alternative .
Provide feedback on the Microsoft Build of OpenJDK
Send us your comments, thoughts, and ideas to help us improve the Microsoft Build of OpenJDK. Visit our OpenJDK discussions page on GitHub to send us your feedback.
Java and OpenJDK are trademarks or registered trademarks of Oracle and/or its affiliates.
Источник
Solarian Programmer
My programming ramblings
Installing Java OpenJDK on macOS Catalina
Posted on September 28, 2018 by Paul
Updated 15 October 2019
This is a short note about getting started with Java 11 LTS or Java 13 on macOS Catalina. As you probably know, starting with Java 11 there was a big change in the license under which the official Oracle JDK is provided. In short, you need to buy a license from Oracle if you want to use the official JDK in a commercial setting. As far as I know, using Oracle’s JDK on your private computer for testing and learning purposes is allowed.
That being said, for most users OpenJDK is the new JDK of choice, it is provided under an open source license and you don’t need to pay for using it.
There is also a video version of this tutorial:
At this time, Java 11, the long term release or LTS, of Java is no longer supported on the OpenJDK website. You can still get the archived version, but this is not recommended because it doesn’t include any new security patches. If you still need to use Java 11, use an alternative build like the one from AdoptOpenJDK. From the AdoptOpenJDK page you will download a pkg file that you can install on your macOS machine directly by double clicking on it.
After you’ve installed the AdoptOpenJDK pkg file, check if you can use it with:
This is what I see on my machine:
If you prefer to use the Java version provided by the OpenJDK website, you will need to use Java 13. Start by getting OpenJDK, chose the macOS version. Extract the archive by double clicking on the file or, assuming it is in your Downloads folder, write this in your Terminal:
Next step, is to move the extracted folder to a place where macOS searches for Java JDK:
Now, check if you’ve successfully installed the JDK with:
This is what I see on my machine:
Just to be sure that everything works, try to compile and run a simple program:
Save the above as HelloWorld.java and compile it with:
If you want to run the compiled version:
This is what I see on my machine:
Side note, you can also run directly the program, without the separate compilation step with:
but this is usually slower than compiling the code with javac and running the compiled code.
Источник
How To Install OpenJDK 14 On Mac
It provides all the steps required to install OpenJDK 14 on Mac systems including macOS Sierra, High Sierra, Mojave, and Catalina.
In this tutorial, we will discuss how to install OpenJDK 14 on Mac systems. It provides the steps required to install OpenJDK 14 on macOS Catalina. The steps should be the same for other versions of macOS including Sierra, High Sierra, and Mojave.
Notes: Oracle Java updates and new releases available on its official site are not free since 16th April 2019. The consumer has to purchase a commercial license unless and otherwise Oracle Java can be used for personal and development purposes. We can still use Java for personal, development, and commercial usage without purchasing any license by using the OpenJDK distributed by Oracle under the GNU General Public License, version 2, with the Classpath Exception, and available on http://jdk.java.net.
System Checks
In this step, we will test whether Java is already installed or not. To do so, open the terminal and type java -version as shown in Fig 1. It shows that Java is already installed on my system.

It might show the message — «No Java runtime present, requesting install» in absence of Java and also opens a dialog to know more about it as shown in Fig 2.
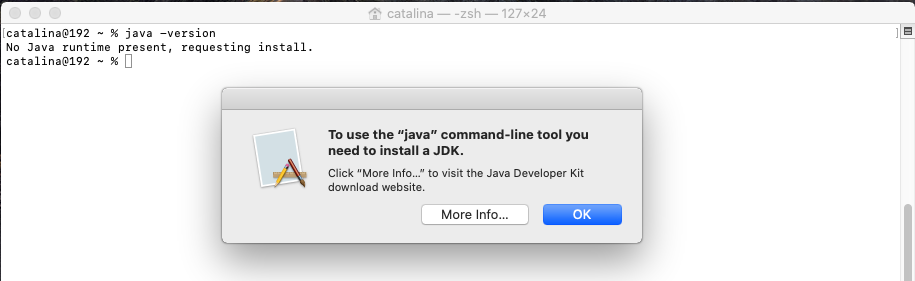
Click the OK Button to hide the dialog in case it’s displayed on your system in absence of Java.
Download OpenJDK 14
Open the download link to select the available versions as shown in Fig 3.

Click the Download Link as highlighted in Fig 3 to download OpenJDK 14 for macOS.
Install JDK
The default location used by macOS to search for the available JDK is — /Library/Java/JavaVirtualMachines. We can use the below-mentioned command to find the available JDKs installed on the system.
It will list down the available JDKs as shown in Fig 4.

Now, install the OpenJDK downloaded in the previous step using the commands as shown below.
Optionally, remove the existing Oracle JDK 14. I have removed the existing Oracle JDK 14 (Fig 1 and Fig 4) to install OpenJDK 14. You may also rename the OpenJDK 14 to install it parallel to the existing Oracle JDK 14.
Install OpenJDK 14 extracted by us.
Now we will verify the installation as shown below.
You might be required to switch the active JDK in case it does not reflect the OpenJDK 14. Again check the list of installed JDKs as shown below.
It should list the OpenJDK 14 installed by us. This is how we can install and verify Java on macOS.
Switch JDK
We can switch between the multiple JDKs using the command as shown below.
This switches the Java version for the active shell. If you close the terminal and again check the Java version by opening a new terminal, your changes won’t be reflected. You can follow How To Switch Java Version On Mac to system-wide update the Java version.
Getting started with Java — Hello World
In this step, we will write, compile, and execute our first program in Java using the standard Hello World example.
Now write the first Java program as shown below, save the program as HelloWorld.java and exit the editor. Make sure that the class name and file name are the same.
Now open the command prompt and navigate to the path where you have saved your Java program. Use the below-mentioned commands to compile and execute the program.
These are the easy to install steps required to install Oracle JDK on Mac and write, compile and execute the first Java program.
Summary
This tutorial provided all the steps required to install Oracle JDK 14 on Mac and also provided the steps required to compile and run the first Java program using a simple Hello World program.
Источник


