- Отладка с помощью xdebug в PhpStorm
- Установка отладчика
- Работа с отладчиком
- Step Over
- Step Into
- Force Step Into
- Step Out
- Run To Cursor
- Отладка через прокси
- Xdebug. Установка отладчика (дебагера) PhpStorm для Windows
- Установка Xdebug
- Проверка работы отладчика Xdebug
- Configure Xdebug
- Download Xdebug
- Integrate Xdebug with the PHP interpreter
- Configure Xdebug in PhpStorm
- Configure Xdebug for using in the On-Demand mode
- Configure Xdebug for using in the Just-In-Time mode
- Command-line scripts
- Web server debugging
- Configure Xdebug running in a Docker container
Отладка с помощью xdebug в PhpStorm
Установка отладчика
Выяснить, какое именно расширение xdebug надо скачать, поможет страница xdebug.org/wizard. Копируем html-код вывода функции phpinfo() и вставляем в поле формы. После отправки формы получаем такой вывод и инструкции по установке:

Копируем расширение в директорию ext , добавляем в файл php.ini строки
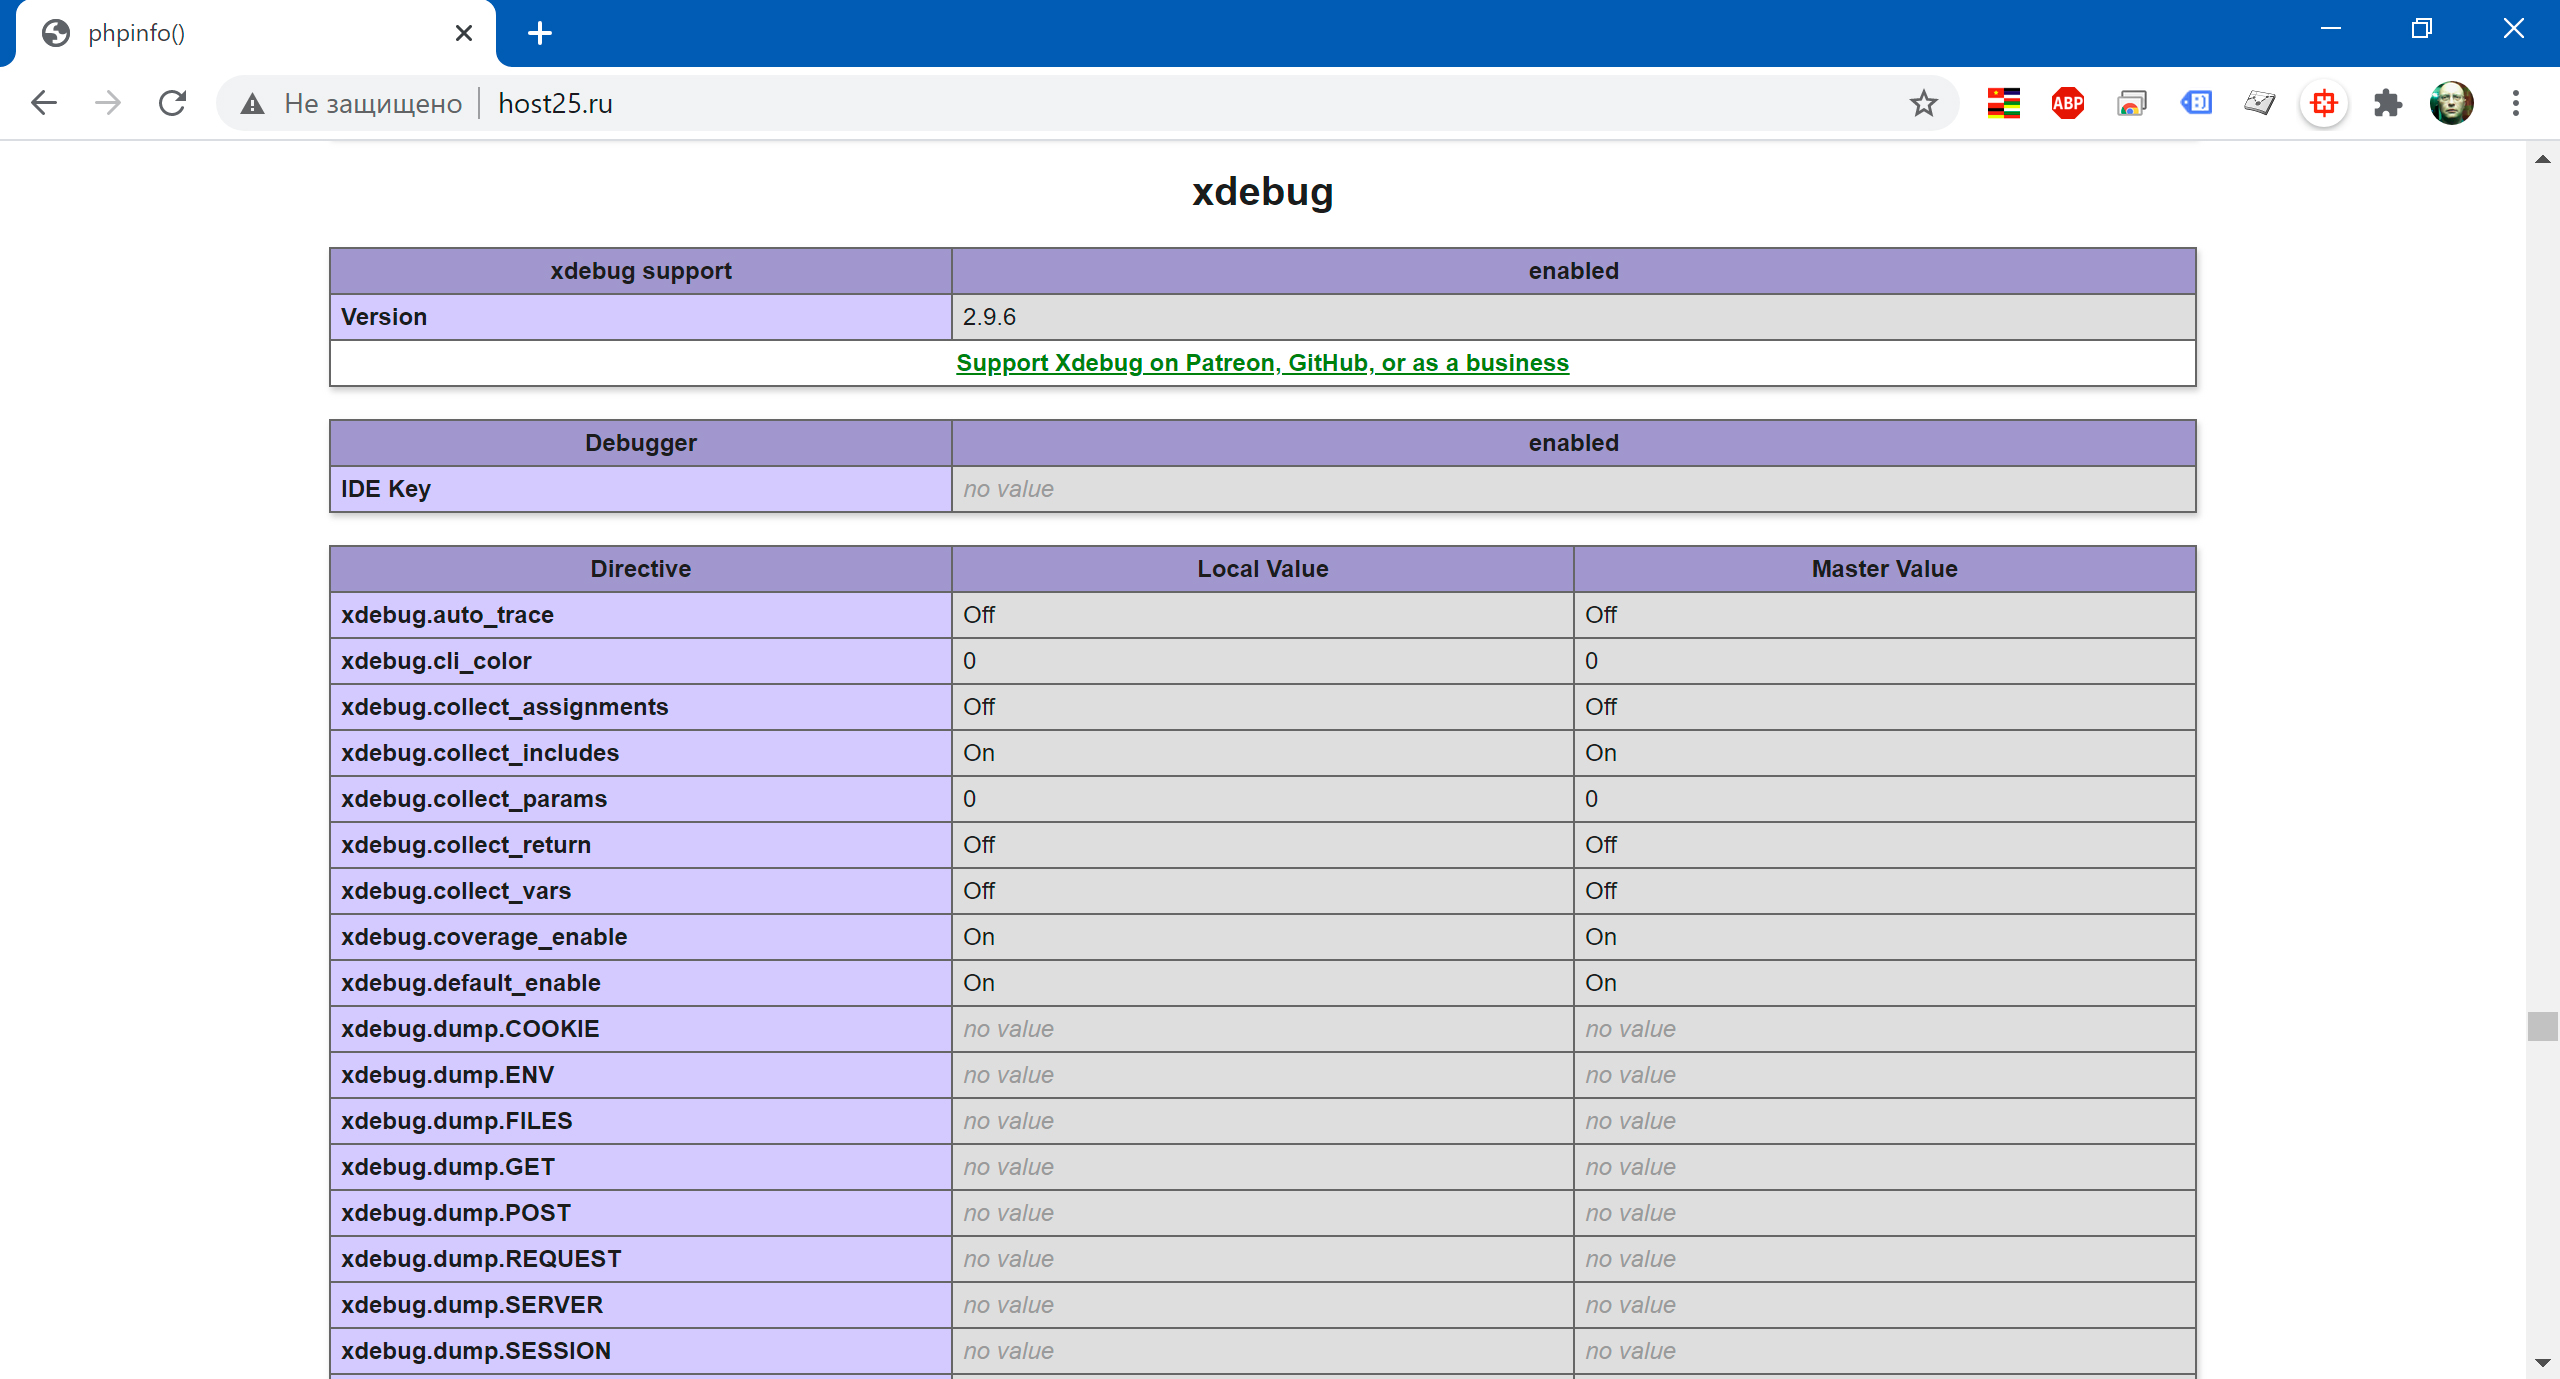
Проверяем вывод функции phpinfo() , чтобы убедиться, что расширение подключено
В PhpStorm настройки отладчика находятся на вкладке File → Settings → Languages & Frameworks → PHP → Debug
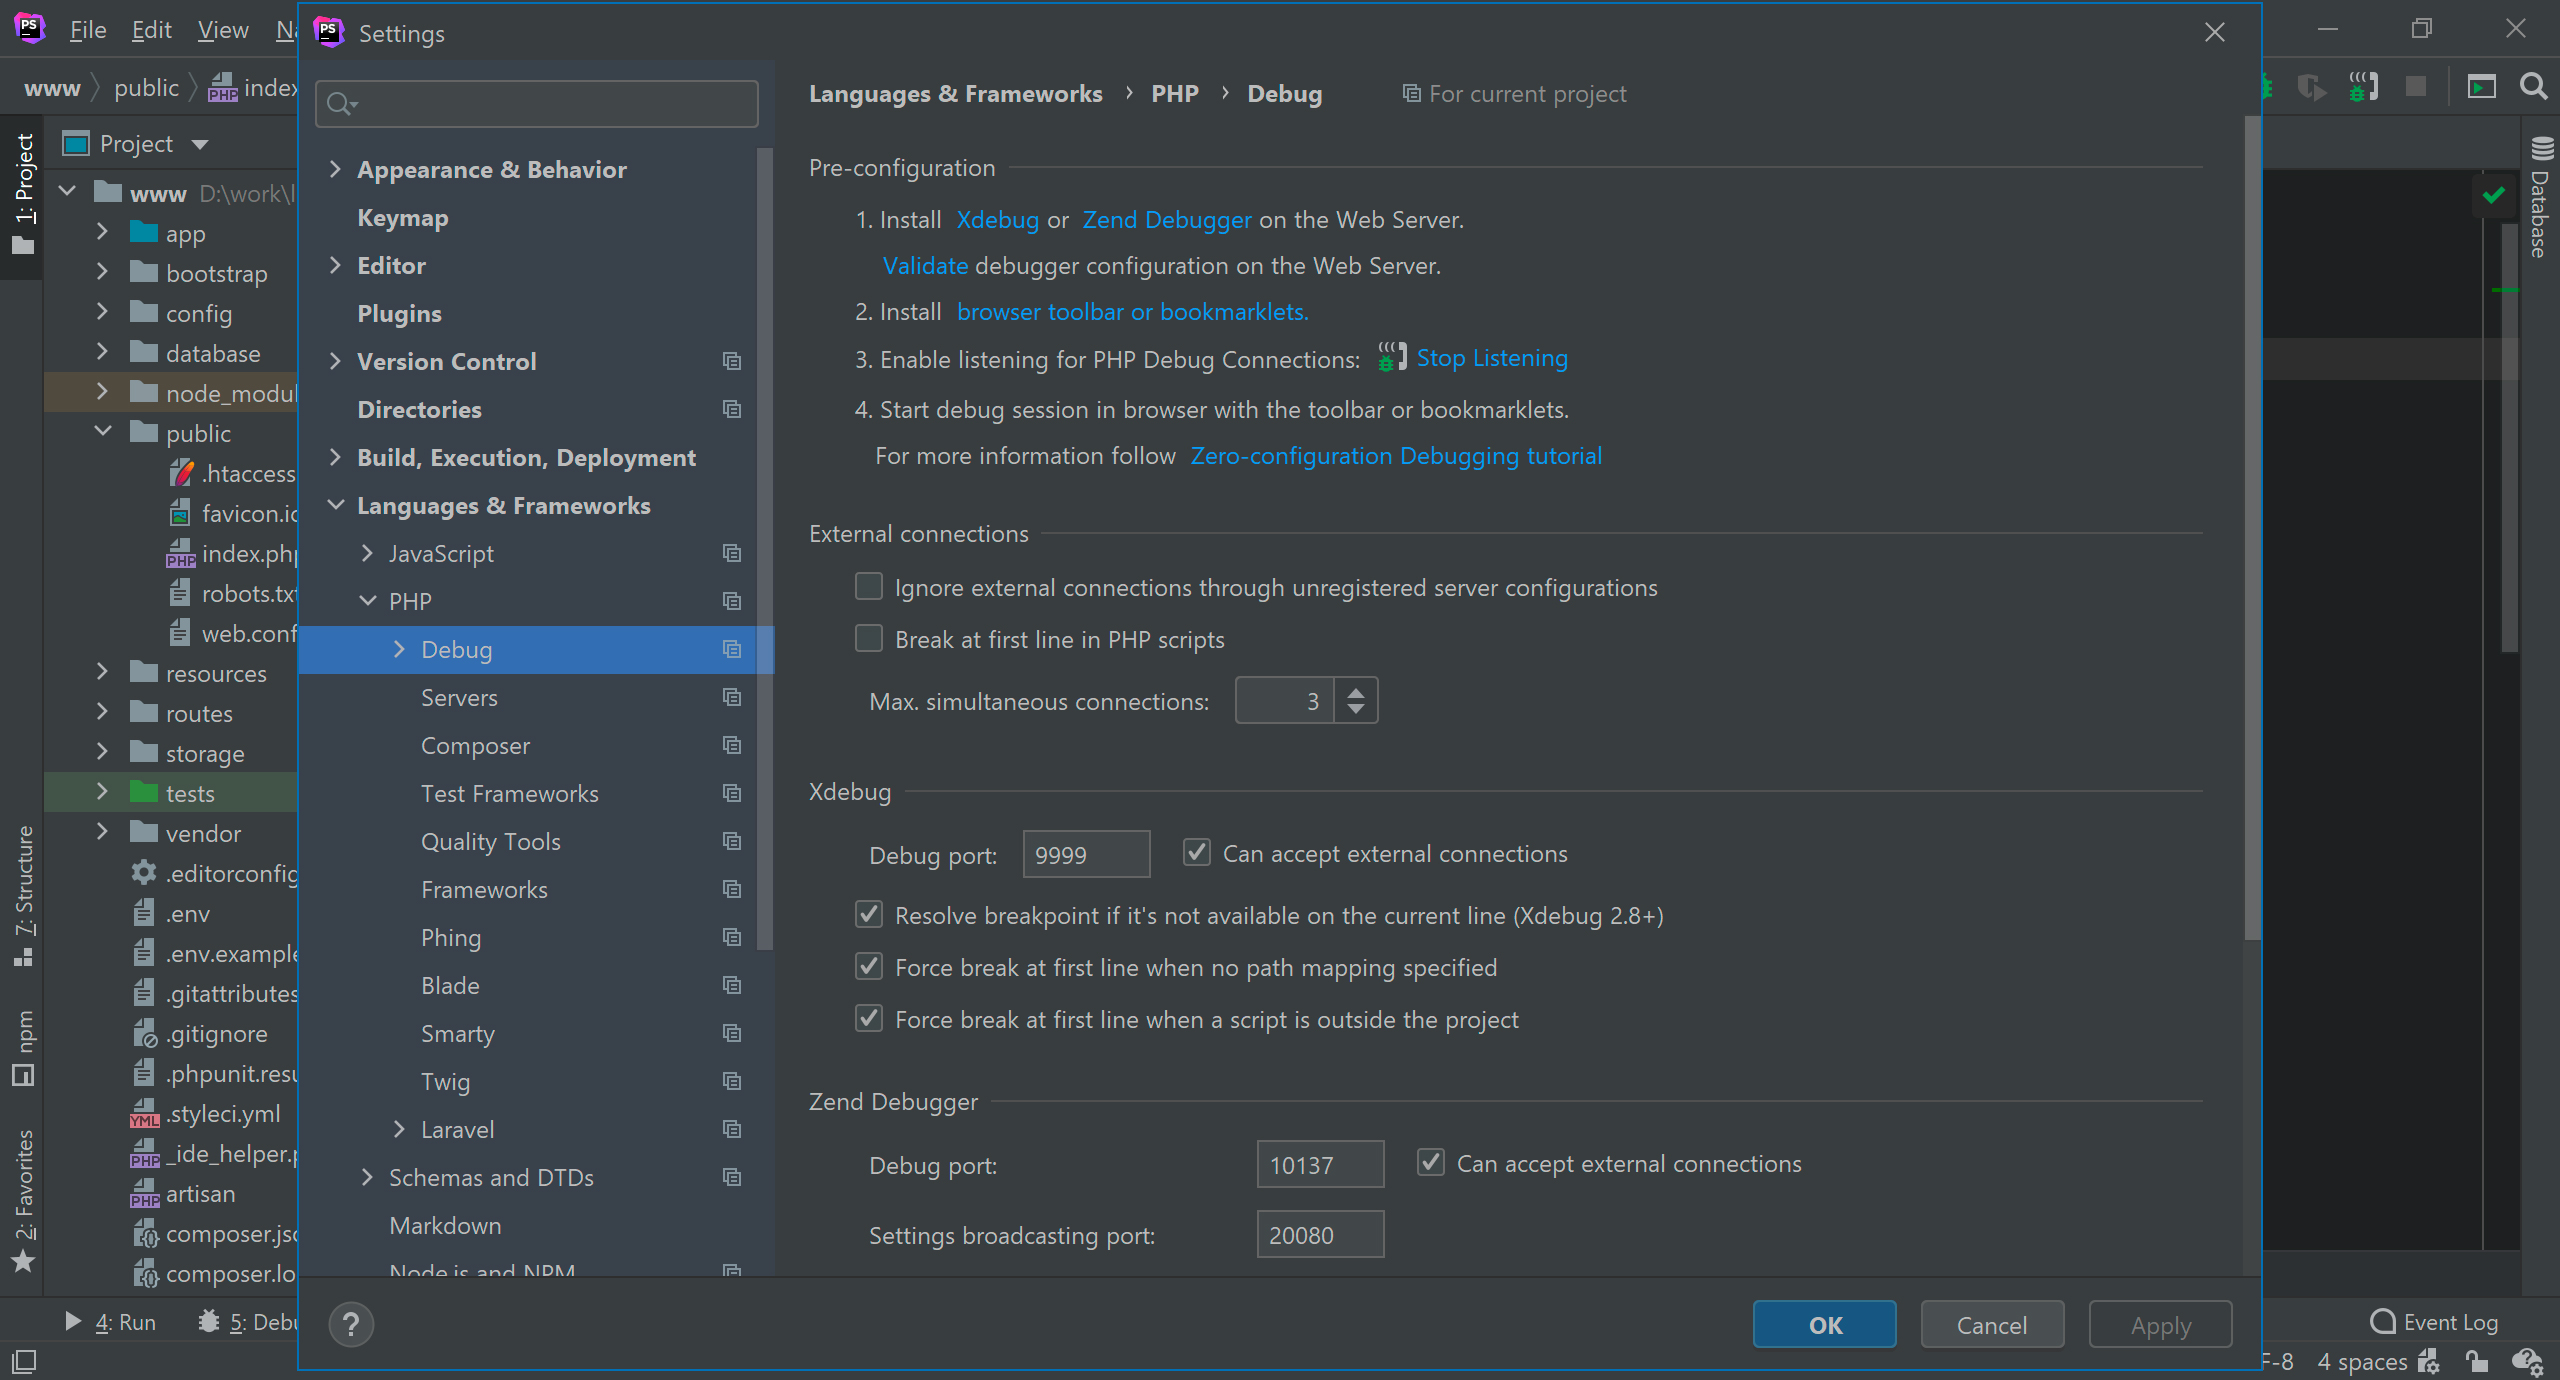
Здесь нужно задать порт, который мы указали в файле php.ini (у меня это 9999).
Работа с отладчиком
Поскольку с помощью remote_autostart мы указали автоматически запускать отладку — нам достаточно в PhpStorm нажать иконку «Start Listening» и задать точку останова — при запросе любой страницы сайта выполнение остановится в этой точке.
В панели отладчика доступны несколько кнопок, назначение которых сейчас рассмотрим.
Step Over
Если следующая строка, которая будет выполнена, является вызовом фунции или метода класса — перешагнуть через вызов (выполнив код функции или метода) — и останавиться на следующей строке кода.
Step Into
Если следующая строка, которая будет выполнена, является вызовом фунции или метода класса — перейти внутрь этой функции или метода — и остановиться на первой строке функции или метода.
Force Step Into
Некоторые скрипты, функции и методы пропускаются Step Into , какие именно — можно посмотреть на вкладке File → Settings → Build, Execution, Deployment → Debugger → Stepping. Кнопка Force Step Into позволяет обойти эту настройку и все-таки войти внутрь скрипта, функции или метода.
Step Out
Выйти из текущей функции или метода и вернуться к месту вызова. Тут все просто — вошли с помощью Step Into , посмотрели — вышли.
Run To Cursor
Выполнять код, пока не будет достигнута позиция курсора — и в этом месте остановиться.
Отладка через прокси
При запуске сеанса отладки, расширение xdebug подключается к ip-адресу, на котором работает PhpStorm, указанному в опции remote_host . PhpStorm принимает это соединение и может общаться с xdebug через него. Расширение xdebug поддерживает подключение только к одному ip-адресу и не подключается автоматически к ip-адресу, на котором работает браузер. Для отладки php кода несколькими разработчиками xdebug предлагает так называемый прокси DBGp.
Когда используется прокси, расширение xdebug больше не подключается к PhpStorm напрямую, а вместо этого подключается к прокси-серверу DBGp. Все разработчики в команде по очереди подключаются к этому прокси. У каждого разработчика есть отдельный сеанс отладки, выполняемый через этот прокси-сервер, что позволяет выполнять многопользовательскую отладку одного и того же кода на одном сервере.
Итак, потребуется прокси DBGp, работающий на машине, к которой может получить доступ как сам веб-сервер, так и все компьютеры разработчиков. Чаще всего прокси запускают на той же машине, на которой работает веб-сервер. Исполняемый файл прокси DBGp принимает два основных аргумента:
- -s — порт для прослушивания соединений отладчика (сервер)
- -i — порт для прослушивания подключений IDE (клиент)
Для примера, запустим прокси который прослушивает соединения отладчика на ip-адресе 127.0.0.1 и порту 9001 , и слушает разработчиков по ip-адресу 192.168.99.1 и порту 9000 .
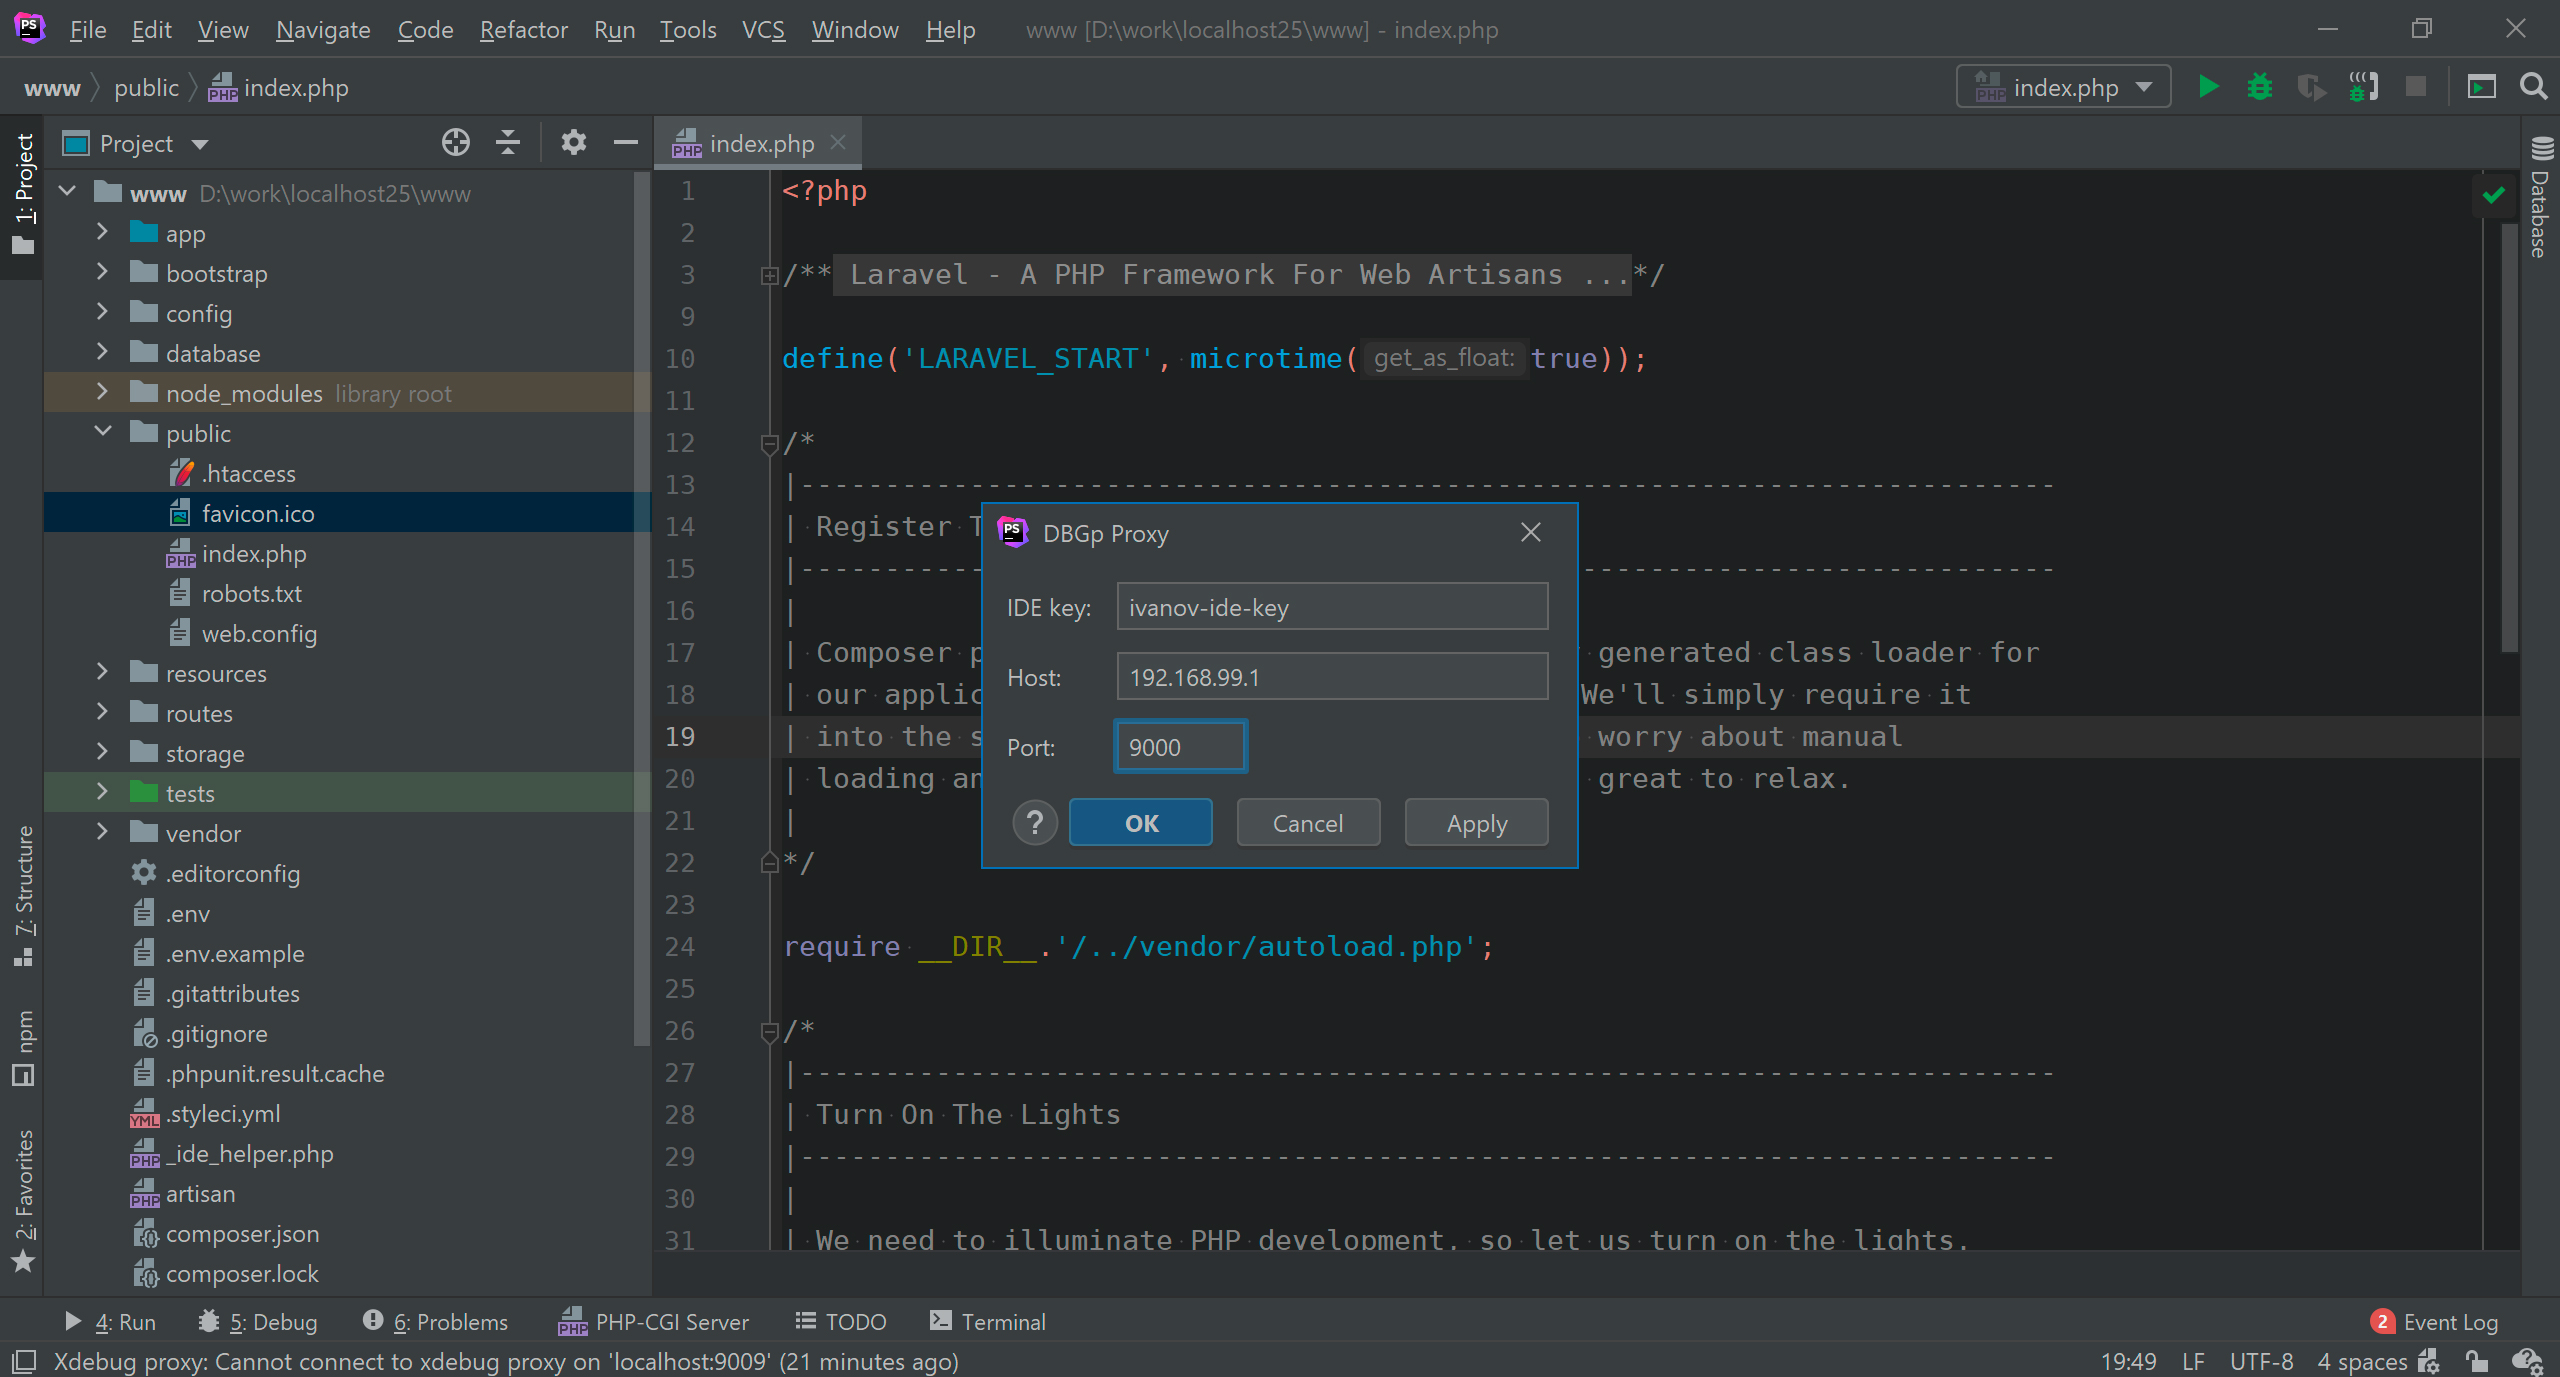
После этого каждый разработчик должен зарегистрировать свой уникальный ключ IDE на прокси — Tools → DBGp Proxy → Register IDE
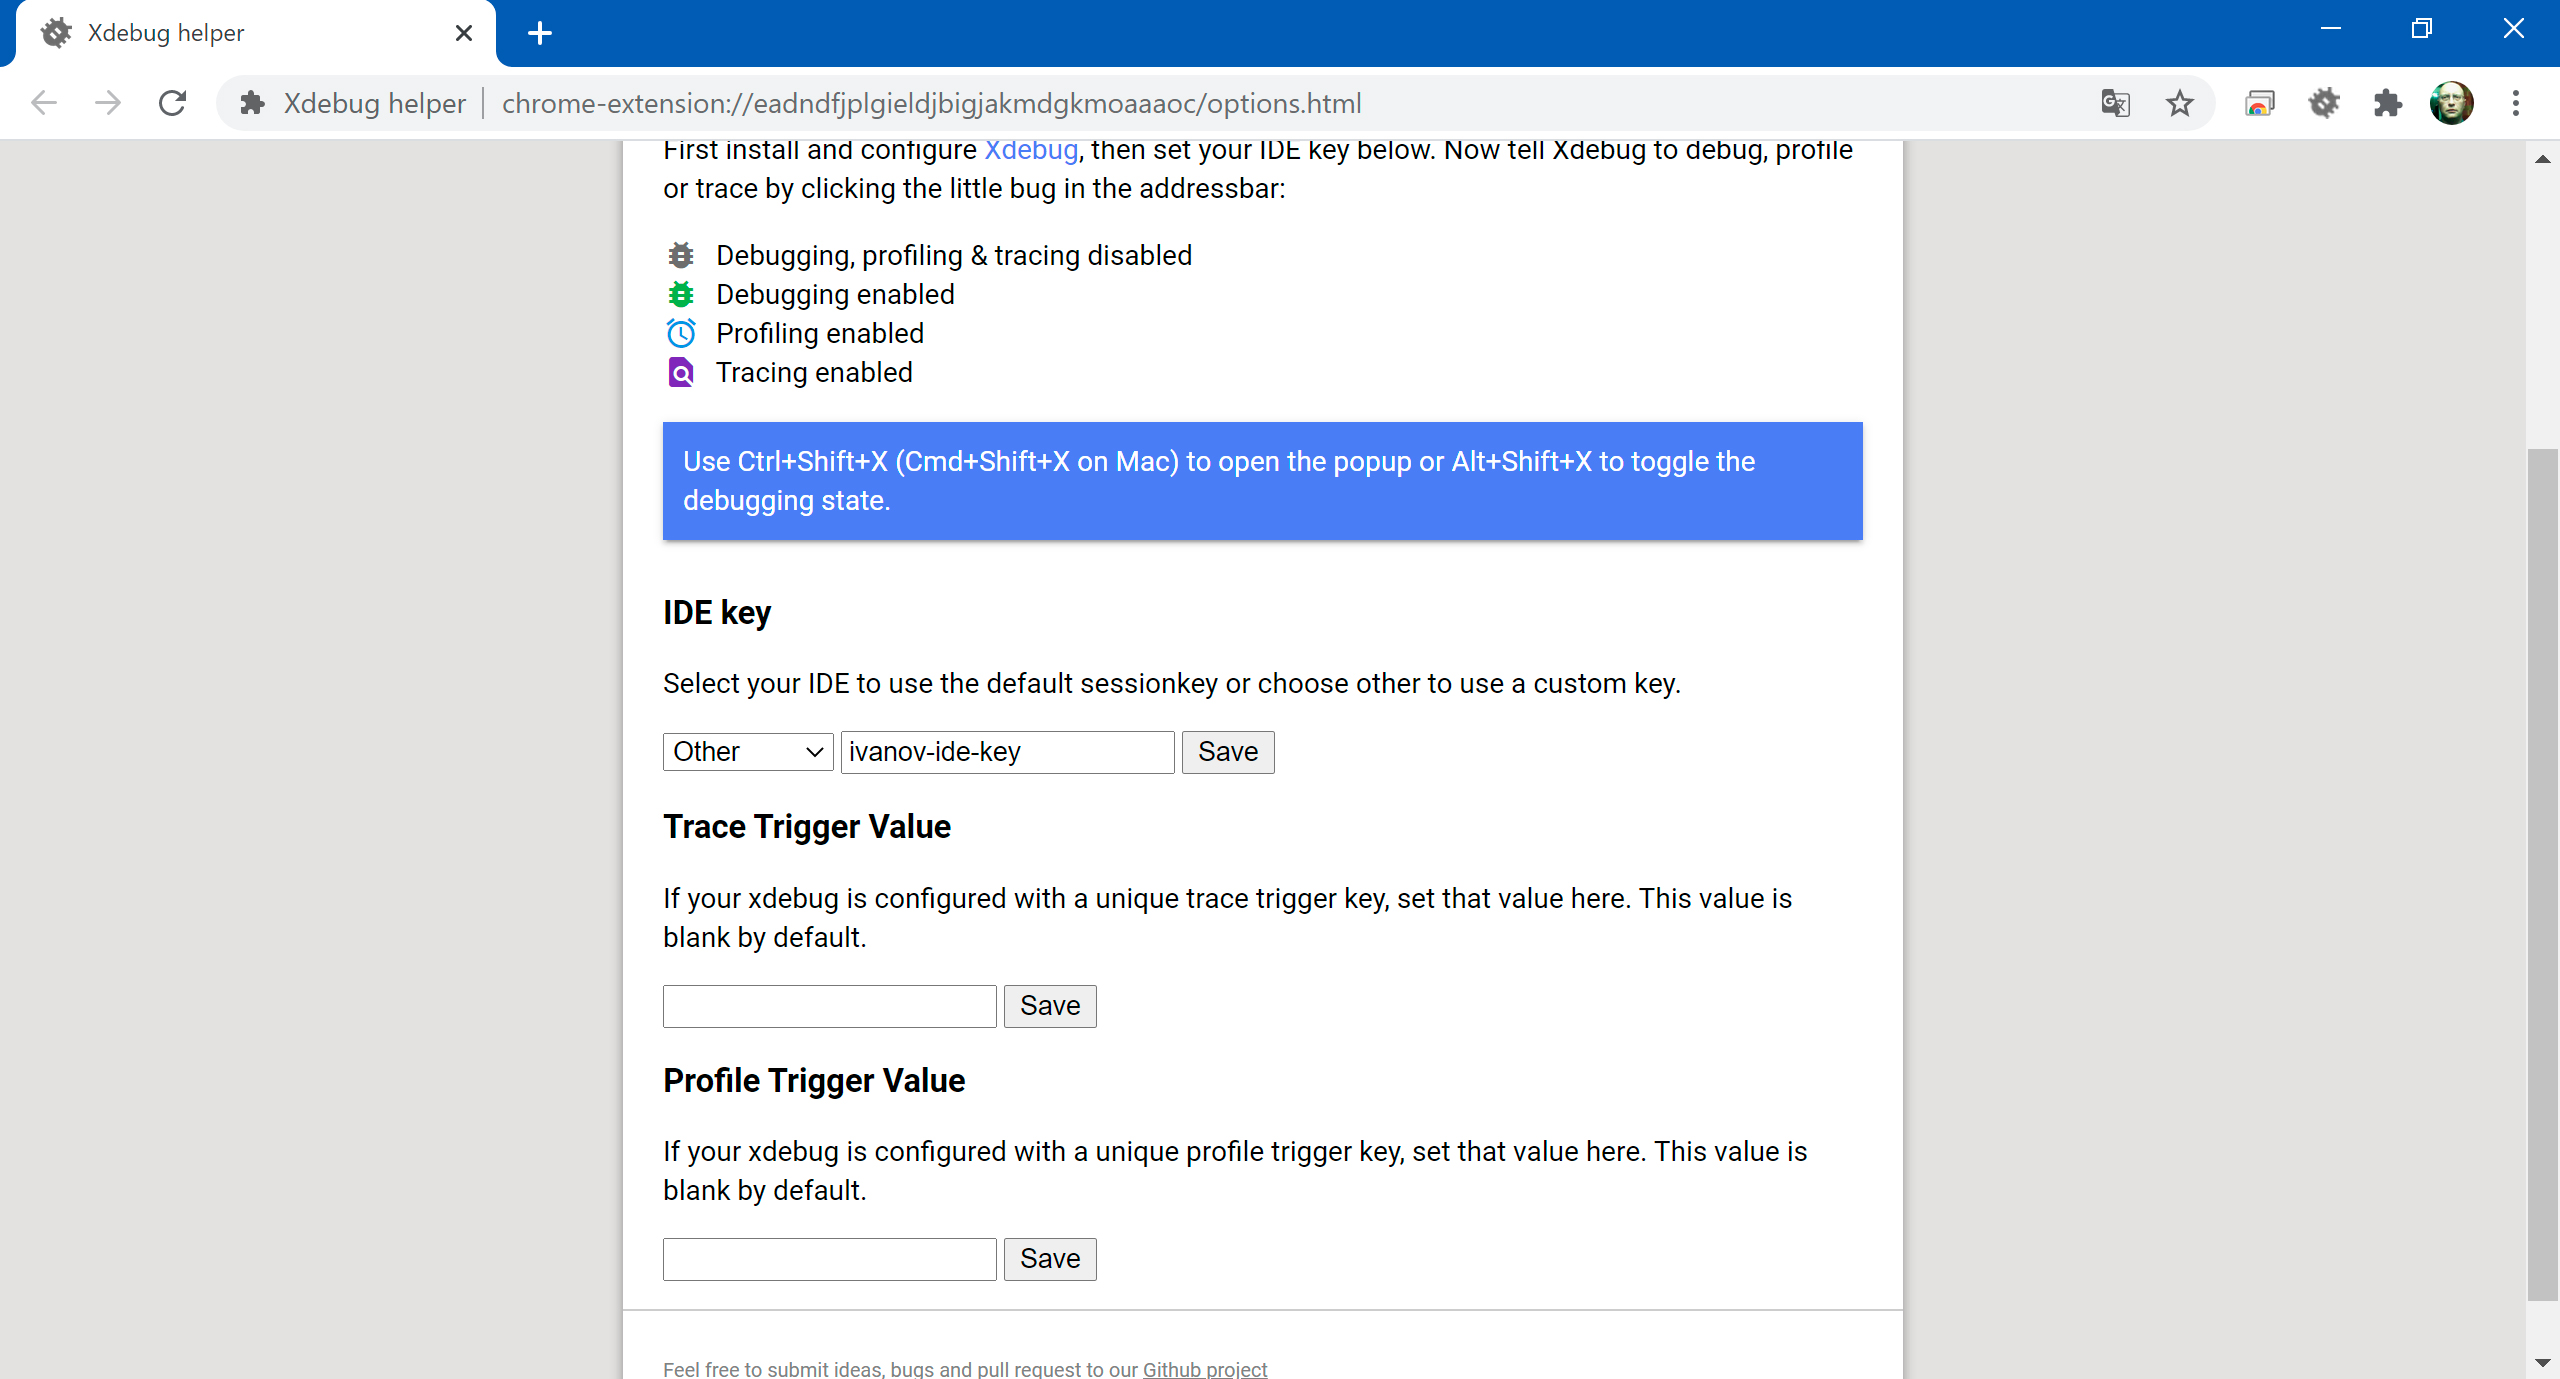
Кроме того, каждый разработчик должен установить расширение Xdebug helper для браузера Chrome и указать в настройках свой уникальный ключ IDE:
Все это более подробно можно прочитать здесь.
Xdebug. Установка отладчика (дебагера) PhpStorm для Windows
В этой статье мы рассмотрим возможность подключения интерпретатора PHP, отладчика Xdebug к PhpStorm на OC Windows и использование встроенного в IDE web-сервера.
Начнем с установки отладчика Xdebug в PHP.
Установка Xdebug
Первым делом убедимся в том, что интерпретатор PHP установлен в систему и доступен, открыв командную строку и введя следующую команду: php -v
Должна появится информация о версии PHP, подобно этой:
Если этого не произошло, тогда делаем следующее:
- Скачиваем интерпретатор PHP по ссылке: http://windows.php.net/downloads/releases/php-5.6.29-nts-Win32-VC11-x64.zip и распаковываем его, например, в директорию C:\php
- Далее, нажав правой кнопкой мыши на значке Этот компьютер, выбираем пункт Свойства -> Дополнительные параметры системы

- В открывшемся окне выбираем вкладку Дополнительно, кнопка Переменные среды

- В разделе Переменные среды пользователя ищем переменную PATH. Если её нет, то создаем:
- Имя переменной: PATH
- Путь до директории, в которую вы распаковали архив с PHP. В моем случае будет так:
- Значение переменной: C:\php

- Сохраняем и обязательно перезапускаем консоль!
Теперь можно снова проверить работу PHP командой php -v. Должна вывестись корректно версия PHP, как было показано выше.
Теперь можно перейти к установке отладчика Xdebug, для которого существует специальный помощник, значительно упрощающий процедуру установки. Для его использования перейдем по ссылке:
На этой странице, необходимо ввести в поле ввода информацию об установленном PHP-интерпретаторе, которая генерируется с помощью PHP-функции phpinfo(). Вводить нужно весь скопированный текст со страницы.
Или, введя в консоль команду php -i, которая генерирует информацию о PHP.
Копируем полученную информацию, нажимаем кнопку Analyse my phpinfo() output и получаем инструкцию по установке Xdebug.
В зависимости от вашей версии PHP и пути установки инструкция может отличаться от моей:
Перемещаем её в папку C:\php\ext
В файл C:\php\php.ini (если такого файла нет, ищем файл файл php.ini-development и переименовываем его в php.ini) находим секцию Dynamic Extensions и добавляем следующую строку:
Подключение интерпретатора PHP к PhpStorm
Теперь перейдем в PhpStorm и откроем настройки комбинацией клавиш Ctrl+Alt+S.
Далее, в секции Languages & Frameworks выберем пункт PHP. В этой секции необходимо назначить интерпретатор для IDE в пункте Interpreter нажав на кнопку …

В открывшемся окне, нажимаем на кнопку +, выбираем пункт Other local… в поле Name вводим любое имя для удобства дальнейшей идентификации, например: PHP 5.6.
В поле PHP executable указываем путь до интерпретатора, например: C:\php\php.exe. Обратите внимание на появившуюся версию PHP и дебагера, что свидетельствует о правильности установки.

Чтобы убедиться в том, что правильно отрабатывает подключенный интерпретатор PHP, создадим в PhpStorm новый проект, добавим к нему файл index.php и запишем в этот файл, например, функцию var_dump([ 1, 2, 3 ]) с переданным в нее массивом.
Работа с отладчиком Xdebug в PhpStorm
Прежде чем приступить к отладке PHP-скриптов с помощью Xdebug произведем необходимую настройку в файле php.ini. В секции Dynamic Extensions, после подключения расширения Xdebug, добавим следующие настройки:
Теперь зайдем в PhpStorm и откроем настройки. Перейдем в Languages & Frameworks -> PHP -> Debug. В секции Xdebug убедимся, что установлены следующие настройки:

Проверка работы отладчика Xdebug
Чтобы проверить, что все действия были проведены верно, создадим в новом проекте файл index.php и напишем следующий код:

И поставим точку остановки на строке с var_dump().
Теперь запустим отладку этого скрипта, нажав правую кнопку мыши и выбрав пункт Debug ‘index.php’.

Если все было сделано правильно, то в PhpStorm появится вывод дебага, как показано на скриншоте.
Configure Xdebug
Download Xdebug
Download the Xdebug extension compatible with your PHP version and install it as described in the installation guide.
Xdebug 3 brings performance improvements, simplified configuration, and PHP 8 support. To learn more on upgrading to Xdebug 3, see the Upgrade guide.
If you are using an AMP package, the Xdebug extension may be already installed. Refer to the instructions specific for your package.
Integrate Xdebug with the PHP interpreter
Open the active php.ini file in the editor:
In the Settings/Preferences dialog Ctrl+Alt+S , click PHP .
On the PHP page that opens, click next to the CLI Interpreter field.
In the CLI Interpreters dialog that opens, the Configuration file read-only field shows the path to the active php.ini file. Click Open in Editor .
To disable the Zend Debugger and Zend Optimizer tools, which block Xdebug, remove or comment out the following lines in the php.ini file:
To enable Xdebug, locate or create the [xdebug] section in the php.ini file and update it as follows:
» xdebug.remote_enable=1 xdebug.remote_host=127.0.0.1 xdebug.remote_port=»
In PHP 5.3 and later, you need to use only zend_extension , not zend_extension_ts , zend_extension_debug , or extension .
To enable multi-user debugging via Xdebug proxies, locate the xdebug.idekey setting and assign it a value of your choice. This value will be used to register your IDE on Xdebug proxy servers.
Save and close the php.ini file.
Verify Xdebug installation by doing any of the following:
In the command line, run the following command:
The output should list Xdebug among the installed extensions:

Create a php file containing the following code:

Configure Xdebug in PhpStorm
In the Settings/Preferences dialog Ctrl+Alt+S , select PHP .
Check the Xdebug installation associated with the selected PHP interpreter:
On the PHP page, choose the relevant PHP installation from the CLI Interpreter list and click next to the field. The list shows all the PHP installations available in PhpStorm, see Configure local PHP interpreters and Configure remote PHP interpreters.
The version of the selected PHP installation.
The name and version of the debugging engine associated with the selected PHP installation (Xdebug or Zend Debugger). If no debugger is configured, PhpStorm shows the corresponding message:

Alternatively, open the Installation Wizard, paste the output of the phpinfo() , and click Analyze my phpinfo() output . Learn more about checking the Xdebug installation in Validate the Configuration of a Debugging Engine.
Define the Xdebug behaviour. Click Debug under the PHP node. On the Debug page that opens, specify the following settings in the Xdebug area:
In the Debug port field, appoint the port through which the tool will communicate with PhpStorm.
This must be the same port number as specified in the php.ini file:
By default, Xdebug 2 listens on port 9000 . For Xdebug 3, the default port has changed from 9000 to 9003 . You can specify several ports by separating them with a comma. By default, the Debug port value is set to 9001,9003 to have PhpStorm listen on both ports simultaneously.
To have PhpStorm accept any incoming connections from Xdebug engine through the port specified in the Debug port field, select the Can accept external connections checkbox.
Select the Force break at first line when no path mapping specified checkbox to have the debugger stop as soon as it reaches and opens a file that is not mapped to any file in the project on the Servers page. The debugger stops at the first line of this file and Examine/update variables shows the following error message: Cannot find a local copy of the file on server
and a link Click to set up mappings . Click the link to open the Resolve Path Mappings Problem dialog and map the problem file to its local copy.
When this checkbox cleared, the debugger does not stop upon reaching and opening an unmapped file, the file is just processed, and no error messages are displayed.
Select the Force break at first line when a script is outside the project checkbox to have the debugger stop at the first line as soon as it reaches and opens a file outside the current project. With this checkbox cleared, the debugger continues upon opening a file outside the current project.
In the External connections area, specify how you want PhpStorm to treat connections received from hosts and through ports that are not registered as deployment server configurations.
Ignore external connections through unregistered server configurations : Select this checkbox to have PhpStorm ignore connections received from hosts and through ports that are not registered as deployment server configurations. When this checkbox is selected, PhpStorm does not attempt to create a deployment server configuration automatically.
Break at first line in PHP scripts : Select this checkbox to have the debugger stop as soon as connection between it and PhpStorm is established (instead of running automatically until the first breakpoint is reached). Alternatively turn on the Run | Break at first line in PHP scripts option from the main menu.
Max. simultaneous connections Use this spin box to limit the number of external connections that can be processed simultaneously.
By default, PhpStorm only listens for incoming IPv4 connections. To enable IPv6 support, you need to make adjustments in PhpStorm JVM options:
Select Help | Edit Custom VM Options from the main menu.
In the .vmoptions file that opens, delete the -Djava.net.preferIPv4Stack=true line.
Configure Xdebug for using in the On-Demand mode
PhpStorm supports the On-Demand mode, where you can disable Xdebug for your global PHP installation and have it enabled automatically on demand only when you are debugging your command-line scripts or when you need code coverage reports. This lets your command line scripts (including Composer and unit tests) run much faster.
Disable Xdebug for command-line scripts:
In the Settings/Preferences dialog Ctrl+Alt+S , go to PHP .
From the PHP executable list, choose the relevant PHP interpreter and click next to it. In the CLI Interpreters dialog that opens, click the Open in Editor link next to the Configuration file:
file. Close all the dialogs and switch to the tab where the php.ini file is opened.
In the php.ini file, find the [xdebug] section and comment the following line in it by adding ; in preposition:
Open the CLI Interpreters dialog and click next to the PHP executable field. PhpStorm informs you that debugger is not installed:
To enable PhpStorm to activate Xdebug when it is necessary, specify the path to it in the Debugger extension field, in the Additional area. Type the path manually or click and select the location in the dialog that opens.
Configure Xdebug for using in the Just-In-Time mode
PhpStorm supports the use of Xdebug in the Just-In-Time (JIT) mode so it is not attached to your code all the time but connects to PhpStorm only when an error occurs or an exception is thrown. Depending on the Xdebug version used, this operation mode is toggled through the following settings:
Xdebug 2 uses the xdebug .remote_mode setting, which has to be set to jit .
Xdebug 3 uses the xdebug.start_upon_error setting, which has to be set to yes .
The mode is available both for debugging command-line scripts and for web server debugging.
Depending on whether you are going to debug command-line scripts or use a Web server, use one of the scenarios below.
Command-line scripts
For debugging command-line scripts, specify the custom -dxdebug.remote_mode=jit (for Xdebug 2) or -dxdebug.start_upon_error=yes (for Xdebug 3) directive as an additional configuration option :
In the Settings/Preferences dialog Ctrl+Alt+S , navigate to PHP .
From the PHP executable list, choose the relevant PHP interpreter and click next to it.
In the CLI Interpreters dialog that opens, click next to the Configuration options field in the Additional area.
In the Configuration Options dialog that opens, click to add a new entry.
For Xdebug 2, type xdebug.remote_mode in the Configuration directive field and jit in the Value field.
For Xdebug 3, type xdebug.start_upon_error in the Configuration directive field and yes in the Value field.
When you click OK , you return to the CLI Interpreters dialog where the Configuration options field shows -dxdebug.remote_mode=jit (for Xdebug 2) or -dxdebug.start_upon_error=yes (for Xdebug 3).
Web server debugging
From the main menu, choose Run | Web Server Debug Validation .
In the Validate Remote Environment that opens, choose the Web server to validate the debugger on.
Choose Local Web Server or Shared Folder to check a debugger associated with a local Web server.
Path to Create Validation Script : In this field, specify the absolute path to the folder under the server document root where the validation script will be created. For Web servers of the type Inplace , the folder is under the project root.
The folder must be accessible through http .
URL to Validation Script : In this field, type the URL address of the folder where the validation script will be created. If the project root is mapped to a folder accessible through http , you can specify the project root or any other folder under it.
Choose Remote Web Server to check a debugger associated with a remote server.
Path to Create Validation Script : In this field, specify the absolute path to the folder under the server document root where the validation script will be created. The folder must be accessible through http .
Deployment Server : In this field, specify the server access configuration of the type Local Server or Remote Server to access the target environment. For details, see Configure synchronization with a Web server.
Choose a configuration from the list or click Browse in the Deployment dialog.
Click Validate to have PhpStorm create a validation script, deploy it to the target remote environment, and run it there.
Open the php.ini file which is reported as loaded and associated with Xdebug.
In the php.ini file, find the [xdebug] section.
Change the value of the xdebug.remote_mode from the default req to jit .
Change the value of the xdebug.start_upon_error from the default default to yes .
Configure Xdebug running in a Docker container
To configure Xdebug running in a Docker container, provide the Xdebug-specific parameters in the Dockerfile , for example:


