- Dual boot ArchLinux и Windows 8 на UEFI без GRUB c помощью rEFInd
- 🐧 Полное руководство по установке Arch Linux
- Установить Arch Linux второй системой с Windows 10
- Шаг 1. Подготовка к установке Arch Linux
- Шаг 2. Загрузка и проверка образа
- Шаг 3. Запись Arch на USB
- Шаг 4. Загрузка с USB-Flash
- Шаг 5. Подключение к интернету
- Шаг 6. Выбор часового пояса
- Шаг 7. Разбиение диска
- xtrymind / archinstall.md
- This comment has been minimized.
- gihyeonsung commented Feb 25, 2020
- This comment has been minimized.
- GreasyPizzaToppings commented Feb 29, 2020
- This comment has been minimized.
- ShahinSha-dot commented Nov 19, 2020
- How to Dual Boot Arch Linux and Windows 10 on UEFI system
- Prerequisites
- Step 1) Create a separate partition for installation of Arch Linux
- Step 2) Configure BIOS to boot from bootable medium
- Step 3) Begin the installation of Arch Linux
- Step 4) Update time and date
- Step 5) Create & format Linux partitions
- Step 6) Format and mount the partitions
- Step 7) Install base system and other required Linux firmware packages
- Step 8) Generate fstab file
- Step 9) Setup timezone
- Step 10) Set up locale
- Step 12) Install netctl Network Manager
- Step 13) Create a regular user
- Step 14) Install GRUB bootloader
- Step 15) Boot into Arch Linux
- Step 16) Post Installation tasks
Dual boot ArchLinux и Windows 8 на UEFI без GRUB c помощью rEFInd
Инструкция для новичков, о том, как сделать красивый dualboot windows и archlinux (и других ОС) через efi без grub и лишних заморочек.
Фото для привлечения внимания:
Можете посмотерть в google как это ещё может выглядеть.
Сразу оговорюсь.
Предполагается, что вы уже поставили windows и archlinux, понимаете как размечать диски и что куда монтировать и осталось вам только разобраться с загрузчиком. Если нет, то рекомендую посмотреть для начала вот это видео.
Я пробовал различные варианты, как описано тут, тут и тут и прочие выкрутасы с efibootmgr. Пытался добавлять опции прямо в «BIOSе» — ничего хорошего у меня не получилось, то рут раздел не находит то ещё что-то. Да и сам подход к переключению систем (жать Esc при включении ПК для выбора системы) меня не очень радовал.
Провозившись весь выходной, нашёл для себя простое и элегантное решение — пакет refind-efi (ArchWiki).
Если коротко, — достаточно установить этот пакет (pacman -S refind-efi) и выполнить refind-install, — всё.
В /boot/efi/EFI/ будет создан каталог refind и в опции загрузки добавлен новый пунк «rEFInd boot manager ».
Предупреждение
Добавлю к этой статье предупреждение: запись в NVRAM из ОС — достаточно опасная операция, которая может приводить к «кирпичу» на некоторых моделях ноутбуков с BIOSами на платформе Phoenix SCT. У автора BIOS на платформе AMI Aptio, с ним таких проблем нет.
Именно поэтому я настоятельно не рекомендую использовать на ноутбуках как саму efibootmgr, так и все, что ее вызывает, и устанавливать любые загрузчики вручную, либо заменяя имеющийся загрузчик по умолчанию (fs0:/EFI/BOOT/bootx64.efi), либо прописывая новый загрузчик из UEFI Shell командой bсfg boot add 0 fs0:/path/to/bootloader.efi «My Fancy Bootloader» — это намного безопаснее.
Всё что вы делаете, вы делаете на свой страх и риск!
Теперь подробнее об установке и конфигурировании
Для начала сверим конфигурации.
В моём случае это:
- Windows 8.1
- Arch Linux x86_64 Kernel Release: 3.14.4-1-ARCH
Вывод lsblk:
Раздел с типом «EFI System» созданный инсталятором windows, монтируем в /boot/efi/ ( /mnt/boot/efi/ ведь мы загрузились с liveiso верно?)
где X это номер вашего EFI раздела ( например mount /dev/sda2 /mnt/boot/efi ).
Далее перейдя в уже установленный arch ( arch-chroot /mnt/ ) устанавливаем сам refind:
Если вдруг такой пакет не найден, поищите в yaourt:
и если не было ошибок
После перезагрузки можно поставить в «биосе» в настройках приоритета загрузки «rEFInd boot manager » на первое место.
И не забудьте отключить «Secure Boot».
В каталоге /boot/efi/EFI создана дирректория refind. В ней есть refind.conf в котором можно установить время отображения списка ОС и настроить внешний вид.
Refind сам находит установленные ОС и определяет параметры их загрузки. Так же мне очень понравилось что если вставлена загрузочная флешка или диск они тоже появляются в списке.
Мне понравилась тема Next-Theme (вы можете подобрать что-то на свой вкус), положил её в /boot/efi/EFI/refind/next-theme и прописал в конфиге:
Конфиг хорошо документирован и вопросов вызывать не должен.
Источник
🐧 Полное руководство по установке Arch Linux

Среди множества дистрибутивов GNU / Linux есть тот, который сочетает в себе практически все преимущества и недостатки этих систем (конечно, есть и другие преимущества).
Речь идет об Arch Linux.
Разработчики все еще следуют своему первоначальному принципу, согласно которому система должна быть максимально простой и функциональной.
Новые пользователи GNU / Linux (и даже те, кто перешел с Ubuntu, Mint и т. д.) могут посчитать Arch довольно недружелюбным и даже грубым.
Дистрибутив просто общается с пользователем чуть более «умным» языком, предлагая ему всю власть над собой.
Это довольно интересный шаг в изучении работы ОС «изнутри».
Статья описывает, как установить Arch Linux с USB Flash.
Установить Arch Linux второй системой с Windows 10
Шаг 1. Подготовка к установке Arch Linux
Если вы планируете установить систему на отдельный диск, который является пустым, то никаких подготовительных операций не требуется.
В другом случае вы должны выделить место на диске специально для новой ОС.
Для этого в Windows 10:
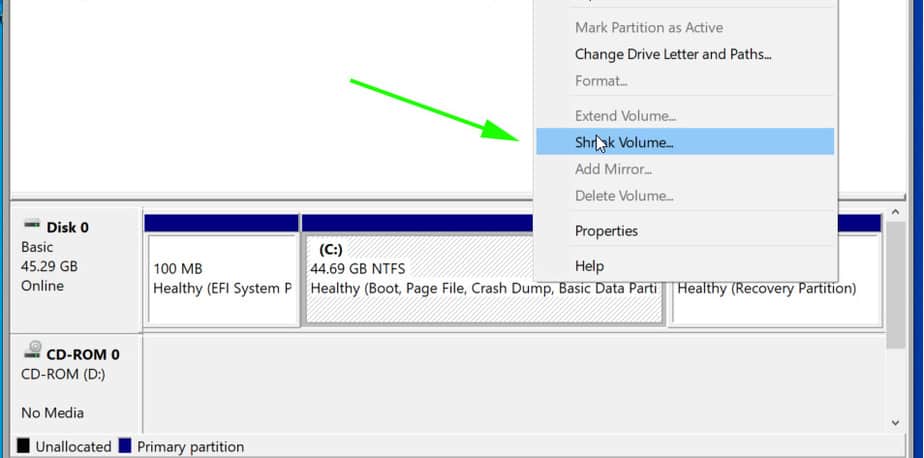
Щелкните правой кнопкой мыши по нужному диску и выберите «Сжать том»
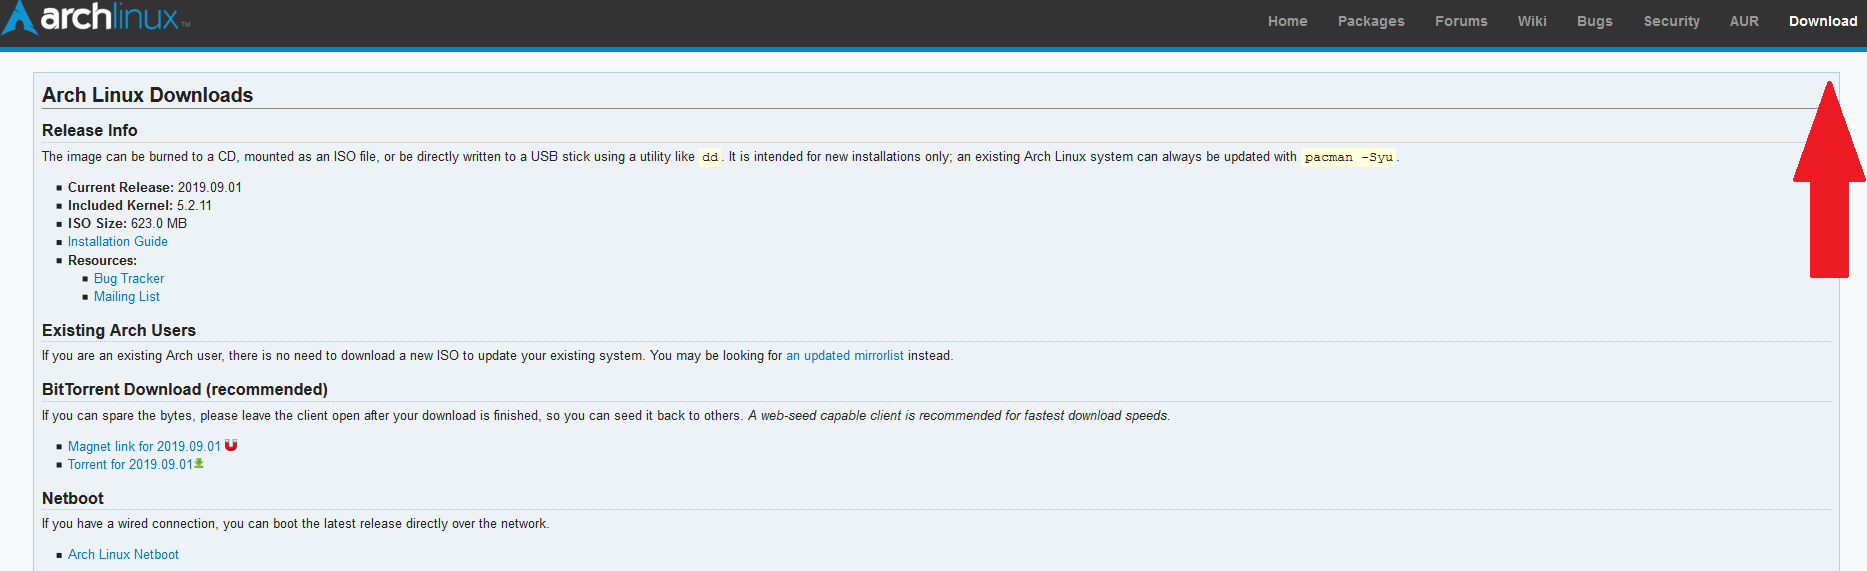
Шаг 2. Загрузка и проверка образа
Arch Linux распространяется бесплатно на официальном сайте.
Они предлагают несколько вариантов загрузки, в том числе через http.
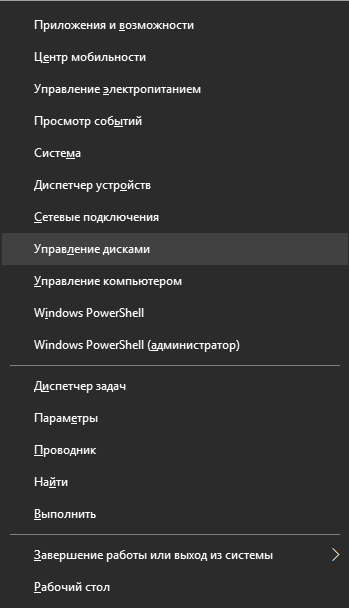
- Нажмите Win + X и выберите «Windows PowerShell».
- Напишите эту строку в терминале:
3. Сравните значение поля Hash с суммой MD5, указанной на сайте (регистр букв не имеет значения).

Шаг 3. Запись Arch на USB
Файл с системой занимает
600 МБ, поэтому подходит практически любая флешка.
Существует несколько программ для записи образа, но одна из них особенно проста и удобна ― Etcher.
Он кроссплатформенный и позволяет выполнить всю процедуру в три клика.
- Новый список слов для Русский -> Русский…
Скачайте и установите Etcher с официального сайта.
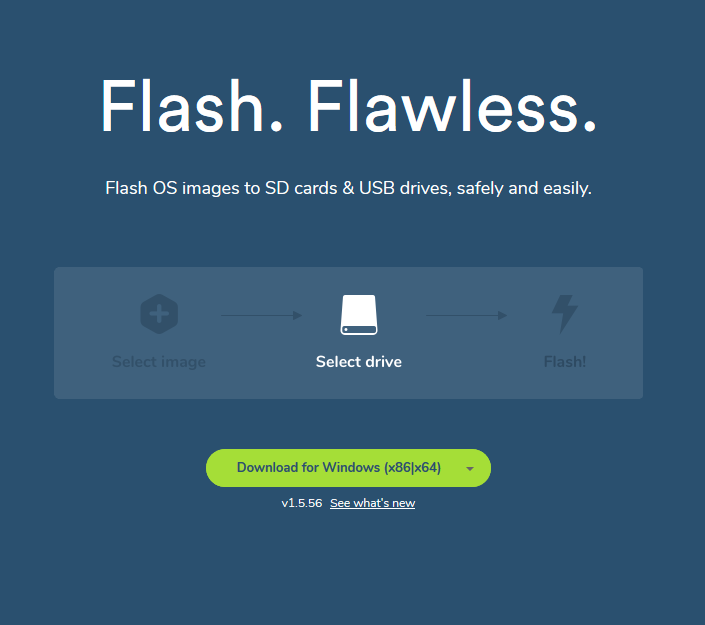
Также есть возможность скачать портативную версию без установки.
З апустите программу.
Следуйте простым инструкциям, предоставленным программой, чтобы записать образ
Шаг 4. Загрузка с USB-Flash
После записи образа перезагрузите компьютер.
Когда компьютер находится на этапе проверки POST (в этот момент появляется логотип материнской платы или текст подсказывает вам нажать функциональные клавиши), нажмите клавишу меню загрузки (в зависимости от материнской платы ее можно назначить по-разному).
Обычно это F11 или F12.
После этого выберите USB-Flash с Arch Linux.
Когда появится начальный экран с логотипом системы, просто нажмите Enter, чтобы выбрать первую строку.
Шаг 5. Подключение к интернету
Через 20 секунд перед вами появится консоль с оболочкой ZSH.
Все действия будут выполняться под суперпользователем, поэтому будьте осторожны.
Небольшой размер дистрибутива означает, что все необходимые компоненты будут взяты из Интернета.
Если вы используете кабель, запустите:
DHCP-клиент будет включен, после этого проверьте доступ в Интернет с помощью строки:
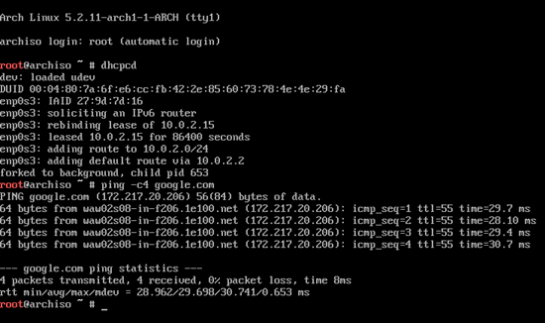
4 пакета будут отправлены на удаленный сервер.
Если они вернутся успешно, это будет написано с фиксацией времени возврата.
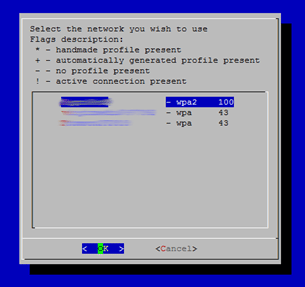
Если вы используете Wi-Fi, запустите утилиту:
Шаг 6. Выбор часового пояса
Чтобы определить и исправить нужный часовой пояс, выполните следующую команду:
Измените Europe/Moscow на ваш регион.
ZSH скажет вам, что делать, если после установки часового пояса вы дважды нажмете Tab.
Откроется список всех зон.
Используйте стрелки и Enter, чтобы выбрать нужную зону.
После этого примените изменения:
Чтобы правильно установить время даже после перезагрузки, введите:
Шаг 7. Разбиение диска
Этот этап установки Arch Linux немного отличается в зависимости от использования BIOS или UEFI, о которых будет сказано ниже.
Чтобы узнать, какое устройство будет использоваться для новой системы, запустите:
Источник
xtrymind / archinstall.md
Arch Linux installation (Windows 10 dual boot)
- Disable Windows Fast-Startup
- Disable Secure Boot
Windows 10 Efi partitioning
| Partition | Location | Size | File system |
|---|---|---|---|
| Recovery | sda1 | 500 MB | ntfs |
| ESP | sda2 | 100 MB | vfat |
| Reserved | sda3 | 16 MB | ? |
| Windows 10 | sda4 | 80 GB | ntfs |
Connect to the internet (Wi-Fi)
Format and mount disks
Chroot and configure base system
/etc/hosts should look like:
Initial ramdisk environment
Then add following content to /boot/loader/entries/arch.conf
and following content to /boot/loader/loader.conf
Edit /etc/default/grub , set DEFAULT_TIMEOUT=30 .
Now, let’s add Windows to the GRUB menu. Edit /boot/grub/grub.cfg and add the following menuentry after the Arch Linux menuentries:
$hints_string by the output of $ grub-probe —target=fs_uuid /boot/efi/EFI/Microsoft/Boot/bootmgfw.efi
$fs_uuid by the output of $ grub-probe —target=hints_string /boot/efi/EFI/Microsoft/Boot/bootmgfw.efi
Network configuration (Wi-Fi)
Unmount and reboot
This comment has been minimized.
Copy link Quote reply
gihyeonsung commented Feb 25, 2020
But, in my opinion, options root=/dev/sba6 rw should be changed to options root=/dev/sdb2 rw .
This comment has been minimized.
Copy link Quote reply
GreasyPizzaToppings commented Feb 29, 2020
Very helpful but there are some errors.
- «tittle Arch» has ‘title’ misspelled
- Where you say to substitute ‘$hints_string’ and ‘$fs_uuid’ for outputs of grub-probe, you put fs_uuid for $hints_string and fs_uuid for $hints_string. The grub-probe command should be swapped for these variables so fs_uuid goes with $fs_uuid and hints_string goes with $hints_string.
This comment has been minimized.
Copy link Quote reply
ShahinSha-dot commented Nov 19, 2020
You could have used os-prober to detect windows automatically
You can’t perform that action at this time.
You signed in with another tab or window. Reload to refresh your session. You signed out in another tab or window. Reload to refresh your session.
Источник
How to Dual Boot Arch Linux and Windows 10 on UEFI system
In this guide, you will learn how to Dual boot Arch Linux with Windows 10 on UEFI system. This guide assumes that you already have Windows 10 installed on your system.
Prerequisites
Before you begin configuring the dual-boot setup, ensure that the following requirements are met:
- A bootable installation medium of Arch Linux (Either USB or DVD). To download the latest Arch Linux ISO, proceed to the official Arch Linux download page . Once you have downloaded the ISO image, grab an 8GB USB drive and make it bootable using Rufus tool or any other application that can create a bootable USB drive.
- A fast and stable internet connection for downloading and installing software packages.
Step 1) Create a separate partition for installation of Arch Linux
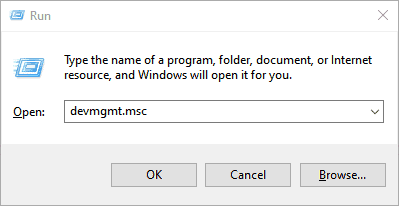
For the dual boot setup to work, we need to create a separate partition on the hard drive on which Arch Linux will be installed. To do so, head over to the disk management utility by pressing Windows Key + R . In the dialogue box, type diskmgmt.msc and hit ENTER .
This launches the disk management utility displaying the various disk partitions on your hard drive. We are going to create an unallocated partition by shrinking the C drive. If you have a bigger partition than the C drive, feel free to use it for creating the separate partition,
So, we are going to right-click on drive C and select the ‘ Shrink Volume ’ option as shown
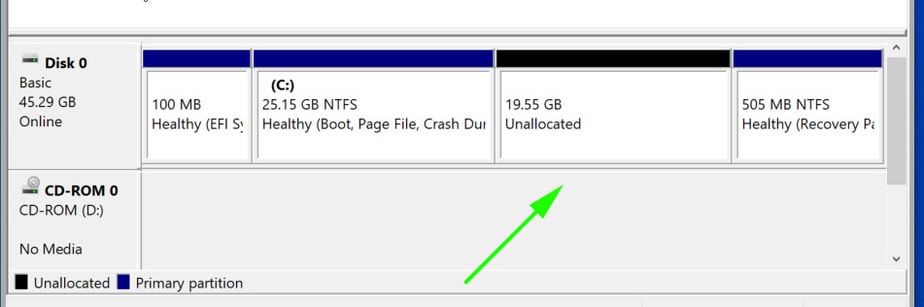
On the pop-up dialogue box that appears, we are going to specify the amount to shrink as shown. This is the amount that will be designated for the installation of Arch Linux. In our example, we have shrunk 20 GB of hard disk space will serve as the unallocated space.
Once you are satisfied, click on the ‘ Shrink ’ button.

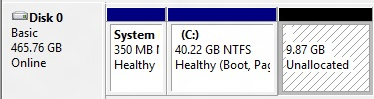
Your unallocated space will be indicated as shown below. In our case, we have set aside approximately 20G for the installation of Arch Linux.
With the unallocated partition in place, plug in your bootable USB and reboot your PC.
Step 2) Configure BIOS to boot from bootable medium
Before you begin with the installation process, it’s prudent to set the boot priority in the BIOS to select your bootable medium as the most preferred option. Depending on your vendor, you can press the Esc , or F10 key to enter the BIOS and navigate to the boot priority Menu.
Also note that we are using the UEFI mode for installation.

Once you have selected your boot medium, press the ESC button to continue with the booting process.
Step 3) Begin the installation of Arch Linux
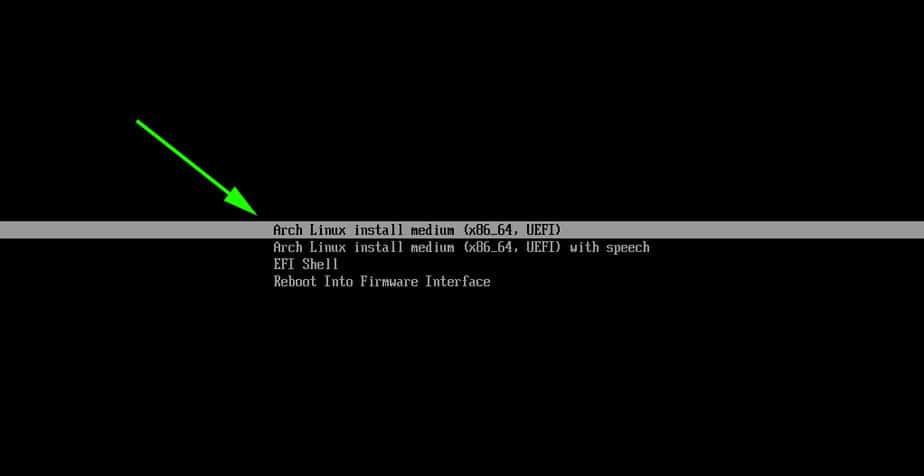
On the bootup screen, you will be presented with options as shown below. Select the first option – Arch Linux install medium (x86_64, UEFI) and hit ENTER.
This initialize Arch Linux as evidenced by the boot messages on the screen.
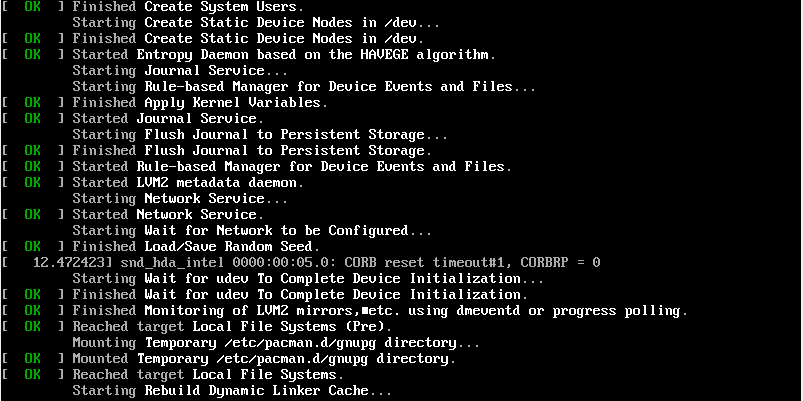
After a few seconds, this ushers you to the prompt as shown below.

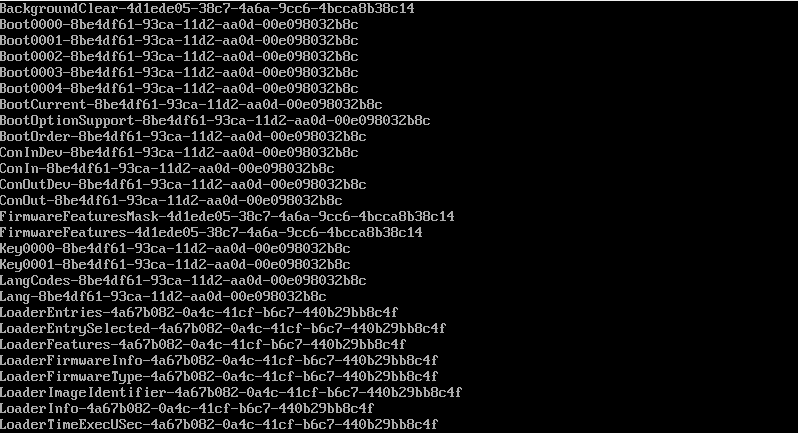
To confirm that you have EFI support, run the command:
You should get some entries on the screen as shown. If nothing is listed on your screen, then it means you are using MBR and this guide won’t work for you in configuring up a dual boot setup.
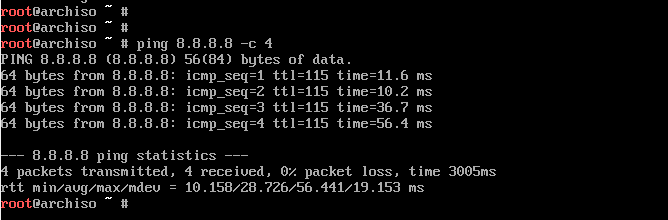
As you begin the installation, you might want to ensure that you have internet connectivity. Internet connectivity is crucial in setting time and date.
You can ping Google’s DNS as shown:
You should get a positive reply as shown.
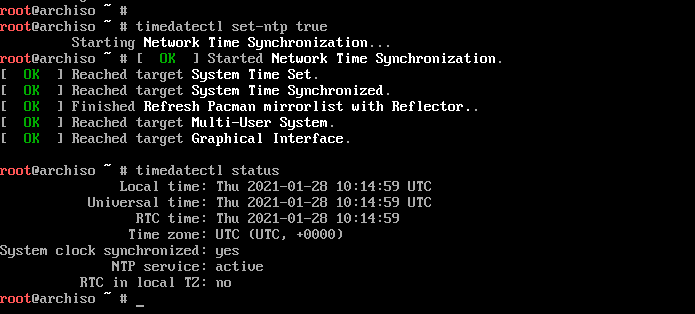
Step 4) Update time and date
Next, we are going to update the system time and date using the timedatectl command as shown.
You can thereafter confirm the time and date using the command
Step 5) Create & format Linux partitions
Next, we are going to partition our hard drive and create some Linux partitions. An easy way of doing this is using the cfdisk utility. Run the command:
This displays all the partitions available including Windows partitions.
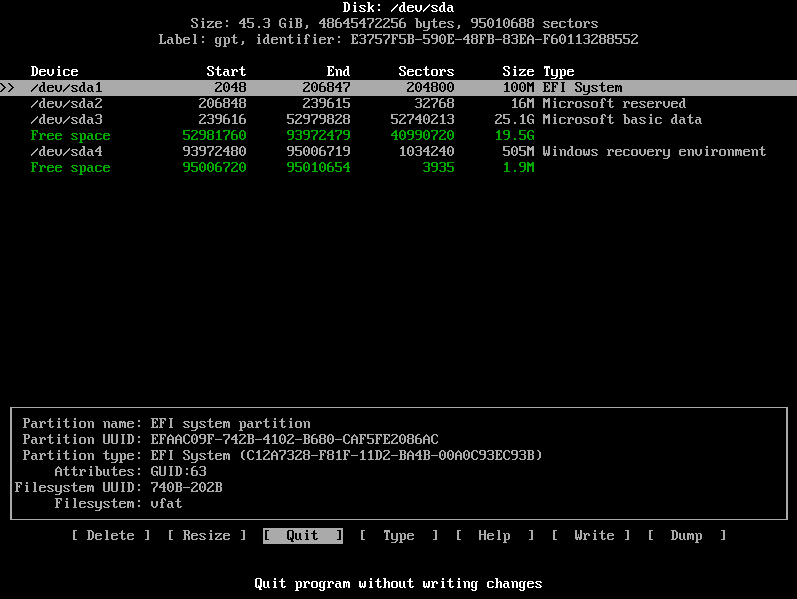
As you can see, we have some free space of 19.5G that we created earlier in step 1 from shrinking drive C on the Windows side. Using this partition, we shall create the following Linux partitions :
- Root partition / 12G
- swap partition 4G
To achieve this, we will navigate to the free space with 19.5G just after /dev/sda3 volume and hit ENTER. We will then specify the volume as 12G for the root partition as shown below. Then hit ENTER.
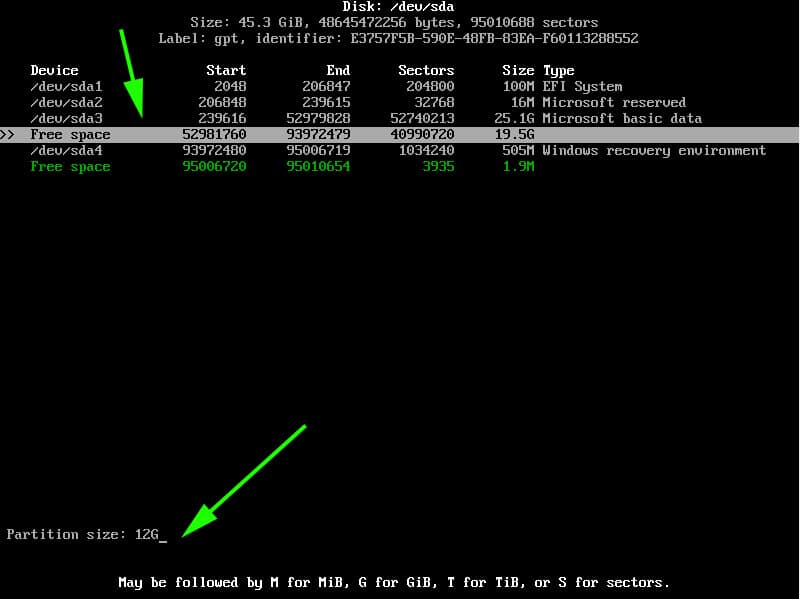
The root partition will be created with the Linux filesystem type as shown.
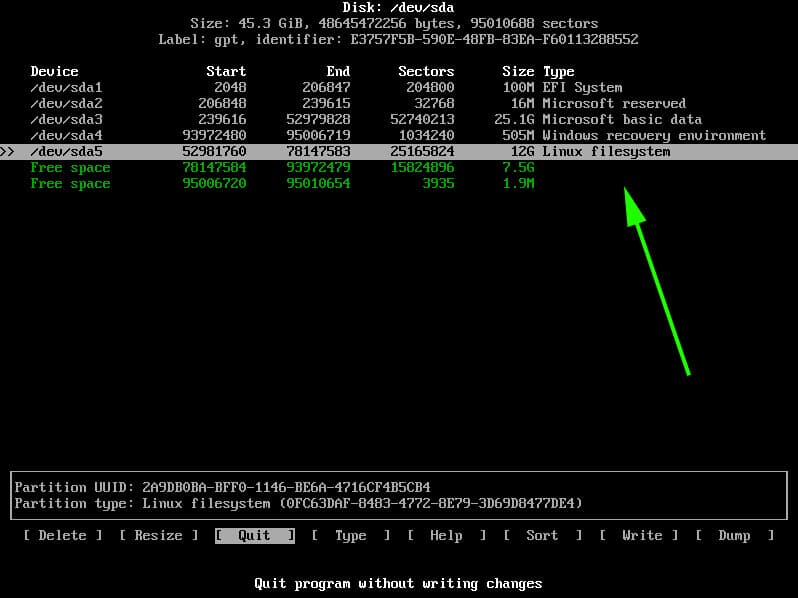
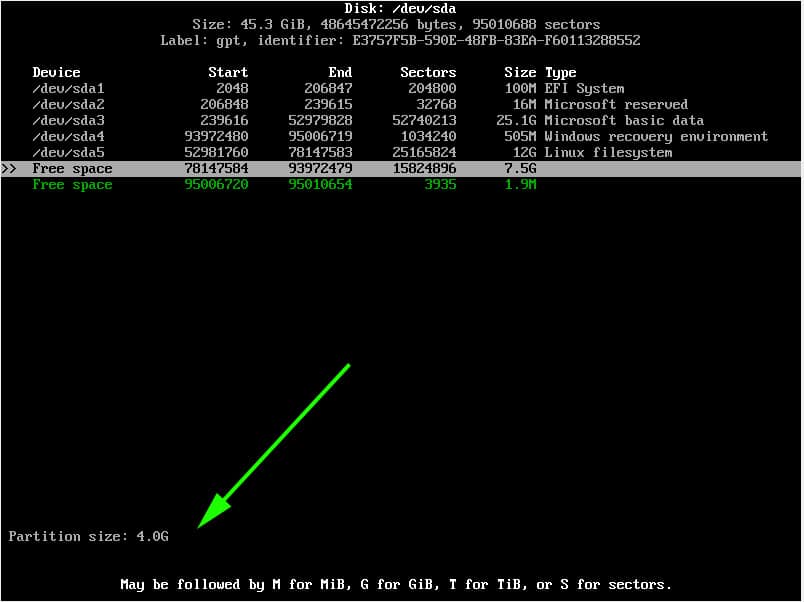
Next, we will create another partition for swap . Using the same method, we will proceed to the remaining free partition of 7G and select the ‘ New ’ option.
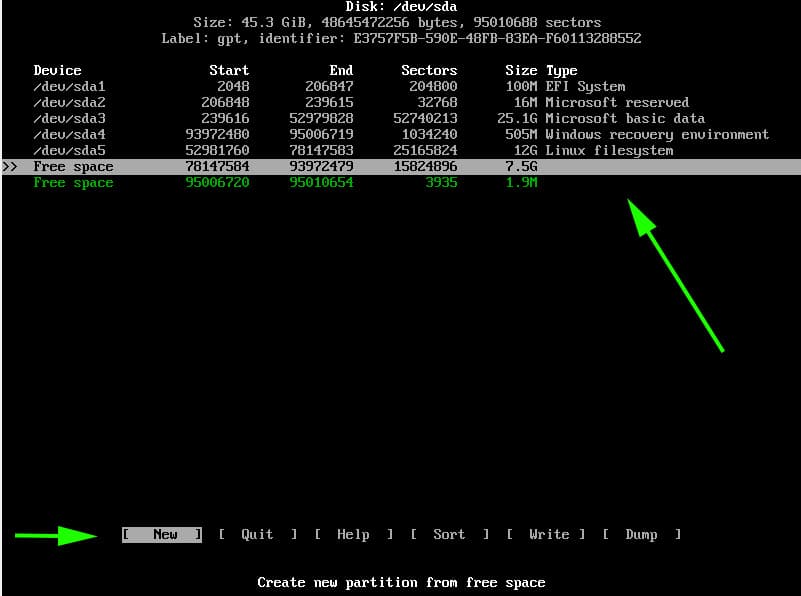
Specify the partition size as 4G
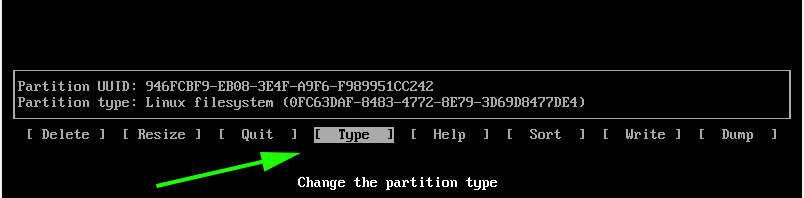
Since this will be our swap partition, we need to go the extra step and modify the partition type. Therefore, we will select the ‘ type ’ option and hit ENTER .
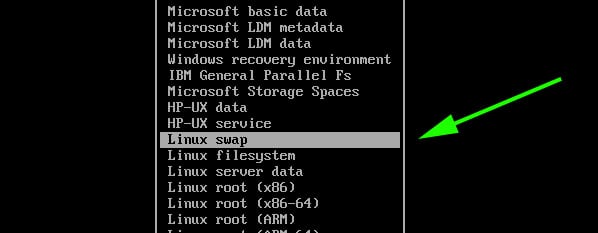
In the list that appears, select ‘ Linux Swap ’ and hit ENTER.
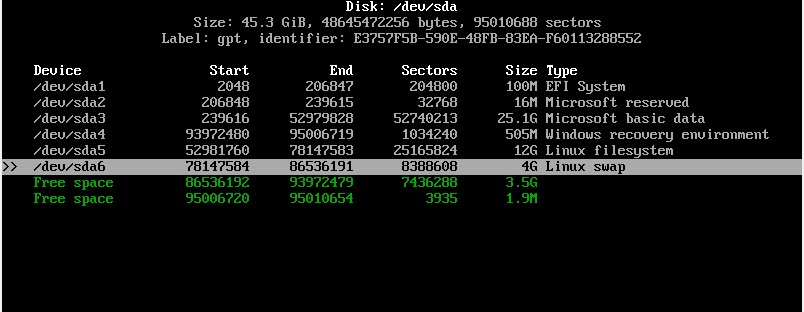
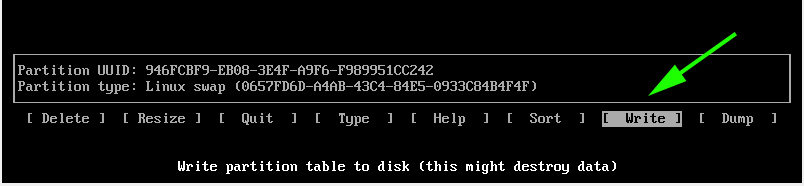
At this point, both the root and Linux swap partitions are created as seen from the partition table below.
To save the partitions, select the ‘ Write ’ option and hit ENTER.
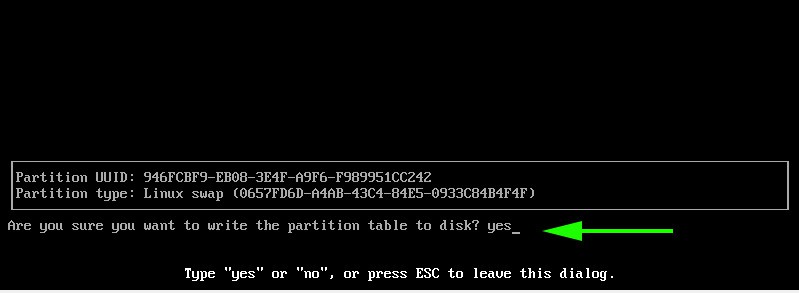
When prompted if you want to write the partition to disk, simply type ‘ yes ’ and hit ENTER.
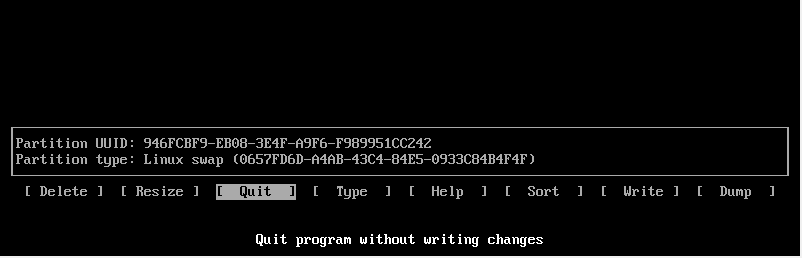
To exit cfdisk utility, select the ‘Quit’ option and hit ENTER.
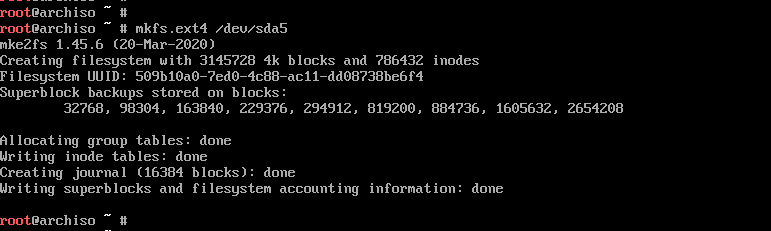
Step 6) Format and mount the partitions
For the partitions to become usable and available for use, we need to format them and later mount them.
To format the root partition, run the command:
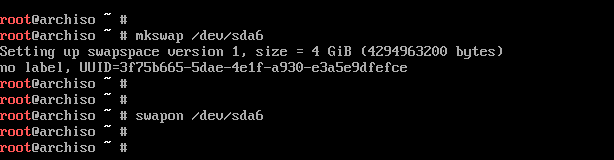
For swap partition, use the command:
Then enable swap using the swapon command shown:
Next, mount the root partition to the /mnt directory
Additionally, we are going to create a directory for the EFI partition on which we will mount the Windows EFI system which , in our case is located on the /dev/sda1 partition.
Then mount the EFI partition on the EFI mount point.

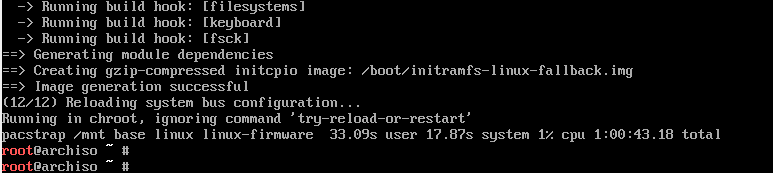
Step 7) Install base system and other required Linux firmware packages
Next, we are going to install the central packages for our Linux system including the base and Linux-firmware packages.

This is going to take quite some time. At this point, you can take a much-deserved break and head out for a stroll and grab some coffee. When the installation is successful, you should get the following output.
Step 8) Generate fstab file
The next step will be to generate the fstab file on the /mnt directory as follows.
Step 9) Setup timezone
After generating the ftab file, navigate to the newly created root filesystem
You can verify that you are in the root filesystem using the command as shown.
Time zone information is found in the /usr/share/zoneinfo/ directory. To set your timezone, create a symbolic link to the /etc/localtime
Next, sync the hardware clock using the command:
Step 10) Set up locale
The locale determines the system language, currency format, numbering and date on your system. This information is contained in the /etc/locale.gen file. So, open the file using the vim editor.
NOTE: To install the vim editor, use the pacman command as follows:
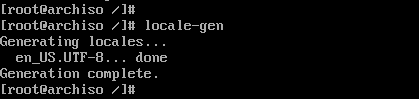
Once you have accessed the file, scroll and uncomment your preferred locale. In this case, we have decided to go with en_US.UTF-8 UTF-8
Save and exit the file. Next generate the locale configuration using the command.
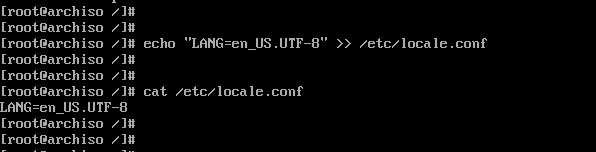
Next, create a new locale configuration file and save the locale as shown.
Step 11) Set up hostname
Next, we are going to configure the hostname of our Arch System. First, create a new file and specify the hostname as shown.

Afterwards, modify the /etc/hosts file as follows.
Step 12) Install netctl Network Manager
To use the internet once the installation is complete and upon a reboot, we need to install a network manager. In this example we wil install the netctl network manager as follows
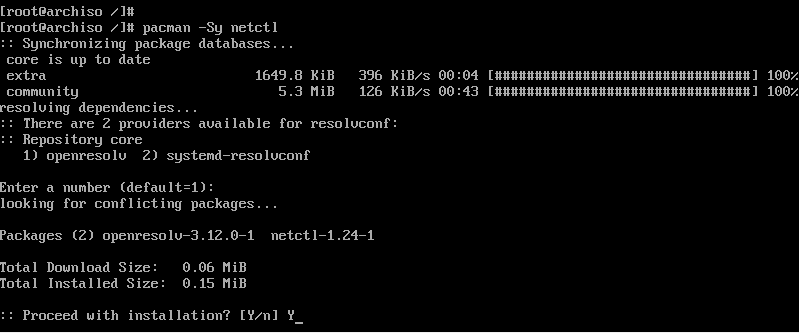
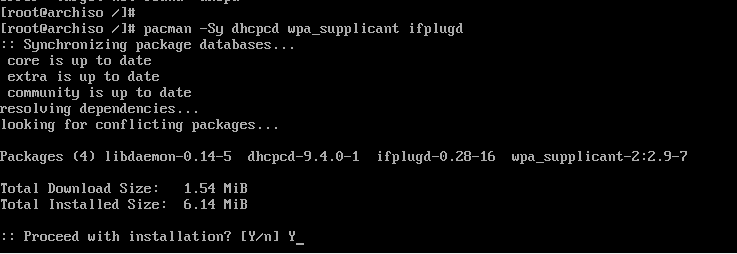
During the installation some optional dependencies for netctl are listed. We are going to install the following dependencies. These are:
- dhcpcd – For DHCP support
- wpa-supplicant – For wireless networking
- ifplugd – For wired connections networking
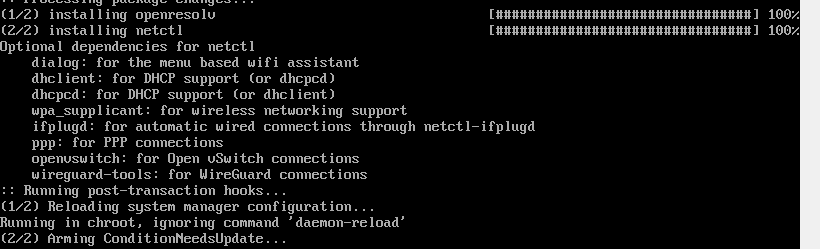
These dependencies will help you set up networking without a problem when you next boot in to Arch Linux.
To install the optional dependencies, run the command below:
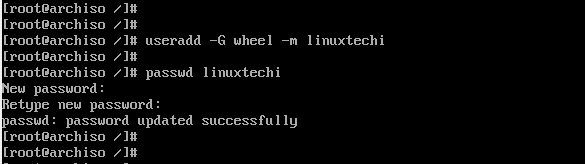
Step 13) Create a regular user
Next, we will create a regular user called linuxtechi and place him in the wheel group as follows.
The next step will be to assign a password to the user.
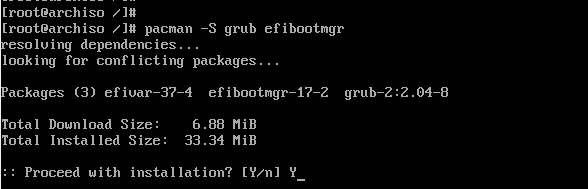
Step 14) Install GRUB bootloader
We are getting close to the finish line. In this step, we will install the grub bootloader to enable us boot into our Arch Linux system upon a reboot.
We will install the grub bootloader package alongside the efi boot manager package since we are using the UEFI mode.
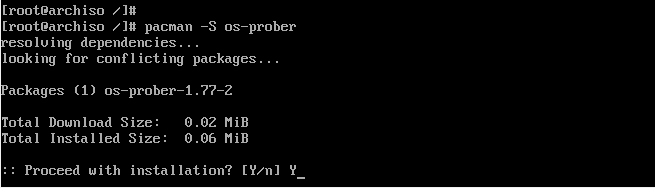
Next, install the os-prober package which will enable Arch Linux to detect the Windows operating system.
Then install grub on the EFI directory as shown.

And install a grub configuration file as shown.
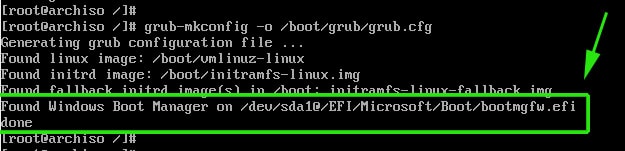
The last line is an indication that Arch has detected the presence of Windows Boot manager on /dev/sda1 partition. Perfect!
The finally, set a password for the root user as shown.
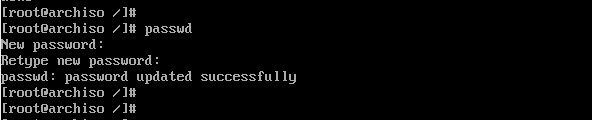
Then exit and reboot your system.
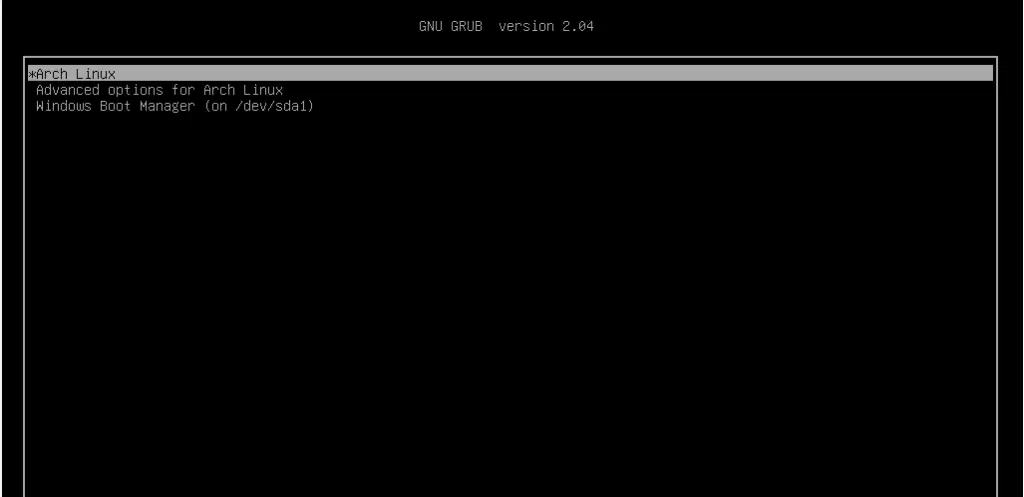
Step 15) Boot into Arch Linux
When booting, the GRUB bootloader will display various options including booting into Arch Linux, which is the first option, and also booting into Windows which is the last option in my case.
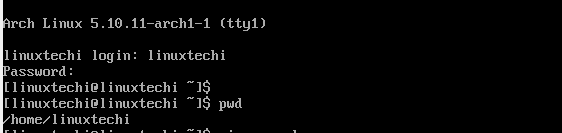
Log in as your regular user as shown
Step 16) Post Installation tasks
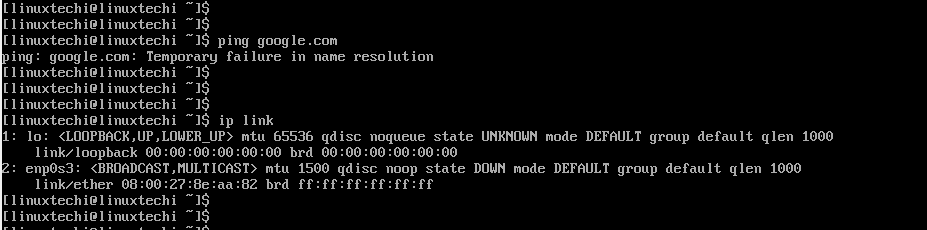
One of the things I noted when I logged in is that I do not have any internet connection. This is an issue caused by the default dhcp profile settings which need to be modified to accommodate the network interface attached to the Arch Linux system.
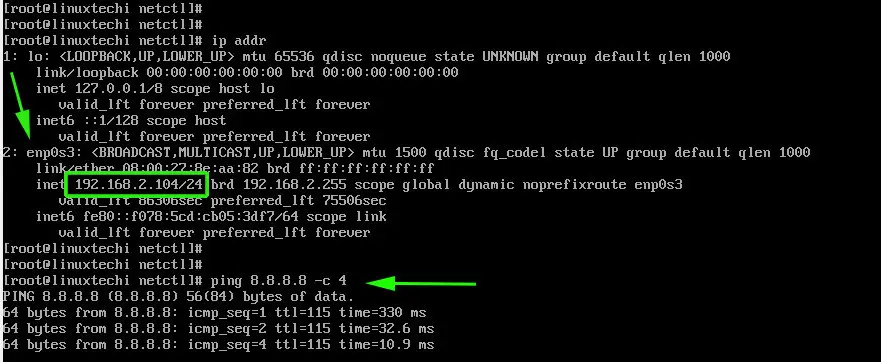
To find the interfaces attached run the command:
The output confirms that our network interface is enp0s3
We need to modify the ethernet-dhcp file in the /etc/netctl/examples/ path and edit out network interface.
But first, lets copy the file to the /etc/netctl directory.
Switch to the root user
Copy the ethernet-dhcp file to the /etc/netctl directory.
Next, navigate to the /etc/netctl directory.
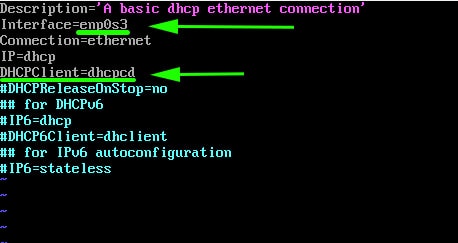
Use the vim editor to edit the file.
The interface attribute is set to eth0 .
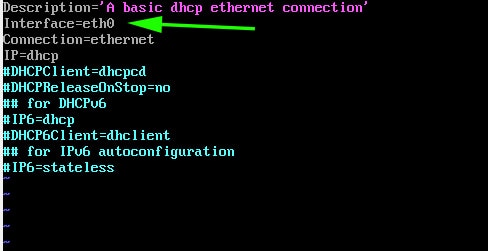
However, as we saw earlier, our network interface is enp0s3 . Therefore, modify it to enp0s3. Additionally, uncomment the line starting with the DHCPClient parameter.
This enables the system to accept IP addresses using the dhcp service.
Save and exit the configuration file. Next, enable the custom dhcp profile.

And finally enable the dhcp service.

Your interface should now pick an IP address from the router and you should have an internet connection.
You can install an X windows system as shown,
Then install a display manager. For example, to install GNOME, run:
Then start and enable gdm service
This brings us to the end of this lengthy topic. Hopefully, you are now in a position to Dual boot Arch Linux with Windows on UEFI system.
Источник


