- 3 простых способа установить Git на Mac
- Что такое Git?
- Как установить Git на Mac
- 1) Установщик Git для macOS
- 2) Установка Git через Homebrew
- 3) Установка Git через GitHub
- Pro Git
- Страницы
- пятница, 6 марта 2015 г.
- Правильная установка Git на Mac OS X
- Install Git
- Install Git on Mac OS X
- Git for Mac Installer
- Install Git with Homebrew
- Install Git with MacPorts
- Install the git-credential-osxkeychain helper
- Install Git with Atlassian Sourcetree
- Build Git from source on OS X
- Install Git on Windows
- Git for Windows stand-alone installer
- Install Git with Atlassian Sourcetree
- Install Git on Linux
- Debian / Ubuntu (apt-get)
- Fedora (dnf/yum)
- Build Git from source on Linux
- How to Install and Get started with Git on Mac
- How to Install Git on Mac
- Option 1: Install Git on Mac with Installer
- Option 2: Install Git on Mac using the Terminal
- Install Git Using Xcode
- Install Git Using Homebrew
- Install Git Using MacPorts
- Get Started with Git on Mac
- Configure Git
- Track and Commit Changes
3 простых способа установить Git на Mac
Если вы – начинающий программист с новым Mac, который хочет заняться программированием, то вам нужно установить Git на macOS. Git – это распределённая система управления версиями, которая используется программистами и разработчиками. Вы сможете использовать систему Git для совместной работы с другими специалистами, для поиска ошибок и др.

Ниже расскажем, как установить Git на Mac и начать программировать. Для этого у вас должны быть навыки работы в Терминал.
Что такое Git?
Git – это распределённая система управления версиями с открытым исходным кодом, которой пользуются разработчики и программисты по всему миру. Система позволяет совместно работать с другими специалистами над общими проектами и отслеживать разработку. С её помощью также можно находить ошибки.
Большинство проектов загружают на Github, а система Git на компьютере как раз и позволяет отправить код на Github и многое другое. Есть несколько способов установить Git на macOS. Мы рассмотри три самых простых.
Как установить Git на Mac
Если на вашем Mac установлена программа Xcode, то она автоматом установила и Git. Однако чаще всего устанавливается не последнее версия, так что лучше установить самую новую версию вручную. После установки Git вы можете подтвердить её статус в Терминал с помощью команды «git –version».
1) Установщик Git для macOS
Это самый простой способ установить Git на Mac. Есть установщик Git специально для macOS.
- Через свой любимый браузер скачайте установщик.
- Запустите скачанную программу.
- Следуйте шагам инструкции по установке. Настройте все опции как вам нужно.
- Нажмите кнопку установки, а затем проверьте статус Git.
2) Установка Git через Homebrew
Многие разработчики предпочитают использовать Homebrew. Таким способом можно установить Git на M1 Mac. Однако некоторые файлы и утилиты ещё не были оптимизированы под процессор Apple Silicon.
Установите Homebrew с помощью этой инструкции или инструкции для M1 Mac. Делается это с помощью команды в Terminal.
- Запустите Терминал.
- Введите команду«-brew install git» и нажмите
- После завершения установки проверьте статус Git.
3) Установка Git через GitHub
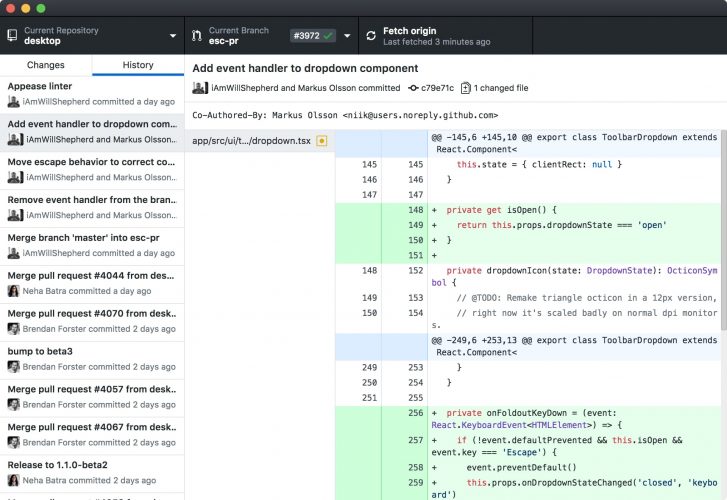
Этот способ не требует установки Homebrew или Xcode. Вам достаточно скачать программу GitHub Desktop на Mac. Вы сможете подключиться к своей учётной записи Git и комментировать проекты. Скачать программу можно с сайта GitHub Desktop.
После установки проверьте статус с помощью команды: git –version.
Это всё! Теперь вы знаете о самых простых способах установить систему Git на Mac. Мы советуем использовать установщик.
Источник
Pro Git
Страницы
пятница, 6 марта 2015 г.
Правильная установка Git на Mac OS X
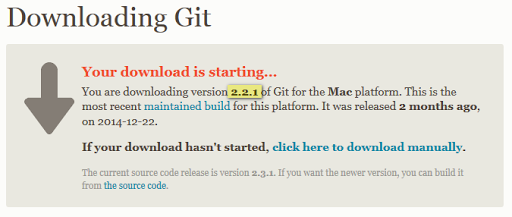
То, устанавливается не самая последняя версия Git.
Дайте команду в терминале
$ git —version
И если вы увидите что то вроде этого
git version 1.9.3 (Apple Git-50)
то это статья для вас. Если вы видите версию 2.3.1 (на момент написания статьи) последняя была такая, то тогда у вас все хорошо.
И так сперва устанавливаем Homebrew, если он у вас еще не стоит.
Просто скопируйте и вставьте эту строку в терминал и запустите ее.
ruby -e «$(curl -fsSL https://raw.githubusercontent.com/Homebrew/install/master/install)»
После того как Homebrew установиться дайте в терминале команду
brew install git
После того как Git установится дайте команду
export PATH=/usr/local/bin:$PATH
чтобы прописать путь к новой установке Git.
И далее смотрим версию Git
$ git —verrsion
Должны увидеть что то типа этого

git version 2.3.1
Все! Далее чтобы обновлять Git достаточно дать команду
brew upgrade git
Просто не правда ли!?
Пример обновления Git в Mac OS X 10.10.2 через Homebrew
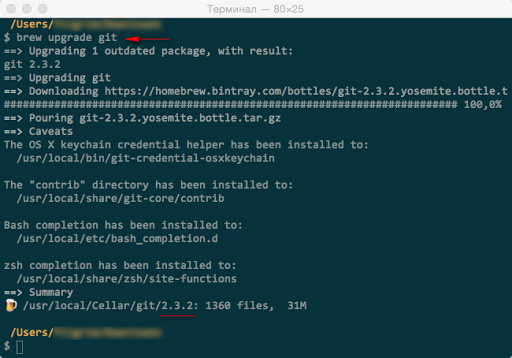
Вот и получили самую свежую версию Git на Mac OS X
Источник
Install Git
Install Git on Mac OS X
There are several ways to install Git on a Mac. In fact, if you’ve installed XCode (or it’s Command Line Tools), Git may already be installed. To find out, open a terminal and enter git —version .
Apple actually maintain and ship their own fork of Git, but it tends to lag behind mainstream Git by several major versions. You may want to install a newer version of Git using one of the methods below:
Git for Mac Installer
The easiest way to install Git on a Mac is via the stand-alone installer:
Follow the prompts to install Git.
Open a terminal and verify the installation was successful by typing git —version :
Configure your Git username and email using the following commands, replacing Emma’s name with your own. These details will be associated with any commits that you create:
(Optional) To make Git remember your username and password when working with HTTPS repositories, configure the git-credential-osxkeychain helper.
Install Git with Homebrew
If you have installed Homebrew to manage packages on OS X, you can follow these instructions to install Git:
Open your terminal and install Git using Homebrew:
Verify the installation was successful by typing which git —version :
Configure your Git username and email using the following commands, replacing Emma’s name with your own. These details will be associated with any commits that you create:
(Optional) To make Git remember your username and password when working with HTTPS repositories, install the git-credential-osxkeychain helper.
Install Git with MacPorts
If you have installed MacPorts to manage packages on OS X, you can follow these instructions to install Git:
Open your terminal and update MacPorts:
Search for the latest available Git ports and variants:
Install Git with bash completion, the OS X keychain helper, and the docs:
Configure your Git username and email using the following commands, replacing Emma’s name with your own. These details will be associated with any commits that you create:
(Optional) To make Git remember your username and password when working with HTTPS repositories, configure the git-credential-osxkeychain helper.
Install the git-credential-osxkeychain helper
Bitbucket supports pushing and pulling your Git repositories over both SSH and HTTPS. To work with a private repository over HTTPS, you must supply a username and password each time you push or pull. The git-credential-osxkeychain helper allows you to cache your username and password in the OSX keychain, so you don’t have to retype it each time.
If you followed the MacPorts or Homebrew instructions above, the helper should already be installed. Otherwise you’ll need to download and install it. Open a terminal window and check:
If you receive a usage statement, skip to step 4. If the helper is not installed, go to step 2.
Use curl to download git-credential-osxkeychain (or download it via your browser) and move it to /usr/local/bin :
Make the file an executable:
Configure git to use the osxkeychain credential helper.
The next time Git prompts you for a username and password, it will cache them in your keychain for future use.
Install Git with Atlassian Sourcetree
Sourcetree, a free visual Git client for Mac, comes with its own bundled version of Git. You can download Sourcetree here.
To learn how to use Git with Sourcetree (and how to host your Git repositories on Bitbucket) you can follow our comprehensive Git tutorial with Bitbucket and Sourcetree.
Build Git from source on OS X
Building Git can be a little tricky on Mac due to certain libraries moving around between OS X releases. On El Capitan (OS X 10.11), follow these instructions to build Git:
From your terminal install XCode’s Command Line Tools (if you haven’t already):
Using Homebrew, install openssl:
Clone the Git source (or if you don’t yet have a version of Git installed, download and extract it):
To build Git run make with the following flags:
Install Git on Windows
Git for Windows stand-alone installer
When you’ve successfully started the installer, you should see the Git Setup wizard screen. Follow the Next and Finish prompts to complete the installation. The default options are pretty sensible for most users.
Open a Command Prompt (or Git Bash if during installation you elected not to use Git from the Windows Command Prompt).
Run the following commands to configure your Git username and email using the following commands, replacing Emma’s name with your own. These details will be associated with any commits that you create:
Optional: Install the Git credential helper on Windows
Bitbucket supports pushing and pulling over HTTP to your remote Git repositories on Bitbucket. Every time you interact with the remote repository, you must supply a username/password combination. You can store these credentials, instead of supplying the combination every time, with the Git Credential Manager for Windows.
Install Git with Atlassian Sourcetree
Sourcetree, a free visual Git client for Windows, comes with its own bundled version of Git. You can download Sourcetree here.
To learn how to use Git with Sourcetree (and how to host your Git repositories on Bitbucket) you can follow our comprehensive Git tutorial with Bitbucket and Sourcetree.
Install Git on Linux
Debian / Ubuntu (apt-get)
Git packages are available via apt:
From your shell, install Git using apt-get:
Verify the installation was successful by typing git —version :
Configure your Git username and email using the following commands, replacing Emma’s name with your own. These details will be associated with any commits that you create:
Fedora (dnf/yum)
Git packages are available via both yum and dnf:
From your shell, install Git using dnf (or yum, on older versions of Fedora):
Verify the installation was successful by typing git —version :
Configure your Git username and email using the following commands, replacing Emma’s name with your own. These details will be associated with any commits that you create
Build Git from source on Linux
Git requires the several dependencies to build on Linux. These are available via apt:
From your shell, install the necessary dependencies using apt-get:
Clone the Git source (or if you don’t yet have a version of Git installed, download and extract it):
To build Git and install it under /usr , run make :
Git requires the several dependencies to build on Linux. These are available via both yum and dnf:
From your shell, install the necessary build dependencies using dnf (or yum, on older versions of Fedora):
or using yum. For yum, you may need to install the Extra Packages for Enterprise Linux (EPEL) repository first:
Symlink docbook2X to the filename that the Git build expects:
Clone the Git source (or if you don’t yet have a version of Git installed, download and extract it):
To build Git and install it under /usr , run make :
Источник
How to Install and Get started with Git on Mac
Home » SysAdmin » How to Install and Get started with Git on Mac
Git is a version control system that allows developers to track a project and actively contribute without interfering in each other’s work.
It supports collaboration within a project and helps prevent miscommunication or code clashing between team members. The system tracks and saves snapshots of an evolving project, essentially keeping a history of the development.
Users who install the software on their machines can communicate with each other through the system. An even better solution is collaborating over a centralized source (for example, GitHub) where developers can push and pull changes on the cloud.
In this tutorial, you will learn how to install and get started with Git on Mac.
- A MacOS
- Access to command line/terminal window
How to Install Git on Mac
There are many different ways to set up Git on Mac. If you prefer using a GUI, Git offers a simple installation using the installer for Mac. On the other hand, you can install Git using the terminal with a couple of simple commands.
Option 1: Install Git on Mac with Installer
The easiest way to set up Git is to use the Git installer for Mac.
1. Open a browser and navigate to Git’s official website.
2. You will see a display showing the version number of the latest source release and a download button, as in the image below.

3. Click Download, and it automatically downloads the software package on your system.
4. Find the package and double-click to open the Git installer.
5. Follow the installation wizard and configure Git to suit your development needs. If you are new to version control systems, the best option would be to leave the default settings.
6. Click Install and type in your password if necessary.
7. Confirm once again by clicking Install Software.
With this, you have finished setting up Git on your Mac. Move on to the next step of configuring Git.
Option 2: Install Git on Mac using the Terminal
There are multiple ways to install Git on Mac via terminal, depending on the development environment or package manager you have on your system.
This guide includes three different options.
Install Git Using Xcode
If you prefer the terminal, using Xcode is the fastest and easiest way to start working with Git. Its command-line tools include Git in the package.
Users who don’t have Xcode can install it with a single command:
With Xcode running on your Mac, you can check whether Git is also available by prompting for the Git version:
The output should display the latest Git release, as in the example below.
If you do not have Git, it automatically asks you whether you want to install it. Confirm the installation, and Xcode sets up Git.
Install Git Using Homebrew
Another way to install Git is with Homebrew, the package management system for Mac.
Run the following brew command in the terminal:
Then, check the Git version to verify the installation:
Install Git Using MacPorts
If you are using MacPorts to manage your packages on the system, you can use the port command to set up Git.
Start by updating MacPorts with the command:
Search for and install the newest Git ports and variants by running the following two commands:
Then, install Git with:
Note: When setting up Git with MacPorts, you can install additional tools you may find useful in the future. Add the bash-completion, svn, and the docs to the command for installing: sudo port install git +svn +doc +bash_completion +gitweb
Get Started with Git on Mac
Configure Git
The next step is to configure Git by adding your credentials to the system. This is important as it helps keep track of which user is committing changes to a project.
Open the terminal and configure your GitHub username:
Then, add your email:
Track and Commit Changes
To demonstrate how to work with files on local Git repositories, we are going to create a demo folder and file to work with.
1. First, open the terminal and create a new folder named NewFolder.
2. Then, move into that directory. The path may differ according to the location where you created the new folder.
3. As we want to keep track of changes inside this folder, we need to create a local Git repository for it. Running the git init command initializes an empty git repository in this particular location. Therefore, run the command:
With this, you have added a hidden folder inside the directory by the name .git.
Note: To see the hidden .git folder, you need to run the command: defaults write com.apple.finder AppleShowAllFiles YES . If you want to hide the folder again, modify the last part of the command by changing the YES to NO ).
4. While in the directory NewFolder, type the following command:
This shows the state of the working directory and displays if any changes made inside the directory.
Since the folder we created doesn’t have any files in it, the output responds with: nothing to commit .
5. Add some files inside NewFolder and see how the git status changes:
6. Check the status again:
The output tells you there are untracked files inside the directory and lists file1.txt . Git is tracking the folder in which the file was added, and notifies you that the changes are not being tracked.
7. Prompt Git to track the new file by running:
If you recheck the git status now, you would see that the file is now being tracked (as it changed from red to green). However, you still need to commit this change.
8. Commit all changes and add a message that describes the commit:
Now, the output tells you the working tree is clean, and there is nothing to commit.
As you can see, it is not difficult to install Git on Mac. After you install Git on Mac, you might find helpful How to Update Git. With this tutorial, you should have successfully set up Git and configured it to start working with this version control system.
Источник


