- 7 JRE Installation for Linux Platforms
- System Requirements
- JRE 8 Installation Instructions
- Installation Instruction Notation and Files
- Installation of the 64-bit JRE on Linux Platforms
- Installation of the 64-bit JRE on RPM-based Linux Platforms
- Installation of the 32-bit JRE on Linux Platforms
- Installation of the 32-bit JRE on RPM-based Linux Platforms
- Installation of Public Key on RPM-based Linux Platforms
- General Installation Notes
- Root Access
- Overwriting Files
- System Preferences
- Установка Java JRE / JDK в Linux
- Устанавливаем Java JRE / JDK в Linux
- Способ 1: Официальные репозитории
- Способ 2: Репозиторий Webupd8
- Способ 3: Обновление с помощью Webupd8
- Способ 4: Ручная установка
7 JRE Installation for Linux Platforms
This page describes JRE for Linux system requirements and gives installation instructions for several JRE-Linux combinations.
This page contains these topics:
See «JDK 8 and JRE 8 Installation Start Here» for general information about installing JDK 8 and JRE 8.
For information on enhancements to JDK 8 that relate to the installer, see «Installer Enhancements in JDK 8».
System Requirements
See http://www.oracle.com/technetwork/java/javase/certconfig-2095354.html for information about supported platforms, operating systems, and browsers.
On a 64-bit system, you can download either the 64-bit or the 32-bit version of the Java platform. However, if you are using a 32-bit browser and you want to use the plugin, then you need to install the 32-bit version of the Java platform. To determine which version of Firefox you are running, launch the application, and select the menu item Help -> About Mozilla Firefox. At the bottom of the window is a version string line that contains either «Linux i686» (32-bit) or «Linux x86_64» (64-bit). To setup the Java plugin, see «Manual Installation and Registration of Java Plugin for Linux».
JRE 8 Installation Instructions
This topic contains these topics:
Installation Instruction Notation and Files
For instructions containing the notation version , substitute the appropriate JRE update version number. For example, if you are installing update JRE 8 update release 2, the following string representing the name of the bundle:
Note that, as in the preceding example, the version number is sometimes preceded with the letter u , for example, 8u2 , and sometimes it is preceded with an underbar, for example, jre1.8.0_02 .
The following table lists the options and instructions for downloading the JRE 8 release for a Linux platform.
| Download File and Instructions | Architecture | Who Can Install |
|---|---|---|
| jre-8u version -linux-x64.tar.gz «Installation of the 64-bit JRE on Linux Platforms» | 64-bit | anyone |
| j re-8u version -linux-i586.tar.gz «Installation of the 32-bit JRE on Linux Platforms» | 32-bit | anyone |
| jre-8u version -linux-x64.rpm «Installation of the 64-bit JRE on RPM-based Linux Platforms» | 64-bit RPM-based Linux | root |
| jre-8u version -linux-i586.rpm «Installation of the 32-bit JRE on RPM-based Linux Platforms» | 32-bit RPM-based Linux | root |
JDK 7u6 and later releases include JavaFX SDK (version 2.2 or later). The JavaFX SDK and Runtime are installed and integrated into the standard JDK directory structure.
Installation of the 64-bit JRE on Linux Platforms
This procedure installs the Java Runtime Environment (JRE) for 64-bit Linux, using an archive binary file ( .tar.gz ).
These instructions use the following file:
Download the file.
Before the file can be downloaded, you must accept the license agreement. The archive binary can be installed by anyone (not only root users), in any location that you can write to. However, only the root user can install the JDK into the system location.
Change directory to the location where you would like the JDK to be installed, then move the .tar.gz archive binary to the current directory.
Unpack the tarball and install the JRE.
The Java Development Kit files are installed in a directory called jdk1.8.0_ version in the current directory.
Delete the .tar.gz file if you want to save disk space.
Installation of the 64-bit JRE on RPM-based Linux Platforms
This procedure installs the Java Runtime Environment (JRE) for 64-bit RPM-based Linux platforms, such as Red Hat and SuSE, using an RPM binary file ( .rpm ) in the system location. You must be root to perform this installation.
These instructions use the following file:
Download the file.
Before the file can be downloaded, you must accept the license agreement.
Become root by running su and entering the super-user password.
Uninstall any earlier installations of the JDK packages.
Install the package.
To upgrade a package:
Delete the .rpm file if you want to save disk space.
Exit the root shell.
There is no need to reboot.
Installation of the 32-bit JRE on Linux Platforms
This procedure installs the Java Runtime Environment (JRE) for 32-bit Linux, using an archive binary file ( .tar.gz ).
These instructions use the following file:
Download the file.
Before the file can be downloaded, you must accept the license agreement. The archive binary can be installed by anyone (not only root users), in any location that you can write to. However, only the root user can install the JRE into the system location.
Change directory to the location where you would like the JRE to be installed, then move the .tar.gz archive binary to the current directory.
Unpack the tarball and install the JRE.
The JRE files are installed in a directory called jre1.8.0_ version in the current directory.
Delete the .tar.gz file if you want to save disk space.
Installation of the 32-bit JRE on RPM-based Linux Platforms
This procedure installs the Java Runtime Environment (JRE) for 32-bit RPM-based Linux platforms, such as Red Hat and SuSE, using an RPM binary file ( .rpm ) in the system location. You must be root to perform this installation.
These instructions use the following file:
Download the file.
Before the file can be downloaded, you must accept the license agreement.
Become root by running su and entering the super-user password.
Uninstall any earlier installations of the JRE packages.
Install the package.
To upgrade a package:
Exit the root shell.
There is no need to reboot.
Delete the .rpm file if you want to save disk space.
Installation of Public Key on RPM-based Linux Platforms
Since JDK version 8, the JRE RPMs are signed with OL keys. Installation of these RPMs on Linux distributions other than OL gives a warning message indicating that security validation of the package fails. This indicates that the public key used to sign this RPM needs to be installed in the system. A sample warning message and the public key installation steps are as follows:
Sample Warning Message
Installation Steps
Download the key file from https://yum.oracle.com/RPM-GPG-KEY-oracle-ol7 using the following command:
Install the key using the following command:
sudo rpm —import RPM-GPG-KEY-oracle-ol7
Public key installation needs to be done only once. The key installation is persistent across reboots.
General Installation Notes
This topic describes general installation topics.
Root Access
Installing the software automatically creates a directory called jre1.8.0_ version . Note that if you choose to install the Java SE Runtime Environment into system-wide location such as /usr/jre , you must first become root to gain the necessary permissions. If you do not have root access, simply install the Java SE Runtime Environment into your home directory, or a subdirectory that you have permission to write to.
Overwriting Files
If you install the software in a directory that contains a subdirectory named jre 1.8.0_ version , the new software overwrites files of the same name in that jre 1.8.0_ version directory. Rename the old directory if it contains files you want to keep.
System Preferences
By default, the installation script configures the system such that the backing store for system preferences is created inside the JRE’s installation directory. If the JRE is installed on a network-mounted drive, it and the system preferences can be exported for sharing with Java runtime environments on other machines.
Источник
Установка Java JRE / JDK в Linux

Компоненты Java необходимы для запуска множества разнообразных приложений и веб-сайтов, поэтому практически каждый пользователь компьютера сталкивается с надобностью инсталляции этой платформы. Конечно, в разных ОС принцип выполнения поставленной задачи отличается, но у дистрибутивов Linux он всегда примерно один и тот же, а мы бы хотели рассказать как осуществляется установка Java в Ubuntu. Обладателям других сборок нужно будет только повторить приведенные инструкции с учетом синтаксиса системы.
Устанавливаем Java JRE / JDK в Linux
Сегодня мы предлагаем ознакомиться с разными вариантами инсталляции библиотек Java, поскольку все они будут максимально полезны и применимы в определенных ситуациях. Например, если вы не хотите использовать сторонние репозитории или же желаете поставить несколько Джава рядом, тогда нужно задействовать отдельный вариант. Впрочем, давайте детально рассмотрим их все.
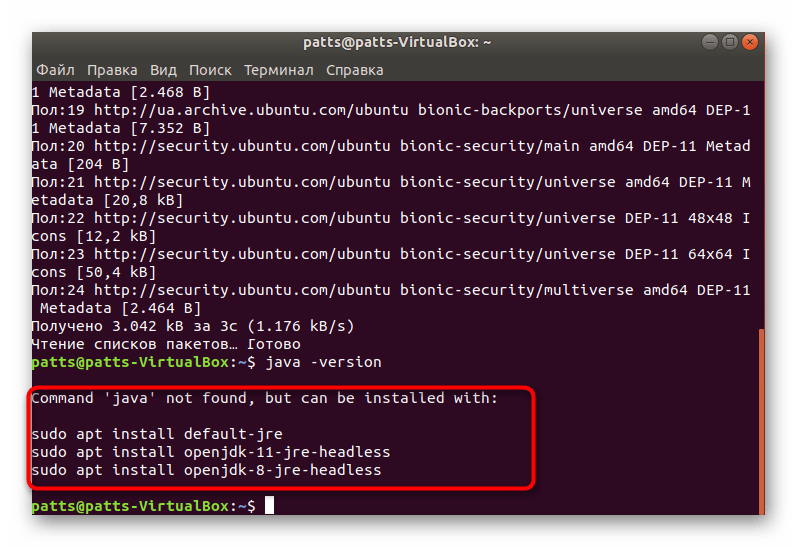
Сначала рекомендуется проверить обновления системных хранилищ и узнать текущую версию Java, если она вообще присутствует в ОС. Делается это все через стандартную консоль:
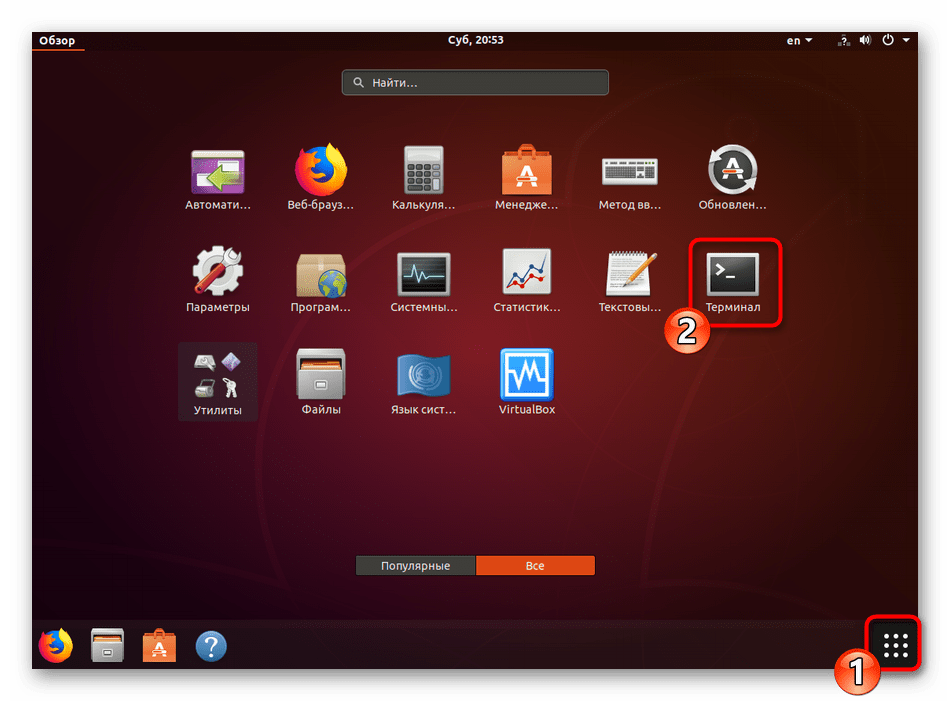
- Откройте меню и запустите «Терминал».
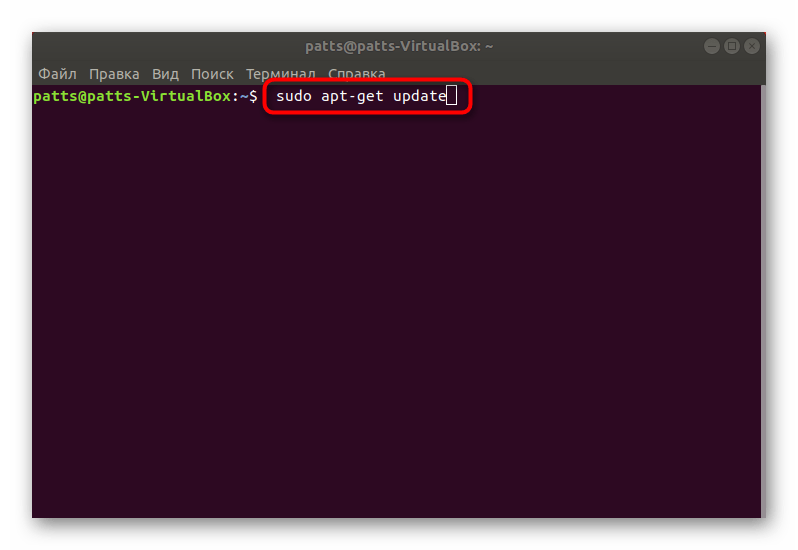
Впишите команду sudo apt-get update .
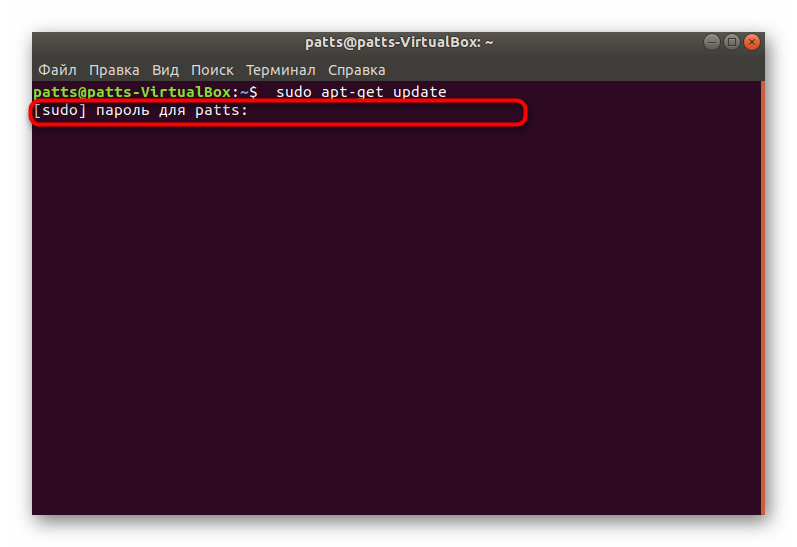
Введите пароль от вашего аккаунта для получения root-доступа.
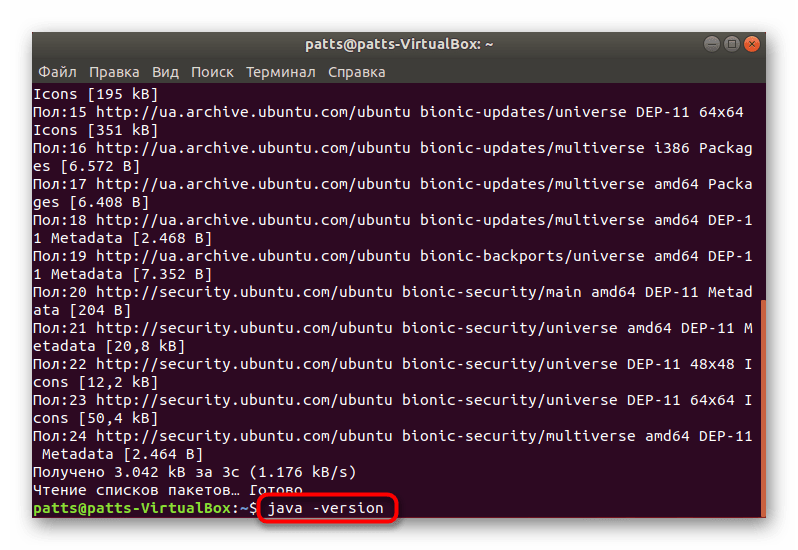
Если вы получили уведомление, похожее на указанное ниже, значит, Джава в вашей ОС не имеется.
Способ 1: Официальные репозитории
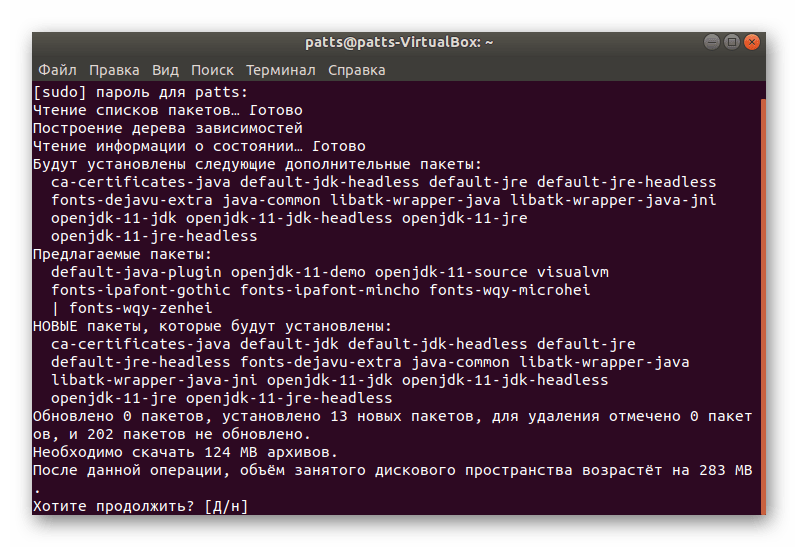
Самый простой метод — использовать официальное хранилище для загрузки Java, которую туда выгрузили разработчики. От вас требуется прописать всего несколько команд, чтобы добавить все необходимые компоненты.
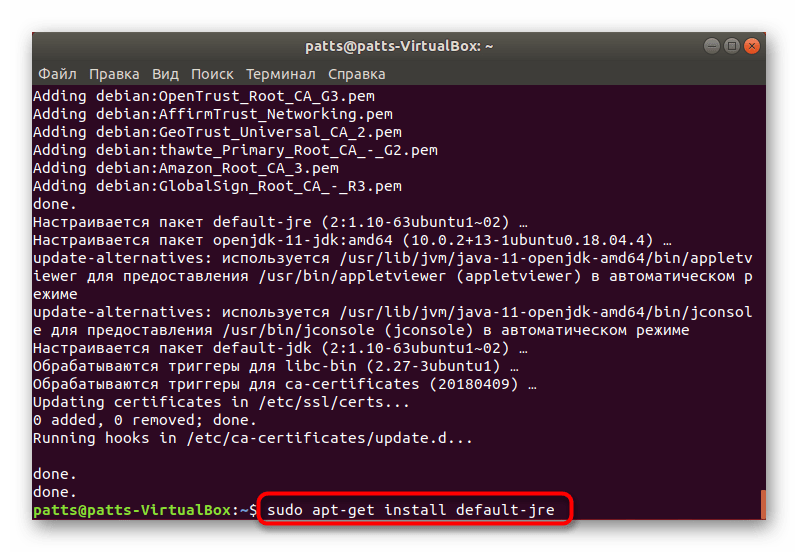
- Запустите «Терминал» и напишите там sudo apt-get install default-jdk , а затем нажмите на Enter.

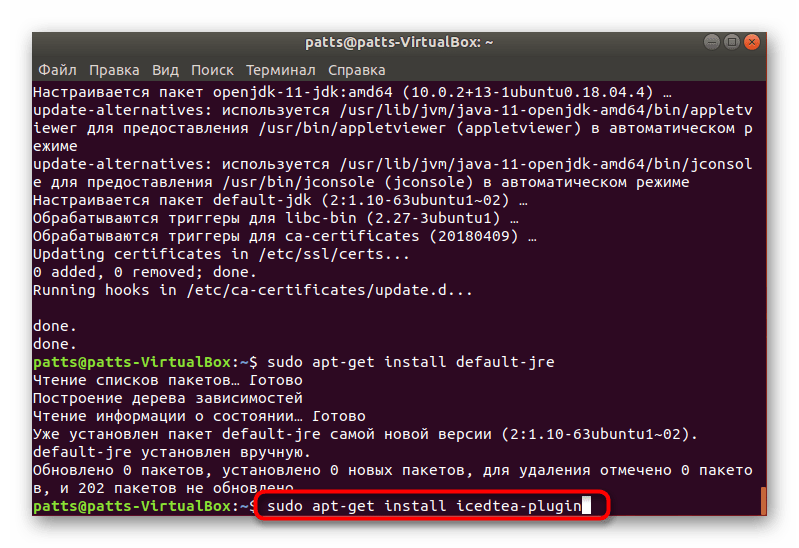
Теперь добавьте JRE, введя команду sudo apt-get install default-jre .
Не помешает и плагин для браузера, который добавляется через sudo apt-get install icedtea-plugin .
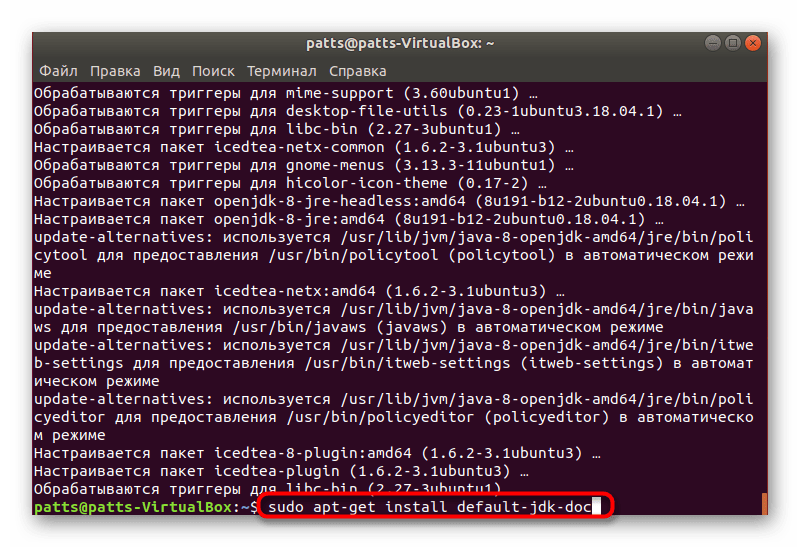
Если вы заинтересованы в получении документации касаемо добавленных компонентов, загрузите их командой sudo apt-get install default-jdk-doc .
Хоть такой метод достаточно прост, он не подходит для установки самых свежих Джава-библиотек, поскольку они последнее время не выкладываются в официальное хранилище. Именно поэтому мы предлагаем ознакомиться со следующими вариантами инсталляции.
Способ 2: Репозиторий Webupd8
Существует пользовательское хранилище под названием Webupd8, в котором имеется скрипт, сравнивающий текущую версию Java с той, что находится на сайте Oracle. Такой метод инсталляции пригодится тем, кто желает установить сброку новее 8 (последней доступной в репозитории Oracle).
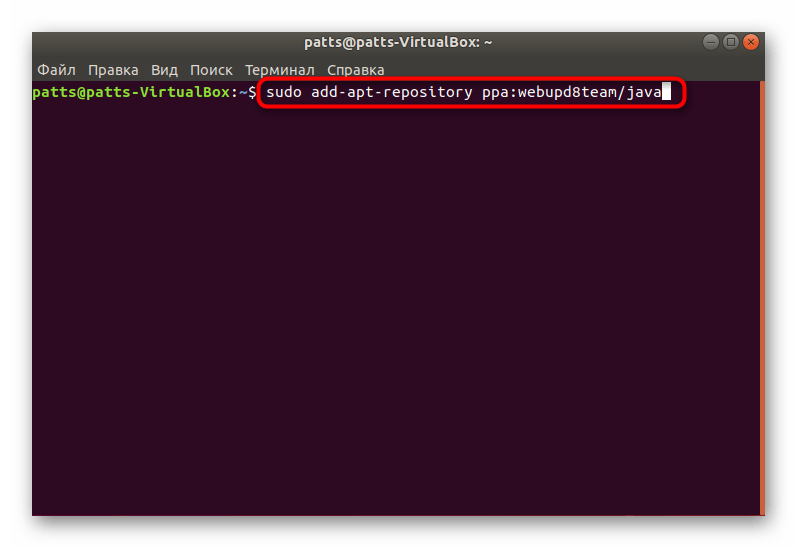
- В консоли введите sudo add-apt-repository ppa:webupd8team/java .
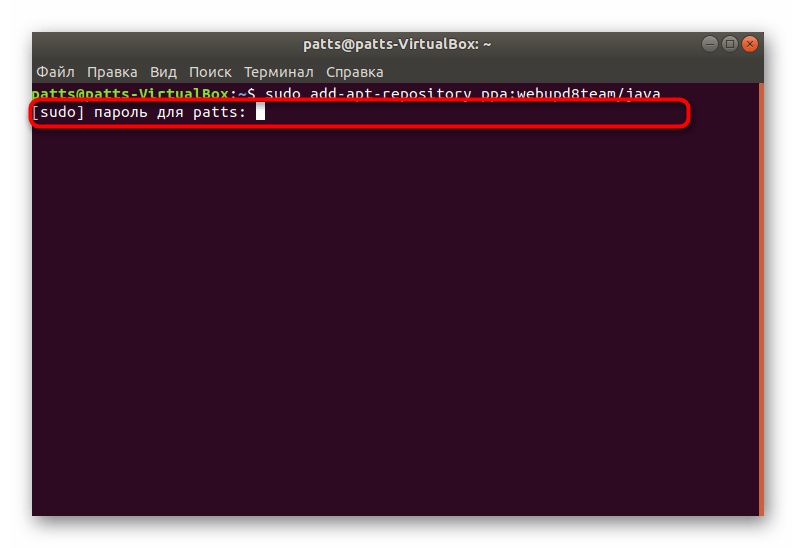
Обязательно укажите свой пароль.
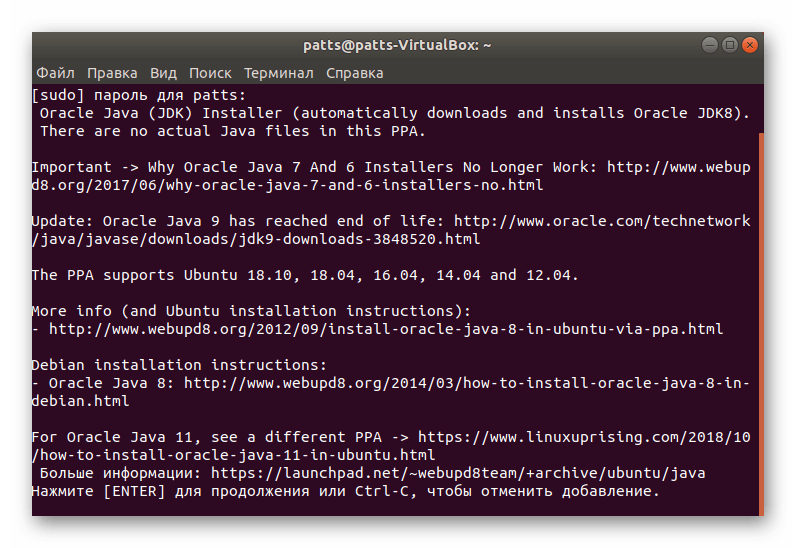
Подтвердите операцию добавления, нажав на Enter.
Ожидайте завершения загрузки файлов, не закрывая «Терминал».
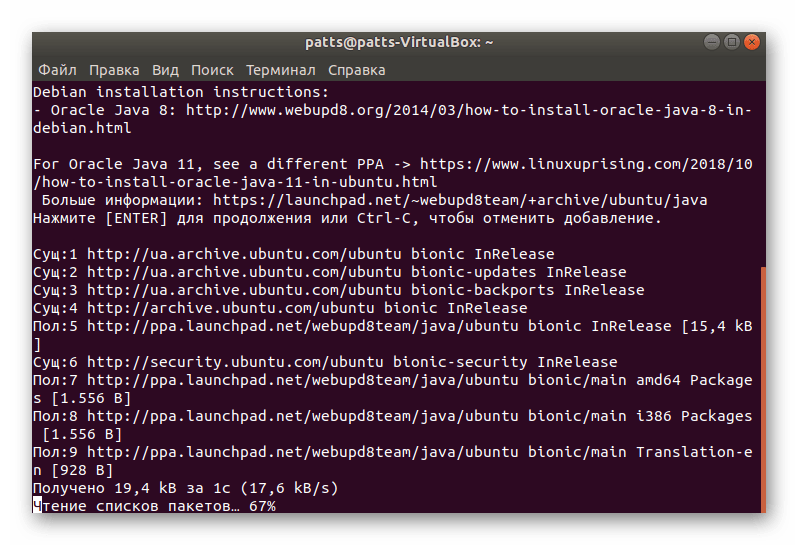
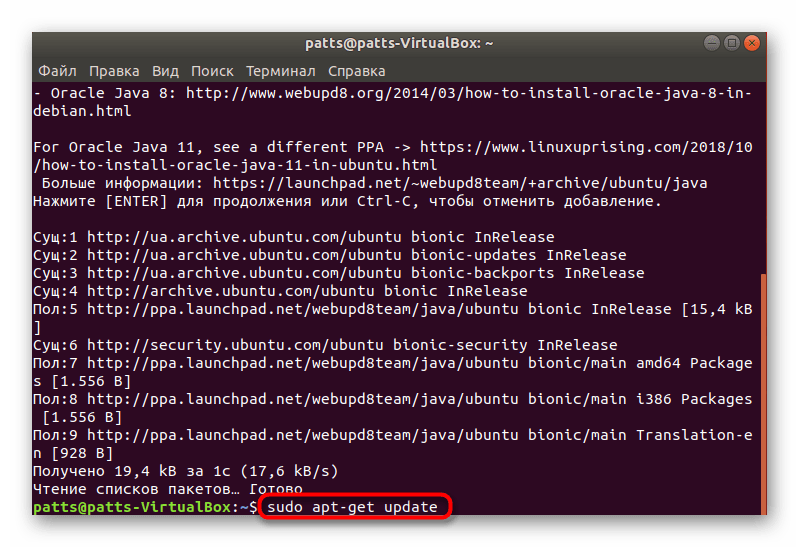
Обновите системное хранилище командой sudo apt-get update .
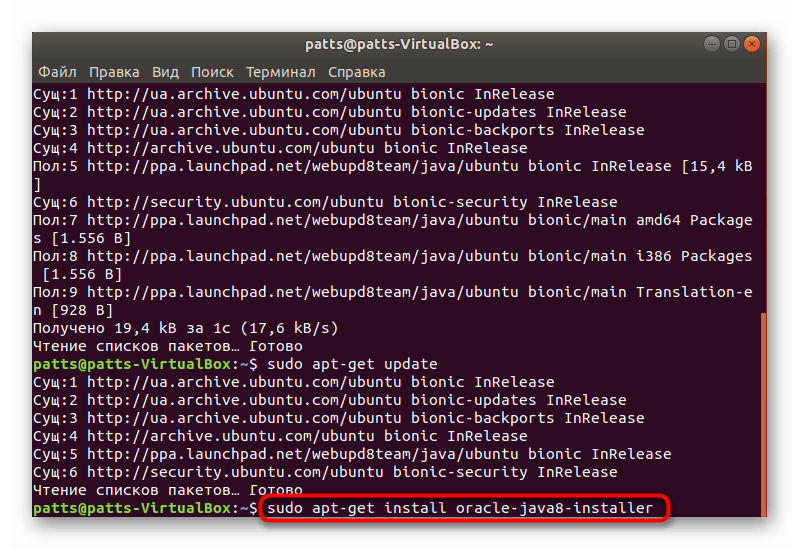
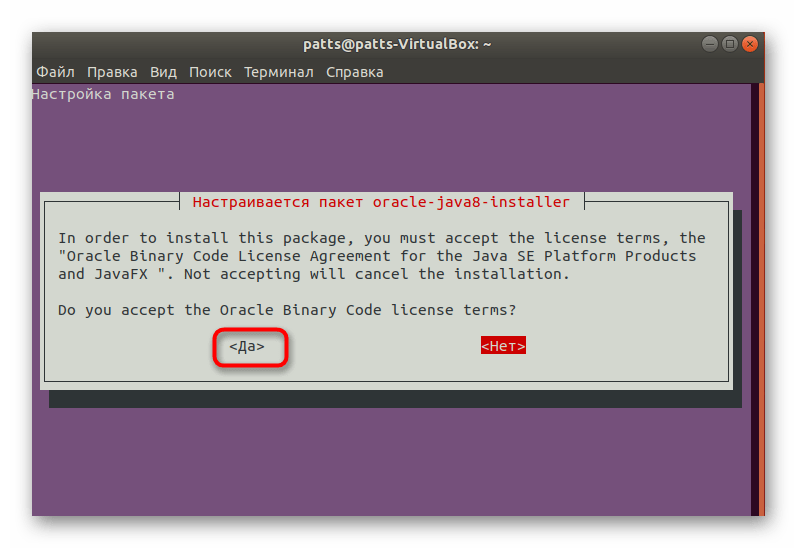
Теперь следует добавить графический инсталлятор путем ввода sudo apt-get install oracle-java8-installer .
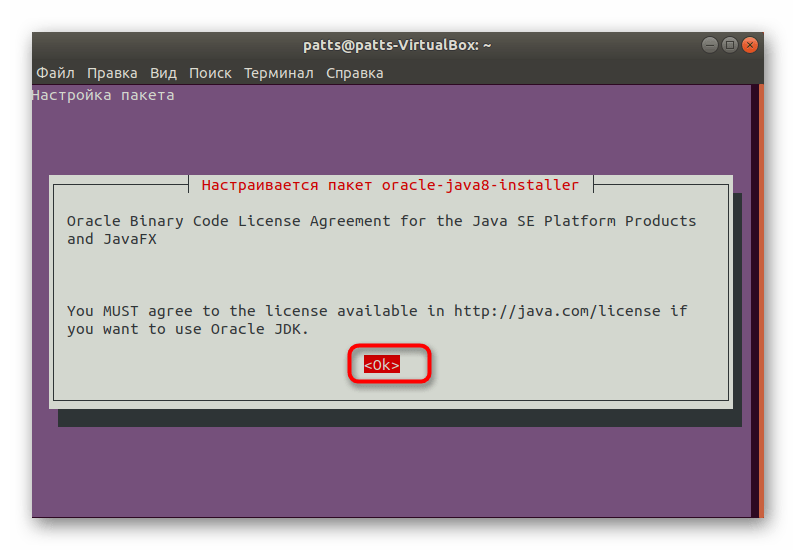
Примите лицензионное соглашение для настройки пакета.
Согласитесь с добавлением новых файлов в систему.
По окончании процесса вам будет доступна команда для инсталляции абсолютно любых версий — sudo apt-get install oracle-java7-installer , где java7 — версия Java. Например, вы можете прописать java9 или java11 .
Избавиться от ненужных инсталляторов поможет команда sudo apt-get remove oracle-java8-installer , где java8 — версия Java.
Способ 3: Обновление с помощью Webupd8
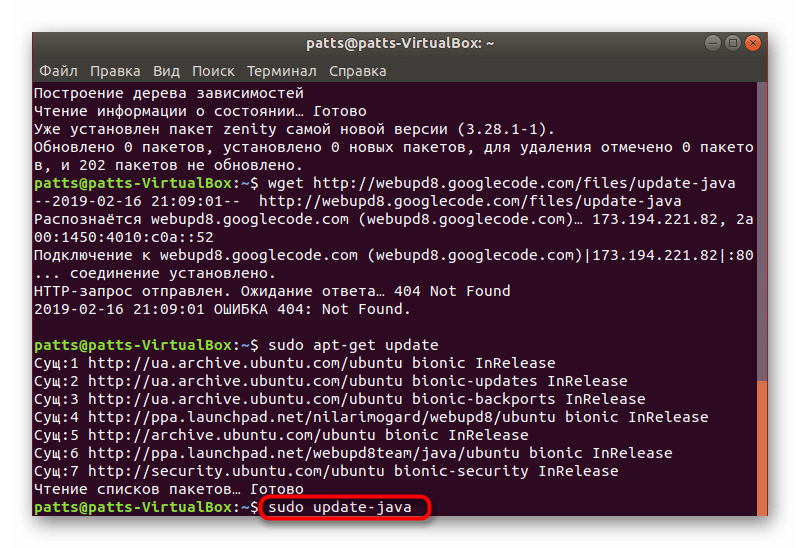
Выше мы рассказали об установке сборок путем использования пользовательского хранилища Webupd8. Благодаря этому же репозиторию можно обновлять версию Джава до самой последней как раз путем скрипта сравнения.
- Повторите первые пять шагов из предыдущей инструкции, если вы еще не сделали эти действия.
- Впишите команду sudo update-java , а затем нажмите на Enter.
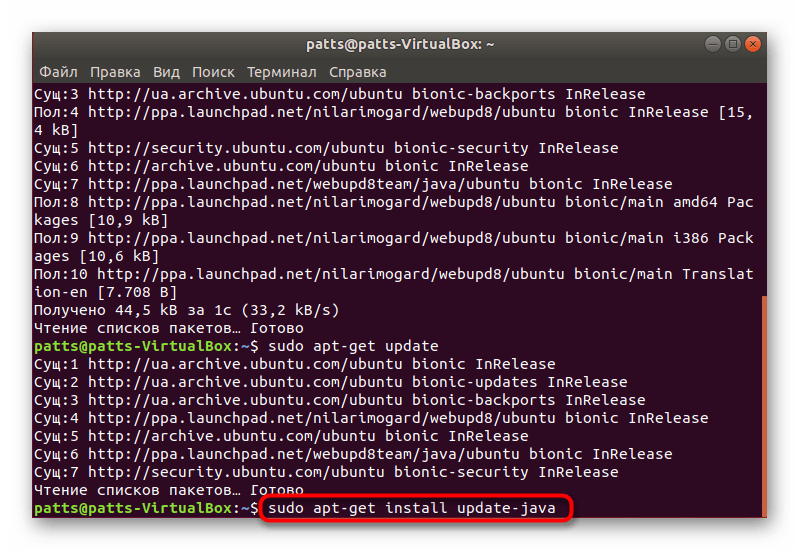
Используйте команду sudo apt-get install update-java для установки обновлений в случае их нахождения.
Способ 4: Ручная установка
Пожалуй, этот способ самый тяжелый из тех, которые мы рассмотрели в этой статье, однако он позволит получить необходимую версию Java без использования сторонних репозиториев и других дополнительных компонентов. Для осуществления этой задачи вам понадобится любой доступный браузер и «Терминал».
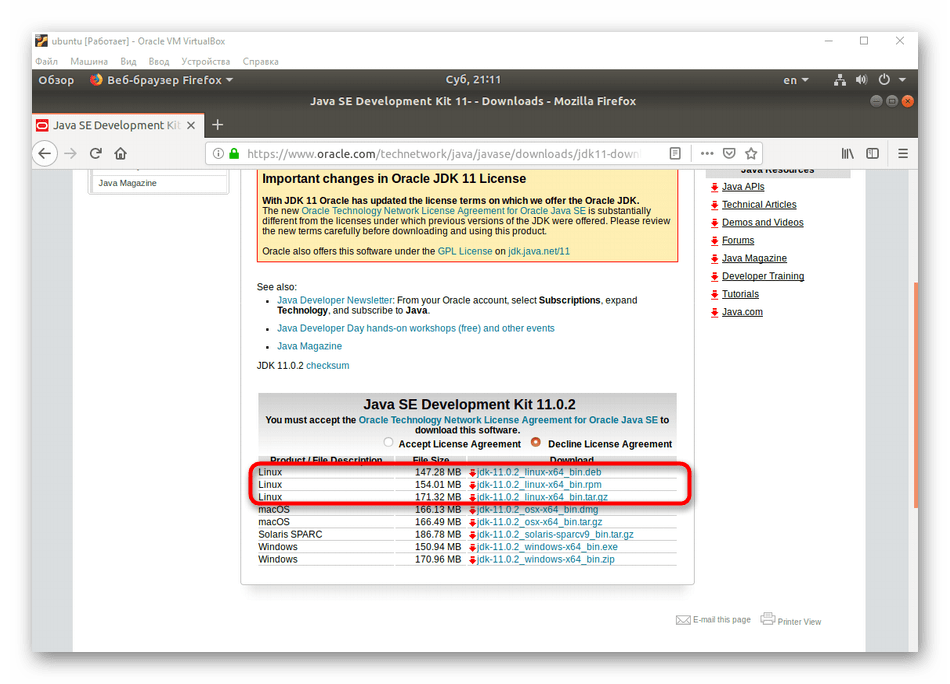
- Через веб-обозреватель перейдите на официальную страницу Oracle для загрузки Джава, где нажмите на «Download» или выберите любую другую необходимую версию.
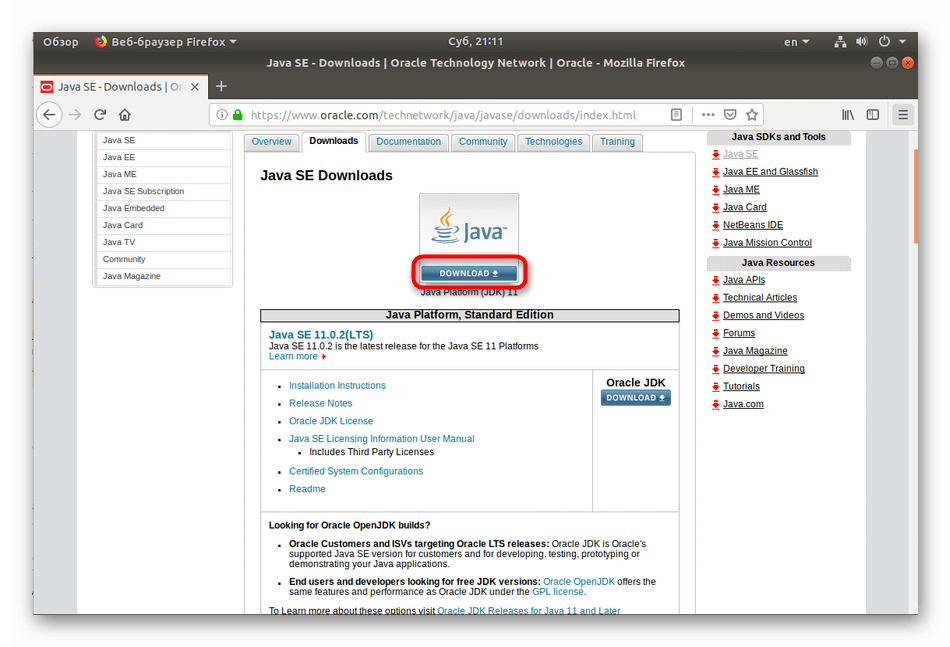
Ниже находится несколько пакетов с библиотеками. Мы советуем скачать архив формата tar.gz.
Перейдите в папку с архивом, щелкните по нему ПКМ и выберите «Свойства».
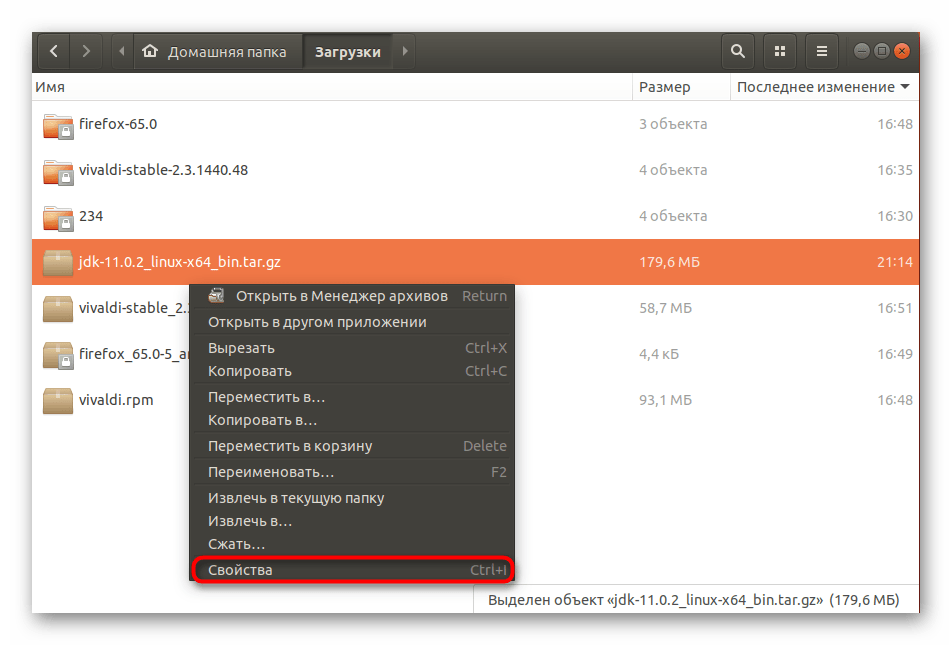
Запомните расположение пакета, поскольку вам придется перейти к нему через консоль.
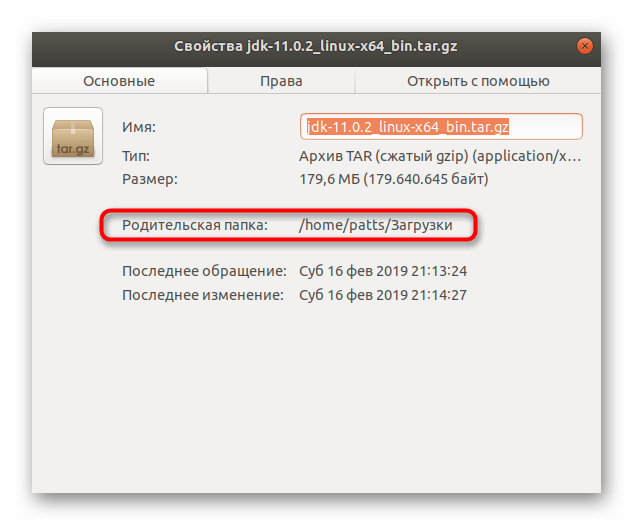
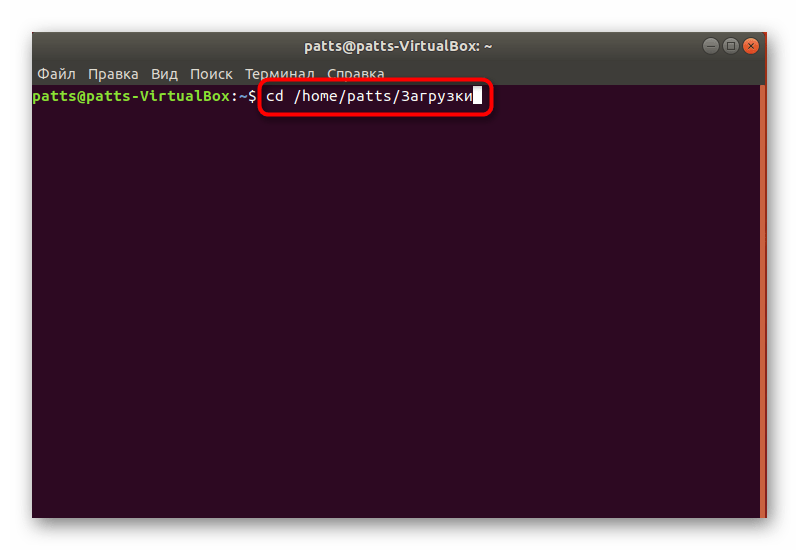
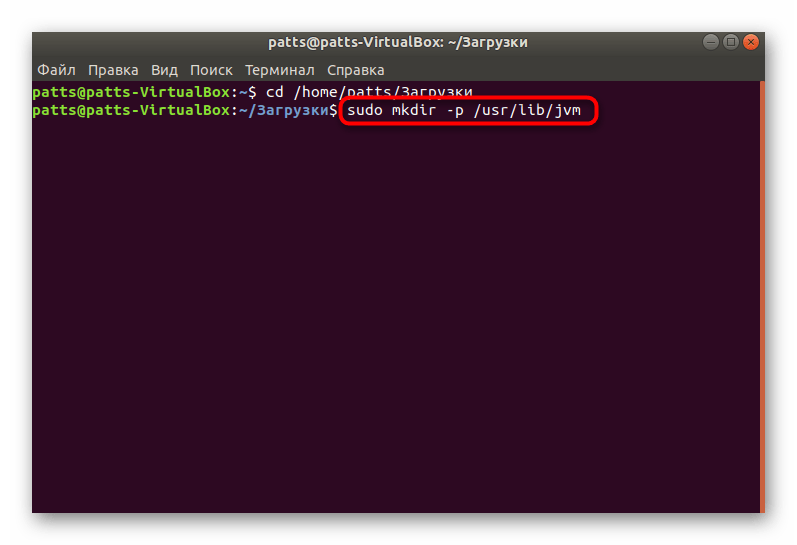
Запустите «Терминал» и выполните команду cd /home/user/folder , где user — имя пользователя, а folder — название папки хранения архива.
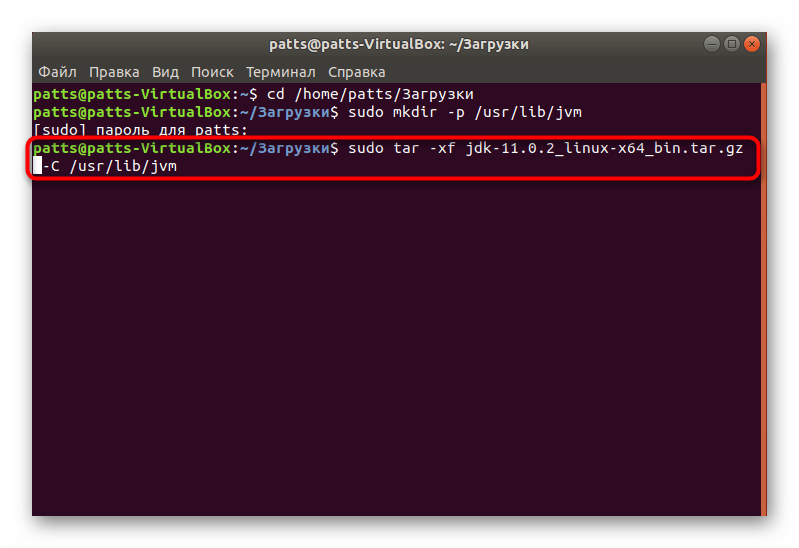
Создайте папку для распаковки архива. Обычно все компоненты помещаются в jvm. Создание директории происходит путем ввода sudo mkdir -p /usr/lib/jvm .
Распакуйте в созданную папку имеющийся архив sudo tar -xf jdk-11.0.2_linux-x64_bin.tar.gz -C /usr/lib/jvm , где jdk-11.0.2_linux-x64_bin.tar.gz — название архива.
Для добавления системных путей вам потребуется последовательно ввести следующие команды:
sudo update-alternatives —install /usr/bin/java java /usr/lib/jvm/jdk1.8.0/bin/java 1
sudo update-alternatives —install /usr/bin/javac javac /usr/lib/jvm/jdk1.8.0/bin/javac 1
sudo update-alternatives —install /usr/bin/javaws javaws /usr/lib/jvm/jdk1.8.0/bin/javaws 1
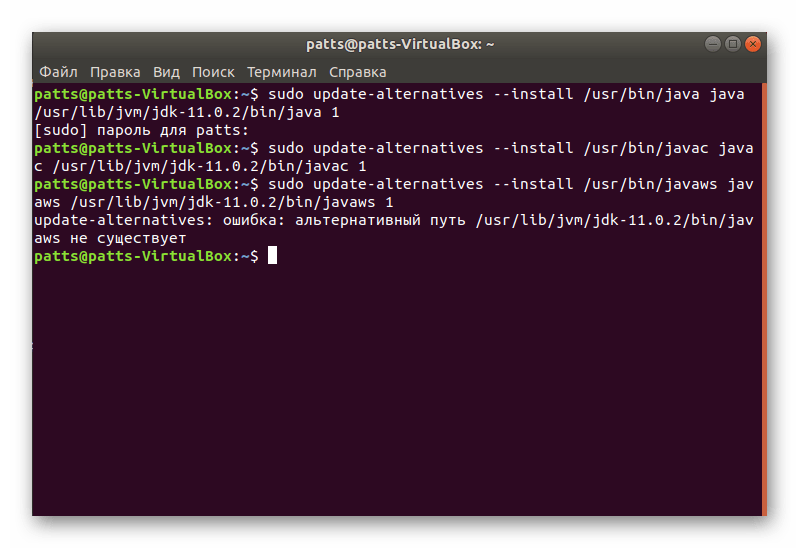
Один из альтернативных путей может не существовать, что зависит от выбранной версии Java.
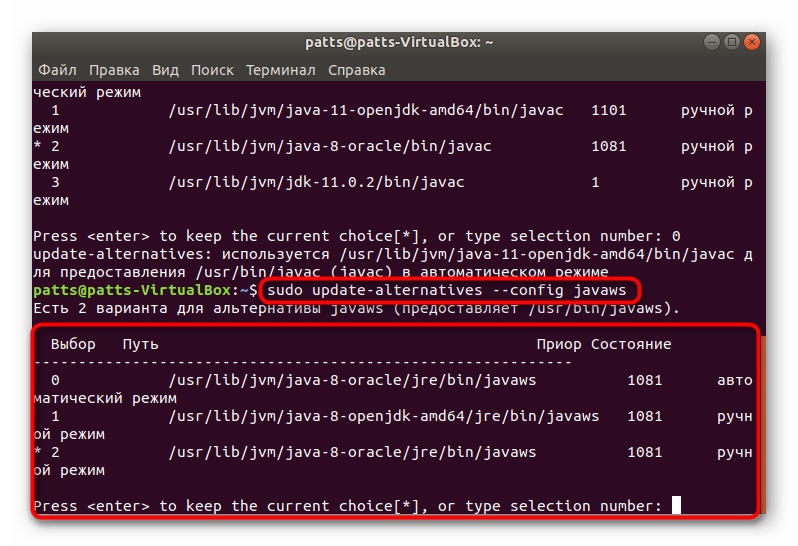
Осталось только провести конфигурацию каждого пути. Сначала выполните sudo update-alternatives —config java , отыщите подходящую версию Java, сверьте ее цифру и впишите в консоль.

Повторите то же действие с sudo update-alternatives —config javac .
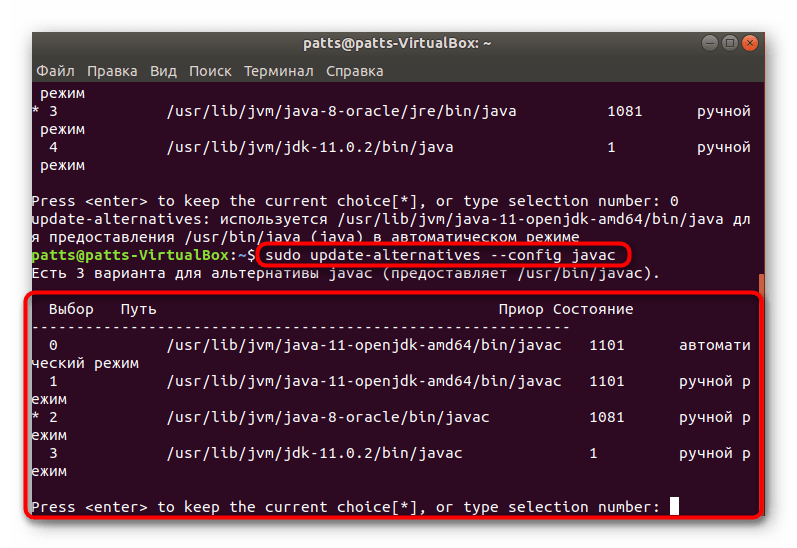
Затем настройте последний путь через sudo update-alternatives —config javaws .
Как видите, методов инсталляции Java в операционную систему Linux существует достаточно большое количество, поэтому каждый пользователь найдет подходящий вариант. Если вы используете специфический дистрибутив и приведенные способы не работают, внимательно изучите отобразившиеся в консоли ошибки и воспользуйтесь официальными источниками для решения проблемы.
Помимо этой статьи, на сайте еще 12315 инструкций.
Добавьте сайт Lumpics.ru в закладки (CTRL+D) и мы точно еще пригодимся вам.
Отблагодарите автора, поделитесь статьей в социальных сетях.
Источник


