- Установка linux mint kvm
- Problem
- Solution
- Share this:
- Like this:
- Related
- About krzysztoftomaszewski
- 3 Responses to How to install KVM/QEMU on Linux Mint 20.1
- Install KVM Virtualization on Linux Mint 20
- Installing KVM Virtualization
- Step 1: Verify processor support for hardware virtualization
- Step 2: Install KVM
- Step 3: Add the user to ‘libvert’ and ‘kvm’ group
- Step 4: Verify Installation
- Step 5: Create a virtual machine in KVM
- About the author
- Karim Buzdar
- How To Install KVM On Ubuntu 20.04 / Linux Mint 20
- Prerequisites
- VT Support
- Create Network Bridge For KVM
- Install KVM
- Create Virtual Machine
- User Permission
- Create VM
- Command Line
- Graphical Mode
- Manage Virtual Machine
- Conclusion
Установка linux mint kvm
From time to time I want to run a virtual machine on my computer, a sandbox containing another operating system with some programs running in total isolation. Under Linux my answer for this need is a set of three components:
- KVM – a virtualization module in the Linux kernel that allows the kernel to function as a hypervisor. (Wikipedia)
- QEMU – a machine emulator and virtualizer that can perform hardware virtualization. It can cooperate with KVM to run virtual machines at near-native speed (Wikipedia)
- Virtual Machine Manager – a nice GUI to use above things as simply as possible.
Problem
How prepare all above components on a fresh installation of Linux Mint 20.1?
Solution
This solution is based on the article “Install KVM Virtualization on Linux Mint 20” with my additions.
First execute following commands:
Here the above-mentioned article claimed everything is ready and working. But it wasn’t in my case. So just restart Linux now. Then proceed with verification steps:
The output should be:
The output should start with following lines:
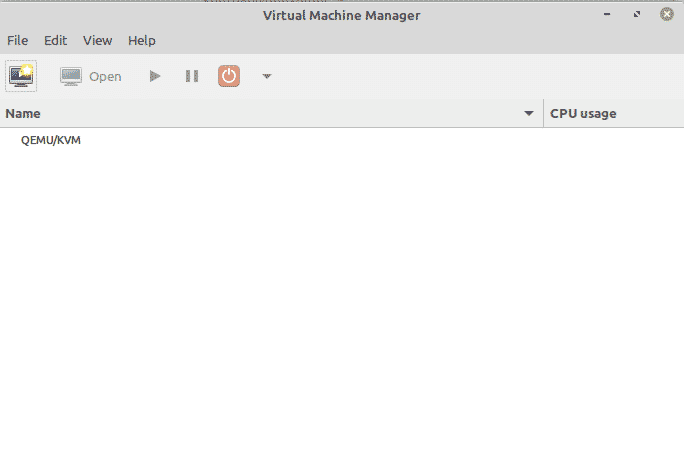
Then start Virtual Machine Manager. It should show that it is connected to KVM/QEMU. It should look like this: 
Share this:
Like this:
Related
About krzysztoftomaszewski
3 Responses to How to install KVM/QEMU on Linux Mint 20.1
To share the libraries such as copy/paste, devices, folders, etc, from the virtualized machine wath the main system, what else should I do?
This works except all I had to do was “sudo apt install qemu-kvm libvirt-daemon-system libvirt-clients bridge-utils virt-manager”, reboot, and it just worked.
@ Dero ; I had the same issue and while I suspect it’s possible to get other methods working I just setup a basic Samba share on the host Mint 20 machine and then from the Windows (Win10) virtual machine I just did the following (without the “) on the section you can type stuff in bottom left area of screen… “\\192.168.1.100\” (or whatever is the IP of the machine running Samba) and it showed the folder name I was sharing and I select it and it just worked (since I did not setup any username/password stuff anyone on my network can access that share straight up). because trying to setup a more standard way of sharing seems more difficult on this QEMU/KVM than in VirtualBox.
Источник
Install KVM Virtualization on Linux Mint 20
In this article, we will explain how to install KVM virtualization on the Linux Mint system. Then we will also explain how to create a virtual machine in KVM. We will be using the command line Terminal application for the installation process. To open the command line Terminal, you can use the Ctrl+Alt+T keyboard shortcut.
Note:
- We have run the procedure and commands on Linux Mint 20 OS. More or less the same procedure can be followed in older Mint versions.
- For installing or removing any package in any Linux distribution including Linux Mint, you must be root user or a standard user with sudo privileges.
Installing KVM Virtualization
Follow the below steps to install KVM virtualization in Linux Mint 20 system:
Step 1: Verify processor support for hardware virtualization
For installing KVM, you must have a processor that supports hardware virtualization. You can verify this using the following command in Terminal:

If the above command returns 0, then it means that the processor does not support hardware virtualization. The value of 1 or greater than it means the processor supports hardware virtualization.
Next, you will need to check whether the virtualization is enabled in the BIOS or not. You can use the kvm-ok command for this purpose which will also tell whether you can run KVM virtual machines in your system or not. To use the kvm-ok, you will need to install the cpu-checker utility. Use the below command to install cpu-checker utility.
Once installed, run kvm-ok:

The above output indicates that virtualization is enabled in the BIOS and you can run KVM virtual machines.
If the virtualization is not enabled in the BIOS, then in the output you might receive hints to enable virtualization by entering into BIOS and then hard poweroff/poweron the system.
Step 2: Install KVM
Now install KVM using the following command in Terminal:
When prompted for a password, enter the sudo password.

Now you will be asked if you want to continue the installation or not. Hit y to continue the installation process. Once it is finished, move on to the next step.
Step 3: Add the user to ‘libvert’ and ‘kvm’ group
Now you will need to add a user to the ‘libvert’ and ‘kvm’ groups. Issue the following commands in Terminal to do so:
Replace the username with the name of the user who will work with KVM.
Now logout and login back to the system to have the user becomes an effective member of the ‘libvert’ and ‘kvm’ groups. This user will be able to run and manage virtual machines.
Step 4: Verify Installation
You can verify the installation with the following command in Terminal:

The output above indicates that the installation has been successful. If something goes wrong, you will receive some error in the above output.
Step 5: Create a virtual machine in KVM
Now you can create a virtual machine in KVM using the GUI based Virtual Machine Manager. Also, download the ISO of any OS you want to install in the virtual machine.
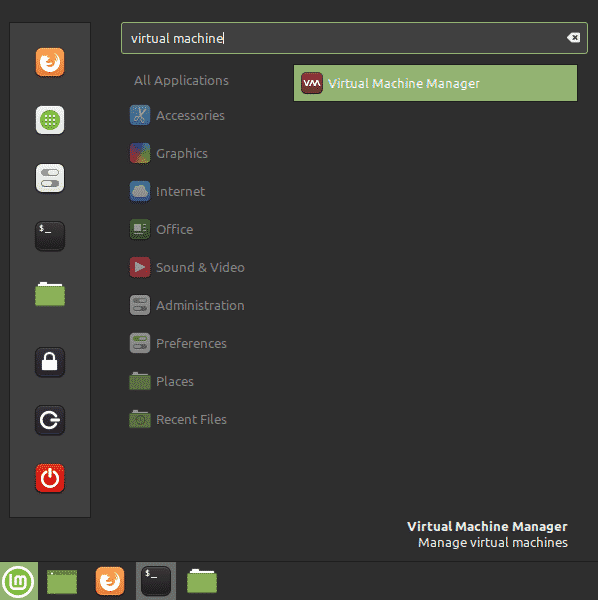
To open the Virtual Machine Manager, hit the super key on your keyboard and type virtual machine. From the search results, click on the Virtual Machine Manager icon to open it.
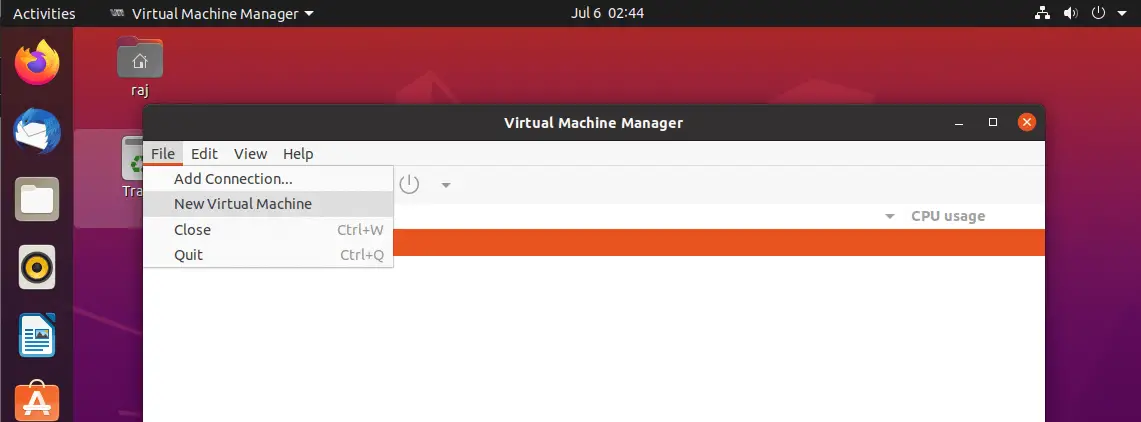
When the Virtual Machine Manager will open, you will see the following window.
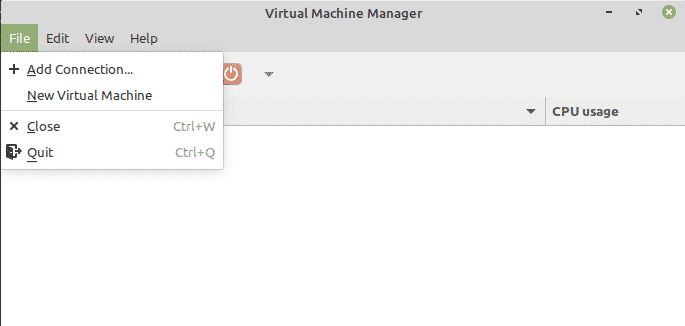
To create a new virtual machine, go to the File menu at the top and then click the New Virtual machine.
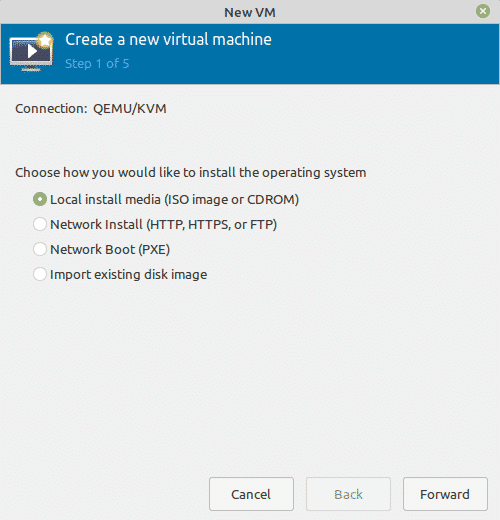
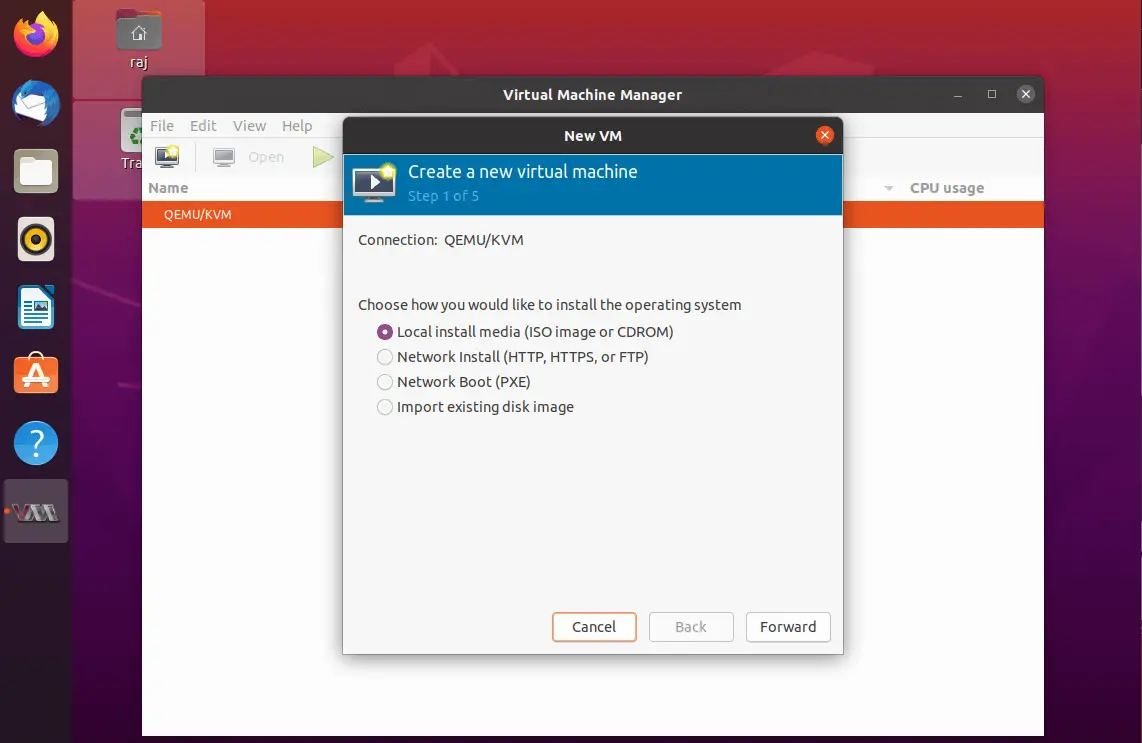
The following window will appear allowing you to choose the method through which you will install the OS. If you have the ISO file on your system, choose the Local install media (ISO image or CDROM) option and click the Forward button.
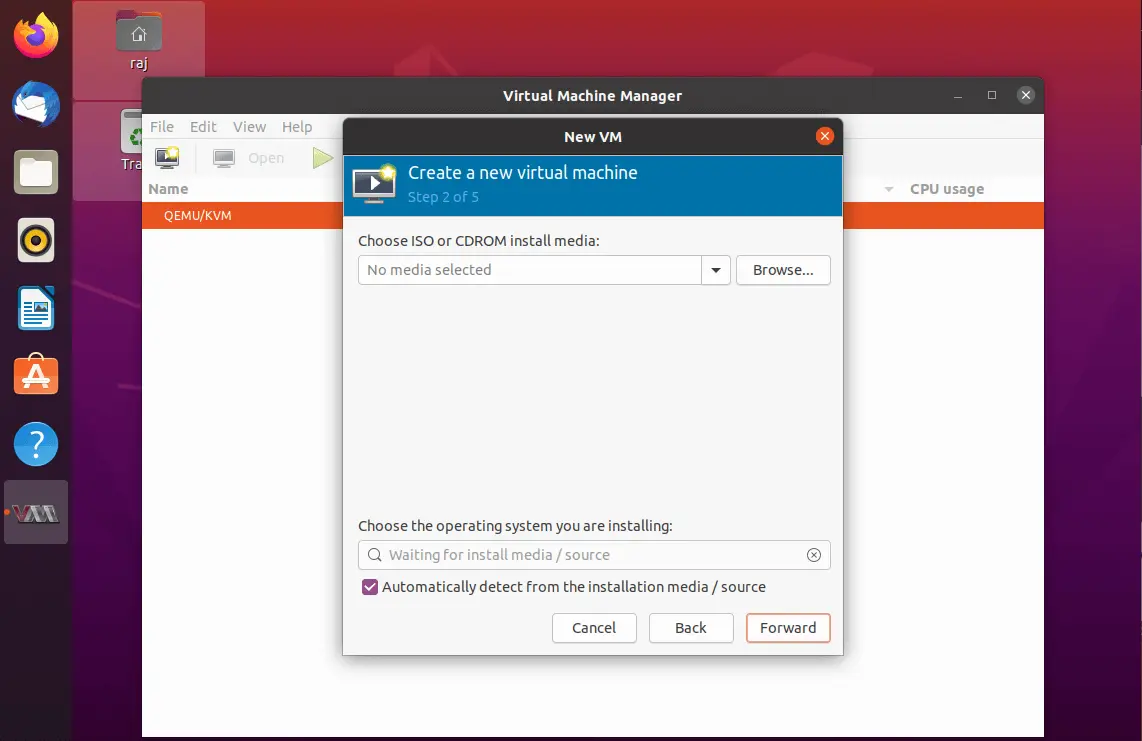
Next in the following window, click the Browse button to locate the ISO of the OS you want to install in your virtual machine. Then click the Forward button.
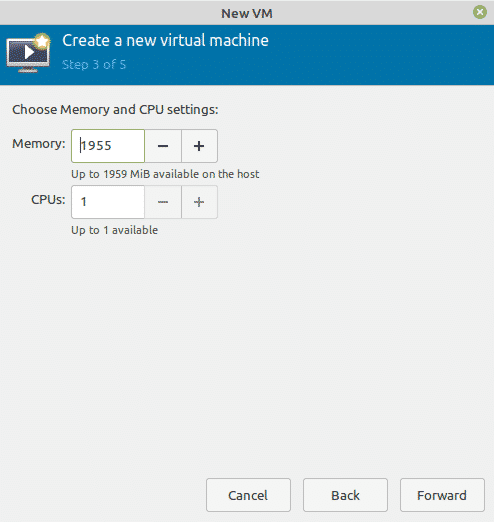
In the next window, set memory and the number of CPU cores you want to use for the new VM. Then click Forward.
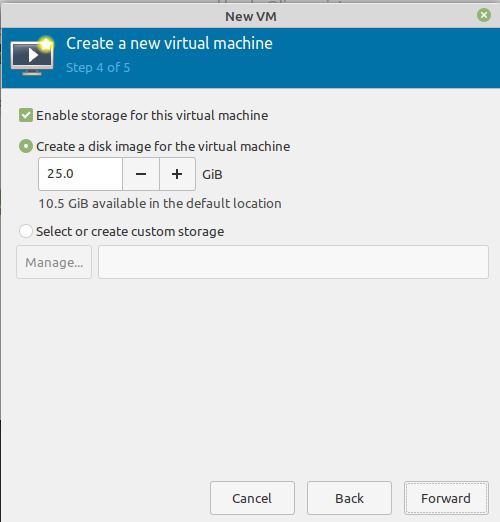
Now enable the storage for your virtual machine and once done, click the Forward button.
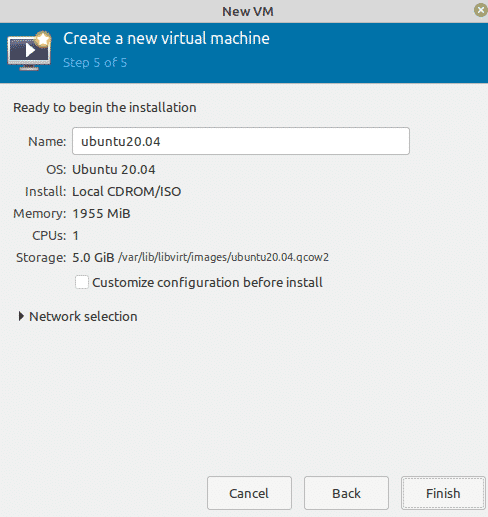
Now type a name for your virtual machine. You can also perform some other configurations here. Once you are done, click the Finish button.
Now the VM will be created based on the configurations and the installation options you have provided.
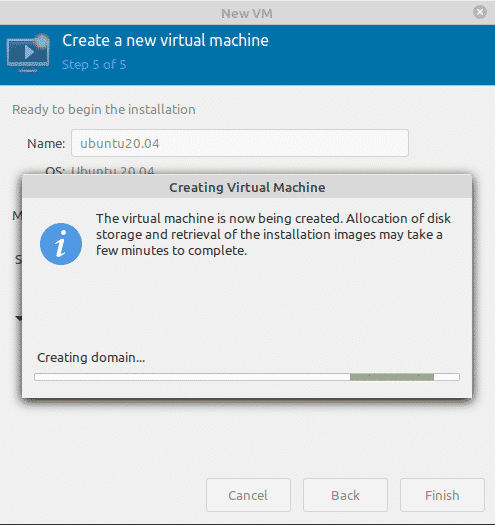
Now the OS installation will be started in a new window. Follow the instructions on the screen to complete the installation process. Once the installation is completed, you will be able to run the virtual machine.
That is all there is to it! In this article, you have learned how to install KVM virtualization on Linux Mint 20 system. You have also learned how to create a virtual machine in KVM and install any operating system inside it.
About the author

Karim Buzdar
Karim Buzdar holds a degree in telecommunication engineering and holds several sysadmin certifications. As an IT engineer and technical author, he writes for various web sites. He blogs at LinuxWays.
Источник
How To Install KVM On Ubuntu 20.04 / Linux Mint 20
CONTENTS
SHARE
KVM is a hypervisor module in the Linux Kernel that helps you run multiple virtual machines on a Linux machine with the help of virtualization extensions.
KVM supports the wide variety of guest operating systems such as Linux, Windows, Unix family OSes, and much more. You can manage virtual machines using the command line or available graphical tools.
Virt-Manager (Virtual Machine Manager) is the graphical application for managing KVM based virtual machines. It supports creating, starting, stopping, and managing virtual machines, as well as the migration of virtual machines between KVM hosts.
Prerequisites
VT Support
KVM will work only if the system CPU has the support of hardware virtualization, either Intel VT or AMD-V.
To find out whether your CPU supports VT features, run the following command.
Output:
If the above command returns nonzero, then your hardware supports VT else it does not.
Create Network Bridge For KVM
The bridged network is a dedicated network interface to a virtual machine that helps virtual machines to connect outside the host machine.
Let us list the available network connections.
Output:
Now, we will create a virtual bridge network br0 with the help of physical interface enp0s3 .
Next, we will assign the IP address of the physical interface to the bridge interface as the Bridge network interface will act as the primary network interface of your host system.
KVM requires a few additional network settings. So, set them.
Disable the physical interface and enable the network bridge.
Finally, check the network connections.
Install KVM
Update the repository cache.
Install the below packages for KVM set up.
Create Virtual Machine
User Permission
Ensure users are part of the libvirt group to create virtual machines. Use id command to check if the user is part of the libvirt group.
Output:
If the user is not part of libvirt group, follow anyone the steps to fix it.
To add an existing user to libvirt group.
OR
If you are creating a new user, use the below command.
Create VM
Once you have installed KVM and other tools, it is all set to start our first virtual machine.
Command Line
Output:
You can use the VNC viewer to connect to the virtual machine console and complete the OS installation.
You can also use Virtual Machine Manager to take a virtual machine console.
Graphical Mode
Activities В» Search for Virtual Machine Manager.
OR
Run virt-manager command in the terminal and bring up the Virtual Machine Manager.
 Start Virtual Machine Manager
Once it is opened, go to File В» New Virtual Machine. The Virtual Machine Manager will start a new virtual machine wizard.
 Create New Virtual Machine
Choose how you would like to install the operating system. Here I chose to install it from ISO image or CD-ROM.
 OS Installation Method
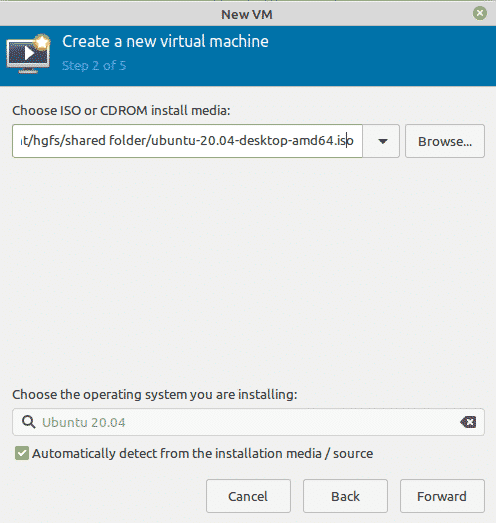
Browse to the location of the ISO image by clicking on Browse and then Browse Local and select the ISO image.
 Browse for ISO Image
 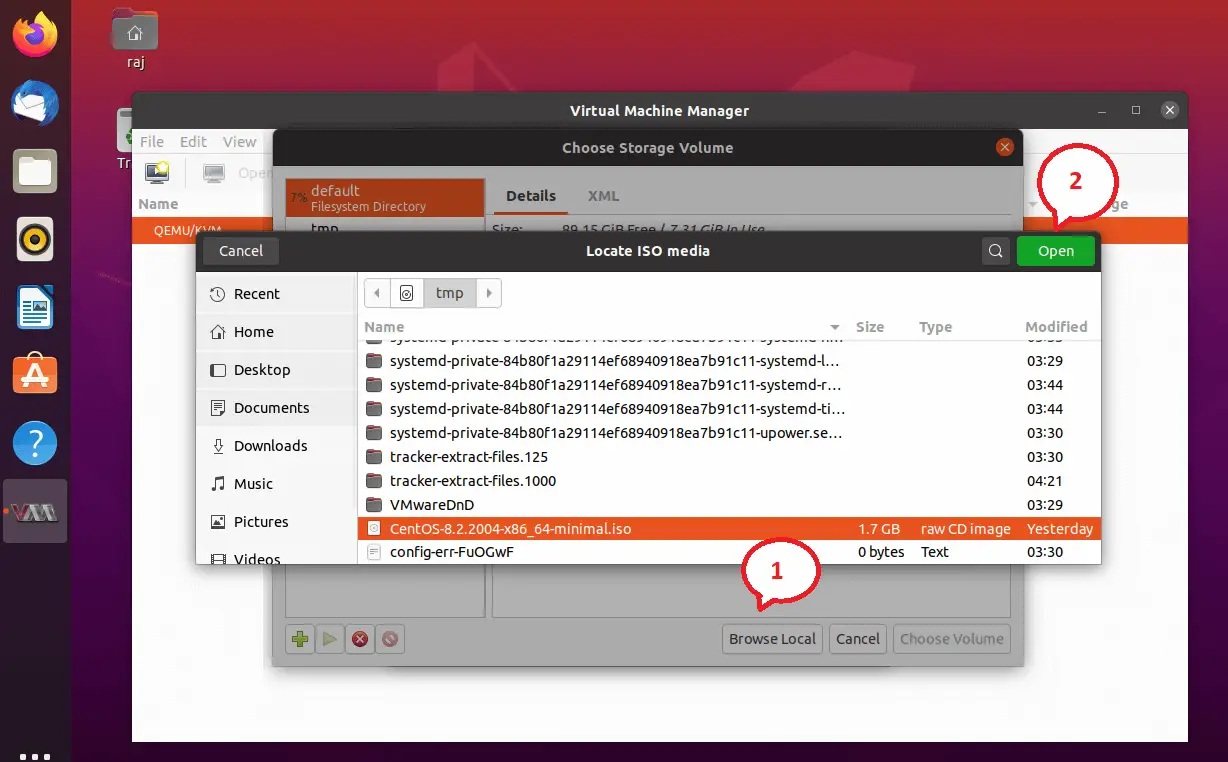 Select ISO Image
The new virtual machine wizard will try to detect the operating system based on your OS image. If not, search for an operating system version by typing the OS version.
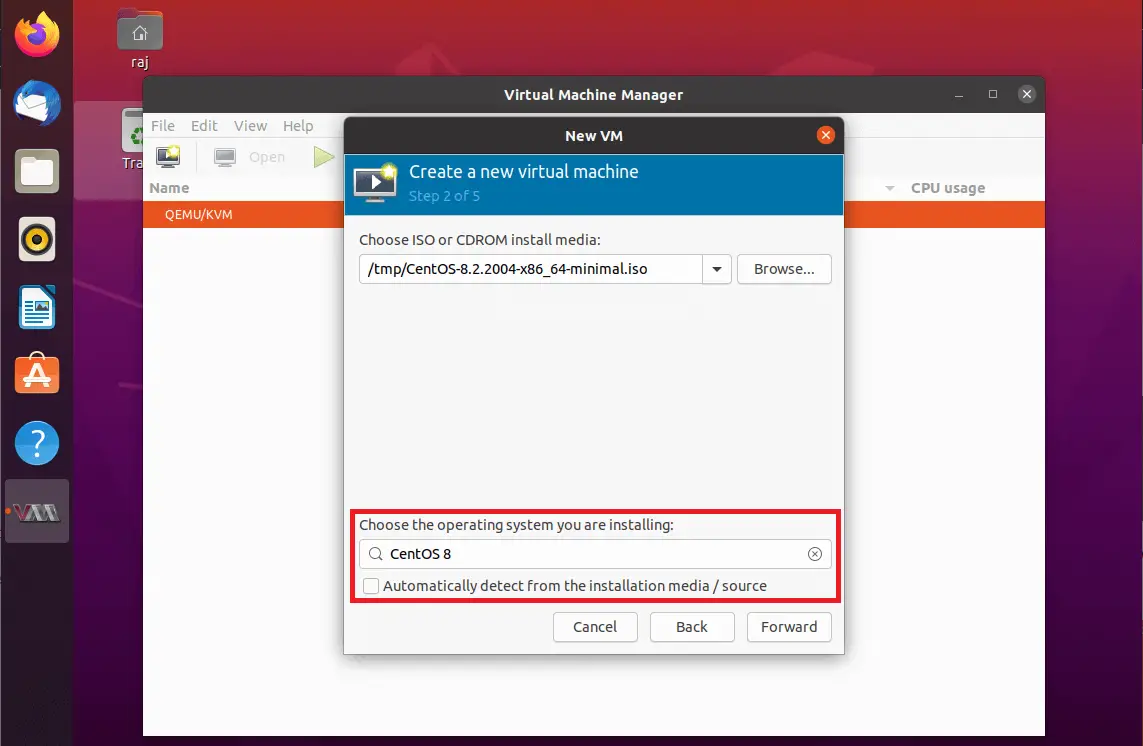 OS Version
Configure CPU and memory allocation for the virtual machine.
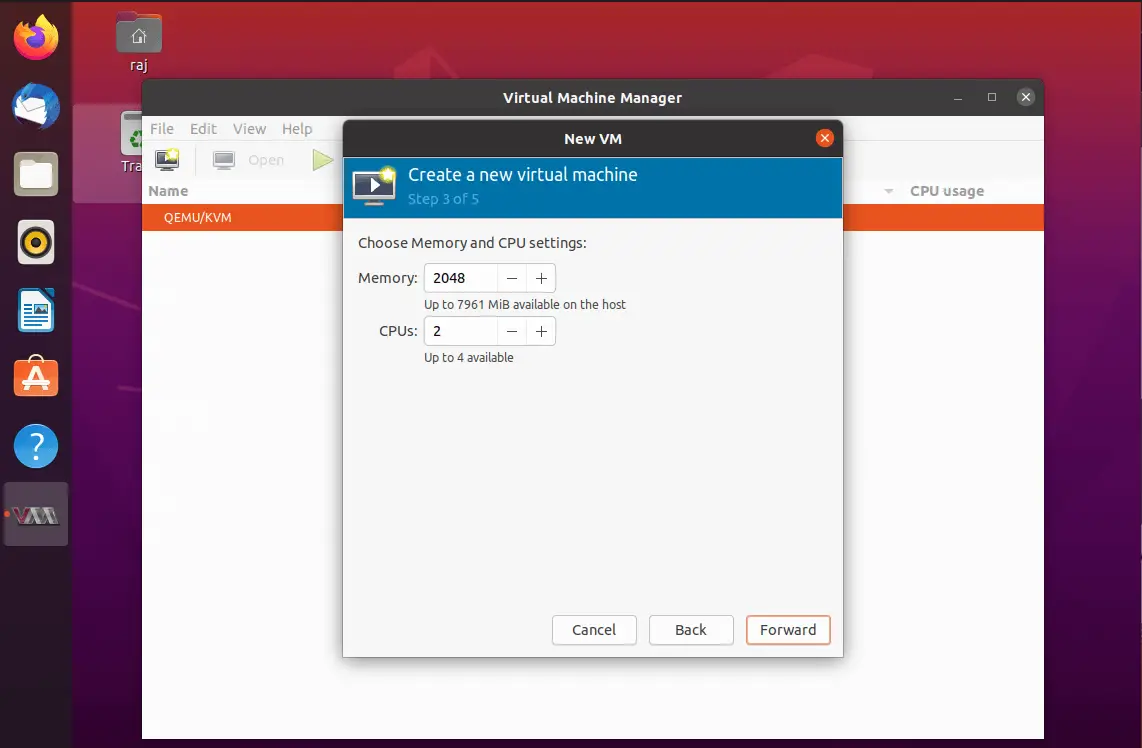 CPU & Memory Information
Here, mention the amount of storage you want to assign to a virtual machine. Additionally, you can change the location of the disk image as per your requirement.
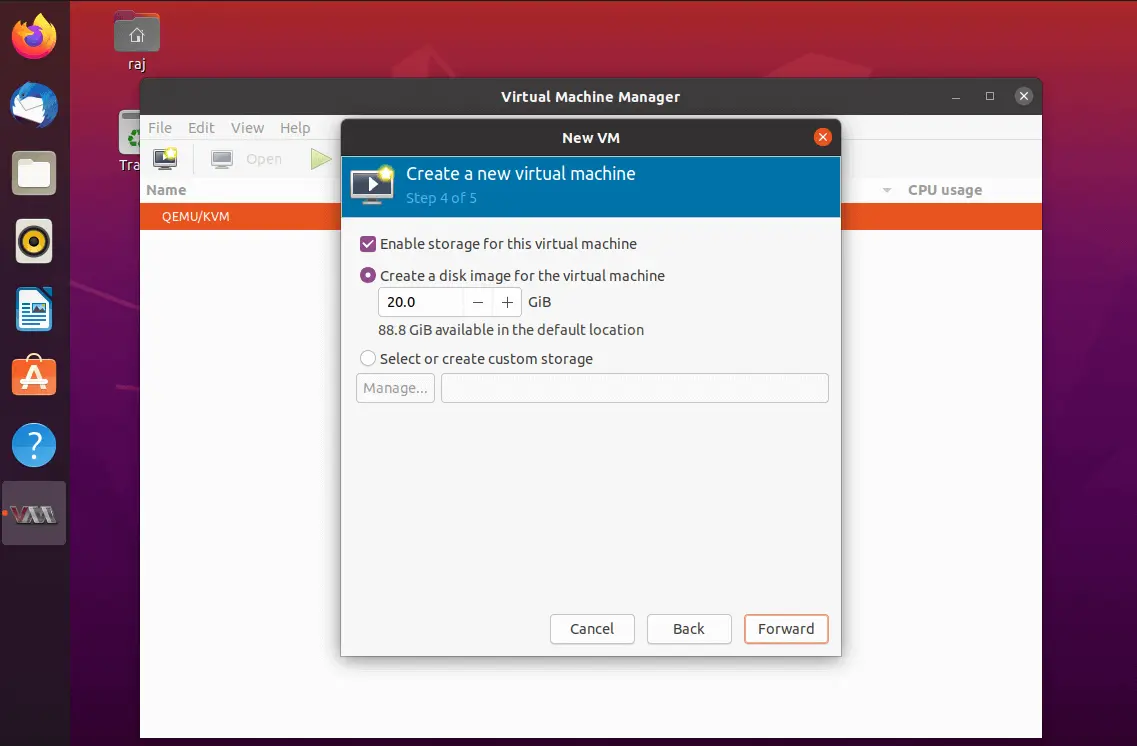 Storage Information
On this page, you will get a summary of the virtual machine.
Click the Network selection and ensure the bridged adaptor we created earlier is chosen for the virtual machine. Finally, click on Finish.
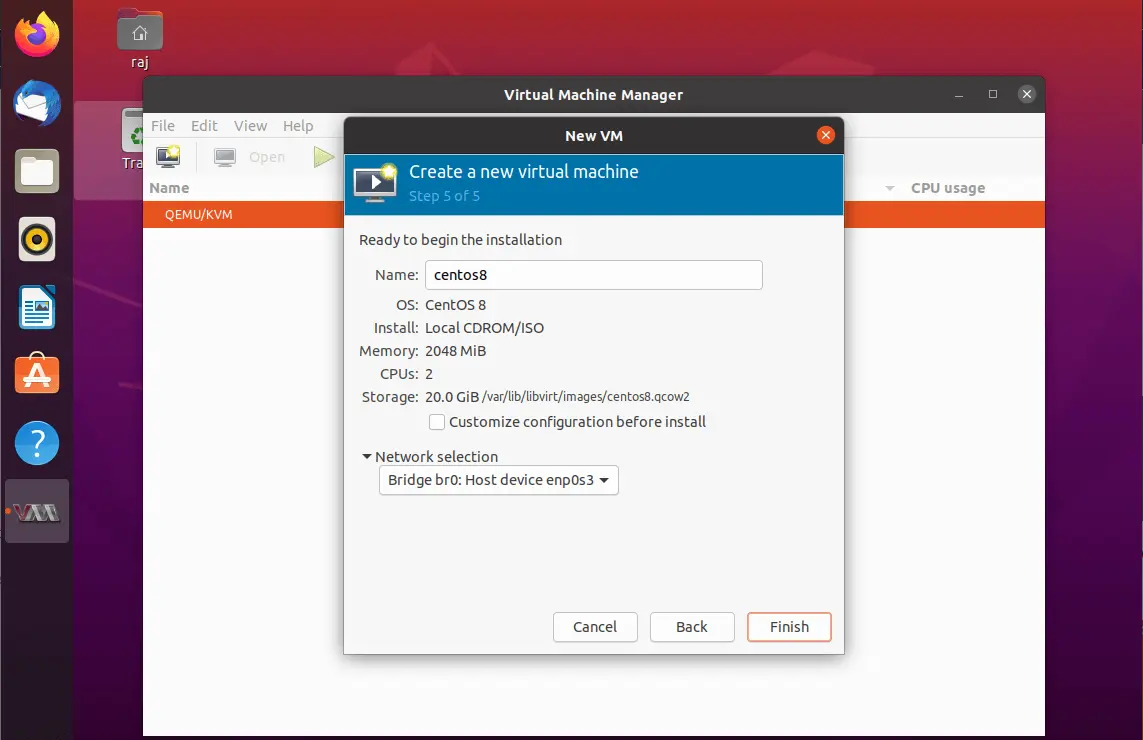 Virtual Machine Summary & Network Selection
Virtual Machine Manager will begin the creation of a virtual machine depends on our input. Once the VM is created, Virtual Machine Manager will start the console for OS installation.
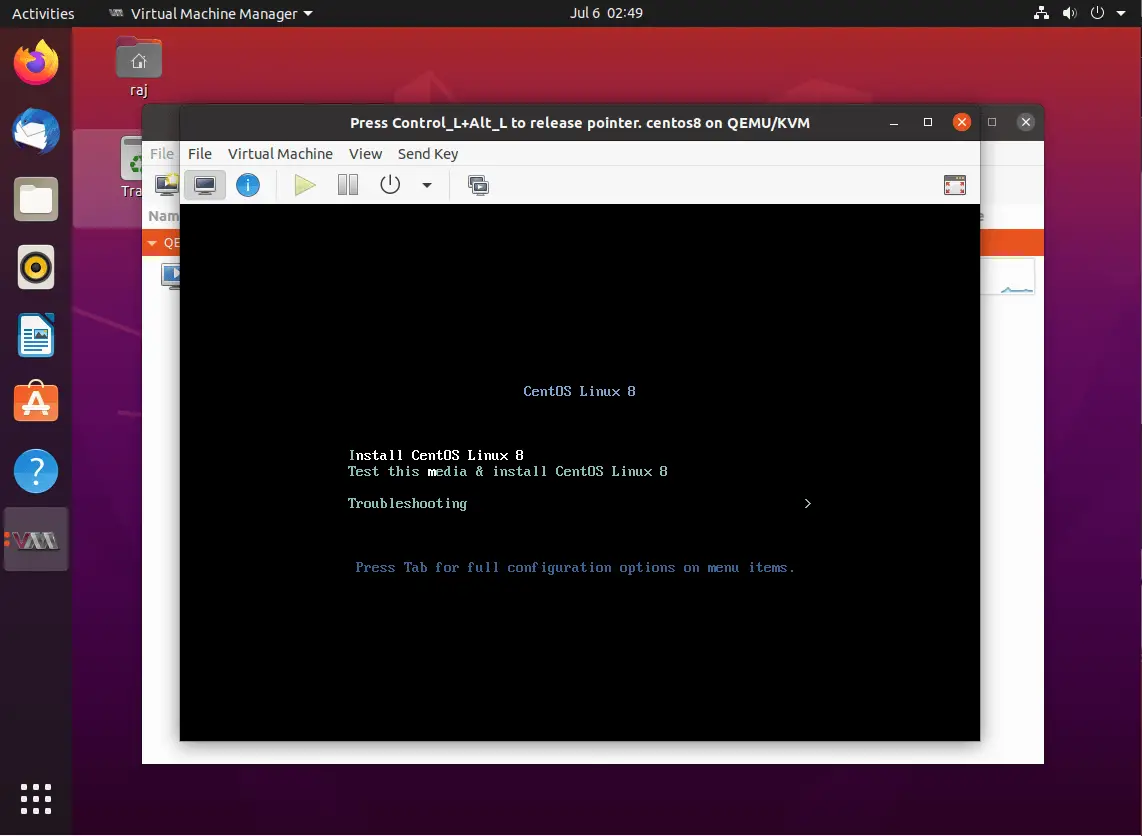 Virtual Machine Running on KVM
Manage Virtual Machine
With the help of Virtual Machine Manager, you can perform a virtual machine’s life cycle actions such as start, power off, reset, clone, and migration by right-clicking on the selected virtual machine.
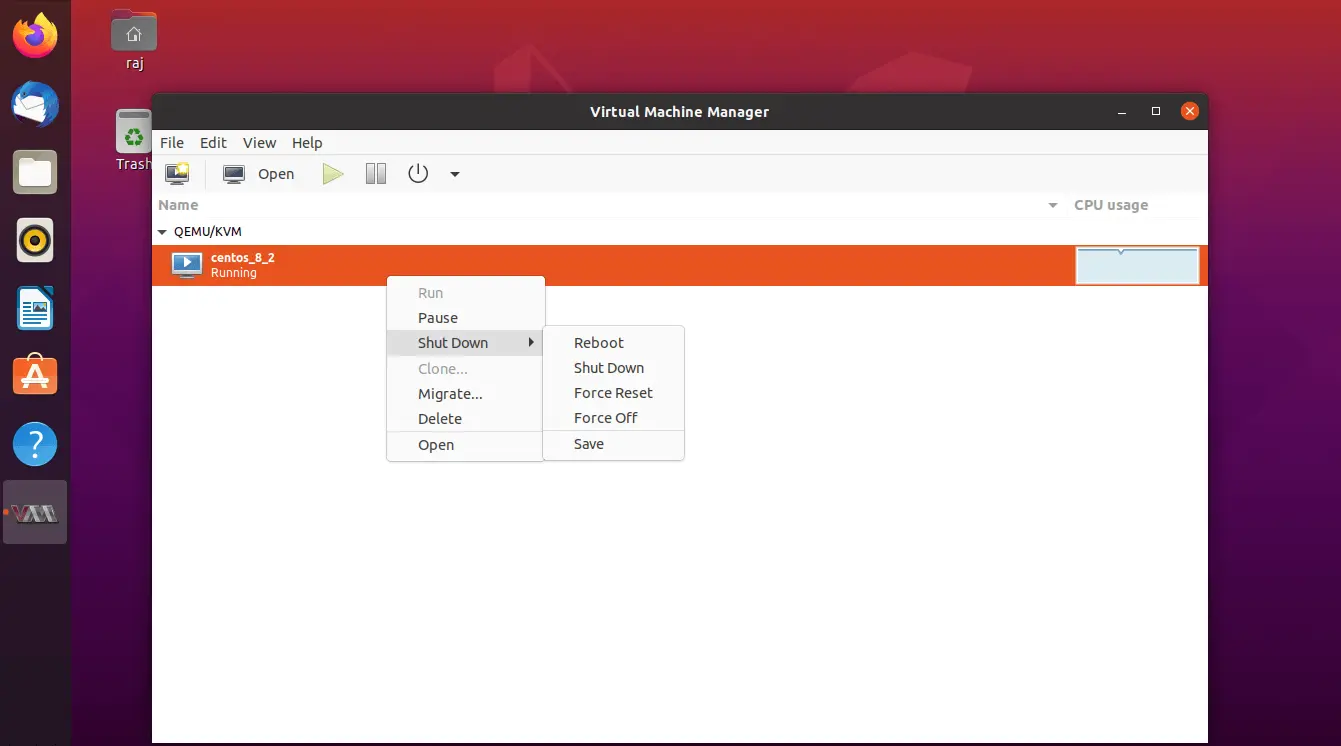 Manage Virtual Machine State
You can view and manage a virtual machine by clicking the info icon in the virtual machine console. Here you can add, remove, and modify devices connected to a virtual machine.
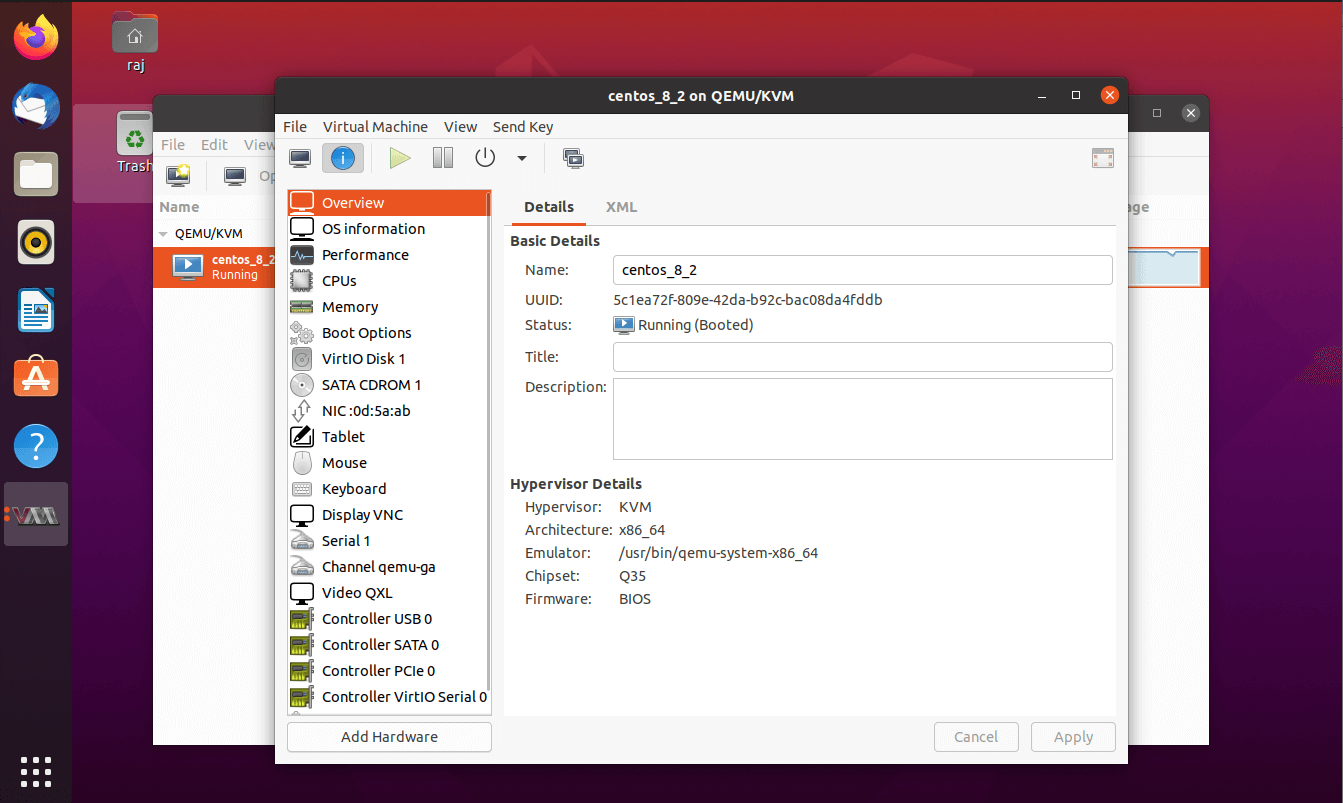 Manage Virtual Machine Configuration
Conclusion
That’s All. I hope you have learned how to install KVM on Ubuntu 20.04 / Linux Mint 20 and create a virtual machine with Virtual Machine Manager and command-line mode.
Источник


