- Setting up an FTP server on Windows Server 2016
- What is it?
- Installing FTP server on Windows server
- Creating an FTP site on a Windows server
- Create user group
- User isolation
- Firewall Setup
- Connect to an FTP server
- Установка и настройка SFTP сервера (SSH FTP) в Windows на базе OpenSSH
- Особенности протокола SFTP
- Реализация SFTP в системах Windows
- Установка Win32 OpenSSH в Windows 10 1803+/Windows Server 2019
- Установка Win32 OpenSSH на Windows Server 2016/2012 R2
- Тестируем SFTP подключение с помощью WinSCP
- Удаление службы Win32 OpenSSH
Setting up an FTP server on Windows Server 2016
The instructions describe the process of installing and configuring the FTP server on virtual machines run by the Windows Server 2016 operating system, setting up the work of the firewall and dividing the access area for different users.
What is it?
FTP (File Transfer Protocol) is an abbreviation of File Transfer Protocol. As the name implies, FTP is used to transfer files between machines on a network. You can use FTP to share files between a local PC and a remote server and to access online software archives.
Our manual will consider the option of installing an FTP server as an IIS web server role, alternatively, you can use other software, for example, FileZilla Server, Titan FTP Server, Home Ftp Server, Ocean FTP Server.
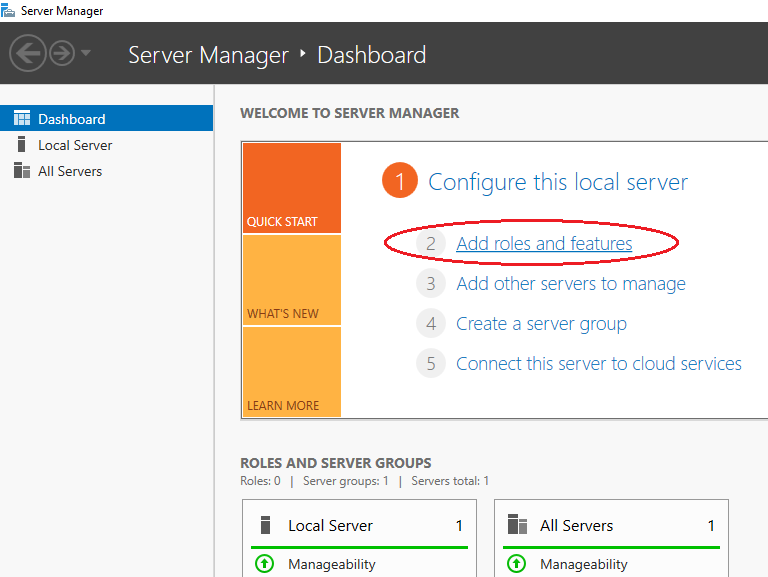
Installing FTP server on Windows server
Open the Windows Server Control Panel and find the Add roles and features.
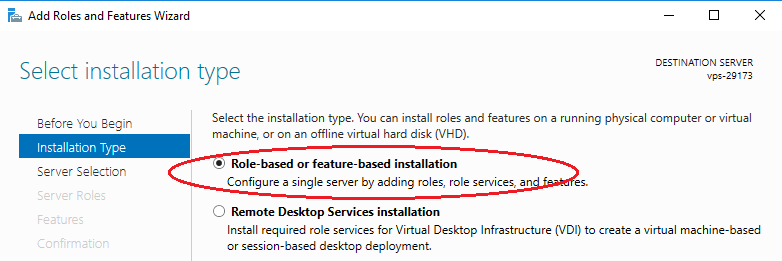
As the installation type, specify Role-based or feature-based installation.
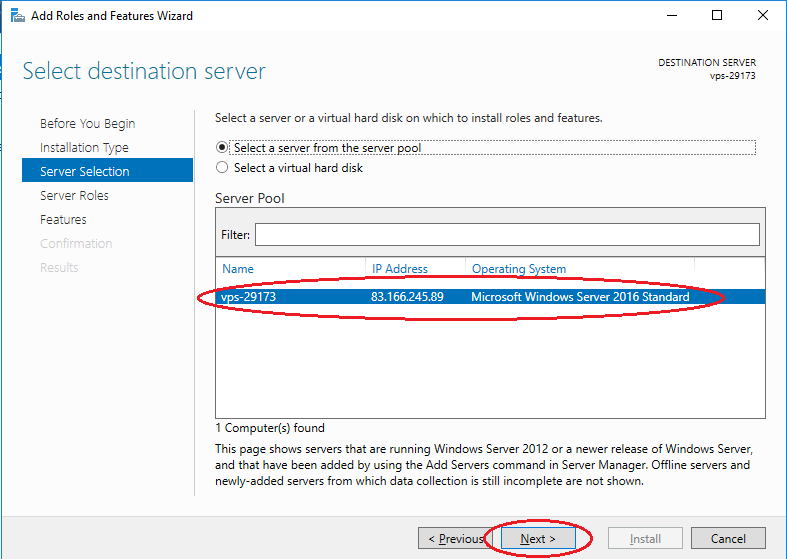
Select your server from the server pool.
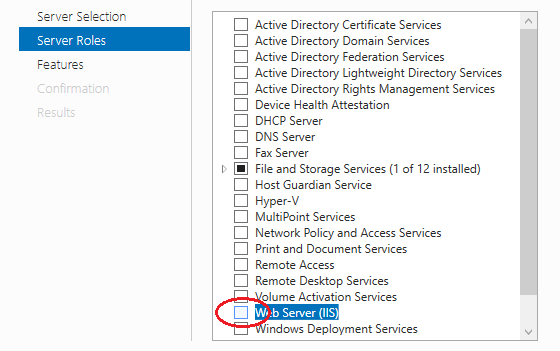
In the next window, check the IIS web server.
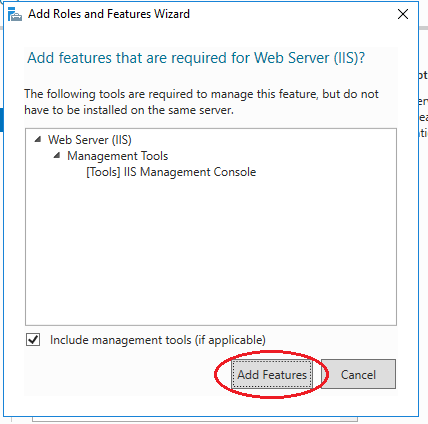
In the window that opens, click Add features.
In the next window Features do not select anything.
Next in the Role services window, check the FTP server.
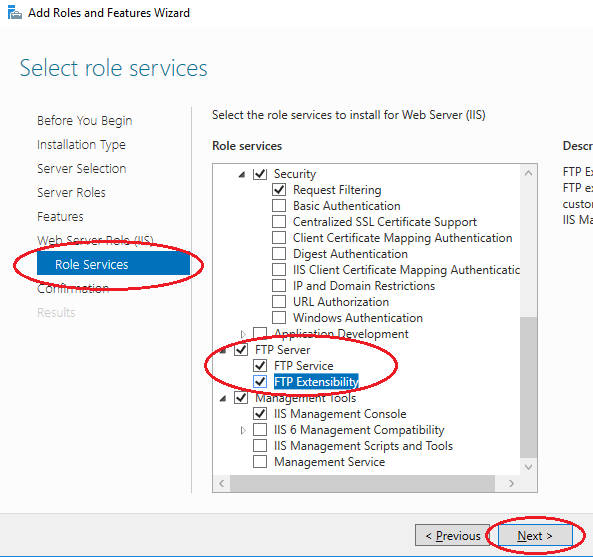
Install all selected features on the server using the Install button.

Creating an FTP site on a Windows server
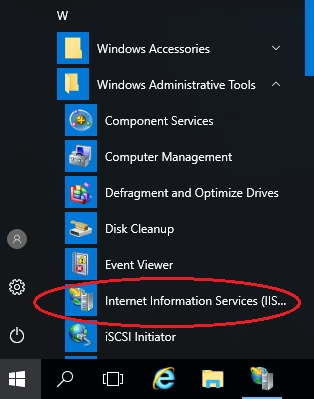
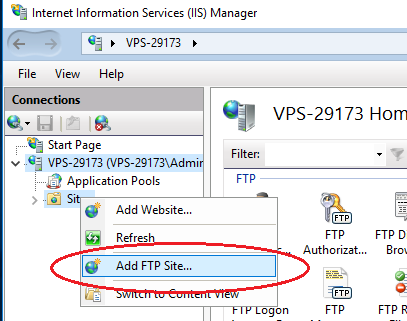
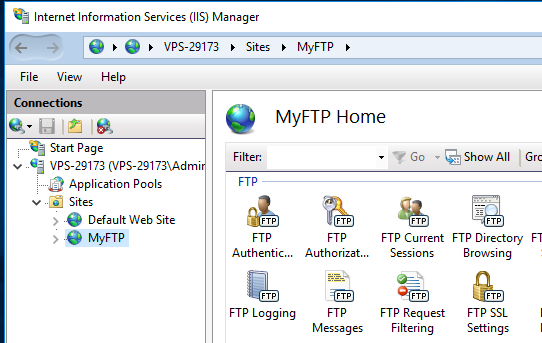
Open IIS Manager. Right-click on Sites and select Add FTP Site from the menu.
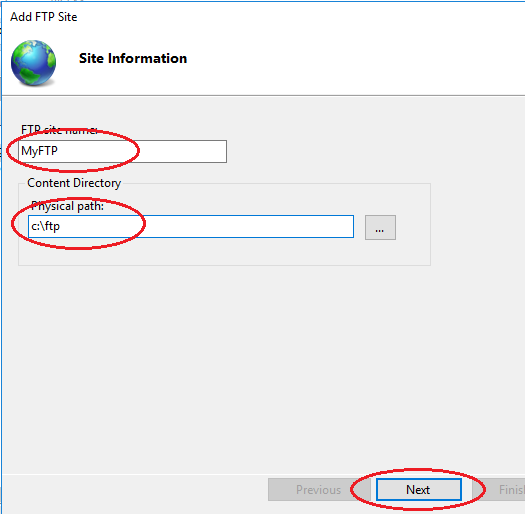
Enter the site name and path to the directory.
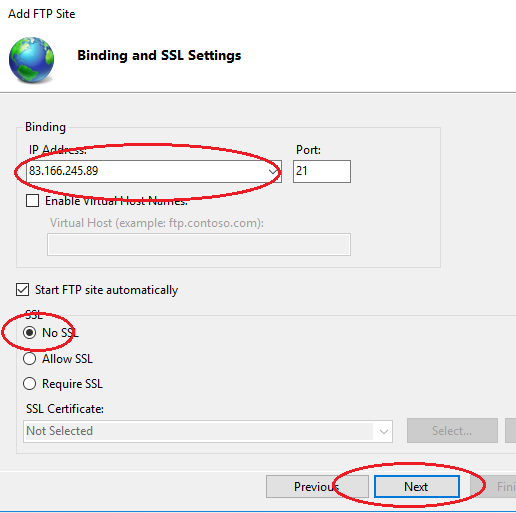
Next, select your IP address in the drop-down list. For encryption, check No SSL.
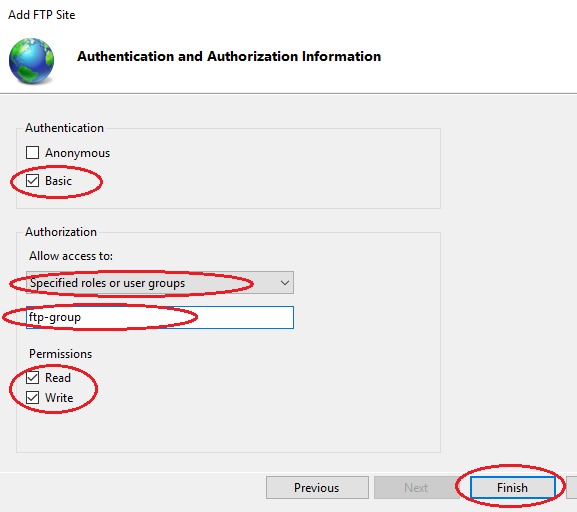
In the next window, select Basic for authentication. Authorization — Specified roles or groups, enter the name of the group of FTP users (example of creation below). Check the desired read and write permissions and click the Finish button.
Your website will appear in the tree structure of the Windows web server.
Create user group
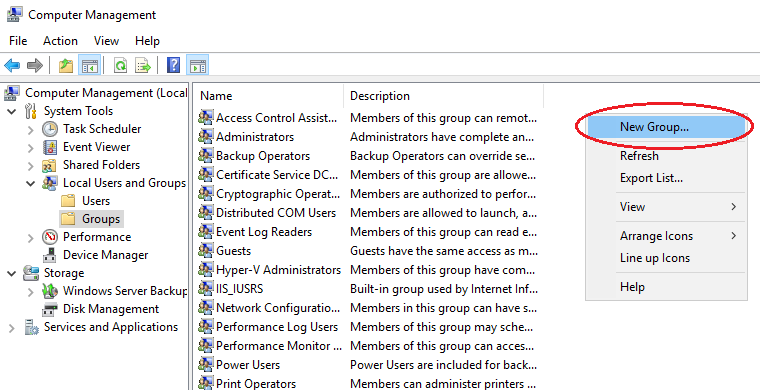
Creating a Windows group is necessary to determine the users who will have access to the ftp server. Open Computer Management. In the menu on the right, select Groups. Use the right mouse button to create a new group (New Group).
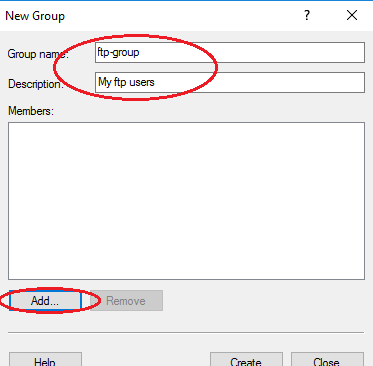
In the window that opens, enter the name of the group, a description if necessary. To add a user, click Add.
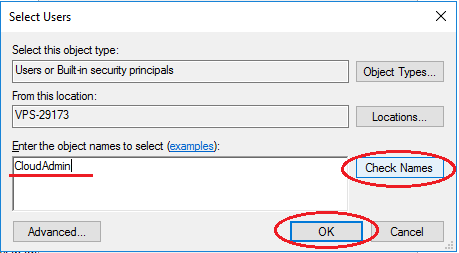
Enter a name in the input field, to check it, click Check Names. If Windows users exist, click Ok.
After everything is added, create a group using the Create button.
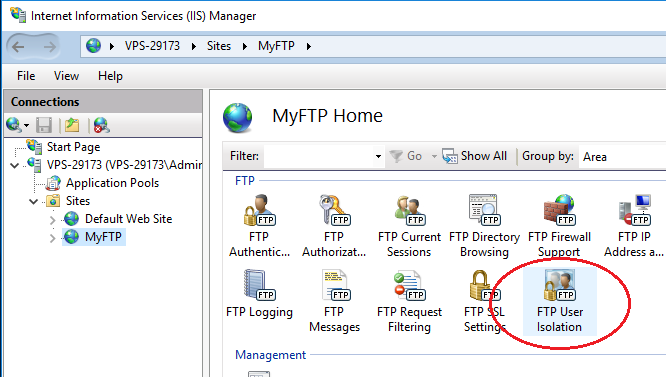
User isolation
In order for each user to get to his own directory and not have access to other files after connecting to the server, it is necessary to set up isolation. To do this, open your ftp site settings and select FTP User Isolation.
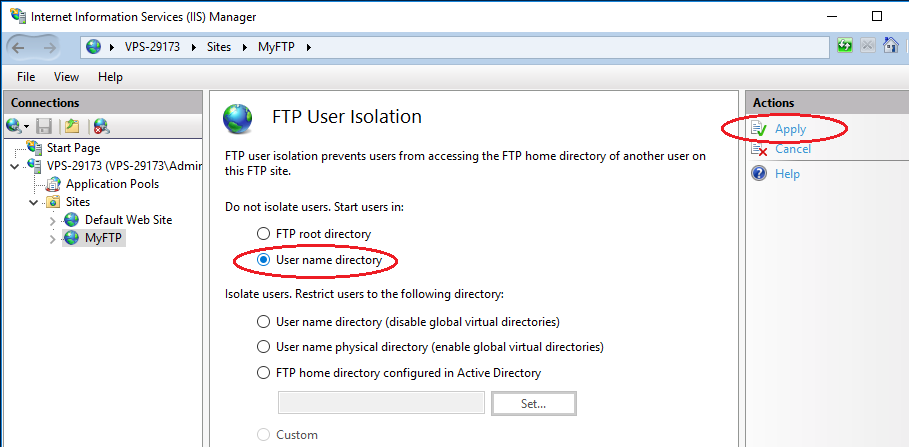
Select the User name directory and click Apply.
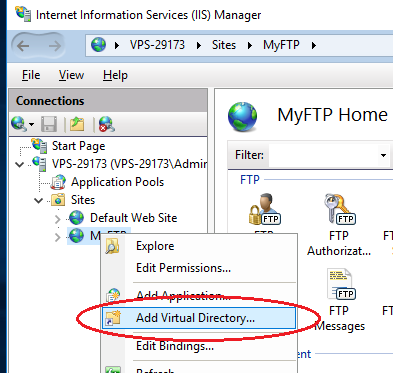
Then, using the right mouse button, open the menu of your ftp site and select Add Virtual Directory.
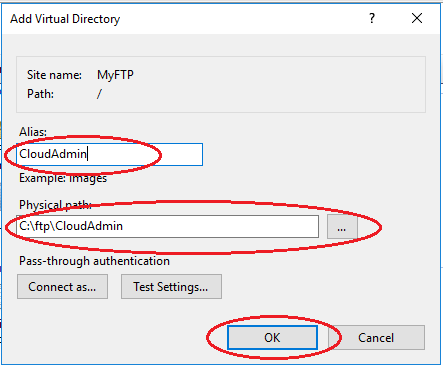
In the Alias field, enter a nickname or name, in the path field enter the path to the user directory, to do this, create a subdirectory in the ftp site directory on your Windows server. Click Ok.
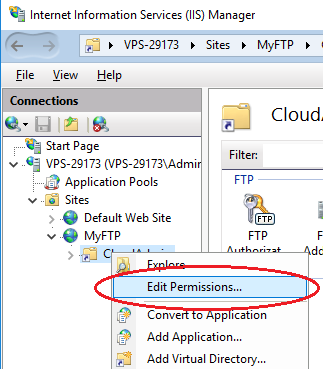
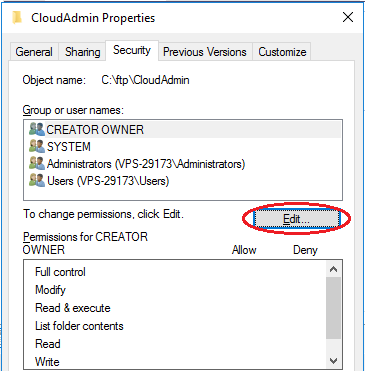
To configure permissions in IIS Manager, expand the hierarchical structure of your ftp server. Using the right mouse button, open the Windows virtual directory menu and select Edit Permission.
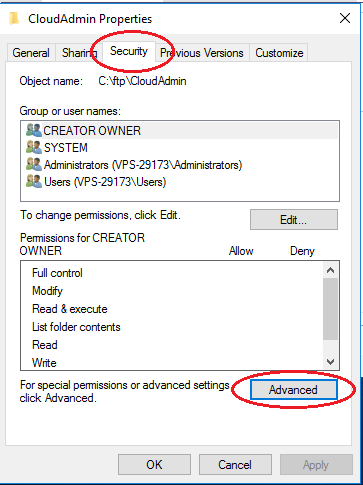
Click the Security tab and click the Advanced button.
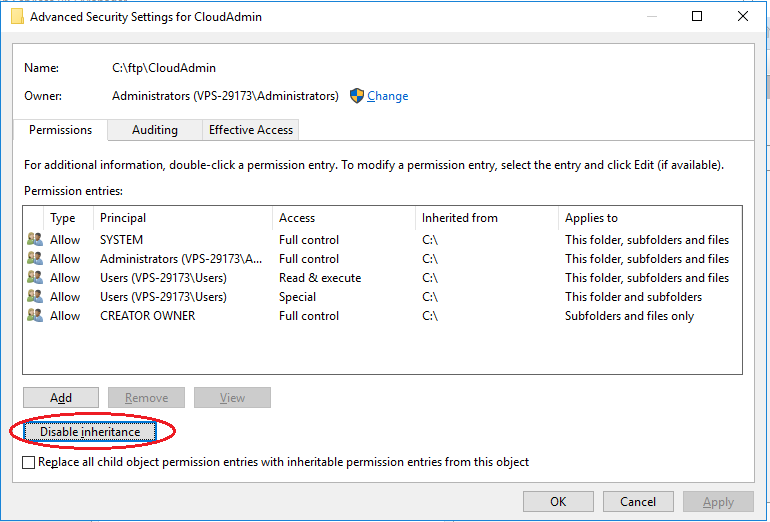
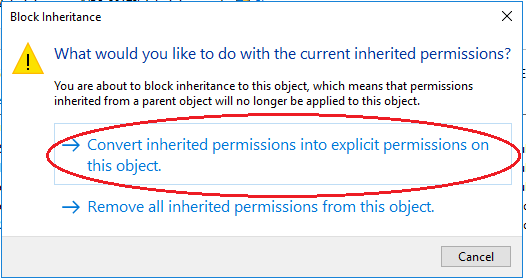
In the window that opens, click the Disable inheritance button, select the first option in the new window, and then click Apply — Ok.
Return to the Security tab and click the Edit button.
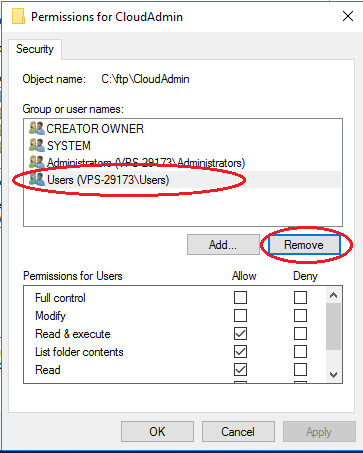
Select the Users group in which all users are located and click the Remove button. This is necessary so that only the owner of the directory has access to it.
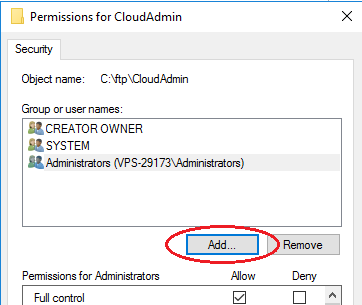
Now add a Windows user who will have full access to the directory. Click the Add button.
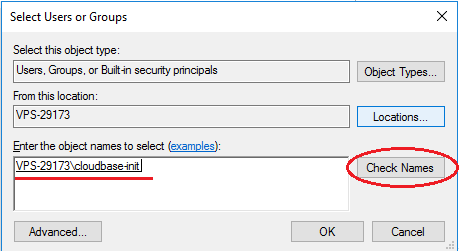
Enter the username of the virtual directory in the input field, to check it, click Check Names. If users exist, click Ok.
Next you need to add rights for complete control of the directory. Select the created user and check all fields Allow (Permissions).

Next, click Apply — Ok.
Firewall Setup
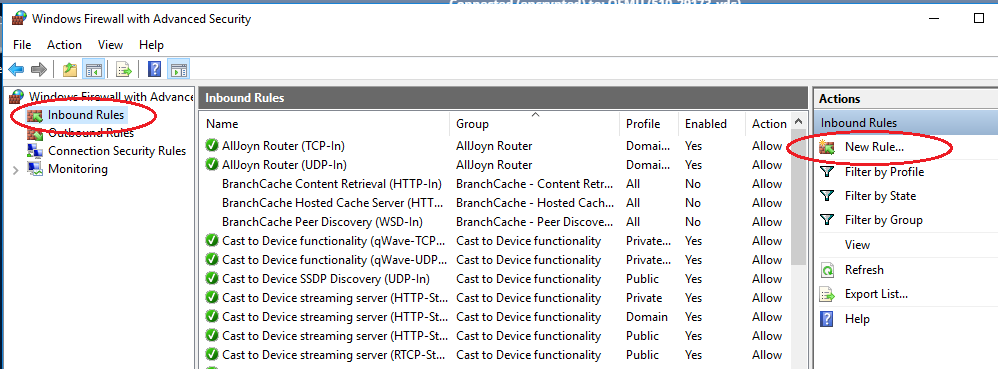
For an external connection to the ftp server, you must configure the firewall. To do this, open Windows Firewall with Advanced Security. In the vertical menu on the left, select Inbound rules, then in the vertical menu on the right New Rule.
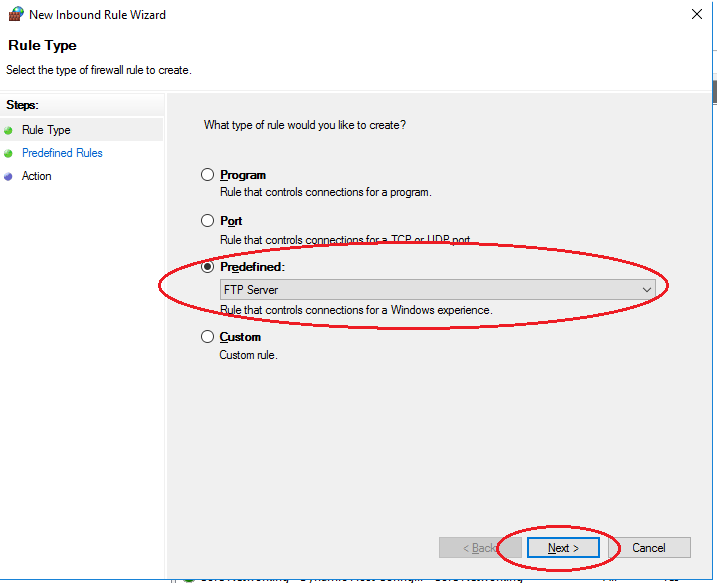
In the window that opens, check the Predefined type and select FTP Server from the drop-down list. Click Next.
Tick all the lines and click Next.

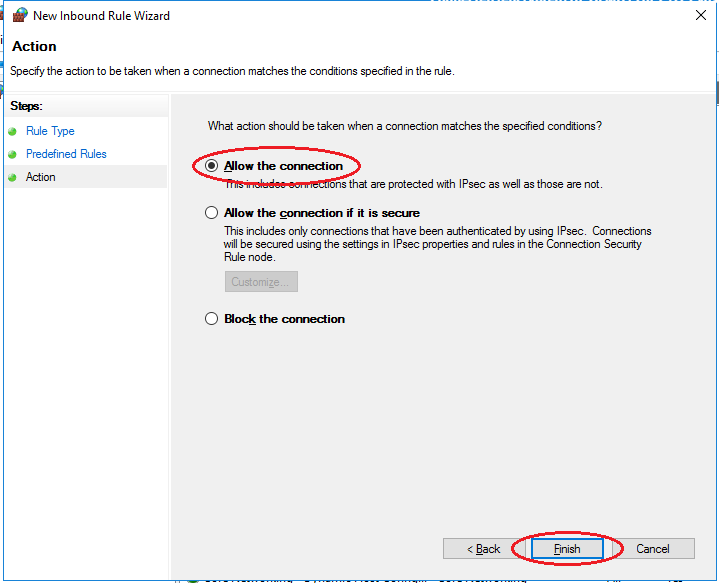
In the next step, select Allow the connection and click Finish. For these rules to take effect — restart the server.
Connect to an FTP server
You can connect to an FTP server in several ways, for example, through the standard Windows utility — Explorer, or through the FileZilla program.
Consider connecting through Explorer. In the address bar, enter:
The login and password input window will open, specify the connection data from the server control panel.
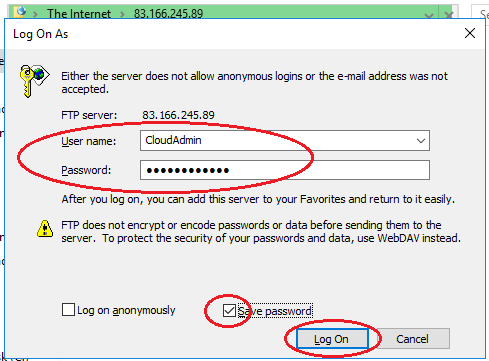
Note: The IIS web server allows you to flexibly configure the connection to the FTP server, for example, to divide the visibility of space for different users, to enable anonymous access and to configure permissions.
As a result, you will see the contents of the FTP server folder:
Note: the built-in ftp server of the IIS web server has many features, such as: user isolation, SSL support, restriction of login attempts to the server, logging with various parameters.
Установка и настройка SFTP сервера (SSH FTP) в Windows на базе OpenSSH
С помощью официального пакета OpenSSH для Windows вы можете с легкостью организовать безопасный обмен файлами между клиентом и серверов Windows по защищенному протоколу передачи файлов SFTP (Secure FTP). В этой статье мы покажем, как с помощью Win32-OpenSSH установить SFTP сервер на Windows 10 или Windows Server 2016/2012R2.
Особенности протокола SFTP
Протокол SFTP (Secure File Transfer Protocol , Secure FTP или SSH FTP) это расширение протокола SSH, являющимся стандартом мира UNIX/Linux систем. Хотя с точки зрения пользователей он похож на FTP, но на самом деле это абсолютно другой протокол, не имеющий с FTP ничего общего. Данные между клиентом и сервером передаются по порту 22 через SSH туннель.
Основные преимущества протокола SFTP:
- Передача файлов и команд происходит внутри защищенной SSH-сессии;
- Для передачи файлов и команд используется одно соединение;
- Поддержка символических ссылок, функций прерывания, возобновления передачи, удаления файла и пр;
- Как правило, на каналах, где FTP работает медленно или с перебоем, SFTP-соединение работает более надежно и быстро;
- Возможность аутентификации с помощью SSH ключей.
Реализация SFTP в системах Windows
Исторически в операционных системах Windows отсутствуют встроенные средства для организации защищенного SFTP сервера. Для этих целей обычно использовались открытые или коммерческие решения, к примеру, Core FTP, FileZilla, CYGWIN, OpenSSH, FTP Shell, IPSwitch и пр. Однако несколько лет назад Microsoft выпустила свою версию порта OpenSSH для win32. Данный проект называется Win32-OpenSSH.
Рассмотрим процесс настройки SFTP сервера в Windows 10 и Windows Server 2016/2012 R2 с помощью пакета Win32-OpenSSH.
Установка Win32 OpenSSH в Windows 10 1803+/Windows Server 2019
В Windows 10, начиная с билда 1803, и в Windows Server 2019 пакет OpenSSH (как и RSAT) уже включен в операционную систему в виде Feature on Demand (FoD).
В Windows 10 и Windows Server 2019 вы можете установить сервер OpenSSH с помощью командлета PowerShell:
Add-WindowsCapability -Online -Name OpenSSH.Server*
Или с помощью DISM:
dism /Online /Add-Capability /CapabilityName:OpenSSH.Server
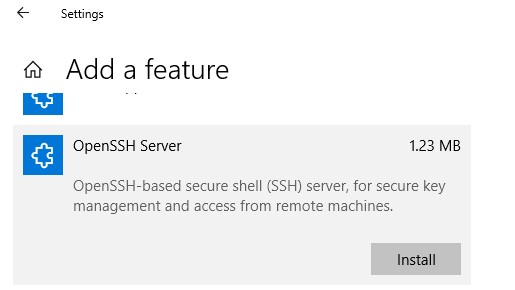
Или можно установить OpenSSH из графического интерфейса Windows 10 (Settings -> Apps -> Optional Features -> Add a feature -> Open SSH Server -> Install).
Исполняемые файлы OpenSSH находятся в каталоге:
Конфигурационный файл sshd_config находится в каталоге C:\ProgramData\ssh (каталог создается после первого запуска службы).
Файл authorized_keys и ключи хранятся в каталоге %USERPROFILE%\.ssh\.
Установка Win32 OpenSSH на Windows Server 2016/2012 R2
В предыдущих версиях Windows 10 и в Windows Server 2016/2012 R2 вы должны скачать и установить OpenSSH с GitHub (https://github.com/PowerShell/Win32-OpenSSH/releases). Нам нужна версия для 64 битной версии Windows: OpenSSH-Win64.zip (3,5 Мб).
- Распаковываем содержимое архива в целевой каталог, к примеру: C:\OpenSSH-Win
- Запускаем командную строку PowerShell с правами администратора и переходим в каталог OpenSSH: Cd C:\OpenSSH-Win
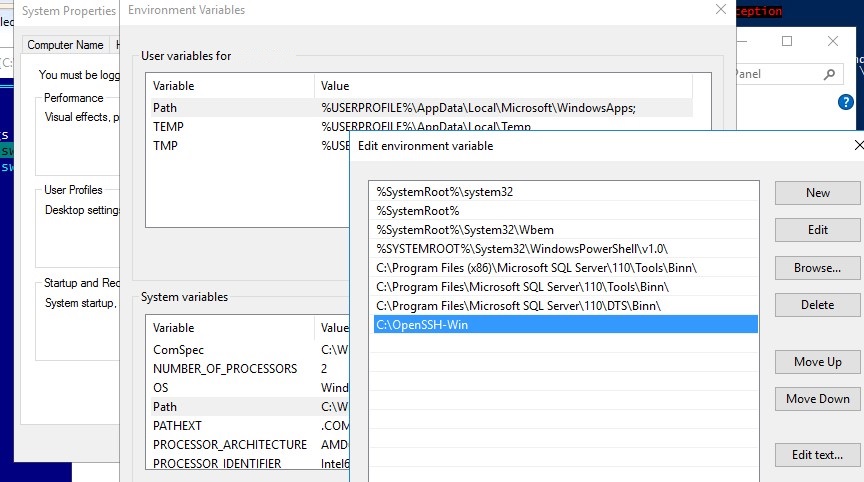
- Добавьте путь к каталогу OpenSSH в переменную окружения Path;

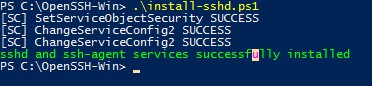
- Установите сервер OpenSSH: .\install-sshd.ps1 (должно появиться зеленое сообщение “sshd and ssh-agent services successfully installed”);
- Сгенерируйте SSH ключи для сервера (нужны для запуска службы sshd): ssh-keygen.exe –A

, убедитесь, что создан каталог %programdata%\ssh.
Тестируем SFTP подключение с помощью WinSCP
Попробуем подключиться к поднятому нами SSH серверу по протоколу SFTP. Для этих целей воспользуемся свободным клиентом WinSCP.
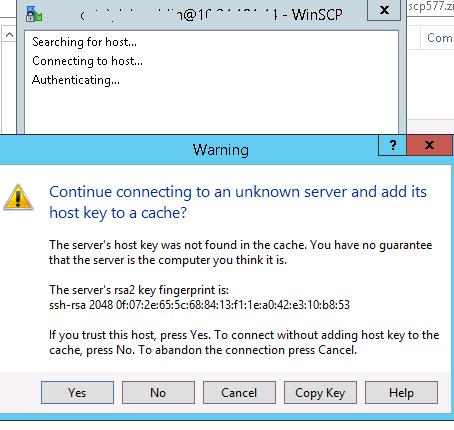
В окне настройки подключения выберите протокол передачи файлов SFTP, укажите имя сервера и данные учетной записи Windows, под которой осуществляется подключение (возможно также настроить авторизацию по ключам).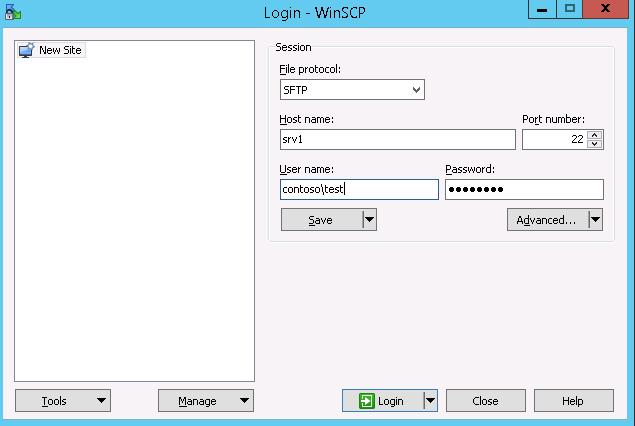 При первом подключении появится окно с предупреждением о том, что ключ хоста отсутствует в локальном кеше.
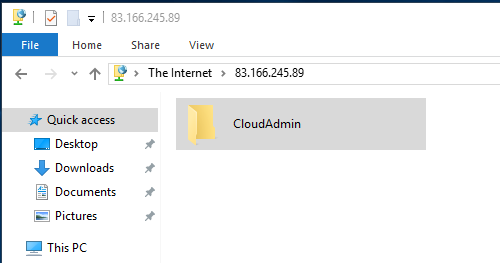
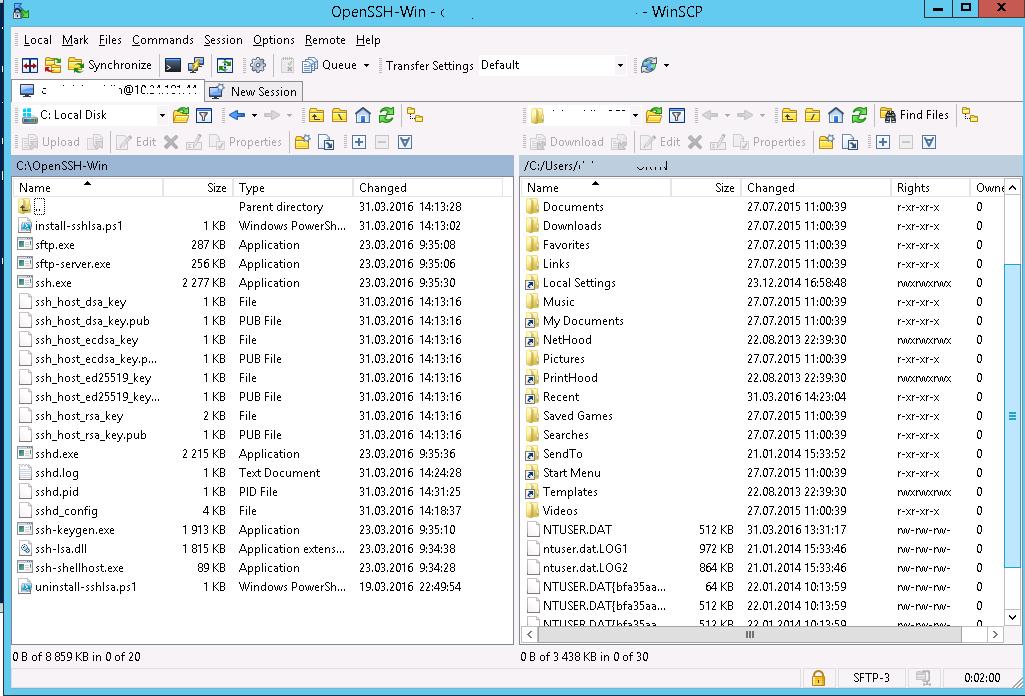
 Если все настроено правильно, клиент должен подключиться к SFTP серверу и отобразить список файлов в домашнем каталоге пользователя (по умолчанию каталог с профилем пользователя).
С помощью привычного интерфейса файлового менеджера можно безопасно копировать файлы между сервером и клиентом. Передача файлов будет осуществляться по защищённому протоколу SFTP.
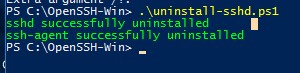
Удаление службы Win32 OpenSSH
Чтобы корректно удалить службу Win32 OpenSSH из системы:
- Откроем консоль Powershell с правами администратора
- Остановим службу SSHD: Stop-Service sshd
- Удалим службу OpenSSD:Удалим ключи: .\uninstall-sshlsa.ps1