- How to Install Scala and Apache Spark on MacOS
- How to Install Scala and Apache Spark on MacOS
- Step 1: Get Homebrew
- Step 2: Installing xcode-select
- Step 3: Use Homebrew to install Java
- Step 4: Use Homebrew to install Scala
- Step 5: Use Homebrew to install Apache Spark
- Step 5: Start the Spark Shell
- How to install latest Apache Spark on Mac OS
- Install Latest Apache Spark on Mac OS
- Step 1 : Install Homebrew
- Step 2 : Install xcode-select
- Step 3 : Install Java
- Step 4 : Install Scala
- Step 5 : Install Spark
- Step 6 : Verifying installation
- Conclusion
- Installing Apache Spark on Mac OS
- How to Install Scala and Apache Spark on MacOS
- Step 1: Get Homebrew
- Step 2: Installing xcode-select
- Step 3: Use Homebrew to install Java
- Step 4: Use Homebrew to install Scala
- Step 5: Use Homebrew to install Apache Spark
- Step 5: Start the Spark Shell
- Тонкая настройка IM-клиента Spark
How to Install Scala and Apache Spark on MacOS

by Jose Marcial Portilla
How to Install Scala and Apache Spark on MacOS
Here is a Step by Step guide to installing Scala and Apache Spark on MacOS.
Step 1: Get Homebrew
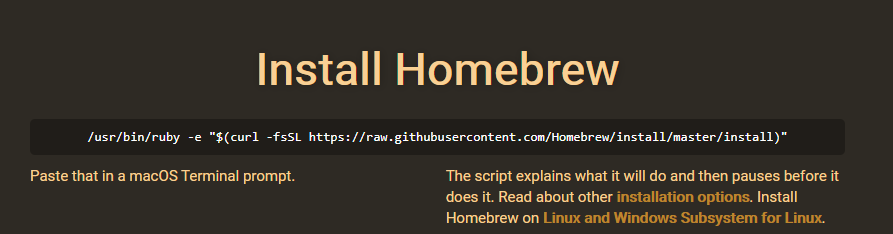
Homebrew makes your life a lot easier when it comes to installing applications and languages on a Mac OS. You can get Homebrew by following the instructions on it’s website.
Which basically just tells you to open your terminal and type:
There are more detailed instructions on installing on the project’s GitHub page. Installing everything through Homebrew should automatically add all the appropriate PATH settings to your profile.
Step 2: Installing xcode-select
In order to install Java, Scala, and Spark through the command line we will probably need to install xcode-select and command line developer tools. Go to you terminal and type:
You will get a prompt that looks something like this:
Go ahead and select install.
Step 3: Use Homebrew to install Java
Scala is dependent on Java, you may or may not need to install it. The easiest way to install it is to just use HomeBrew:
In your terminal type:
You may need to enter your password at some point to complete the java installation. After running this Homebrew should have taken care of the Java install. Now we can move on to Scala.
Step 4: Use Homebrew to install Scala
Now with Homebrew installed go to your terminal and type:
Step 5: Use Homebrew to install Apache Spark
Now with Scala installed go to your terminal and type:
Homebrew will now download and install Apache Spark, it may take some time depending on your internet connection.
Step 5: Start the Spark Shell
Now try this command:
You should see a flood of text and warnings but eventually see something like this:
You can confirm that it is working by typing the scala code:
Congratulations! You’re all set up!
Common Issue: Setting PATH in bash.
Homebrew should have taken care of all of this, but in case you need to add spark to your PATH, you’ll want to use:
Just type that straight into your terminal.
I’m Jose Portilla, and I teach over 200,000 students about programming, data science, and machine learning on Udemy. You can check out all my courses here.
If you’re interested in learning Python for Data Science and Machine learning, check out my course here. (I also teach Full Stack Web Development with Django!)
If this article was helpful, tweet it.
Learn to code for free. freeCodeCamp’s open source curriculum has helped more than 40,000 people get jobs as developers. Get started
freeCodeCamp is a donor-supported tax-exempt 501(c)(3) nonprofit organization (United States Federal Tax Identification Number: 82-0779546)
Our mission: to help people learn to code for free. We accomplish this by creating thousands of videos, articles, and interactive coding lessons — all freely available to the public. We also have thousands of freeCodeCamp study groups around the world.
Donations to freeCodeCamp go toward our education initiatives and help pay for servers, services, and staff.
Источник
How to install latest Apache Spark on Mac OS

Install Latest Apache Spark on Mac OS
Following is a detailed step by step process to install latest Apache Spark on Mac OS. We shall first install the dependencies : Java and Scala. To install these programming languages and framework, we take help of Homebrew and xcode-select.
Step 1 : Install Homebrew
Open Terminal. Run the following command in Terminal :
Enter the password if asked and continue.
Step 2 : Install xcode-select
To install Java, Scala and Apache Spark through command line interface in Terminal, we shall install xcode-select. Enter and run the following command in Terminal :
Step 3 : Install Java
To install Java through command line, enter and run the following command in the Terminal :
Step 4 : Install Scala
To install Scala through command line, enter and run the following command in Terminal :
Step 5 : Install Spark
To install Apache Spark through command line, enter and run the following command in the Terminal :
Step 6 : Verifying installation
To verify if the installation is successful, run the spark using the following command in Terminal :
We have successfully installed Apache Spark on Mac OS.
The installation directory would be /usr/local/Cellar/apache-spark/.
Conclusion
In this Apache Spark Tutorial, we have learnt to install latest Apache Spark on Mac OS .
Источник
Installing Apache Spark on Mac OS

Copy the url from Home page on mac os terminal to install Home brew

Run below command to update home brew
Check Java Version

Run below command to install Java8

For Latest Java use
Check Java Version


Use scala -version to get the scala version

Install Apache Spark

To start spark shell execute below command

Run below command to check the execution which will return the string “Hello World”

Run pyspark to start pyspark shell

Add Spark path to bash profile
Run below command and then add the path to the profile

And execute below command to start all services
Источник
How to Install Scala and Apache Spark on MacOS

Here is a Step by Step guide to installing Scala and Apache Spark on MacOS.
Step 1: Get Homebrew
Homebrew makes your life a lot easier when it comes to installing applications and languages on a Mac OS. You can get Homebrew by following the instructions on it’s website.
Which basically just tells you to open your terminal and type:
There are more detailed instructions on installing on the project’s GitHub page. Installing everything through Homebrew should automatically add all the appropriate PATH settings to your profile.
Step 2: Installing xcode-select
In order to install Java, Scala, and Spark through the command line we will probably need to install xcode-select and command line developer tools. Go to you terminal and type:
You will get a prompt that looks something like this:

Go ahead and select install.
Step 3: Use Homebrew to install Java
Scala is dependent on Java, you may or may not need to install it. The easiest way to install it is to just use HomeBrew:
In your terminal type:
You may need to enter your password at some point to complete the java installation. After running this Homebrew should have taken care of the Java install. Now we can move on to Scala.
Step 4: Use Homebrew to install Scala
Now with Homebrew installed go to your terminal and type:
Step 5: Use Homebrew to install Apache Spark
Now with Scala installed go to your terminal and type:
Homebrew will now download and install Apache Spark, it may take some time depending on your internet connection.
Step 5: Start the Spark Shell
Now try this command:
You should see a flood of text and warnings but eventually see something like this:
You can confirm that it is working by typing the scala code:
Congratulations! You’re all set up!
Common Issue: Setting PATH in bash.
Homebrew should have taken care of all of this, but in case you need to add spark to your PATH, you’ll want to use:
Just type that straight into your terminal.
I’m Jose Portilla, and I teach over 200,000 students about programming, data science, and machine learning on Udemy. You can check out all my courses here.
If you’re interested in learning Python for Data Science and Machine learning, check out my course here. (I also teach Full Stack Web Development with Django!)
Источник
Тонкая настройка IM-клиента Spark
Мы у себя в сети несколько лет успешно и стабильно используем связку OpenFire + Spark с 200 активными пользователями (с учетом удаленных подключений). IM-клиент Spark принят в качестве корпоративного стандарта для системы мгновенного обмена сообщениями. Не вдаваясь в причины выбора, хочу поделится тонкостями его настройки для конечного пользователя. Процесс будет описан на примере установленного пакета Spark 2.7.0 для ОС Windows 7.
В установленном каталоге находим файл spark.jar (C:/Program Files/Spark/lib/spark.jar), открываем его любым архиватором (IzArc), далее любым текстовым редактором (Notepad++) открываем файл «spark.jar/org/jivesoftware/resource/default.properties». Необходимо учесть, что файл «spark.jar» перезаписывается после каждой переустановки или обновлении IM-клиента Spark, поэтому его необходимо снова заменить (при переустановке) или сделать новый (в случае смены версии) на компьютерах всех своих пользователей. Итак, приступим…
Раздел «Окно приглашения»
# изменения стартового изображения и название приложения
# размер изображения должен быть 244х188 пикселя
MAIN_IMAGE = images/spark.gif
APPLICATION_NAME = Spark
# указываем фиксированное имя сервера
HOST_NAME = SRV5-VM1 
# установка значения «true» запретит пользователям изменить имя сервера
HOST_NAME_CHANGE_DISABLED = true
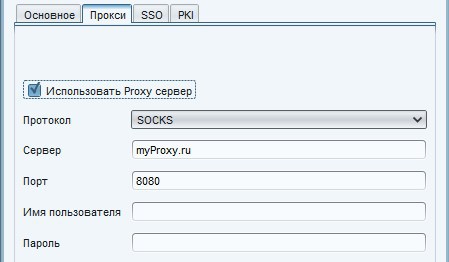
# настройки Proxy, доступные протоколы HTTP или SOCKS, чувствительны к регистру.
PROXY_PROTOCOL = SOCKS
PROXY_HOST = myProxy.ru
PROXY_PORT = 8080
# удаление кнопки создания учетной записи с формы загрузки
# пользователи не смогут создавать новый учетные записи в Spark
ACCOUNT_DISABLED = true
# удаление кнопки дополнительных настроек с формы загрузки
# пользователи не будут иметь доступ к дополнительным настройкам
ADVANCED_DISABLED = true

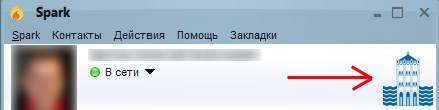
# добавление логотипа компании, он будет отображается в правом верхнем углу основного окна
# изображение должно быть размещено в папке src/resource/images, путь должен быть «images/file.jpg» или «images/file.png»
BRANDED_IMAGE = images/our-logo.png
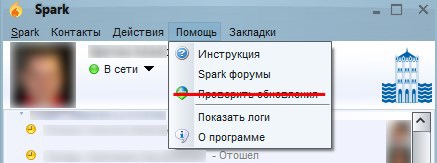
# можно отключить возможность обновления
DISABLE_UPDATES = true
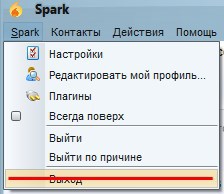
# отключаем возможность закрытия Spark
DISABLE_EXIT = true

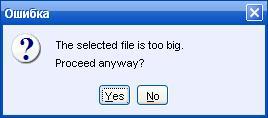
Раздел «Передача файлов»
# определяем размер, при котором пользователи будут получать сообщение о слишком большом файле
# 10 Мб = 10485760
# 100 Мб = 104857600
# 1 Гб = 1073741824
# по-умолчанию = -1 (бесконечность)
# максимально 9223372036854775806 байт = 8388608 Тб
FILE_TRANSFER_WARNING_SIZE = 10485760
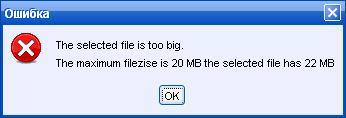
# определяем максимальный размер файла, который пользователь может отправить
FILE_TRANSFER_MAXIMUM_SIZE = 20971520
Раздел «Settings Window»
# отключаем возможность добавления контактов в Spark
ADD_CONTACT_DISABLED = true
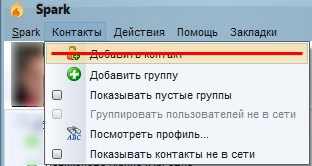
# отключаем возможность добавления групп в Spark
ADD_CONTACT_GROUP_DISABLED = true

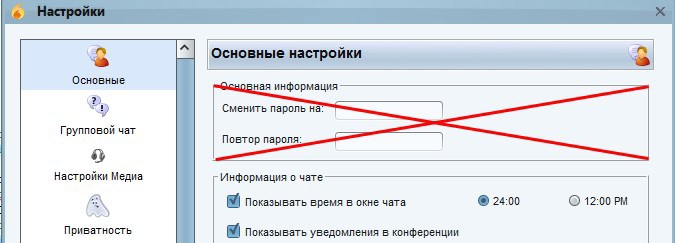
# запретить пользователю менять пароль
CHANGE_PASSWORD_DISABLED = true
# расположение руководства пользователя, по-умолчанию www.igniterealtime.org/builds/spark/docs/spark_user_guide.pdf
HELP_USER_GUIDE = ссылка на руководство пользователя на корпоративном сайте
# отображать меню руководства пользователя или нет
HELP_USER_GUIDE_DISABLED =
# расположение форума помощи, по-умолчанию www.igniterealtime.org/forum/forum.jspa?forumID=49
HELP_FORUM = ссылка на форум помощи на корпоративном сайте
# отображать меню форума помощи или нет
HELP_FORUM_DISABLED =
# следующий текст будет отображаться вместо «Spark forum»
# если оставить пустым, значение будет по-умолчанию
HELP_FORUM_TEXT =
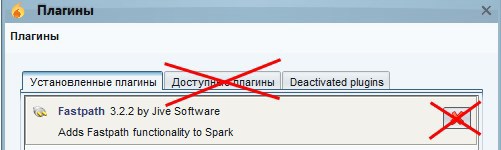
# отключение возможности установки плагинов
INSTALL_PLUGINS_DISABLED = true
# отключение возможности удаления плагинов
DEINSTALL_PLUGINS_DISABLED = true
# для того чтобы сделать плагин(ы) недоступным(и), укажите названия через запятую, написание чувствительно к регистру.
# названия плагинов можно найти в файле «plugin.xml»
# например: Fastpath,Jingle Client,Phone Client,Window Flashing Plugin
# значение по-умолчанию пустое
PLUGIN_BLACKLIST = Fastpath
# для того чтобы сделать плагин(ы) недоступным(и) с помощью классов, укажите их названия через запятую, написание чувствительно к регистру.
# например: org.jivesoftware.fastpath.FastpathPlugin
# значение по-умолчанию пустое
PLUGIN_BLACKLIST_CLASS = org.jivesoftware.spark.translator.TranslatorPlugin
Два последних пункта полностью сделают недоступным все плагины с именем Fastpath и все плагины с org.jivesoftware.spark.translator.TranslatorPlugin.
Раздел «Цвета и Внешний вид»
# по-умолчанию, сервер рассылок получает свой собственный JFrame, который содержит сообщение
# при этом могут использоваться HTML-тэги для жирного, наклонного или подчеркнутого текста
# если вы хотите чтобы сообщения рассылки выглядели как остальные сообщения, установите значение «true»
BROADCAST_IN_CHATWINDOW = true
# сделать недоступным изменение внешнего вида
# изменить настройки внешнего вида можно в «Настройки»->«Внешний вид»
LOOK_AND_FEEL_DISABLED = true
# сделать недоступным изменение цветов
# изменить настройки цветов можно в «Настройки»->«Внешний вид»->«Цвета»
CHANGE_COLORS_DISABLED = true
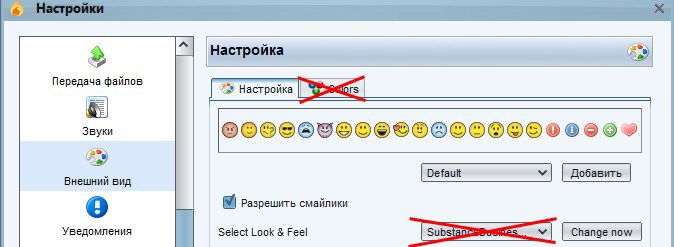
# изменение внешнего вида, по-умолчанию внешний вид SubstanceBusinessBlueSteelLookAndFeel
DEFAULT_LOOK_AND_FEEL = com.jtattoo.plaf.luna.LunaLookAndFeel
# установка текста выпадающего меню, работает только при установке внешних видов JTattoo
MENUBAR_TEXT = «Название компании»
Источник


