- Utm windows 10 mac os
- Downloads
- Instructions
- Enable Higher Resolutions
- Share files with host
- Troubleshooting
- System drive gets corrupted
- Utm windows 10 mac os
- Information
- System
- Drives
- Display
- Input
- Network
- Sound
- Sharing
- Managing virtual machines
- Using a virtual machine
- Power
- Suspend
- Restart
- Capture Mouse
- Resize
- Disk Image
- Shared Directory
- UTM Preferences
- UTM: Run Virtual Machines on Your Apple Silicon M1 Mac (Updated)
- Download UTM
- Install UTM
- Launch UTM
- Creating a Windows 10 Virtual Machine with UTM
- Connecting the Windows Drive
- Add the SPICE Guest Tools ISO as a CD/DVD
- Install Windows
- Run the SPICE Guest Tools installer application
- Sharing Files with your Mac
- How Well Does UTM Work?
- Ubuntu Server for ARM
Utm windows 10 mac os
This guide is designed to only work with Apple Silicon Macs.
Downloads
- UTM for Mac (v2.0.15 or higher)
- Windows for ARM (build 20231 or higher)
- SPICE Guest Tools (v0.164 or higher)
Instructions
- Open UTM and create a new virtual machine.

- Give the VM a name and optionally choose an icon.

- In System, select the “ARM64 (aarch64)” architecture, and specify the amount of memory. At least half of your computer’s total memory is recommended for performance.

- In Drives, select “Import Drive” and select the Windows 10 VHDX that you’ve downloaded. (Please read the troubleshooting section below about a bug with VHDX in QEMU.)

- After importing the drive, you must set the interface to NVMe.

- Now click “New Drive” and check Removable and click Create to make add CD drive.

- Save the VM, and select it in the sidebar. On the bottom right, click Browse and select the SPICE guest tools ISO.

- Follow the Windows installer. If you have issues with the mouse, press the mouse capture button in the toolbar to send mouse input directly. Press Control+Option together to exit mouse capture mode. Sometimes, due to driver issues, you can enter and exit capture mode and the mouse cursor works normally again.

- Once installation is complete and you’ve logged in, we can proceed to install the guest tools. With the ISO mounted in the D: drive, open Windows Explorer and browse to D:\ . Run spice-guest-tools-xxx.exe which should install all drivers along with QEMU agent, SPICE agent (for copy/paste and dynamic resolution), and shared directory.

Note that due to libslirp limitations, ping will not work and so Windows may think that there is still no internet connection.
Enable Higher Resolutions
- After installing the SPICE guest tools, go to the desktop, right click anywhere, and choose Display Settings.

- Scroll down to “Multiple displays” and select “Show only on 1”. The mouse might be stuck in the second display so you will have to use the keyboard to confirm and then restart.

Share files with host
- With the VM shut down, open the settings and go to the Sharing tab. Make sure “Enable directory sharing” is checked.

- Under “Shared Directory” click Browse and select the directory to share with the VM.

Once booted, with the SPICE guest tools installed, the shared directory should show up as a Network Drive.
Troubleshooting
System drive gets corrupted
Do to an issue with QEMU handling of VHDX images, sometimes Windows will be corrupted from normal usage. This would result in BSOD or random application crashes/errors. To work around this issue, it is recommended that you convert the VHDX image to a QCOW2 image. Currently, UTM does not provide this functionality in the UI so you have to do it directly from QEMU.
- Install Homebrew if you do not have it already.
- Run brew install qemu
- Run qemu-img convert -p -O qcow2 /path/to/Windows10_InsiderPreview_Client_ARM64_en-us_21286.VHDX /path/to/output/Windows10_InsiderPreview_Client_ARM64_en-us_21286.qcow2 replacing the paths with your own.
- Use the QCOW2 image with UTM. It is recommended you do this with a fresh VHDX from Microsoft in case your image was already corrupted.
Источник
Utm windows 10 mac os
In the main window, press the “+” button on the top toolbar next to the title. You have the option to browse the gallery (recommended for new users) or to create a new VM from scratch. If you choose to create from scratch, most users do not need to change any options except from the Information tab, the System tab, and the Drives tab. All the other tabs are for more advanced use cases and the options should be set to the recommended default.
Information
When creating a new VM from scratch, you will see the same screen as when modifying an existing VM’s configuration. In the Information tab, you should give your VM a Name and optionally assign an icon to identify your VM by. The name must be unique as it is also the name of the .utm package which contains all data corresponding to this VM.
You can also write any Notes that will be displayed in the home screen when the VM is selected.
System
In the System tab, you can configure the Architecture, System, and Memory. The architecture is the CPU and determines what operating systems you can run. The most common architecture is x86_64, which is used by modern Intel and AMD processors (most PCs) and is used by most versions of Windows and Linux.
When you change the architecture to a well-known one, other settings will change to the default recommended settings so in most cases you do not have to manually change any of the other settings (except Memory and Drives).
The System drop-down lets you fine tune the emulated system to be a specific model or device. Most users should not have to change this from the default.
You should not assign more memory than the amount of physical RAM on your computer or you may experience slowdowns or even crashes. It is recommended that you assign no more than half the amount of physical RAM if you do not want to significantly affect the performance of your Mac.
Most users should not touch the Advanced Settings, but there you can fine tune parts of the emulation.
The QEMU tab is only for advanced use cases and for debugging emulation issues. You can choose to enable debug logging and to export the last debug log (created when the VM starts). You can also export the full QEMU command generated by UTM for the current configuration. If you choose to Bypass Configuration, then all other configuration options (including attached drives) will be ignored! This option should only be used for debugging.
Drives
You can create and mount virtual drives for the VM in the Drives tab. Import Drive will let you select a file to mount and New Drive will let you create either an empty removable drive or an empty hard drive.
If you wish to mount an ISO disk image, it is recommended that you create a New Drive and check Removable. You can then select the ISO image from the home screen or while the VM is running. If you choose to Import the ISO, then you cannot change the mounted disk image while the VM is running.
If you choose to Import Drive, it is recommended that you import a QCOW2 formatted drive image. Most other common disk image formats are compatible with QEMU but you will not be able to suspend a running VM when you have non-removable non-QCOW2 images mounted.
If you create a New Drive you can choose the Interface to attach the drive to. Most users can leave the default here as only advanced use cases require changing the interface.
The listed order of the drives are the same order exposed to QEMU which can affect boot order. You can re-order drives by using the arrow buttons.
Display
The Display tab provides options to showing the VM’s output. Full Graphics emulates a display card while Console Only emulates a serial console. Full Graphics is not supported for all architectures and if it is not supported, it will be grayed out.
In Full Graphics, the Emulated Display Card will be set to be recommended default. Most users should not change this. The Scaling options control what hardware scalers are used when resizing the VM window. Most users should not change this.
In Console Only mode, you can change aspects of the terminal display. The Resize Console Command is a string that is sent to the serial input when the Resize button is pressed while the VM is running. The command is different depending on the guest operating system, but should be used to inform the OS that the console size has changed and to render UI elements accordingly. The default command should work in most Linux distributions.
Input
The Input tab gives the option for Legacy mode which should only be enabled for ancient operating systems (such as DOS) which does not support USB. Invert Mouse Scroll can be used to invert the emulated scroll wheel.
Network
If networking is unsupported by the emulated architecture, these options will be disabled. Advanced Options allow you to configure the guest network subnet and does not need to be used in most cases.
Port Forward lets you forward ports from the guest subnet to your local (host) machine.
Sound
If sound is unsupported by the emulated architecture, these options will be disabled. Emulated Audio Card should be set to the recommended default and can be changed for advanced use cases.
Sharing
If SPICE Guest Tools are installed in the guest OS, clipboard sharing and directory sharing can be used. If the tools are not installed, these features will not work even if enabled. The shared directory can be specified in the home screen.
Managing virtual machines
From the home screen, you can re-order the VM list by dragging the VM entry around. A secondary click on a VM will open a menu of options such as Delete, Clone, and Edit. You can also show the VM’s package location in Finder.
When a VM is selected, the top right toolbar provides similar operations.
To Start a VM, you can press the small play button on the right of the VM entry or the large play button when the VM is selected.
Using a virtual machine
Once started, there are a few buttons in the toolbar for controlling the virtual machine.
Power
Powers off the VM with a force power off.
Suspend
Only works if all non-removable drives are QCOW2 drive images AND the current VM is not virtualized (the guest and host architecture are the same). This allows you to save the state of the VM and the next time you start it, it will resume from this point instead of booting up fresh.
Restart
Force restarts the VM.
Capture Mouse
Not available in console mode. Fully captures mouse and keyboard input and redirects it to the VM. To exit this mode, press Control+Option key at once.
Resize
Only available in console mode. Sends the Resize Console Command configured in the Display tab of the settings screen. This allows you to notify the guest operating system that the console size changed and that UI can be rendered correctly.
Disk Image
Opens the disk image menu which allows you to change or eject the removable disk image. Only drives marked Removable (in Drives settings) support this.
Shared Directory
If Shared Directory is enabled (in Sharing settings) and the SPICE Guest Tools are installed in the guest operating system, this allows you to change the shared directory to be accessed in the guest.
UTM Preferences
You can access the preferences with Cmd+, or from the UTM menu. This allows you to change global emulation options including the option to disable virtualization (automatically enabled if the guest and host architecture are the same).
Источник
UTM: Run Virtual Machines on Your Apple Silicon M1 Mac (Updated)
Your shiny and speedy new Apple Silicon Mac is missing something – the ability to run virtual machines. While you might be spending most of your time in macOS 11 Big Sur, your job might require you to use Windows-only apps, Perhaps you need a Linux VM for development work. UTM (which I believe stands for Universal Turing Machine) is an open source virtual machine environment.
UPDATE (July 9, 2021): Parallels Desktop now runs on Apple Silicon, a solution that was not available in March of 2021 when this article was first published. VMWare has pledged an Apple Silicon version of Fusion, but it won’t support Windows virtual machines! There’s still no word on whether the free VirtualBox VM environment will ever be updated to run on Apple Silicon.
That’s why I was happy to see that there is a VM environment that works on M1 Macs – UTM. It’s free to download or $9.99 on the Mac App Store. UTM also works on “the other Apple Silicon”, with versions of both iOS and iPadOS. If you’ve ever had a burning desire to run Windows on an iPhone or iPad, UTM does the job. However, your devices must be running iOS 11 – 13; iOS 14 requires a jailbreak. Let’s see an example of how UTM works on M1 Macs.
Download UTM
It’s quite simple to download UTM for Mac. To download the app you go directly to the app download page and either click the Download button or click the Mac App Store button to pay $9.99 for the app.
Why would you want to pay $9.99 when the app is free? Because you’ll get automatic updates just like any other Mac app downloaded from the Mac App Store. Your purchase also funds the future development of UTM. I would suggest downloading and using UTM for Mac for free; if you end up using it regularly for work or pleasure, purchase it.
Install UTM
If you purchased UTM from the Mac App Store, installation is done for you. If you download the app directly, a disk image file named UTM.dmg appears in your download folder. Open it to mount the disk image. Press the Command Key, then drag the UTM application icon from the disk image to the Applications folder.
Launch UTM
That was easy, wasn’t it? Now launch UTM, and a screen similar to this appears:
You’ll notice that this startup screen has four buttons: Create a New Virtual Machine, Browse UTM Gallery, User Guide and Support. Clicking the User Guide button launches a web page in your default browser displaying a succinct user guide.
Probably the most useful button for new UTM users is Browse UTM Gallery. Click this to display a web page with links to download pages for a number of virtual machines (screenshot above). At this time, ARM native VMs are available for:
- ArchLinux
- Debian 10.4 (Custom i3, LDXE, Minimal or Xfce)
- ReactOS 0.4.14
- Ubuntu 20.04
- Windows 10 (requires free membership in the Windows Insider Program)
Creating a Windows 10 Virtual Machine with UTM
As an example, I’ll be creating a Windows 10 virtual machine. Click Windows 10 in the Gallery to display a web page showing requirements. Those consist of an Apple Silicon Mac, UTM for Mac, Windows for ARM, and SPICE Guest Tools. Links to the software components appear in the Gallery. Download each file to your Mac prior to starting the installation.
The Windows link downloads a VHDX (Hyper-V Virtual Hard Disk) with the installer. SPICE Guest Tools are a collection of utilities and drivers to aid running Windows on Apple Silicon.
UPDATE: In a previous version of this article, UTM booted from the VHDX file to install Windows. There’s a new critical step — that file must be converted to QCOW2 format. Here’s what the UTM team had to say about the conversion (from https://mac.getutm.app/gallery/windows-10-arm):
Due to an issue with QEMU handling of VHDX images, sometimes Windows will be corrupted from normal usage. This would result in BSOD or random application crashes/errors. To work around this issue, it is recommended that you convert the VHDX image to a QCOW2 image. Currently, UTM does not provide this functionality in the UI so you have to do it directly from QEMU.
- Install Homebrew if you do not have it already.
- Run brew install qemu
- Run qemu-img convert -p -O qcow2 /path/to/Windows10_InsiderPreview_Client_ARM64_en-us_21286.VHDX /path/to/output/Windows10_InsiderPreview_Client_ARM64_en-us_21286.qcow2 replacing the paths with your own.
- Use the QCOW2 image with UTM. It is recommended you do this with a fresh VHDX from Microsoft in case your image was already corrupted.
Now comes the fun part! With UTM open on your M1 Mac, click the Create a New Virtual Machine button. I gave the VM the name “Windows 10”, added a note that this is “Windows 10 on Apple Silicon”, and added an optional operating system icon (see image below).
Next, click the System tab. Here, select ARM64 (aarch64) as the architecture, and select at least half of your system’s memory for the virtual machine. For an M1 Mac, that can be as much as 8GB (8192MB).
UPDATE: Note that you should use QEMU 6.0 ARM Virtual Machine (alias of virt-6.0) (virtual) rather than the 5.2 version shown below.
Connecting the Windows Drive
UPDATE: Now click the Drives tab. Click the Import Drive button, then navigate to the Windows 10 QCOW2 file you downloaded earlier. Open it, then select NVMe as the Interface to the drive (important – many people neglect this important step, resulting in boot errors!)
We need to add one more drive – a virtual CD/DVD drive to read ISO image files. Click New Drive, then add a removable drive with a USB interface (image below):
Click “Create”. The Windows Disk Image and the virtual USB CD/DVD Drive appear on the Drives tab. Click Save.
Add the SPICE Guest Tools ISO as a CD/DVD
You now see the Windows 10 virtual machine in the left sidebar of UTM. Click it, and on the right side of the screen, you’ll see the information. CD/DVD appears as “empty” – click on it and select Browse. Now find the SPICE Guest Tools ISO file that was downloaded earlier, select it, and Open it to make it available to the virtual machine (image below).
Install Windows
Ready to rock and roll? Click that big button in the middle of the virtual machine window (the “play” triangle in the black circle).
Sit back and watch as the Windows installer goes through its processes. You’ll be asked to select your region – in my case, the United States was selected, so I clicked Yes to continue. Note that you might not actually see the cursor on the Windows installer – if that’s the case, click the cursor button in the toolbar to make the cursor visible. You can also hold down the control and option keys to make the cursor visible in Windows.
Next, Windows wants to know if your keyboard layout is correct. Mine was listed as US, so I clicked Yes. You’ll be asked if you wish to add a second keyboard layout. I chose to skip this step.
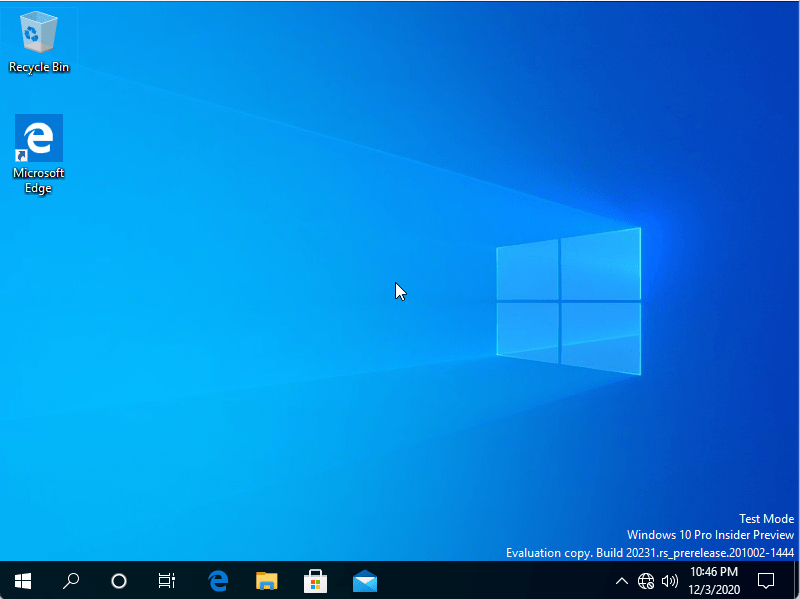
Windows also wants you to connect to the Internet…yet there is no way at this point to actually select a Wi-Fi network. Click the “I don’t have Internet” link and continue the installation. Within a minute or so, the usual Windows 10 desktop appears:
Run the SPICE Guest Tools installer application
To load drivers and actually be able to do some useful things with the Windows 10 virtual machine, click on the File Explorer button (the file folder icon in the bottom toolbar – see below). Click the CD Drive (D:), and then double click on the spice-guest-tools-0.164 (version number might be different) application. Allow the application to write to your “Windows machine” and let it complete the installation of drivers.
This installs drivers you need for an Internet connection…although Windows may still tell you there’s no connection.
Sharing Files with your Mac
I’m not going to show you how to do everything with Windows, as where’s the fun in that? 😀 But there is one good thing to know, and that’s how to share files with your Mac (the “host” machine).
Shut down your Windows virtual machine, then with UTM running and the Windows VM selected, click on the Sharing tab. Click Enable Directory Sharing, then click Save.
You’ll see Shared Directory listed now under the idle virtual machine. Click it to browse for a Mac directory (folder) you wish to share with the Windows VM. At this point, you can launch the virtual machine again.
How Well Does UTM Work?
There are some little quirks you’ll run into using UTM and Windows. For example, it seemed like the cursor liked to disappear. That was usually resolved by using the control-option key combo to make it visible. I also noticed that after shutting down the Windows VM using the Windows “Shut Down” command, I’d lose the cursor completely. The only way I found to resolve that was to use Command ( ⌘ )-Option-Esc and Force Quit UTM.
Compared to most Windows virtual machines I’ve used, UTM and the ARM64 version of Windows seemed lightning fast. The UTM developers do mention that the app doesn’t do GPU emulation, so it’s probably not wise to try to play graphics-intensive games.
UPDATE: Fast scrolling of any window in the virtual machine also produces a somewhat pixellated image. This is normal.
Ubuntu Server for ARM
As a second experiment, I installed Ubuntu Server for ARM from the UTM Gallery. If you have followed the Ubuntu Server on Mac mini series, you’ll know that it was a rather convoluted and time-consuming process to get it running. Not so with UTM and the instructions on how to install Ubuntu Server for ARM.
I installed the server quickly following the directions, then install Ubuntu Desktop as well to give the virtual machine a friendly non-command-line interface. In less than 15 minutes, everything was up and running:
To be honest, the Ubuntu virtual machine installation went much smoother than the Windows installation, primarily because Ubuntu Linux “knew” immediately how to resize the VM screen to fit the MacBook Air at its highest resolution. The Mac mini server was no slouch in terms of speed, but the virtual machine on Apple Silicon is insanely fast.
Anyone with an Apple Silicon machine – the M1 MacBook Air, MacBook Pro, or Mac mini who has a need to run another operating system needs to take a look at UTM (especially since Virtualbox is not yet an option). It’s not perfect and can be a little finicky during setup, but with a little patience, you can be running Windows 10, Linux, or other operating systems at full speed.
Источник


