- Download VirtualBox
- VirtualBox binaries
- VirtualBox 6.1.26 platform packages
- VirtualBox 6.1.26 Oracle VM VirtualBox Extension Pack
- VirtualBox 6.1.26 Software Developer Kit (SDK)
- User Manual
- VirtualBox older builds
- VirtualBox Sources
- Pre-built VirtualBox VMs
- Download VirtualBox for Linux Hosts
- VirtualBox 6.1.26 for Linux
- Oracle Linux
- Debian-based Linux distributions
- RPM-based Linux distributions
- Как установить Oracle VM VirtualBox Extension Pack
- Установка Oracle VM VirtualBox Extension Pack
- Шаг 1. Версия VirtualBox
- Шаг 2. Загрузка Extension Pack
- Шаг 3. Установка Extension Pack
- Оцените статью:
- Об авторе
- 6 комментариев
- Install VirtualBox Extension Pack
- Installation
- Testing out New Features
- 1. Full Disk Encryption
- 2. USB 2.0 devices
- Removing Extension Pack
- About the author
- Ranvir Singh
Download VirtualBox
Here you will find links to VirtualBox binaries and its source code.
VirtualBox binaries
By downloading, you agree to the terms and conditions of the respective license.
If you’re looking for the latest VirtualBox 6.0 packages, see VirtualBox 6.0 builds. Please also use version 6.0 if you need to run VMs with software virtualization, as this has been discontinued in 6.1. Version 6.0 will remain supported until July 2020.
If you’re looking for the latest VirtualBox 5.2 packages, see VirtualBox 5.2 builds. Please also use version 5.2 if you still need support for 32-bit hosts, as this has been discontinued in 6.0. Version 5.2 will remain supported until July 2020.
VirtualBox 6.1.26 platform packages
- Windows hosts
- OS X hosts
- Linux distributions
- Solaris hosts
- Solaris 11 IPS hosts
The binaries are released under the terms of the GPL version 2.
See the changelog for what has changed.
You might want to compare the checksums to verify the integrity of downloaded packages. The SHA256 checksums should be favored as the MD5 algorithm must be treated as insecure!
- SHA256 checksums, MD5 checksums
Note: After upgrading VirtualBox it is recommended to upgrade the guest additions as well.
VirtualBox 6.1.26 Oracle VM VirtualBox Extension Pack
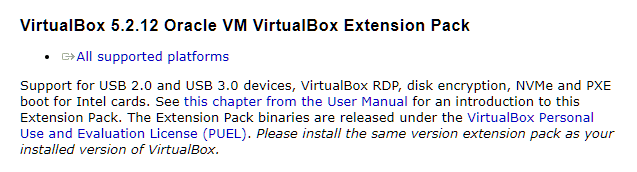
- All supported platforms
Support for USB 2.0 and USB 3.0 devices, VirtualBox RDP, disk encryption, NVMe and PXE boot for Intel cards. See this chapter from the User Manual for an introduction to this Extension Pack. The Extension Pack binaries are released under the VirtualBox Personal Use and Evaluation License (PUEL). Please install the same version extension pack as your installed version of VirtualBox.
VirtualBox 6.1.26 Software Developer Kit (SDK)
User Manual
The VirtualBox User Manual is included in the VirtualBox packages above. If, however, you would like to take a look at it without having to install the whole thing, you also access it here:
You may also like to take a look at our frequently asked questions list.
VirtualBox older builds
The binaries in this section for VirtualBox before version 4.0 are all released under the VirtualBox Personal Use and Evaluation License (PUEL). As of VirtualBox 4.0, the Extension Pack is released under the VirtualBox Personal Use and Evaluation License and the other packages are released under the terms of the GPL version 2. By downloading, you agree to the terms and conditions of the respective license.
VirtualBox Sources
The VirtualBox sources are available free of charge under the terms and conditions of the GNU General Public License, Version 2. By downloading from the below links, you agree to these terms and conditions.
- Browse the source code repository
This is the current development code, which is not necessarily stable.
- View the latest source code changes
- Download the VirtualBox OSE about logo in higher resolutions: 1024×768, 1600×1200.
- Checking out from our Subversion server. This is the current development code, which is not necessarily stable.
After getting the sources in one of the ways listed above, you should have a look at the build instructions.
Please also take a look at our licensing FAQ, in particular regarding the use of the name VirtualBox.
Pre-built VirtualBox VMs
There are some pre-built VMs designed for developers and the curious over on the Oracle Tech Network site.
Источник
Download VirtualBox for Linux Hosts
Note: The package architecture has to match the Linux kernel architecture, that is, if you are running a 64-bit kernel, install the appropriate AMD64 package (it does not matter if you have an Intel or an AMD CPU). Mixed installations (e.g. Debian/Lenny ships an AMD64 kernel with 32-bit packages) are not supported. To install VirtualBox anyway you need to setup a 64-bit chroot environment.
The VirtualBox base package binaries are released under the terms of the GPL version 2.
Please choose the appropriate package for your Linux distribution.
VirtualBox 6.1.26 for Linux
- Oracle Linux 8 / Red Hat Enterprise Linux 8 / CentOS 8
- Oracle Linux 7 / Red Hat Enterprise Linux 7 / CentOS 7
- Oracle Linux 6 / Red Hat Enterprise Linux 6 / CentOS 6
- Ubuntu 19.10 / 20.04 / 20.10 / 21.04
- Ubuntu 18.04 / 18.10 / 19.04
- Ubuntu 16.04
- Debian 11
- Debian 10
- Debian 9
- openSUSE 15.0
- openSUSE 13.2 / Leap 42
- Fedora 33 / 34
- Fedora 32
- All distributions (built on EL6 and therefore not requiring recent system libraries)
You might want to compare the checksums to verify the integrity of downloaded packages. The SHA256 checksums should be favored as the MD5 algorithm must be treated as insecure!
- SHA256 checksums, MD5 checksums
Oracle Linux
Users of Oracle Linux 6, 7 and 8 can use the Oracle Linux yum repository and enable the ol6_developer channel for Oracle Linux 6, the ol7_developer channel for Oracle Linux 7, or the ol8_developer channel for Oracle Linux 8. After that, do
to get the latest maintenance release of VirtualBox 6.1.x installed.
Debian-based Linux distributions
Add the following line to your /etc/apt/sources.list. According to your distribution, replace ‘ ‘ with ‘eoan‘, ‘bionic‘, ‘xenial‘, ‘buster‘, ‘stretch‘, or ‘jessie‘ (older versions of VirtualBox supported different distributions):
The Oracle public key for apt-secure can be downloaded
- here for Debian 8 («Jessie») / Ubuntu 16.04 («Xenial») and later
- here for older distributions.
You can add these keys with
or combine downloading and registering:
The key fingerprint for oracle_vbox_2016.asc is
The key fingerprint for oracle_vbox.asc is
(As of VirtualBox 3.2, the signing key was changed. The old Sun public key for apt-secure can be downloaded here.)
To install VirtualBox, do
Replace virtualbox-6.1 by virtualbox-6.0 or virtualbox-5.2 to install the latest VirtualBox 6.0 or 5.2 build.
What to do when experiencing The following signatures were invalid: BADSIG . when refreshing the packages from the repository?
RPM-based Linux distributions
We provide a yum/dnf-style repository for Oracle Linux/Fedora/RHEL/openSUSE. All .rpm packages are signed. The Oracle public key for rpm can be downloaded here. You can add this key (not normally necessary, see below!) with
or combine downloading and registering:
The key fingerprint is
After importing the public key, the package signature can be checked with
Note that importing the key is not necessary for yum users (Oracle Linux/Fedora/RHEL/CentOS) when using one of the virtualbox.repo files from below as yum downloads and imports the public key automatically! Zypper users should run
The package signature is checked by yum/dnf/zypper as well:
Источник
Как установить Oracle VM VirtualBox Extension Pack
Виртуальная машина VirtualBox распространяется с открытым исходным кодом. Однако у неё есть набор проприетарных модулей, которые добавляют дополнительные возможности. Например, поддержку USB 2.0, подключение к машине по VNC или RDP, а также возможность загрузки PXE в виртуальной машине. После установки этого плагина вы получаете возможность пробрасывать вашу мышь и клавиатуру прямо в виртуальную машину.
В этой небольшой статье мы рассмотрим как установить Oracle VM VirtualBox Extension Pack на примере операционной системы Ubuntu.
Установка Oracle VM VirtualBox Extension Pack
Шаг 1. Версия VirtualBox
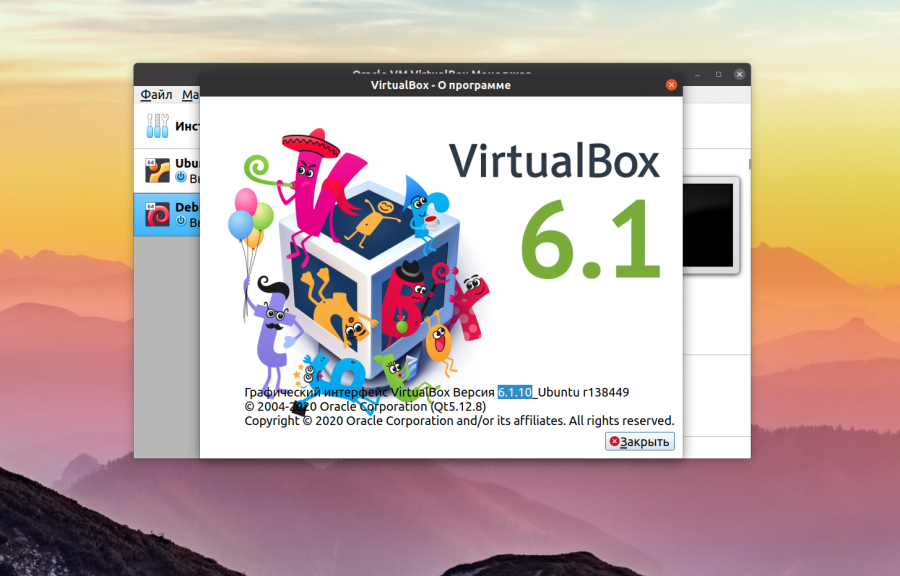
Плагин VirtualBox Exetension Pack выпускается для каждой версии VirtualBox, поэтому сначала надо узнать какая версия у вас установлена. Для этого запустите программу, кликните по меню Справка, а в нём выберите О программе:

В открывшемся окне вы можете видеть версию VirtualBox, в данном случае это 6.1:
Шаг 2. Загрузка Extension Pack
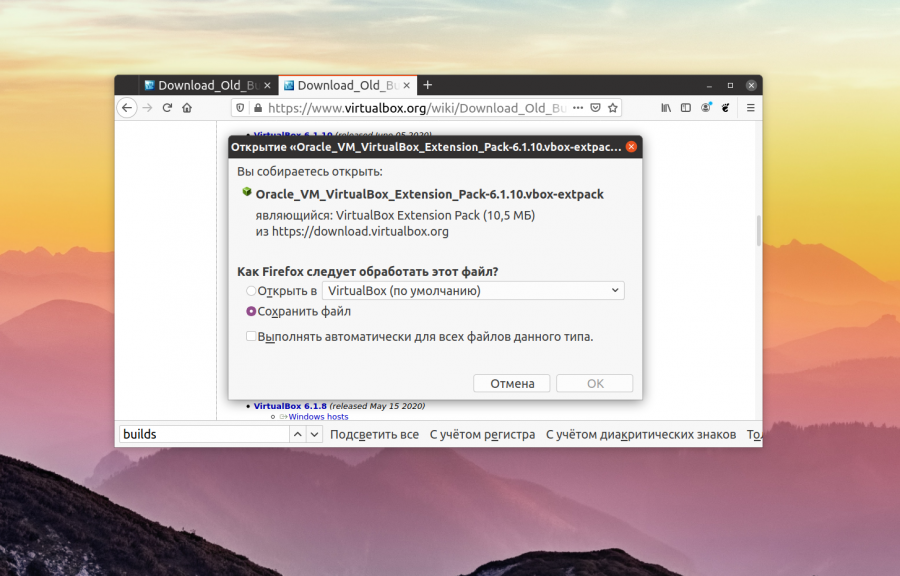
Скачать VirtualBox Extension Pack можно с официального сайта VirtualBox. Если у вас самая последняя версия VirtualBox, которая есть на этой странице, можно скачивать Extension Pack прямо отсюда. Но в данном случае, нам надо не 6.1.16, а 6.1.10. Поэтому надо найти ссылку на страницу Older builds:

Здесь вы берите нужную мажорную версию виртуальной машины, а уже на самой странице старых сборок VirtualBox найдите свою минорную версию:

Здесь есть ссылка на Extension Pack. Просто кликните по ней, затем выберите Сохранить файл в чтобы скачать плагин в папку Загрузки.
Шаг 3. Установка Extension Pack
Теперь осталось только установить Extension Pack. Для этого в главном окне VirtualBox откройте меню Файл, а затем Настройки. В открывшемся окне выберите Плагины:
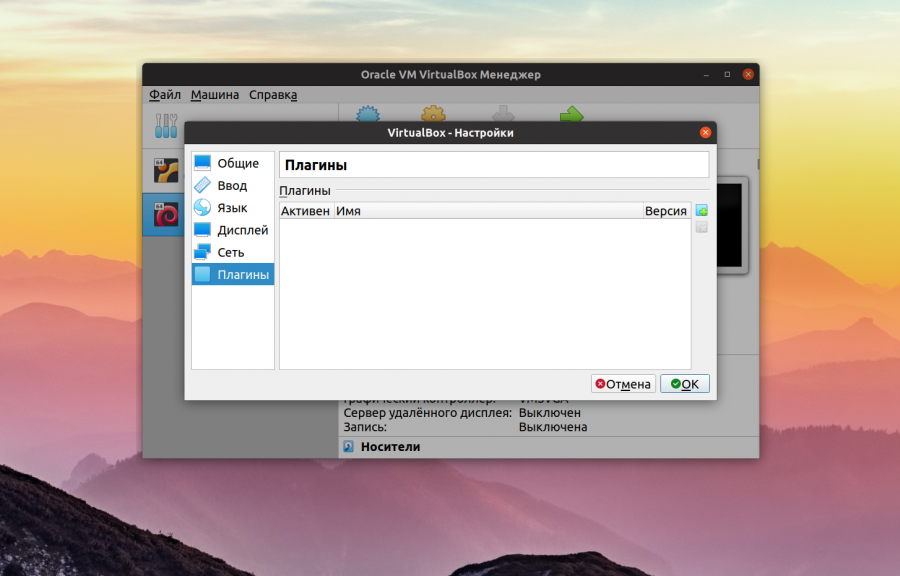
В этом окне кликните по кнопке с зелёным плюсом и выберите файл плагина. Затем подтвердите установку с помощью кнопки Установить:
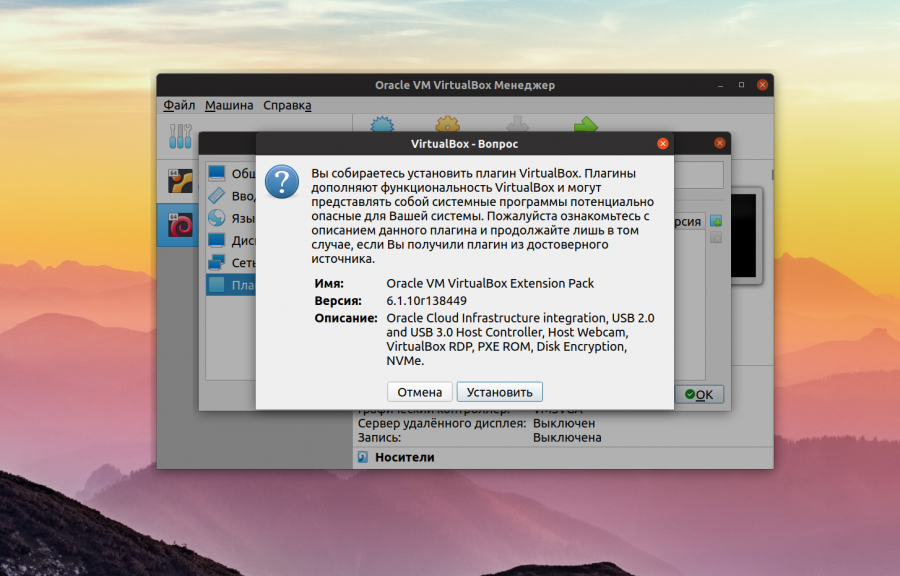
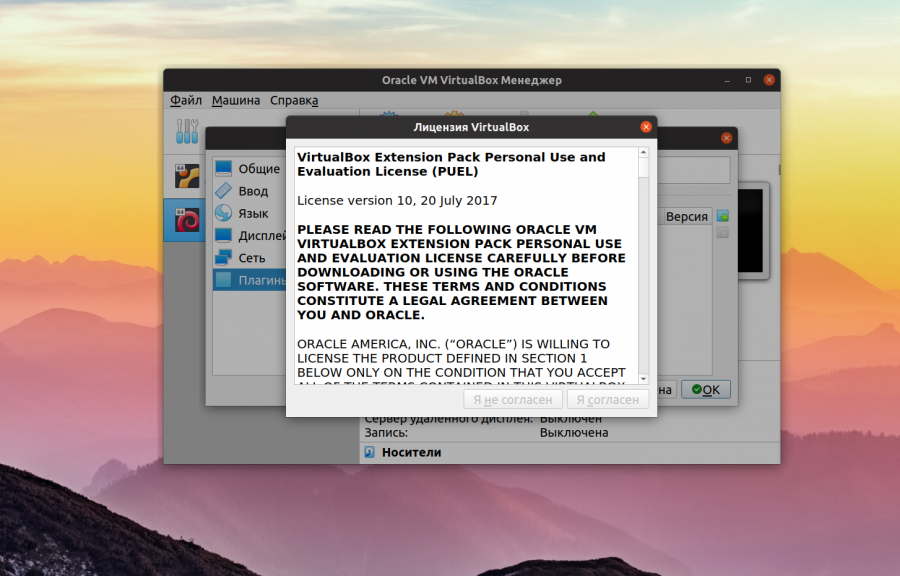
Спустя несколько мгновений программа сообщит, что VirtualBox Extension Pack успешно установлен:

Теперь вы можете использовать USB 2.0, пробрасывать свою мышь или клавиатуру в виртуальную машину, а также подключаться к виртуальной машине по RDP.
Нет похожих записей
Оцените статью:
Об авторе
Основатель и администратор сайта losst.ru, увлекаюсь открытым программным обеспечением и операционной системой Linux. В качестве основной ОС сейчас использую Ubuntu. Кроме Linux, интересуюсь всем, что связано с информационными технологиями и современной наукой.
6 комментариев
Нет, я понимаю, что надо популизировать линукс , что статьи разные нужны и статьи разные важны . Но Losst , вы опускаетесь до уровня Ответы.Mail.ru . Вам нечем наполнить контент ? Сделайте опросник, тем накидают кучу. С уважением , старый ваш читатель.
Отлично! Теперь ждем новость, как то-же самое проделать на QEMU, общий буфер обмена, масштабирование, открытие виртуальной машины в полный экран, подключение локальных дисков, папок, подключение съемных носителей, usb, и. т. д .
Всё хорошо, но никак не могу создать общую папку. Приходится чесать правой рукой левое ухо: передавать данные из системы в виртуальную машину с помощью флешки (((
samba тебе в помощь. Расшарь папку и лазь по сетке
Лет пять назад написал себе скрип:
VBOX_VER=`VBoxManage —version|awk -Fr ‘
EXTPACK_FILENAME=Oracle_VM_VirtualBox_Extension_Pack-$VBOX_VER.vbox-extpack
gfile=http://download.virtualbox.org/virtualbox/$VBOX_VER/$EXTPACK_FILENAME
al=—accept-license=33d7284dc4a0ece381196fda3cfe2ed0e1e8e7ed7f27b9a9ebc4ee22e24bd23c
echo $EXTPACK_FILENAME
if [ -e $EXTPACK_FILENAME ]; then
echo «Файл $EXTPACK_FILENAME обнаружен.»
echo «Устанавливаем файл $EXTPACK_FILENAME. »
VBoxManage extpack install —replace $EXTPACK_FILENAME $al
exit 0
else
echo «Файл $EXTPACK_FILENAME не обнаружен.»
echo «Загружаем файл $EXTPACK_FILENAME. »
wget $gfile
echo «Устанавливаем файл $EXTPACK_FILENAME. »
VBoxManage extpack install —replace $EXTPACK_FILENAME $al
fi
#========================================================
Источник
Install VirtualBox Extension Pack
Functionalities such as USB 2.0 and 3.0 support, full disk encryption for your virtual disk images and even physical disk passthrough are available within this pack. A few extra functionalities include NVMe support, Remote Desktop and PXE boot for Intel chips.
Installation
To get your copy of the extension pack, visit the official VirtualBox site and scroll down to the Oracle section and download the extension pack for your running version of VirtualBox. Click on “All supported platforms” to get this file.
The file is about 20 MB in size and has the extension .vbox-extpack which is the same exact file for any host operating system be it Windows, Linux or macOS.
Once the file is downloaded, open up your VirtualBox manager, from the top menu select File → Preferences (Top-left corner) and a new VirtualBox Preferences window will pop up.

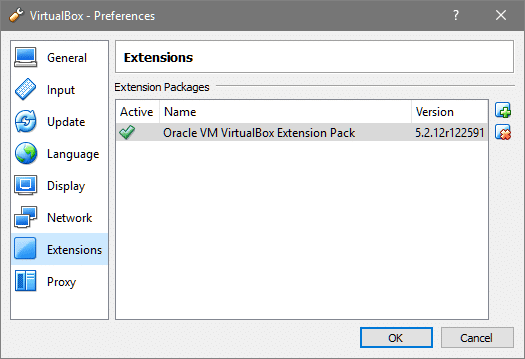
In this Window, select the Extensions option from the left-side menu.
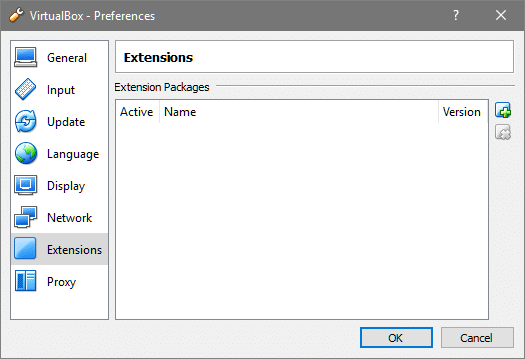
Use the icon on the right side which has a plus sign on it, to open File explorer and locate the Extension pack that we downloaded earlier, in your filesystem. Most likely, it is in your Downloads folder. Upon selecting and clicking OK, you will be informed that some of the system level software can harm your computer if they are untrusted.
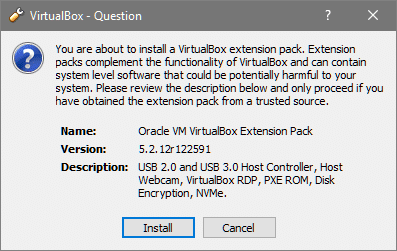
Since we obtained our extension pack from the official website, it is quite safe to install it. Click install and then Agree to the terms and services if you would like to use the extension pack.
You will then be prompted for your root or sudo password (for Linux users) and Windows users will be greeted by a familiar UAC prompt. In either case, give VirtualBox the permission to install the necessary packages.
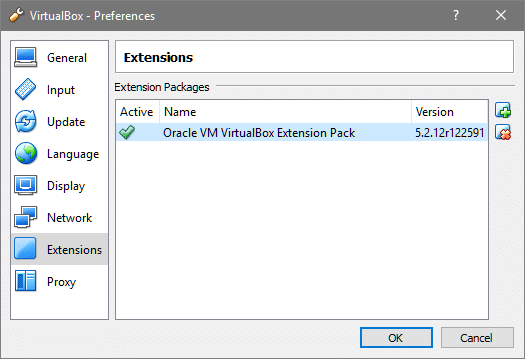
Once the extension pack is installed, your Preferences → Extension window will show something like this.
Testing out New Features
Let’s start using a few of the features that we now have at our disposal.
1. Full Disk Encryption
First and foremost would be full disk encryption. This is one of the best ways to ensure that your data inside the VM stays safe from the host.
There are cases where you may not trust the host operating system with your data or privacy, for example, if you are using a company laptop or some obscure OS with un-audited source code. Having your personal data inside a VM doesn’t help very much, unless you have the entire disk encrypted, in which case, the host has fewer ways of getting that information.
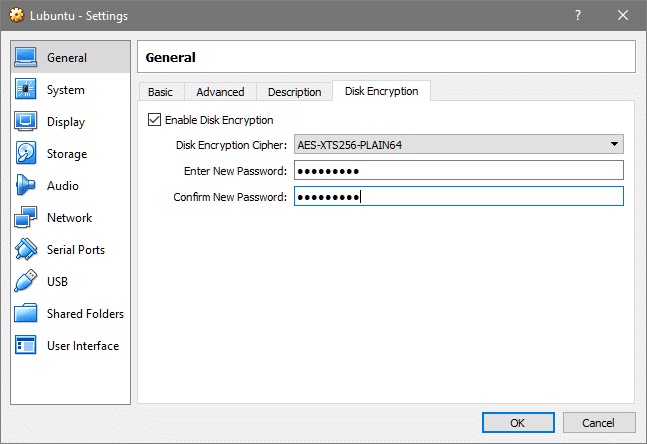
To enable disk encryption select your virtual machine from the VirtualBox manager, right click and go to its settings. In the General settings you would notice that the Disk Encryption option is available. Enable it and select any of the cipher that you prefer and then set your password. Once that is done, click OK and it will encrypt the entire .vdi (virtual disk image) file where your OS resides. You can do this while creating a new VM or for your pre-existing VMs as well.
Depending on the actual size of the virtual disk it might take some time. Now everytime you boot your VM, you will be asked for a passphrase:
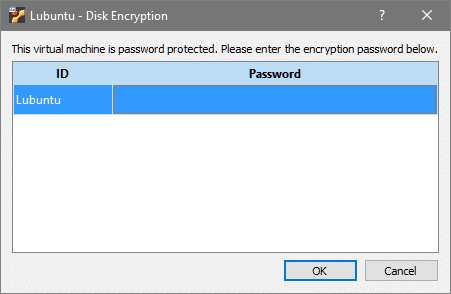
If you are already using full disk encryption from inside the VM, then this might not be necessary. But, of course, encrypting your disks in this way secures it against vulnerabilities in guest operating system as well.
2. USB 2.0 devices
If you have some data on a USB device and you want to transfer it to your VM, you would typically do that by copying the data to the host machine and then copy the data from there to the guest machine. You may also try using a shared folder to speed up the process, but there will be copying of data involved.
Wouldn’t it be nice if you can just plug your USB device directly into your VM? Well this can be easily achieved once your extension packs are installed. Just go to your VM’s settings as before, and select USB menu from the sidebar.
Settings → USB

Select the kind of controller that your hardware offers. It can be USB 2.0 or USB 3.0. USB ports are backwards compatible so if you select 3.0 and use a 2.0 device that would still work.
You need not select any USB filtering for now, if you are just experimenting, but I urge you to explore further into it.Things can turn ugly if you select the wrong USB device. For example if your USB mouse is selected to be passed through to the VM, then your host machine, your main computer, has no mouse connected to it!
So for now, we shall leave the filtering part untouched and boot our VM, And once again use the Device option from the menu, go to USB option and select the USB device fitting the description of, say, our flash drive, as shown below.
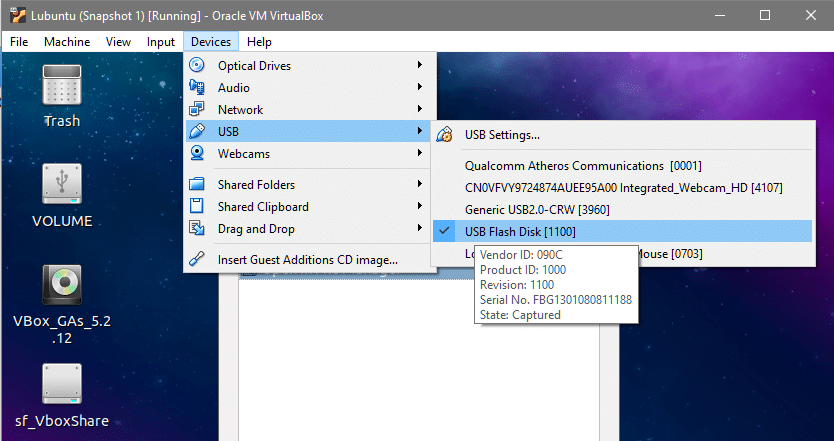
Once you select that, you will notice that a new media is mounted inside the guest operating system which contains all the data held by your flash device.
Once again, your host operating system will have no idea about the existence of this flash device plugged into its hardware. Your VM would have taken control of the USB interface completely.
Removing Extension Pack
To ensure that removing the extension pack doesn’t break any of your VM, make sure that none of the feature like disk encryption or USB passthrough are actively being used.
With USB devices it is a simple matter of powering down all your VMs and none would use any physical interface avaible to them. With disk encryption, however, it is recommended that you go back to the Settings → General → Disk Encryption and uncheck the Enable Disk Encryption option. This is because your data is encrypted even at rest (on your hard disk) and if you remove the extension pack you have no way of decrypting it unless you reinstall the pack.
Once you are sure that none of the extension features are actively in use, you can go to VirtualBox Manger’s File → Preferences –> Extension.
Then click on the red icon on the right-column and you are back to the vanilla VirtualBox environment.
Hope you found this article on VirtualBox extension pack helpful, informative and fun! Please let us know if there’s any Linux related topic that you might want us to cover. You can reach us on Twitter, Facebook or subscribe to us via email.
About the author

Ranvir Singh
I am a tech and science writer with quite a diverse range of interests. A strong believer of the Unix philosophy. Few of the things I am passionate about include system administration, computer hardware and physics.
Источник


