Serial Port Programming using Win32 API

This tutorial teaches you to program your Windows PC to communicate with an external peripheral like data acquisition boards, USB GPIO Boards,Relay boards etc through its serial port (Virtual or Real).
Here i am assuming that you are using a Virtual COM port based any of the numerous IC’s available on the market.
The tutorial is aimed at Software/Embedded developers who may want to interface real world sensors like DAQ’s,USB Relays,USB GPIO boards ,Temperature sensors,Humidity sensors etc to Windows PC .
The software is written using C language and communicates with the Serial Port using Win32 API.
All codes have been tested on a 64bit Windows 10 System.
All the codes in this tutorial are licensed under MIT License making it eligible to be used for developing proprietary software applications.
Contents
Isolated USB to Serial Converters
One major issue with interfacing real word devices with your PC’s is that High voltage spurious transients can couple on to your USB or RS232 or RS485 lines.These high voltage transients can cause severe damage to your computer or its ports.
It is highly recommended to use an
to protect your PC .
Sourcecodes

- Please note that the source codes on the website show only the relevant sections to highlight the process of programming the serial port.
- Contact Us to Enquire about the full Source codes
Compilers and IDE’s used
Since we are developing on Windows platform,
- Recommended IDE is Visual Studio (Professional or Community Edition).
In Visual Studio,there is no longer an option for creating a C project.
So create a Win32 C++ project and save your source file with a .C extension (Eg: MySourceFile.C).Compiler would automatically do the rest.
GCC/MinGW
You can also compile the code using GCC or MinGW after a few tweaks.
The Code uses some Microsoft specific safe C functions like
- strcat_s() and
- scanf_s()
which are used to get the COM number from the user and create the COM port address string (Eg «\\.\COM9» ).The code will compile on GCC after removing those functions.
Make sure that variables referenced by those functions are also changed.
Finding out your COM port Number
A little bit of History,
Serial ports are simple 9 pin legacy ports used by the PC to communicate with external peripherals like Printers,Data Acquisition Sytems,Printers etc.
The simple protocol and the 3 pin hardware physical lines (RX,TX,GND) made it quite popular among manufacturers who wanted an easy way to connect their devices with a computer.
In the 2020’s, the old DB9 Serial port is found only on industrial motherboards and old PC’s.The once ubiquitous serial port have been completely replaced by the familiar USB standard.
The arrival of cheap USB to UART chips like FTD FT232RL,TUSB3410,CP2102 have made it quite easy to upgrade the existing software that used to talk over serial to USB protocol.These chips provide a virtual serial port that behaves like a real one but transmits the data through USB.
If your PC does not have any hardware serial ports (RS232 DB9 ports), you can use USB to Serial Converter’s like USB2SERIAL .(non Isolated).
In Windows ,
Serial ports are named as COM1,COM2 ,COM3.. etc .COM1 and COM2 usually refer to the hardware serial ports present in the PC (quite rare now)
while COM numbers in double digits like COM32,COM54,COM24.. etc are given to USB to Serial Converters or PCI serial port extenders.
To find out the COM number corresponding to your serial port,
- Open Device Manager by right clicking on My Computer icon and selecting Manage → Device Manager. or
- by typing «Device Manager» on the taskbar search box in Windows 10
Under Ports(COM & LPT) you can see the parallel and serial ports (COM) detected by your system.

If your PC has any hardware ports, it will be shown either as COM1 or COM2 under the Ports Section.
I am using a FTDI based USB to Serial Converter (USB2SERIAL)which is recognized as COM24 (this may be different under your system).
If you double click on COM24,you can see the details of the corresponding port.

Windows10 Accounts
The codes/executables are able to open the connection to the serial port under both Administrator Account and Standard User Account in Windows 10.
Opening and Closing a Serial Port
we use the CreateFileA() function to open a serial port.
CreateFile() is a Win 32 function which is used to create or open a file, stream or an IO device like serial port.
On success CreateFileA() will return a handle which is then used to refer the connection in all subsequent operations.
After opening a serial port using the CreateFileA() function you should close it with CloseHandle() function, otherwise port will become unavailable to other programs.
Now let’s write a small program to open and close a serial port on Windows.
Open a text editor like notepad and type the below code and save it as “serial.c”.If you are using IDE like VS Express, use the one integrated with it.
#include windows.h >
#include
int main()
<
HANDLE hComm ;
hComm = CreateFileA( “ \\\\.\\COM24 ”, //port name
GENERIC_READ | GENERIC_WRITE, //Read/Write
0 , // No Sharing
NULL, // No Security
OPEN_EXISTING, // Open existing port only
0 , // Non Overlapped I/O
NULL ) ; // Null for Comm Devices
if ( hComm == INVALID_HANDLE_VALUE )
printf(“Error in opening serial port”);
else
printf(“opening serial port successful”);
CloseHandle( hComm ) ; //Closing the Serial Port
Configuring the DCB Structure
In Windows ,settings like Baud rate ,Number of start/Stop bits,data formats etc for the serial port are controlled by the DCB structure.
To Configure the DCB structure we use two functions,
GetCommState() function which retrieves the current control settings of the serial port and
SetCommState() function which configures the serial port with the new values in DCB structure provided by us.
ReadIntervalTimeout Specifies the maximum time interval between arrival of two bytes. If the arrival time exceeds these limits the ReadFile() function returns.
ReadTotalTimeoutConstant is used to calculate the total time-out period for read operations. For each read operation, this value is added to the product of the ReadTotalTimeoutMultiplier member and the requested number of bytes.
ReadTotalTimeoutMultiplier is used to calculate the total time-out period for read operations. For each read operation, this value is multiplied by the requested number of bytes to be read.
WriteTotalTimeoutConstant similar to ReadTotalTimeoutConstant but for write operation.
WriteTotalTimeoutMultiplier similar to ReadTotalTimeoutMultiplier but for write operation.
After this you have to set the values using SetCommTimeouts() function.
Writing Data to Serial Port
Writing data to the opened serial port is accomplished by the WriteFile() function. WriteFile() function can be used to write both into the files and I/O ports.
Status = WriteFile( hComm , // Handle to the Serial port
lpBuffer, // Data to be written to the port
dNoOFBytestoWrite , //No of bytes to write
& dNoOfBytesWritten , //Bytes written
NULL ) ;
If your PC does not have any hardware serial ports you can use any USB to Serial Converters(I am using USB2SERIAL).
Microcontroller Interface
I have interfaced a microcontroller MSP430G2553/ATmega328P to the serial port like this

You can use any microcontroller of your choice like 8051,AVR or ARM(LPC2148).
The Controller waits for a character to be received and lights up the corresponding LED.
The code for interfacing MSP430 is available in the Github repo.
.If you want to know how to configure the MSP430 controller UART you can check this tutorial.

We have also included code for
in the Repo too. The connection setup is similar to the MSP430.
Please note that if you are using a DB9 RS232 Serial Port of your PC, you will have to build a RS232 signal level converter at the microcontroller side to decode the RS232 signal.
Directly connecting the PC’s RS232 Serial port to MSP430 ‘s pins will damage the chip.
Here is the screen shot of the Program writing into serial port of Windows 7 Computer
Please note that i have changed the names of the C files in the latest release.
Use the files in the «PC_Transmits» folder.

Here is the screen shot of the Program writing into serial port of Windows 10Computer
![]()
Reading from the Serial Port
Reading from the serial port is accomplished by the ReadFile() function.
One way to do that is to use polling where the ReadFile() continuously reads from the serial port and checks for any received characters.
Other way is to setup an event and let windows notify us when a character is received.
We are going to use the second method here, following are the steps.
1. Create an Event for a particular action like character reception, change in modem lines etc using SetCommMask() function .
2. Ask windows to wait for the event set by SetCommMask() function using WaitCommEvent() and notify us when the condition happens.
3. Call ReadFile () to read the received data from the Serial port.
Functions used are
SetCommMask() is used to set the events to be monitored for a communication device
WaitCommEvent() is used to wait for the events set by SetCommMask() to happen, i
Codes running on Windows 7 PC.
Please note that i have changed the names of the C files in the latest release.
Use the files in the «PC_Receives» folder.

Reset the Micro controller to transmit the string “Hello from MSP430”.

Codes running on Windows 10 PC .
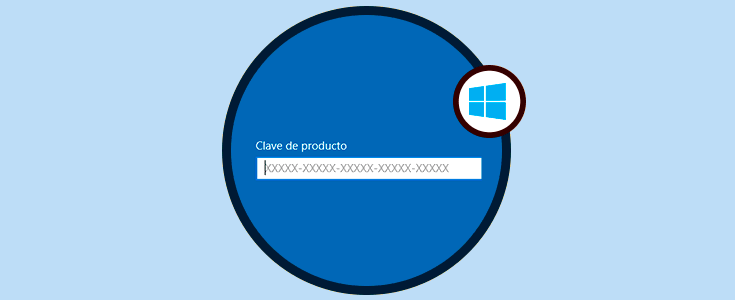
Cómo recuperar serial o clave de Windows 10, 8, 7
Tutorial con vídeo para saber serial o clave la licencia de tu Windows 10, 8 y 7 fácilmente.


¿Quién no ha necesitado alguna vez conocer el número de licencia serial de Windows? Muchos somos los que lo instalamos, actualizamos a versión superior, o bien se ha roto la pegatina original de Microsoft donde aparecía nuestro número de licencia. Si quieres recuperarlo, estás en el tutorial indicado.
Cuando hemos realizado una actualización a Windows 10 desde Windows 7 u 8 o ejecutado una instalación limpia desde el DVD de Windows es muy posible que en algún momento el sistema nos solicite ingresar la clave del producto, para obtener todos los beneficios de tener un equipo legal y registrado.
Tener una licencia supone poder acceder a un determinado software de manera legal con las limitaciones que este tipo de licencia implique. Cuando registramos una licencia lo hacemos asociando un código o número determinado a esa licencia para realizar la activación. A excepción de algunas licencias multiequipo, por lo general un serial únicamente podrá estar asociado a varios ordenadores a la vez.
El problema surge cuando no tenemos a mano el serial de Windows 7 u 8 a mano o hemos perdido la caja original de Microsoft Windows y si no registramos el Sistema Operativo perdemos funciones y soporte vital para el equipo.
Como decimos es importante tener disponible el número de serial de la licencia de Windows 10 ya sea ésta la que venía con el equipo original o si hemos comprado una con un partner oficial. Si no lo tenemos, conllevará una serie de desventajas en nuestro Sistema Operativo.
Si no activamos Windows 10 podemos presentar las siguientes limitaciones:
- Imposibilidad de personalizar el sistema: Si no activamos Windows 10 no podremos establecer configuraciones como temas, fondos de escritorio o protectores de pantalla.
- Marca de agua: Al no activar Windows 10 veremos un mensaje no tan interesante en la esquina inferior derecha que nos indica que Windows no ha sido activado.
- Falta de garantía: Al no tener un Sistema Operativo activo no podremos solicitar algún tipo de soporte o garantía a Microsoft.
Hoy en día existen muchas herramientas que permiten ver y recuperar las licencias de Windows pero no las pueden recuperar desde la carpeta Windows.old la cual es sumamente importante.

Para todos es bien conocido que cuando compramos un software legal, llámese aplicación o sistema operativo, el proveedor nos brinda ya sea en la propia caja del disco o a través de un medio digital, la clave de dicho producto para su activación y soporte posterior. Pero en muchas ocasiones podemos borrar sin querer dicho correo o no contar con esta clave o serial a mano, y esto es útil para situaciones como las siguientes.
- Reportes de auditoria de seguridad
- Tareas administrativas
- Control de licenciamiento de la organización
- Soporte del producto
- Garantías y demás.
El siguiente videotutorial te ayuda a recuperar el número de serie o la clave de tu Windows 10, 8 o 7 ya sea con un programa o a través de un script.
Para estar al día, recuerda suscribirte a nuestro canal de YouTube! SUSCRIBETE Para estar al día, recuerda suscribirte a nuestro canal de YouTube! SUSCRIBETE —>


