- Tips to free up drive space on your PC
- Best Windows 10 Disk Space Analyzer Software to find Space Hogging Files
- Disk space analyzer software for Windows 10 you need to check out
- Glary Utilities (recommended)
- WinDirStat
- SpaceSniffer
- SpaceMonger
- TreeSize
- Folder Size
- GetFolderSize
- Scanner
- RidNacs
- JDiskReport
- Disktective
- DiskSavvy
Tips to free up drive space on your PC
Getting a message that your PC is running out of room can be a stressful event—or, even a genuine emergency if you’re in the middle of an important project. The good news is you can probably free up a lot of space on your PC running Windows by following the tips here. But if you keep getting messages about low drive space, you might want to consider other options, including adding additional removable storage.
To get the most out of these tips, do them in order from top to bottom.
Swipe in from the right edge of the screen, tap Settings, and then tap Change PC settings. (If you’re using a mouse, point to the lower-right corner of the screen, move the mouse pointer up, click Settings, and then click Change PC settings.)
Select PC and devices, and then select Disk space.
Under Free up space on this PC, note the amount of free space and total size.
You can view the size of your Windows Store apps and choose whether to uninstall them by tapping or clicking See my app sizes.
You can also free up space by tapping or clicking Empty my Recycle Bin if you have files there.
If you don’t see Disk space, you don’t have the latest update to Windows 8.1 and Windows RT 8.1. For more info, see Install the Windows 8.1 Update (KB 2919355).
You can also check the current space on your PC in File Explorer by searching for This PC.
Cleaning out your PC on a regular basis frees up drive space and helps it run better. One of the easiest ways to clean up files you no longer need is by using Disk Cleanup.
Open Disk Cleanup by clicking the Start button . In the search box, type Disk Cleanup, and then, in the list of results, select Disk Cleanup.
If prompted, select the drive that you want to clean up, and then select OK.
In the Disk Cleanup dialog box in the Description section, select Clean up system files.
If prompted, select the drive that you want to clean up, and then select OK.
In the Disk Cleanup dialog box, on the Disk Cleanup tab, select the check boxes for the file types that you want to delete, and then select OK. To remove data from a previous installation of Windows, select the Previous Windows installation(s) check box.
In the message that appears, select Delete files.
Go back to Computer in File Explorer, select the drive you cleaned up, and then select Refresh. If you need to free more space (the drive is still marked red), go to the next tip.
Uninstall desktop apps you don’t need any more in Programs and Features.
To uninstall or change a program
Open Programs and Features by clicking the Start button , clicking Control Panel, clicking Programs, and then clicking Programs and Features.
Select a program, and then click Uninstall. Some programs include the option to change or repair the program in addition to uninstalling it, but many simply offer the option to uninstall. To change a program, click Change or Repair. If you’re prompted for an administrator password or confirmation, type the password or provide confirmation.
Note: If the program you want to uninstall isn’t listed, it might not have been written for this version of Windows. To uninstall the program, check the information that came with the program.
You can also uninstall Store apps you don’t want anymore.
Swipe in from the right edge of the screen, tap Settings, and then tap Change PC settings. (If you’re using a mouse, point to the lower-right corner of the screen, move the mouse pointer up, click Settings, and then click Change PC settings.)
Select Search and apps, and then select App sizes to see how much space each app is taking on the local drive.
Once you locate an app you want to uninstall, select the app, and then select Uninstall.
Note: This will only uninstall Store apps from your user account.
If you have photos, music, videos, or other files that you want to keep but don’t necessarily want on your PC, consider saving them to removable media, such as an external drive, USB drive, DVD, or cloud storage. You’ll still be able to view those files as long as your PC is connected to the removable media or cloud storage, but they won’t take up space on your PC.
Open This PC by swiping in from the right edge of the screen, tapping Search (or if you’re using a mouse, pointing to the upper-right corner of the screen, moving the mouse pointer down, and then clicking Search), entering This PC in the search box, and then tapping or clicking This PC.
In the Search This PC box in the upper-right, enter size:huge.
Select the View menu, select Sort by, and then select Size. The largest files display at the top.
Once you locate a file you want to delete, press and hold or right-click the file and then select Delete.
Warning: Deleting files from the WinSxS folder or deleting the entire WinSxS folder might severely damage your system and make it impossible to restart or update your PC.
The WinSxS folder is located in the Windows folder on your PC (for example, C:\Windows\WinSxS). It stores the Windows Component Store files, which are used to support functions needed to customize and update Windows. You can use the Task Scheduler to reduce the size of this folder.
Swipe in from the right edge of the screen, and then tap Search. (If you’re using a mouse, point to the lower-right corner of the screen, move the mouse pointer up, and then click Search.)
Enter Control Panel in the search box, and then select Control Panel.
Select System and Security, and then select Schedule tasks under Administrative Tools.
Select the arrow next to Task Scheduler Library, select Microsoft, select Windows, and then select Servicing.
Select StartComponentCleanup, and then select Run under Selected item.
Files that are available offline take up more space on your PC. OneDrive also needs 200 MB of free space on your PC to sync your files. To free up space, you can make some files or folders online-only.
If you have Access all files offline turned on, you need to first turn off this setting before you can make files online-only.
If you have pending uploads to OneDrive, you need to wait until they are completed before making files online-only.
On the Start screen, select OneDrive to open the OneDrive app.
Browse to the file or folder you want to make online-only.
Swipe down or right-click the file or folder to select it.
Select Make online-only. To make your entire OneDrive online-only, swipe in from the right edge of the screen (or, if you’re using a mouse, point to the lower-right corner of the screen, and move the mouse pointer up), select Settings, select Options, and then select Make all files online-only.
Open File Explorer by swiping in from the right edge of the screen, tapping Search (or if you’re using a mouse, pointing to the upper-right corner of the screen, moving the mouse pointer down, and then clicking Search), entering File Explorer in the search box, and then tapping or clicking File Explorer.
Browse to the file or folder you want to make online-only.
Press and hold or right-click the file or folder, and then choose Make available online-only. To make your entire OneDrive online-only, press and hold or right-click OneDrive, and then choose Make available online-only.
The removable drive will need to be formatted with the NTFS file system.
To check space availability
Before you move your OneDrive files, you should make sure the removable drive has enough space to store your files. Follow these steps:
Open File Explorer by swiping in from the right edge of the screen, tapping Search (or if you’re using a mouse, pointing to the upper-right corner of the screen, moving the mouse pointer down, and then clicking Search), entering File Explorer in the search box, and then tapping or clicking File Explorer.
Press and hold or right-click OneDrive.
Select Properties, and then look at the amount next to Size on disk.
In File Explorer, select This PC, and then see how much space is free on the removable drive.
To move your OneDrive files
First, you’ll need to create a folder on the removable drive for your OneDrive files. After you create the folder, follow these steps to move your files:
Warning: Moving your OneDrive files will cancel any pending uploads.
In File Explorer, press and hold or right-click OneDrive.
Select Properties, and then select the Location tab.
Browse to the removable drive, and then select Select Folder.
In the OneDrive Properties dialog box, select OK.
In the Move Folder dialog box, select Yes. Your OneDrive files have been moved to the new drive. You can now delete the old OneDrive location.
Note: For more help with moving files in OneDrive, contact customer support.
A longer-term strategy for expanding your PC’s storage capacity is to add removable storage, including SD cards, USB flash drives, DVDs or CDs, or using cloud storage or network drives. Removable storage options:
Secure Digital (SD) cards. There are few different types of cards, including SD (32.0×24 mm), miniSD (21.5×20 mm), and microSD (15.0×11 mm). It’s important to check with your PC manufacturer to understand which types of SD cards options are available on your PC.
Tip: If you’re using Surface, you can add up to 64 GB of storage with a microSD card. On Surface RT, the microSD card reader is located under the kickstand on the right side. On Surface Pro, the card reader is located on the right edge, above the power connection.
USB and external drives. Most PCs include one or more USB ports that you can plug a USB flash or external drives into. Some newer PCs include a USB 3.0 port, which includes faster transfer speeds of up to 10 times USB 2.0. While you can use a USB 2.0 flash drive in a USB 3.0 port (at USB transfer speeds), you can’t use a USB 3.0 flash drive with a USB 2.0 port. Check with your PC manufacturer to understand which USB ports your PC supports.
DVDs and CDs. If your PC has a CD, DVD, or Blu-ray Disc drive that can read and write to a blank disc, you can use the drive to store data, much like an SD or USB flash drive. Here’s how: When you insert a blank disc into the PC, choose Like a USB flash drive from the list of options.
Cloud storage using OneDrive. Windows comes with the OneDrive app, which helps you get to your free OneDrive storage in the cloud, sometimes referred to as online storage. You can save files to OneDrive and work with them in several different ways: on the website (OneDrive.com), with the app for Windows 8.1 and Windows RT 8.1, with the desktop apps for a PC or Mac, and with apps for your mobile devices.
To see how much storage is available, and add more storage, swipe in from the right edge of the screen (or, if you’re using a mouse, point to the lower-right corner of the screen), select Settings, select Change PC settings, and then select OneDrive. You can also go to Manage storage on the OneDrive website.
Best Windows 10 Disk Space Analyzer Software to find Space Hogging Files


- Download Restoro PC Repair Tool that comes with Patented Technologies (patent available here).
- Click Start Scan to find Windows issues that could be causing PC problems.
- Click Repair All to fix issues affecting your computer’s security and performance
- Restoro has been downloaded by 0 readers this month.
Any person using a computer is well aware with the problem of low disk space. To resolve this issue Disk Space Analyzers are used for windows. What is a Disk Space Analyzer you ask?
It is a software utility for windows used by many people around the world to kick out the problem of low disk space.
Disk Space Analyzer software visualizes the hard disk space usage on your personal computer by getting the size for each for each folder this also includes the sub folders and files or folders in a drive.
This software allows the user to understand the distribution of his hard disk usage between different folders or any other criteria specified by generating graphical presentation.
Some of these software also offer the analysis of history of size and count for each folder which helps in finding the growing folders.
There are numerous software offered on the internet for the Disk Space Analysis for Windows. Some of them are mentioned below with their specifications.
Disk space analyzer software for Windows 10 you need to check out
Glary Utilities (recommended)
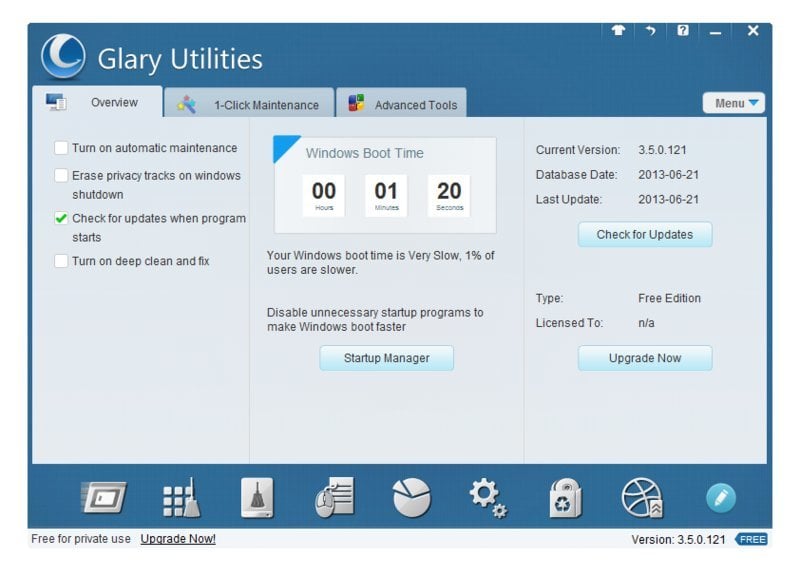
Glary Utilities is a software software which performs the basic functions of disk space analyzer and presents the disk space used by the user of the computer.
It shows all the information used by the files and fodders using most of the space on your computer.
Then the information gathered is presented in a graphical form. This software also performs the task of system optimizer software.
This software scans and analyses your computer issues faster and more thoroughly than ever before.
Glary Utilities is a very popular and one of the most frequently recommended system utilities.
WinDirStat
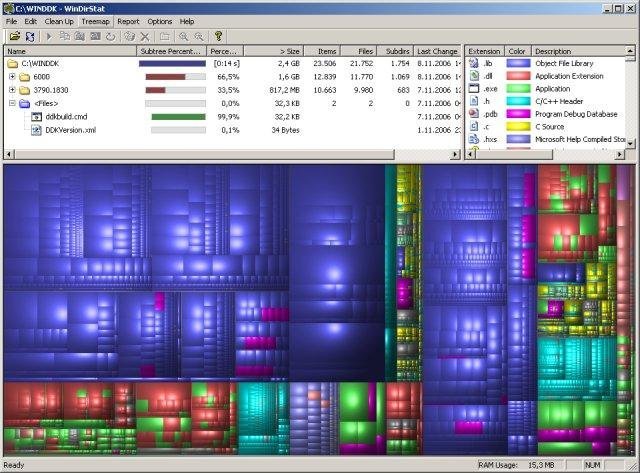
It is a freeware for windows. This software analyses the number of files and folder on the hard disk drive and determine files and folders occupying the most of the disk space on your computer.
WinDirStat views the data in colorful visual depiction making it is easy for the user to understand the data provided by the software.
The visual depiction includes all the files and folders on the hard disk of your computer and this software also allows you to remove the unwanted files from your computer
SpaceSniffer

This software is also a freeware and provides the function a disk analyzer software for windows.
It presents the data relating to the size of the files and folders graphically, making it stress-free for the user to comprehend. Space Sniffer displays the complete structure of the directory in a tree form, displaying the files and folders according to their sizes.
It is also easy to find the folders or files in software by just typing the first letter of the name of folder or file you are trying to find. this characteristic helps in filtering the specific extensions and filenames.
SpaceMonger
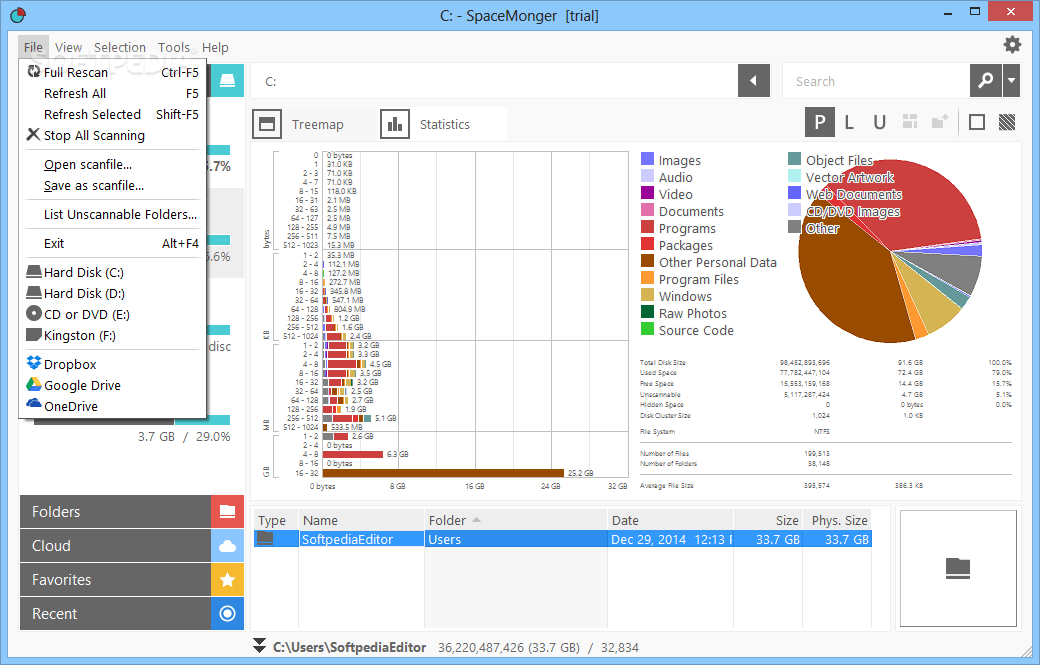
This app is not a freeware and costs $19.99 but this app is advanced in spite of other basic apps.
The developers of this app also offers 30-day free trial. This app shows the data in tree view and graphical view and these views can be configured by the user.
It is not easy as other apps and is mainly designed for the advanced users. It is also available as a portable app.
TreeSize
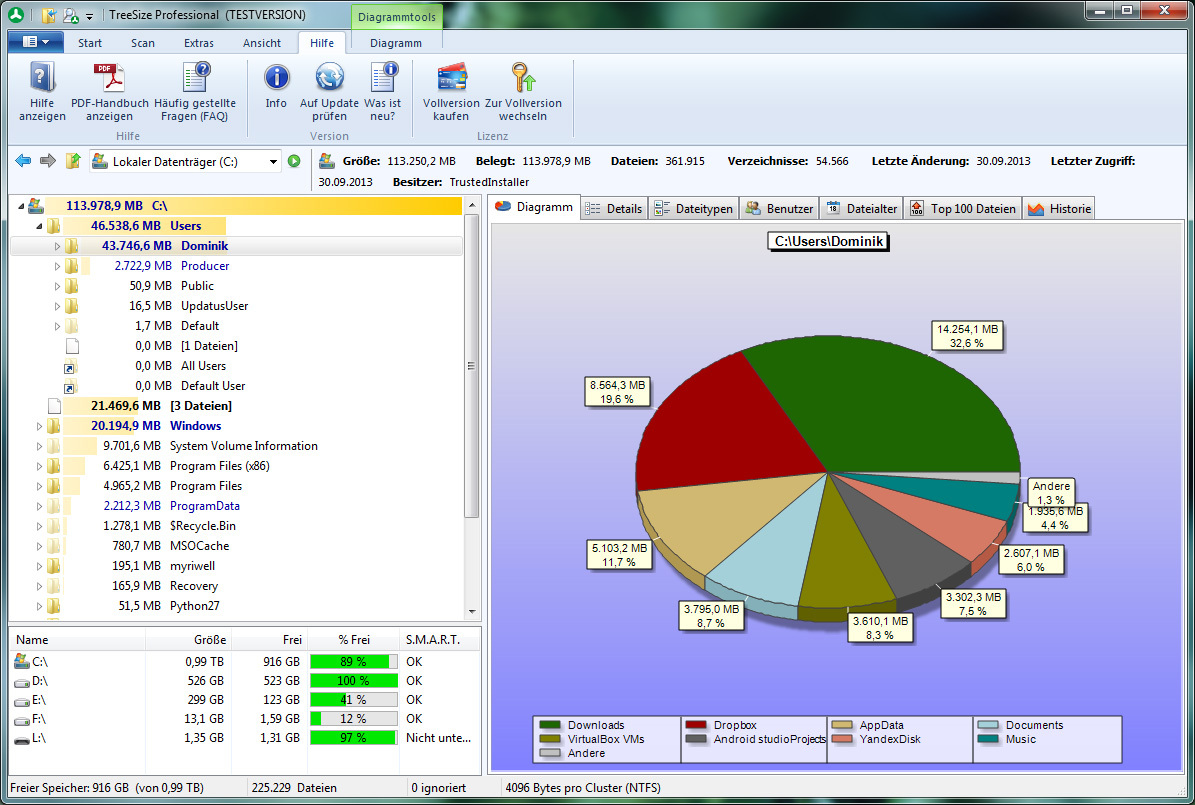
It is a freeware for windows user to analyze the disk space for your personal computer.
This app rapidly scans the hard drive and exhibits the directories and files which occupies the most space on the drive. This app enables the integration with the contextual menu of Windows explorer.
Tree Size presents the data in detail form as the name of files and folders, size, allocated size, number of directories, number of files and total disk space used as percentage.
Folder Size
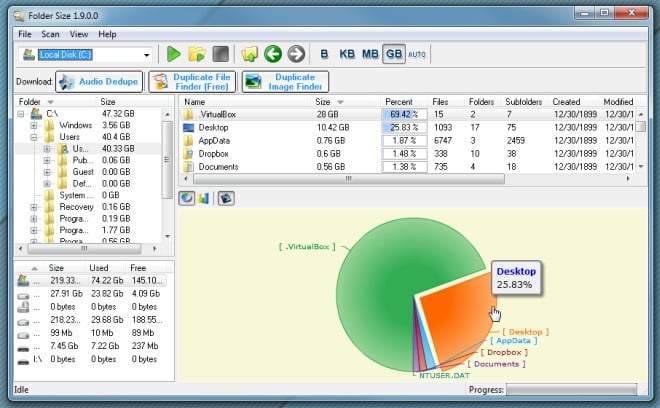
This software is developed Mind Gems Softwares. It is freely distributed for the users. It displays the scanned data as a chart display making visual but need a flash player to show the data.
It also has the ability to scan a folder and show size, percent of space used, number of files, number of sub-folders, date, attributes and owner. It shows the data in different units as bytes, KB, MB or GB.
GetFolderSize
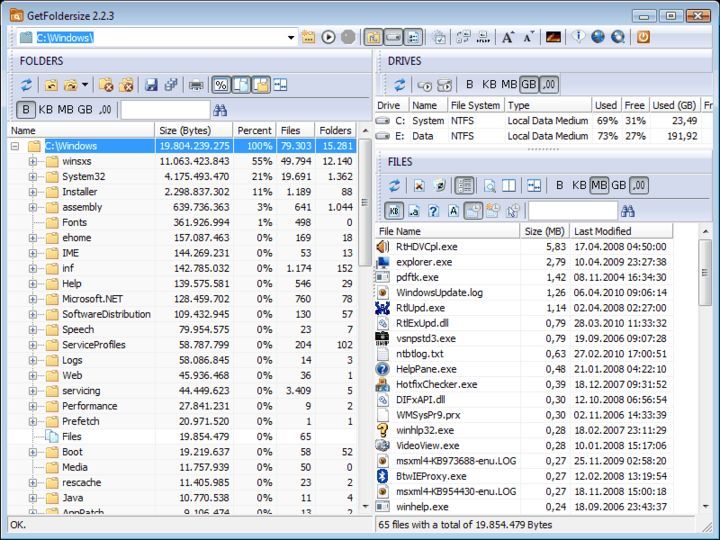
For analyzing the disk space on windows GetFolderSize is a freeware. It lets the user find all the files and folders occupying the maximum of the disk space creating the issue of low disk space.
It then saves the data report to a text file. It shows the file sizes in KBs, MBs and GBs.
Scanner
To find the unwanted files on your computer Scanner is a very useful tool to perform this task.
It scans the disk and analyzes the files according to their size and presents the information in the form of pie chart.
RidNacs
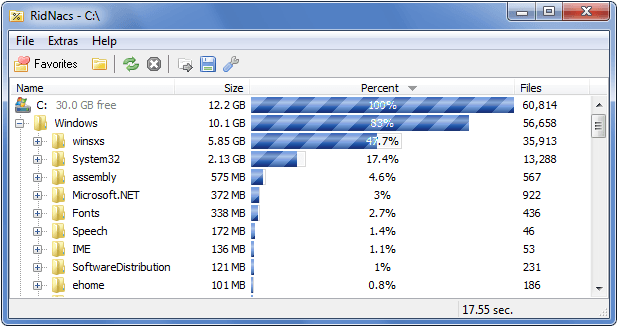
Scanning and analyzing is the main function of this software to determine the size on disk and impact on the computer. It is a freeware software and it serves as a disk space analyzer.
It displays the results of analyzing in the form of Bar Graph and percentages. It also improves the performance of your PC.
JDiskReport
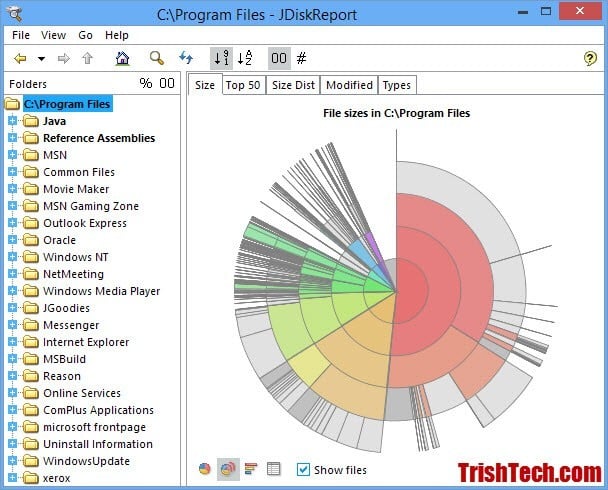
It is a free disk analyzer software for windows which evaluates the information about the disk space engaged by different files and folders. And it lets the user of the software to remove the unwanted files and folders.
The report is then displayed in the form of a table and charts to be understood easily. This software is Java based which makes it more user friendly.
Disktective
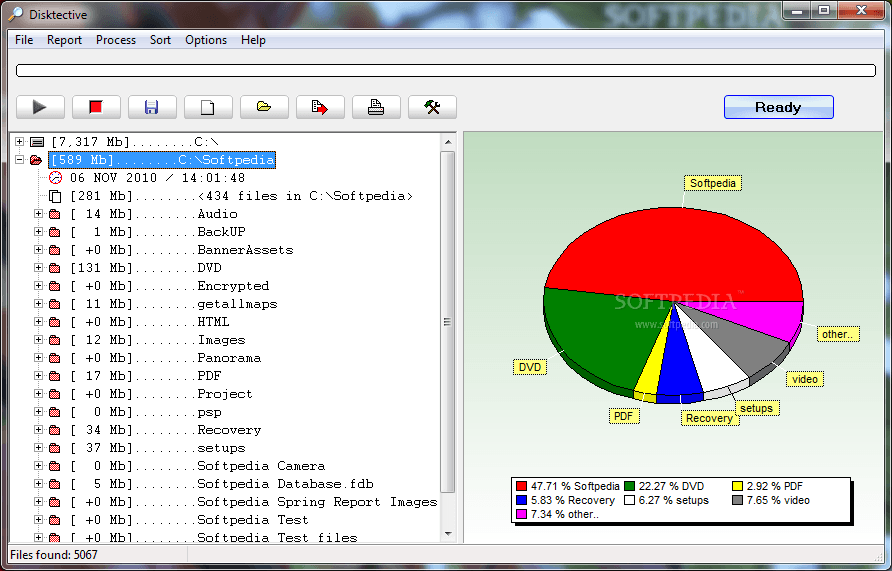
It is a portal utility software which offers the function of detecting the size of the hard disk used by the directories and space inside them.
This software is freeware and is compatible with all the versions of Windows and Linux.
DiskSavvy
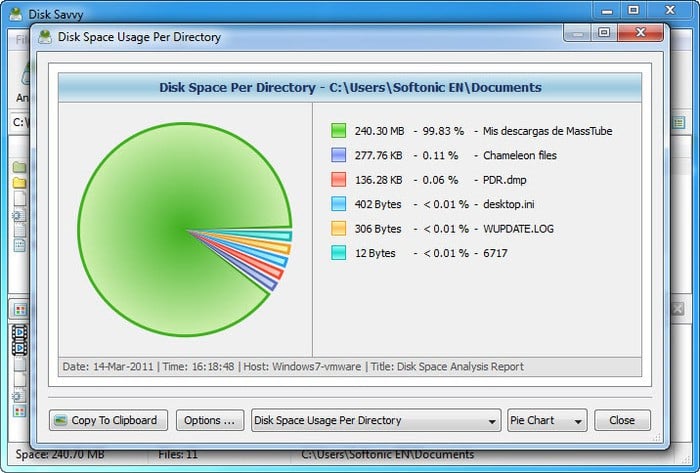
This is one the most popular free disk analyzer software which is designed to provide the information about the disk space used by different directories.
In this software user can customize the scans and or delete filters while scanning for the files.
It then represents the information in the form of a chart which can easily be understood by the user.


