Как вы запускаете Vim в Windows?
Я только что установил gVim и попытался использовать обычную технику «vim myfile.java», которая обычно работает для linux, чтобы открыть файл и отредактировать его. Но, к сожалению, это не похоже на работу. Я также попробовал «gvim myfile.java», но это тоже не работает.
Кто-нибудь знает, как открыть vim (и использовать его, как в Linux), используя Windows Powershell или какой-либо другой метод?
7 ответов 7
Я запускаю gVim, щелкая значок на рабочем столе или используя «edit with vim» из контекстного меню в проводнике Windows.
Если вы хотите вызвать vim из командной строки Windows, вам нужно либо добавить путь к vim.exe в% PATH%, либо ввести полный путь (например, «c:\program Files\gvim\vim9.9\vim.exe» foo.txt
получите исполняемый файл Gvim и установите его в нужной системе.
Сначала откройте Power shell и установите псевдоним для канонизированных команд (Windows 7 и выше):
Ответы касаются вопроса о том, что к пути необходимо добавить каталог vim содержащий исполняемый файл vim.exe .
Но для тех, кто нуждается в более четких указаниях, выполните следующие процедуры.
Я почти уверен, что в mysysgit для Windows есть vim, но эта оболочка предназначена для использования Git в Windows, хотя, насколько я знаю, она имеет vim. Быстрый поиск в Google нашел это все же. Это то, что вы ищете?
Спасибо за комментарий, Зак, вместо перезапуска после добавления vim к пути, вы можете использовать команду SET для загрузки пути к недавно установленному vim, например, set path=c:\program Files\gvim\vim9.9\vim.exe так что вы можете перезагрузить после нормальной сессии
Другой вариант — установить Cygwin (Linux-подобную среду для Windows) с пакетом vim.
Во время установки найдите «vim» в менеджере пакетов и установите последнюю версию.
Windows 10
добавьте этот путь в переменную окружения PATH C:\Program Files (x86)\Vim\vim80
- Системные свойства (или Win+Break )
- Расширенные системные настройки
- Вкладка «Дополнительно» -> Переменные среды
- нажмите на Path , затем [Изменить]
- нажмите [Создать] и добавьте новую переменную со значением: C:\Program Files (x86)\Vim\vim80
Теперь вы можете запустить vim из cmd или Win+R (запустить)
В основном я использую gVim, который устанавливается вместе с шоколадным пакетом Vim (хотя в настоящее время он значительно отстает от последнего выпуска). Это создало ярлыки меню Windows для gVim и «Редактировать с помощью Vim» в контекстном меню. Это имеет преимущество перед обычным Vim в том, что он работает с множеством ярлыков Windows и включает в себя строку меню с множеством общих команд Vim. Кроме того, если вы хотите использовать Vim в качестве штатного редактора, gVim также является вашим лучшим выбором, так как он отлично обрабатывает 24-битные цвета / цветную схему, а также полужирный / курсив.
Я регулярно запускаю Vim в командной строке DOS, устанавливая Git из Chocolatey, а затем добавляя C:\Program Files\Git\usr\bin в мой путь. Это дает вам vim и vimdiff в командной строке DOS, а также около 250 других команд unix, скомпилированных для Windows, таких как ls , grep , sed и awk . В качестве альтернативы, использование vim.exe , доступного на странице релизов Github , даст вам самую последнюю 64-битную версию.
Обратите внимание, что после Windows 10 в командной строке DOS были сделаны большие улучшения, поэтому использование Vim вместо gVim должно быть возможным:
- 24-битный цвет в консоли Windows 10 (Windows 10 выпуск 1703 и далее)
- В теории Vim 8 был исправлен, чтобы использовать 24-битные возможности консоли при использовании set termguicolor но я не могу понять, как это работает
- Использование ColorTool для установки цветов практически любой цветовой схемы iTerm, которую вы хотите получить, выбирается Vim. Обратите внимание, что я не смог указать конкретную цветовую схему Vim, она полностью зависела от цветов консоли — но вы получите довольно отличные цвета
- Установите шрифт TTF Powerline, например, Anonymous Pro означает, что вы можете включить его в консоли и получить там прекрасный четкий шрифт, а также получить правильные значки в Vim-aviation, хотя я не смог заставить работать любой из цветов темы авиакомпании.
Знаменитый текстовый редактор Vim в исполнении под Windows
Vim — это продвинутый и очень расширяемый текстовый редактор для Linux, Windows и Mac OS. Он был разработан по такому принципу, чтобы процесс создания и редактирования текста был как можно более эффективным. На первый взгляд Vim совсем не кажется удобным, но первое впечатление как всегда обманчиво. Многие считают его текстовым редактором программиста и даже IDE, что не удивительно, ведь наибольшую популярность этот редактор приобрел именно в среде программистов. Похвально также, что пожертвования этому проекту идут на благотворительные цели. Так что Vim молодец во всех смыслах и ему уже больше 20 лет! О nix-версияx (для операционных систем группы Unix и Linux) этого редактора я говорил в своей статье — консольный текстовый редактор Vi, сегодня я расскажу о Vim под Windows.
Первый вопрос, возникающий у пользователя при первом знакомстве с этим редактором: «Как его закрыть?». Я сразу дам ответ на этот вопрос, чтобы снять напряжение, закрыть редактор без сохранения изменений можно с помощью команды:
Но закрыть его «так сложно» только в консольном режиме, в средах, оснащенных графическим интерфейсом пользователя, достаточно закрыть окно с программой.
Версия редактора Vim для Windows
Под Windows существует даже 2 версии этого редактора, обе из которых можно свободно скачать в сети. Первая — подразумевает работу с редактором в консольном режиме. Я не советую вам использовать эту версию, потому что работа с консольным текстовым редактором в cmd.exe (стандартный эмулятор терминала в OS Windows), это далеко не так удобно, как работа в bash (аналогичный эмулятор в OS Linux). Приверженцы MS Windows вспомнят о PowerShell, но в любом случае, я не советую вам работать с консольными программами в системах не оснащенных удобным интерфейсом командной строки.

Второе исполнение Vim для Windows — это программа работающая в стандартном оконном режиме. Все возможности Vim при этом сохраняются, многие функции доступны из панели инструментов, но далеко не все. Все функциональные возможности этого редактора не сможет вместить ни одна панель инструментов программ, работающих в графическом оконном режиме. Чтобы не искать сайт разработчика (я и сам его не помню) можете скачать эту версию редактора по моей прямой ссылке. Сама программа называется GVim (Gnome Vim), точно так же, как версия для DE Gnome в операционных системах Linux.
При работе с этой программой у меня возникла необходимость открывать и редактировать файлы, которые находятся на удаленном FTP-сервере. На этом сервере нет SSH или SFTP доступа. Вот пара рецептов для этого.
Как использовать FTP через VIM?
Согласно руководству, поддержку Vim FTP можно организовать следующим образом. В режиме ввода команд (задействуется автоматически при открытии редактора) нужно набрать следующее:
После открытия можно модифицировать и сохранить указанный файл. Но если в вашем случае этот способ не работает, тогда нужно соблюсти пару правил:
- Не забудьте создать временный каталог C:\Temp, или C:\TMP, или каталог согласно пути, который прописан в настройках программы. Windows Vim нуждается в нем для хранения временных файлов.
- При открытии файла по FTP, убедитесь, что вы прописали двойной слеш в подобном случае:
Например, я попытался открыть файл
и это сработало.
Но когда я попытался открыть
программа выдала ошибку!
И в варианте написания
файл снова получилось открыть.
Немного непривычные требования, но меня этот способ устраивает.
Консольный VIM в Windows
Введение
Бывают ситуации, когда очень хочется использовать любимый редактор, но под рукой нету *nix операционных систем, либо разработка ведётся на Windows.
Первое что приходит на ум — использование Windows версии gVim, но в этом случае возникает куча проблем с установкой плагинов, переносом конфигов и адаптации всего и вся. Что-то не будет компилироваться без бубна (например Ctrl-p), а что-то падать во время работы.
Cygwin и Mintty спешат на помощь
Качаем с сайта и устанавливаем последнюю версию Cygwin.
При установке выбираем любое зеркало из списка доступных.
Выбираем следующие пакеты:
- git
- Vim
- ruby
- libsasl2
- ca-certificates
Пока пакеты качаются и ставятся, самое время добыть удобный терминал. Мой выбор пал на mintty. Установка осуществляется копированием mintty.exe в папку bin Cygwin-а.
Для того, чтобы всё выглядело прилично — его нужно поднастроить. Запускаем mintty, тыкаем правой кнопкой на иконку в левом верхнем углу консольки и выбираем «Options. ».
Выключаем опцию Blinking, чтобы не отвлекало, выбираем привычный Block в качестве курсора.

Выбираем шрифт по вкусу, ставим сглаживание в Full, Locale — C, Character Set — UTF-8.

Очень важно поставить тип терминала в xterm-256color.

Одно несомненное преимущество данного подхода это то, что теперь можно использовать ту же самую конфигурацию Vim, что и в *nix системе. А так же мы получаем в своё распоряжение полноценную консоль и можем работать с Windows файлами с помощью утилит grep, find, ack.
Рекомендую создать приватный репозиторий со всеми конфигами совершенно бесплатно на каком-нибудь Bitbucket. Такие подборки обычно называют dotfiles.
Одним приятным открытием в плане конфигурации Vim-а для меня стал Vimified, который базируется на Vundle.
Его лучше ставить по шагам, а то мало-ли что-то пропустили во время установки Cygwin. Шаги установки подробно расписаны в описании к репозиторию.
Первый запуск Vim может пройти с ошибками из-за того, что предусмотренные конфигурацией пакеты ещё не установлены, но это не страшно.
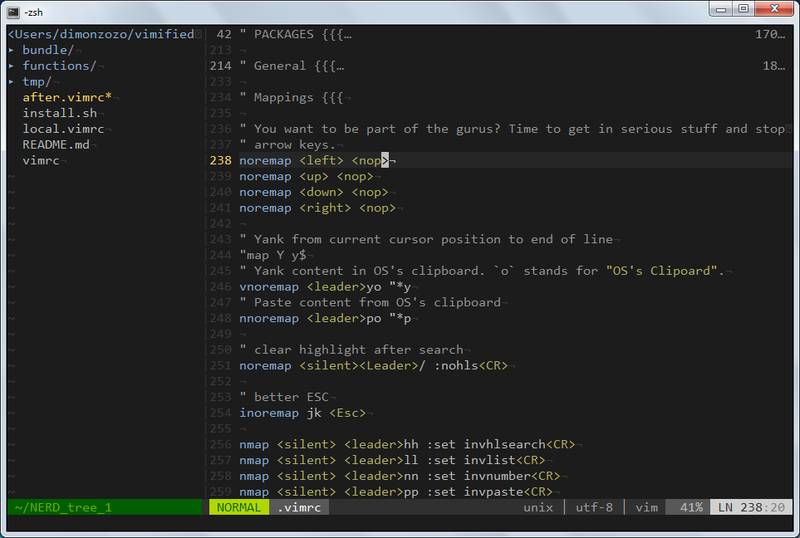
Перезапускаем Vim. И вот что у нас должно получится после небольших корректировок и правок.
Заключение
В итоге мы получили:
- Полноценный рабочий Vim
- Приятная цветовая схема и палитра, которая радует глаз
- Работает прокрутка колесом мыши (для любителей)
- Работает изменение размера панелей простым кликом и перетаскиванием
Спасибо за внимание. Надеюсь кому-нибудь пригодится.
Извещения об ошибках — хабрапочтой.
Только зарегистрированные пользователи могут участвовать в опросе. Войдите, пожалуйста.
danwagnerco / vim_vundle_and_conemu.md
Vim, Vundle and ConEmu on Windows
Let’s start by getting it out on the table: Sublime Text is great, and version 3 should no longer be considered «abandonware» as of build 3065. Sublime Text served me very, very well over the years. That said, trying out new things is a major part of leveling-up, and in that vein Vim deserves a go. (And have you seen some of those thoughtbot guys flying around in Vim? It’s awesome!)
Getting Vim up-and-running on your Windows machine doesn’t have to be an all-day project. In this post, we’ll walk through:
- Installing gVim, which gives us both the «classic» command line version as well as the graphical version
- Installing Vundle, the best way to handle Vim-enhancing packages
- Installing ConEmu, a supercharged command line emulator for Windows
Let’s get after it!
Quick note before we get started: whenever you see text that looks like this:
That means we’re executing «something» from the command line. ConEmu is my recommended tool for doing command line work on Windows, but since getting ConEmu up-and-running is part of this walkthrough I’ll be using regular-ol’ cmd.exe .
End of the notes section. NOW let’s get after it!
1. Download the gVim installer
As of this writing, the latest-n-greatest is version 7.4, so that’s what we’ll get from the Vim download page:
Download the MS-Windows version and you’ll wind up with a nice executable.
2. Run the gVim installer as an administrator and get through the basics
If you’re an admin on your machine, go ahead and double-click on your recently-acquired gVim74.exe file and you’ll see a very familiar set of wizard-style screens. If you are NOT an admin, right-click the gVim74.exe file and select «Run as Administrator» — this will ensure all the necessary files are installed. (This means that if you aren’t an admin, stop! Go get yourself admin status right now!)
[vim-install-01.png] You bet! Click «Yes» y’all
[vim-install-02.png] Of course «I Agree» ya dingus
The first time we’re actually going to adjust the defaults is on the «Select the type of install:» screen. We want the full installation, so select «Full» before clicking «Next».
[vim-install-03.png] Pick the «Full» option here
The next step is another step away from the default. You’re going to want to install to your User directory (often referred to as your home directory) rather than the typical «Program Files» destination. On my laptop, that means:
Once you’ve selected your User directory, click «Install» and BOOM!
[vim-install-04.png] Pick that home directory and then let it rip!
Now, for the moment of truth. Open up a command window (you can type «cmd» into the Search Everywhere box if you’re using the Metro interface), navigate to a directory with a text-ish file and try gvim the_text_file.txt :
> cd C:\Some\Directory > gvim the_text_file.txt
Are you looking at the file in gVim? If so, congrats — let’s keep the streak going by starting on the Vundle install. But what if you’re greeted with this pain-in-the-ass message?
‘gvim’ is not recognized as an internal or external command, operable program or batch file.
WTF, right? You walked through the FULL install, the window said «Happy Vimming», this is bullshit. Why isn’t ‘gvim’ recognized? Read on for the culprit.
Remember way back at the start of this guide? Way up in step #2, where you needed to run the installer as an administrator? Are you absolutely, 1,000% sure you did that? Because the gVim installer code attempts to put some very, VERY important batch files into your C:\Windows directory, and adding files to that folder is an admin-only joint.
These batch files, cleverly-named «vim.bat», «gvim.bat» and even «vimtutor.bat» (recognize the pattern?) are the secret sauce here. They are essentially shortcuts that enable the Windows command line to behave like a Unix or Linux terminal, and that’s the name of the game with Vim. Long story short: if you want to be flying around the command line with Vim, you’re going to need those batch files. Get in touch with your admin, get access and re-run the installer with administrative priviledges.
3. Clean up your Vim subfolders
Before we get to the magic of Vundle, let’s do a little housekeeping on our Vim directory to make sure the install and setup is smooth like butter.
After following the Vim installation instructions above in steps #1 and #2, open up Windows Explorer and navigate your Vim directory. In my case, that means going here:
Inside that directory, you should see 3 things:
- A folder named «vim74»
- A folder named «vimfiles»
- A file named _vimrc
[vundle-install-01.png] Vim directory pre-cleanup
Navigate into the «vimfiles» folder and delete everything except the folder itself. (Yes, seriously — if you’re feeling skittish, go ahead and check out some of those default folders, like «colors» for example. you’ll find that they’re all empty.)
Next, jump into the «vim74» folder. Inside «vim74», cut the folder named «autoload» and paste it into the «vimfiles» directory. At this point, «vimfiles» should have exactly one folder inside, the «autoload» directory you just cut from neighboring folder «vim74».
[vundle-install-02.png] «vimfiles» looking so fresh and so clean (clean)
Finally, you’re going to create one last directory inside the «vimfiles» folder — call this one «bundle», and you’re done.
[vundle-install-03.png] «bundle» folder created
4. Install Git via mysisgit
Strictly-speaking, Git is a version control system, but Vundle uses Git to pull in the plugins from your _vimrc . Let’s get it installed! Grab the super-easy installer from mysisgit first:
Once the installer downloads, double-click it and walk through the wizard (like so many before it). In this case, the version I am installing is 1.9.4-preview20140929 , but regardless of the version the process should be super similar.
Right off the top, let’s get this sucker into our User directory to keep it nice and portable, exactly how we did above with the Vim install. So, on the installer screen where you are asked to choose a destination, go ahead and put everything into a Git folder in your User directory:
In my case, this path will look like this:
[vundle-install-04.png] Install Git to the top-level of your User directory
After that tweak, the defaults are all golden until until you land on the «Adjusting Your PATH environment» window:
[vundle-install-06.png] Install Git to run from the command prompt
Selecting the middle option, for «Use Git from the Windows Command Prompt«, is critical here. Down the line we’re going to want to clone from trusty old cmd.exe — so make sure you pick that option.
After that, the remaining defaults are all A-OK, so go ahead and «Next» through them too, and before you know it you’ll have git installed. Whammy!
[image of champ kind saying Whammy] Bet you didn’t think I would throw it all the way back to 2004, did you?
You can verify the install by opening up cmd.exe and typing git —version from any directory:
> git —version git version 1.9.4.msysgit.2
You should be greeted by a courteous one-liner listing, you guessed it, the version.
[vundle-install-07.png] «git —version» at work
5. Configure cURL to work from the command line
We’re getting so close — I promise!
Vundle requires a program called cURL work properly, but don’t trip — it came along for the ride when you installed Git in the last step. Unfortunately, cURL is very *nix-y and does not play nice with the Windows command line out-of-the-box, so we’re going to need to make a one-time adjustment.
Go to this gist (written by Vundle’s author gmarik) and copy the text onto your clipboard:
Here’s the gist direct in case you don’t want to go all the way to github for it:
Next, open up a text editor (Notepad will do just fine) and paste in what you just copied.
[vundle-install-08.png] The modification info from gmarik of Vundle fame
Save this file as «curl.cmd» inside the ..\Git\cmd directory that was installed as part of step #4 above. So, if you’re following my recommendations, the full save path will look like this:
Here’s what that looks like on my laptop:
[vundle-install-09.png] Making sure Curl will work from the Windows command line
Let’s confirm that Curl is working by checking its version the same way we did for Git above:
> curl —version curl 7.30.0 (i386-pc-win32)
[vundle-install-10.png] Curl working like a champ
6. Install Vundle
We’re finally to the actual Vundle install!
Open up a new command line and navigate to the «bundle» folder created in step #5 above. On my laptop, that command looks like this:
[vundle-install-11.png] Navigate to your freshly-created «bundle» folder
Then, run this command to clone the Vundle files into the «bundle» folder:
> git clone https://github.com/gmarik/Vundle.vim.git
You’ll see some updates from Git regarding the status of the clone, and then you’ll land on a new line. You can verify that the clone was successful by running Dir like so:
[vundle-install-12.png] Whaddup, now you’ve got a folder named «Vundle.vim» inside the «bundle» folder
All that’s left to do now is update that juicy _vimrc file. and admittedly, this one was a bit of a challenge.
After working through the recommended guide (including the Windows-specific steps), I kept getting this error:
E492: Not an editor command: PluginInstall
Argh! But after hours spent slogging through a wasteland of «my .vimrc is broken, halp!» questions around the web, a solution was finally found. Save yourself the headache and the hours and check out my fully-functional _vimrc file, start-to-finish, which will work like gangbusters:
Naturally, if any of those plugins are not to your liking, comment them out. When you’d like to pull down those vim add-ins, simply write vim +PluginInstall +qall at the command prompt from any directory (or :PluginInstall from inside Vim in normal mode). Check it:
> vim +PluginInstall +qall
[vundle-install-13.png] Let it rip!
Boom! Look at that glorious install go!
[vundle-install-14.png] Sweet berry wine!
If you were to stroll on over to your bundle directory, you’d see that those folders are now in place. damn it feels good to be a gangster. Quit Vim by hitting Esc to get into normal mode, then typing :q and hitting Enter .
7. Download the ConEmu installer
ConEmu is the command prompt you NEED to be using on Windows. Besides supporting tabs and being super-customizable, it’s actively developed and supported by Maximus directly on Super User. The dude WILL answer your question, real talk. Did I mention it’s also free ninety-nine?
Download the ConEmu Preview Installer (32-bit and 64-bit) and you’ll soon have another executable.
8. Run the installer as an administrator
No admin worries here — the ConEmu installer has added it as a checkbox to the initial screen! Naturally, you want to run this one as an admin. Pick the x64 version if you’re running a 64-bit version of Windows: otherwise pick x86.
[conemu-install-01-1.png] Pick the right install for your version of Windows
After putting in your admin password you’ll find yourself at another wizard, and fortunately this time defaults are ALMOST perfect. The only recommended change is to install to your User directory, which for me is C:\Users\danie_000 . This can be a little tricky considering what you see immediately after launching the installer! (Take a look at the last screenshot if you forgot. it TELLS you that the destination is inside Program Files !)
Don’t worry though, you can still make your user directory the resting place for ConEmu by clicking the «Browse» button on the «Custom Setup» page.
[conemu-install-01-2.png] Let’s get this little guy installed into our User directory instead
Inside the window that opens after clicking «Browse», you’ll be able to navigate to your User directory (again, it’ll look something like C:\Users\ ) and create a new folder called «ConEmu» there as the destination. Easy as pie.
[conemu-install-01-3.png] Get a nice folder all set up for the install
And boom, you’re done! Let’s get into the fun stuff.
9. Open up that freshly-installed ConEmu app
[conemu-install-02.png] So fresh and so clean (clean)
JACKPOT. Let’s go ahead and set up some super-handy shortcuts to make ConEmu the terminal we want AND need.
10. Set ConEmu to default into a different folder (that you pick)
First up, on initial open ConEmu will drop you into your Users folder. Not a bad place to start, but we can do better. Suppose that you keep your Git repos in a folder you created as C:\github like your boy does — it would make the most sense to have ConEmu default to that directory, since you’re undoubtedly using the terminal as part of your development process.
Go ahead and click the icon with three small blue lines, then select the «Settings. » option.
[conemu-install-03.png] Getting to ConEmu’s «Settings. » pane
The Settings window will pop up momentarily. Now, click the «Tasks» option underneath «Startup» and you should see a window called «Predefined tasks (command groups)» with 7 options already built in, like this:
[conemu-install-04.png] Check out the already-created default tasks that come standard with ConEmu
Click the «+» button to add a new predefined task. «Group8» doesn’t tell you much about what’s actually going on here, so let’s call it «github» instead:
[conemu-install-05.png] Rename this task to «github»
Now for the secret sauce. Inside the «Task parameters» field, add:
Then, inside the «Commands» field, add:
Once you’ve made your modifications, your settings should look like this:
[conemu-install-06.png] Make sure you’ve got the /dir «C:\github» and cmd.exe options configured
Finally, this predefined task is something you’re probably going to use on the regular, so go ahead and click the «Up» button until it gets into the first position.
[conemu-install-07.png] «I, am, number one.» -Nelly
Click «Save settings» and BOOM, you’ve got your first Predefined task set up.
«But Dan», you’re probably asking, «we were supposed to set up the start directory! Why do we care about adding this task?» That’s a great question my friend. Now that we have our favorite folder stored as a task, getting ConEmu to load it up by default is easy cheesy!
Get to the Settings window again (by clicking the three blue bars icon again or using keyboard shortcut Win + Alt + p ) and this time select «Startup» from the hierarchy on the left:
[conemu-install-08.png] Get to the «Startup» section
Now, instead of leaving the «Command line» option checked, click the «Specified named task» radio button and select your recently-added task («github») from the dropdown:
[conemu-install-09.png] Choose «github» as the Startup option instead of the original setting
Click «Save settings» again and you’re golden! You can verify that ConEmu now defaults into the folder you chose by restarting the app. you’ll be in the right directory for sure.
[conemu-install-10.png] $traight ca$h.
Not only do we start in the right directory, but now we’ve got a super-easy shortcut for opening a new ConEmu tab into the C:\github directory. Go ahead and try it! Hit Win + n to open the predefined tasks window, then hit 1 to open a new ConEmu tab inside C:\github .
[conemu-install-11.png] DAMN that’s a handy shortcut!
11. Set a Predefined Task for your _vimrc
Chances are, especially in the beginning, you’re going to be tweaking your _vimrc A LOT. new Vundle packages, new settings, adjusting the colorscheme, whatever. A ConEmu predefined task that cues up your _vimrc file in gVim will save you lots of energy, so let’s take what we learned in step 10 above and build out this tasty treat.
Create a new predefined task, and this time name it «vimrc». The «Task parameters» field should look like this, as we want to start in the Vim directory: /dir «C:\Users\danie_000\Vim» . Finally, we want to pass the console an argument, which can be done from the «Commands» field. It should look like this: cmd.exe /k gvim _vimrc . In the screenshot below, the «vimrc» task has been moved to position #2:
[conemu-install-12.png] Gimme that sweet _vimrc editing
And that’s it! Now, whenever you want to adjust your _vimrc , you can simply type Win + n then hit 2 from ConEmu. How simple is that!?
[conemu-install-13.png] Fugg yeah!
And with that, you have installed Vim, Vundle and ConEmu like a champ — congratulations! Check yourself out in a mirror right now, because you are looking strong as an ox.


