- Ubuntu Documentation
- Local Installation
- Installation for Remote Server
- Launching
- Creating a Virtual Machine
- Working with a Running Virtual Machine
- Console
- Details
- Deleting a Virtual Machine
- Jiab77 / virt-manager.md
- Virt-Manager: графическая консоль управления KVM
- Установка Virt-Manager в Linux
- Управление KVM через virt-manager из Windows
- Использование Virt-Manager для управления виртуальными машинами KVM
- Типовые проблемы с Virt-Manager
Ubuntu Documentation
You can create, delete, run, stop, and manage your virtual machines graphically. The tool virt-manager allows you to use a graphical interface to interact with KVM.
Local Installation
Install virt-manager on your desktop:
- From a Command Line
- Or from the Ubuntu Software Center:
Applications ->Ubuntu Software Center -> Search for «virt-manager»
Installation for Remote Server
When you install virt-manager, the packages assumes you have a KVM installation to manage on your desktop. While this is not a totally unreasonable assumption, it is often not correct. And if you do not want to manage a local installation, having it install the suggested packages like «libvirt-bin» can add a lot of weight. But going minimal will leave things out.
- From a Command Line
This will give you virt-manager, and the tool to ask for an ssh password to connect to other servers, and that is all.
Launching
To launch KVM/VirtManager:
Applications ->System Tools ->Virtual Machine Manager
To manage virtual machines on the local system:
- Double-click on «localhost (System)»
Or to connect to any other virtual machine host (running libvirt-bin and openssh-server):
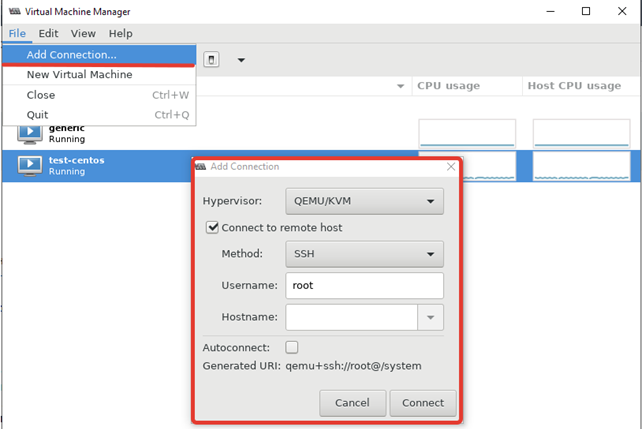
File ->Add Connection
Hypervisor: QEMU/KVM
Connection: Remote tunnel over SSH
Hostname: hostname or IP address of the remote host. For a user other than root use the format username@hostname and make sure the user is part of the libvirtd on the remote server.

Creating a Virtual Machine
- First, download an ISO cd image of some OS you want to run. For Ubuntu, you can find these at:
Double click on the name of the host. The Status column should read Active
Right click on the name of the host, and select New
This will start a wizard to guide you through the rest of your VM creation
- Enter your virtual machine details
Name: foo
Choose Local install media (ISO image or CDROM), or you can use another method if you know what you’re doing
Forward
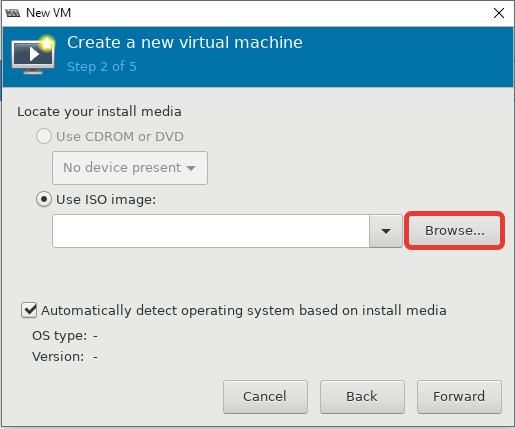
Locate your install media
Use ISO image
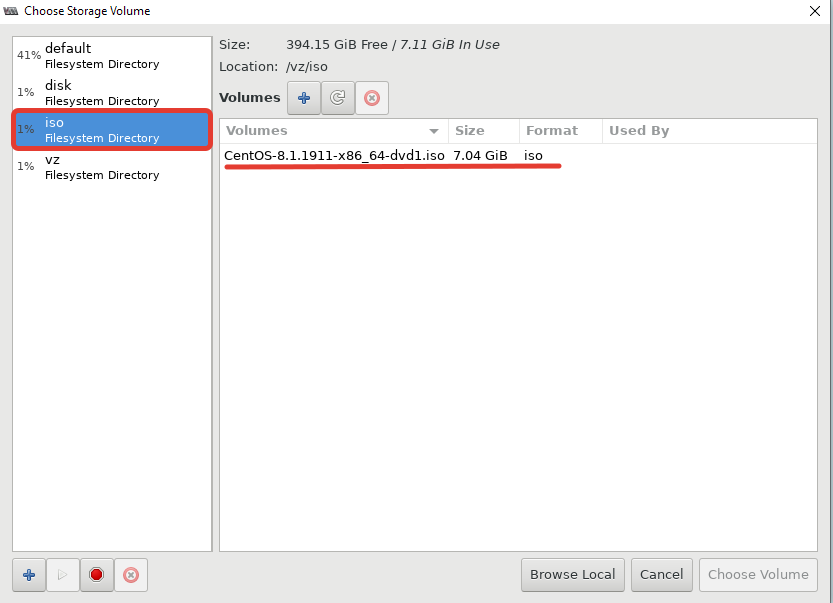
Browse to find the ISO you downloaded earlier
Optional: Select the matching OS Type
Optional: Select the matching Version
Forward
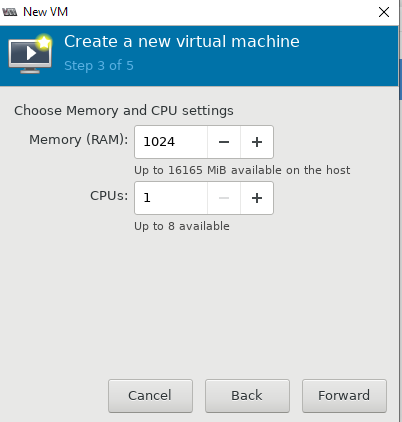
Choose Memory and CPU settings
Memory (RAM): 512MB (your choice)
CPUs: 1 (your choice)
Forward
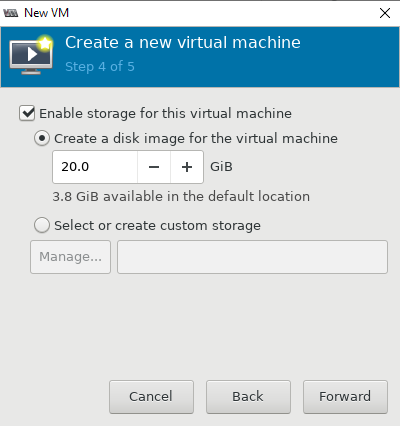
Select Enable storage for this virtual machine
Select Create a disk image on the computer’s hard drive
8 GB is the default
To speed up VM creation, you can unselect Allocate entire disk now
Forward
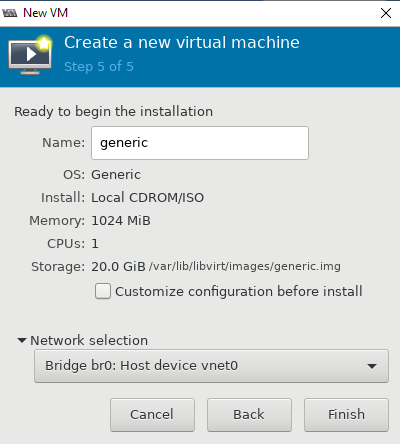
Ready to begin installation
- Confirm the details
Finish
Working with a Running Virtual Machine
If you double-click on any machine in Virtual Machine Manager, a new window will open, with functions unique to that virtual machine.
From this window, you apply several actions to this VM:
- Run
- Pause
- Shutdown (cleanly shuts down the VM OS)
- Reboot (cleanly reboots the VM OS)
- Force off (equivalent to yanking the power, could yield data loss in the VM)
- Fullscreen
Console
The Console tab in the main window provides access to the VM’s desktop and tty consoles.
- The desktop is accessed over a VNC connection to the guest. When you are «inside» the guest, the keyboard and mouse are «locked» to the guest. To release the keyboard and mouse, press the buttons Ctrl-Alt at the same time.
- The tty console can been accessed by:
Send Key ->Ctrl-Alt-F1
Details
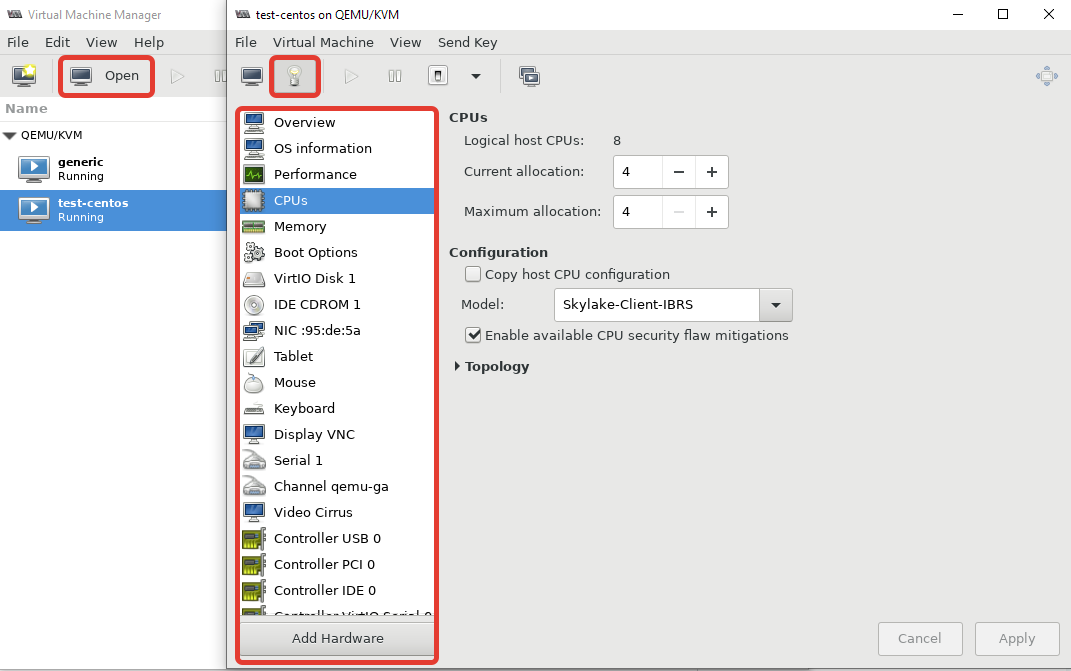
The Details tab provides a view of the resources assigned to this virtual machine. Here, you can see:
- the number of processors allocated
- the amount of memory assigned
- the default boot device (CDROM or Hard Disk)
- a listing of the storage devices attached to the VM and their type (CDROM, IDE, SCSI, Virtio)
- the network adapter and its model
- the emulated mouse, display, serial, and sound hardware
Deleting a Virtual Machine
To delete a virtual machine:
- Shutdown or force off the VM.
- In Virtual Machine Manager, highlight the VM you want to delete
Click Delete at the bottom of the panel
KVM/VirtManager (последним исправлял пользователь leesharp 2016-04-10 01:23:12)
The material on this wiki is available under a free license, see Copyright / License for details
You can contribute to this wiki, see Wiki Guide for details
Источник
Jiab77 / virt-manager.md
Virt-Manager Installation (for ubuntu based distrib)
This gist will give you all installation steps needed to install properly virt-manager with all dependencies.
Here is the list of all dependencies required to install properly virt-manager on your ubuntu based distrib.
- libvirt-bin
- qemu
- python-spice-client-gtk
- spice-client-gtk
- spice-vdagent
- gir1.2-spice-client-gtk-3.0
This will deffer depending on your version, 16.04 and 18.04 does not share the same dependencies.
Simply run apt as usual 😉
Then reboot to be sure that everything is loaded correctly.
If you want to install Windows 7, you may use cirrus as a video display during the installation then switch to qxm once the operating system is ready.
To use the qxm display, you’ll need to install the spice-guest-tools on the windows guest.
This will also add support for some features like copy and paste, automatic resolution switching, etc.
To have all desktop integration features on Linux guests, you’ll have to install spice-vdagent also on guest (previously installed on host). Just do it so:
Sometimes the connection to qemu is failing without reasons. but it’s possible to fix this issue.
- Verify that your user is still in the libvirtd group:
- Restart the libvirtd service:
Then try to connect again, it should work.
Will add more details later, actually this gist is a draft.
Источник
Virt-Manager: графическая консоль управления KVM
Virt-Manager – графическая консоль для управления виртуальными машинами KVM от компании Red Hat. С помощью Virt-Manager можно, создавать, редактировать, запускать и останавливать виртуальные машины на гипервизоре KVM. Можно выполнять настройку параметров виртуальных машин, что значительно упрощает работу по сравнению с управлением KVM из интерфейса командной строки.
В статье мы рассмотрим установку Virt-Manager на сервер с KVM, типовые задачи управления виртуальными машинами в графической консоли и покажем, как использовать virt-manager из Windows-клиента.
Установка Virt-Manager в Linux
Прежде всего нужно установить необходимые пакеты из базового репозитория на сервере с KVM (в нашем примере сервер KVM установлен на Linux CentOS). Выполните следующую команду yum (или dnf):
# yum install -y virt-manager xorg-x11-xauth liberation-sans-fonts
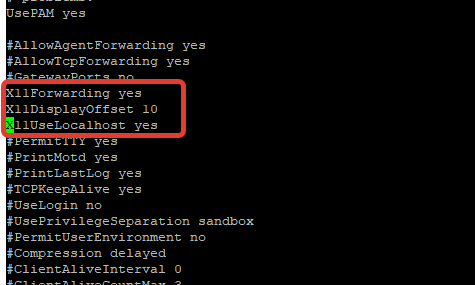
Чтобы удаленно подключаться к virt-manager с Windows-компьютера, нужно дополнительно настроить SSH. Откройте файл sshd_config:
Включите следующие параметры:
Перезапустите сервис sshd:
# service sshd restart
Управление KVM через virt-manager из Windows
Для удалённого подключения к virt-manager с Windows компьютера, вам понадобится следующее ПО:
- Putty – ssh клиент
- Xming – порт сервера для ОС Windows.
Скачать putty можно с официального сайта https://www.putty.org/, а Xming по ссылке https://sourceforge.net/projects/xming/
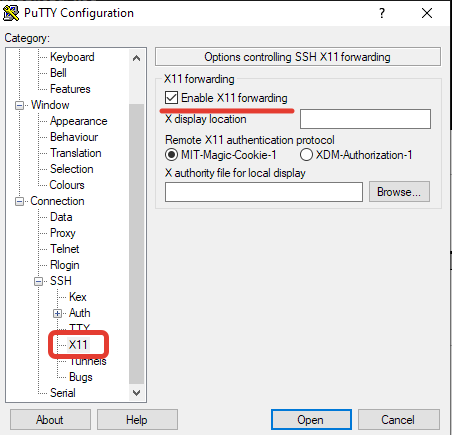
Откройте Putty, перейдите в Connection—>SSH—X11. Включите опцию “Enable X11 Forwarding“.
Теперь на вкладке Session, укажите адрес KVM сервера, имя сессии, укажите порт и сохраните подключение.
Чтобы из Windows удаленно подключаться к KVM серверу через virt-manager, используется следующий порядок:
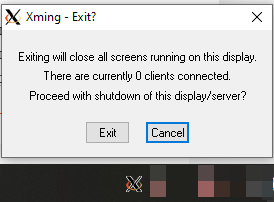
- Сначала запускаете Xming;
- Запускаете сохраненную сессию Putty с опцией X11 Forwarding;
- Подключаетесь к virt-manager.
После включения Xming у вас в трее должен светиться значок X:
Далее запустите Putty, и после авторизации на сервере, выполните:
Через несколько секунд у вас должно открыться окно управления virt-manager и окно дополнительной авторизации, где нужно ввести данные для подключения к серверу:
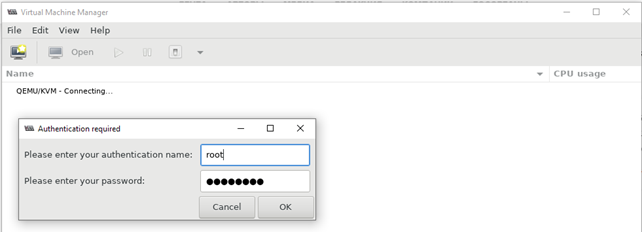
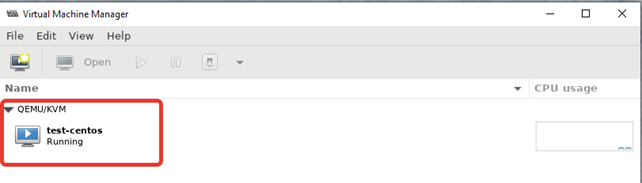
После авторизации вы должны увидеть список виртуальных машин.
Использование Virt-Manager для управления виртуальными машинами KVM
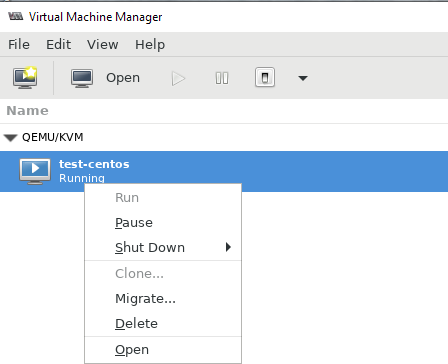
Щелкнув ПКМ по виртуальной машине, вы можете выключить, перезагрузить, включить ВМ.
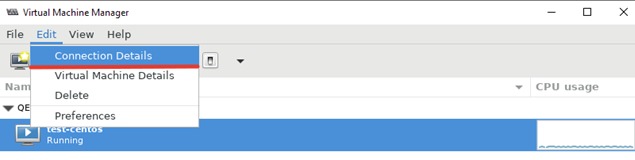
Далее я хочу изменить директорию для хранения файлов виртуальных машин, так как основное место на диске при установке операционной системы на сервере с KVM, я отдал под директорию VZ. Чтобы поменять стандартную директорию, перейдите в меню “Edit -> Connection Details”.
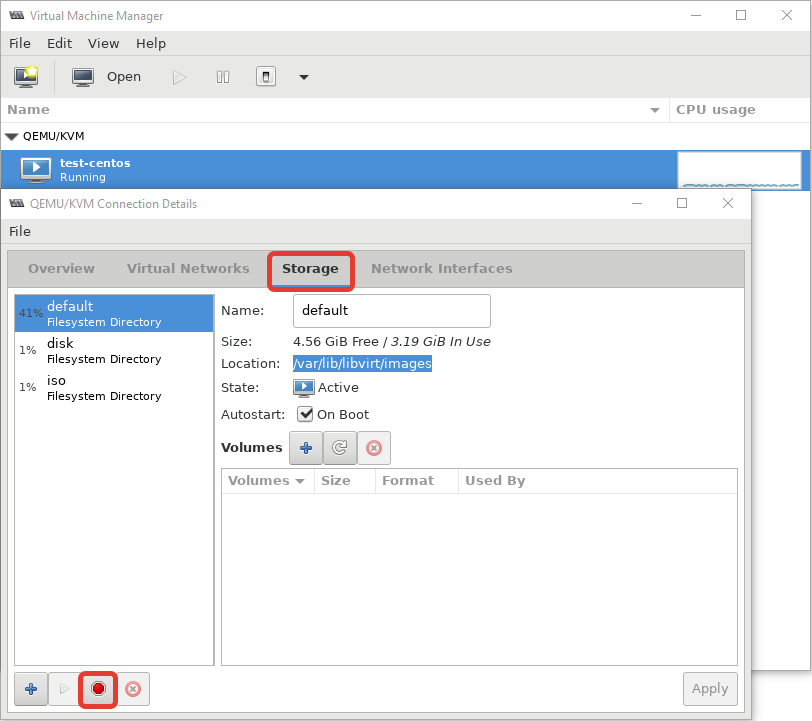
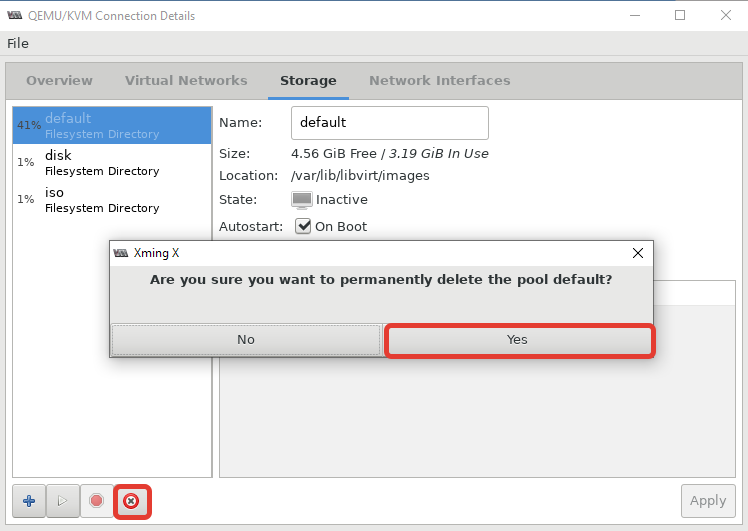
 В открывшемся окне, нужно перейти во вкладку “Storage”. Для создания нового пула, нужно остановить работу текущего и после чего удалить его:
После установки пула, кнопка удаления станет активна:
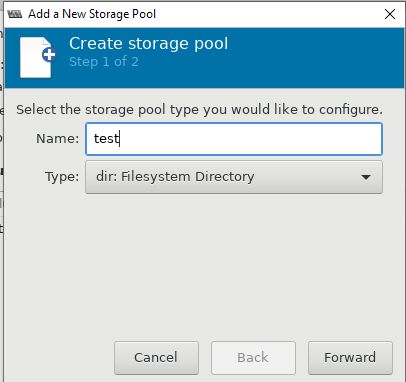
Теперь можно создать пул в нужной вам директории или разделе:
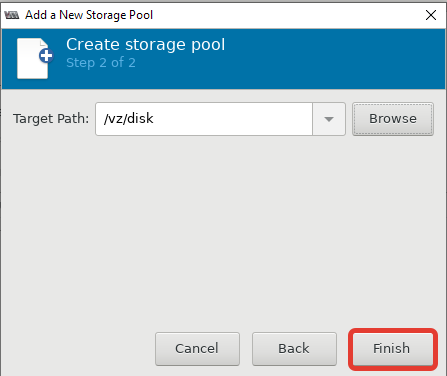
После этого, у меня стал активным мой основной раздел для файлов ВМ:

Либо просто удалить первоначальную директорию и создал симлинк на нужный раздел:
# rm -rf /var/lib/libvirt/images/
# ln -s /vz/disk/ /var/lib/libvirt/images
Теперь можно попробовать создать новую виртуальную машину KVM. Ниже я прикреплю ряд скриншотов, на которых по шагам будет все более-менее понятно. В конце опишу весь процесс создания машины.
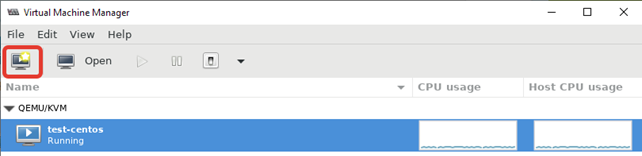
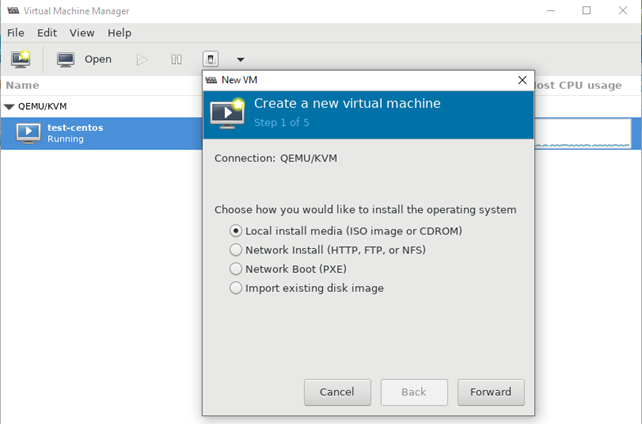
- При нажатии кнопки на первом скриншоте, запускается процесс создания новой виртуальной машины KVM;
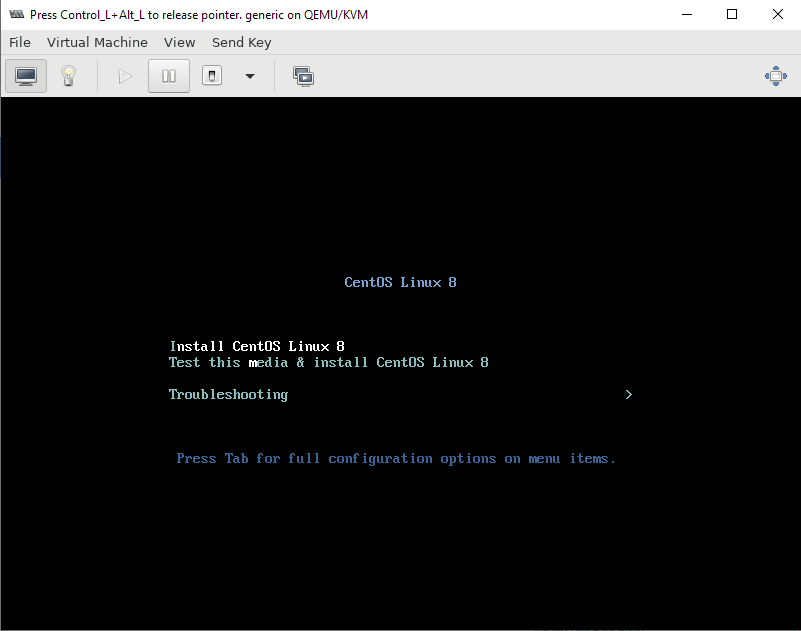
- Затем указываем, откуда запускать установку ОС на виртуальной машине. Я использовал локальный ISO образ с дистрибутивом CentOS 8;
- Далее настраиваются ресурсы виртуальной машины: количество памяти и vCPU, размер виртуального диска (при необходимости его можно будет расширить или уменьшить), имя, и указываем сеть;
- После создания ВМ к ней сразу будет примонтирован установочный образ ОС, который указали при создании.
Чтобы изменить ресурсы или какие-то параметры уже созданной машины, вам нужно выделить ее и нажать кнопку “Open”. В открывшемся меню нажмите на лампочку и у вас откроется список параметров виртуальной машины KVM.
Чтобы добавить новый сервер KVM, выполните следующее “File -> Add Connection” и заполните данные в открывшемся окне:
Типовые проблемы с Virt-Manager
Во время изучения интерфейса virt-manager, я столкнулся с несколькими ошибками и решил описать их в статье. Первая ошибка, с которой я столкнулся, вышла на стадии создания новой виртуальной машины:
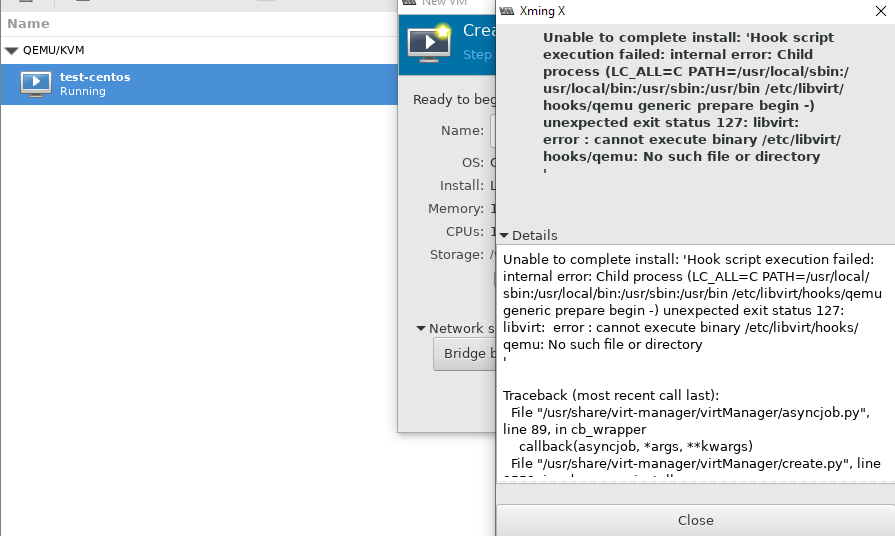
Система ругается на отсутствие файла, который скорее всего должен быть создан при установке KVM на сервер, но в моем случае он отсутствовал. Решился вопрос, созданием файла:
После этого нужно перезапустить сервис libvirtd:
# service libvirtd restart
Следующая ошибка ожидала меня сразу же на следующем шаге установки:
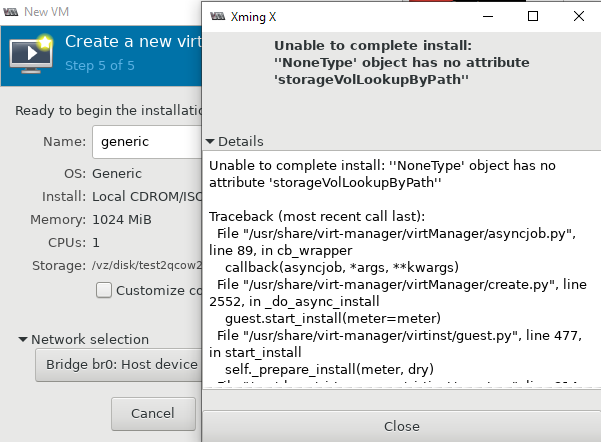
Чтобы решить эту проблему и возможно последующие другие, нужно установить пакет qemu-kvm-tools:
# yum install qemu-kvm-tools -y
После выполненных действий, виртуальная машина создалась без ошибок, и я смог выполнить установку гостевой операционной системы на ней.
Управлять KVM через virt-manager очень удобно. Вы значительно сократите время на выполнение рядовых операций с виртуальными машинами, а также сможете подключиться к ним из Windows.
Источник


