Создание виртуальной машины на базе VMWare Workstation и CentOS
В этом материале мы рассмотрим, как установить и настроить VMWare Workstation, а также создать виртуальную машину на базе CentOS.
Оглавление
Это позволит развернуть тестовую среду для отладки и разработки в отдельной виртуальной машине, которая будет работать на вашем же компьютере.
Подготовка
В качестве виртуальной машины мы рекомендуем использовать VMWare Workstation.
Для домашнего и некоммерческого использования есть бесплатная версия программы VMWare Player. Нам она подойдет как нельзя лучше. Скачать можно по этой ссылке.
Установка очень простая — следуем за установщиком и жмём Next.
Также нам понадобится образ Linux, который мы будет устанавливать на виртуальную машину.
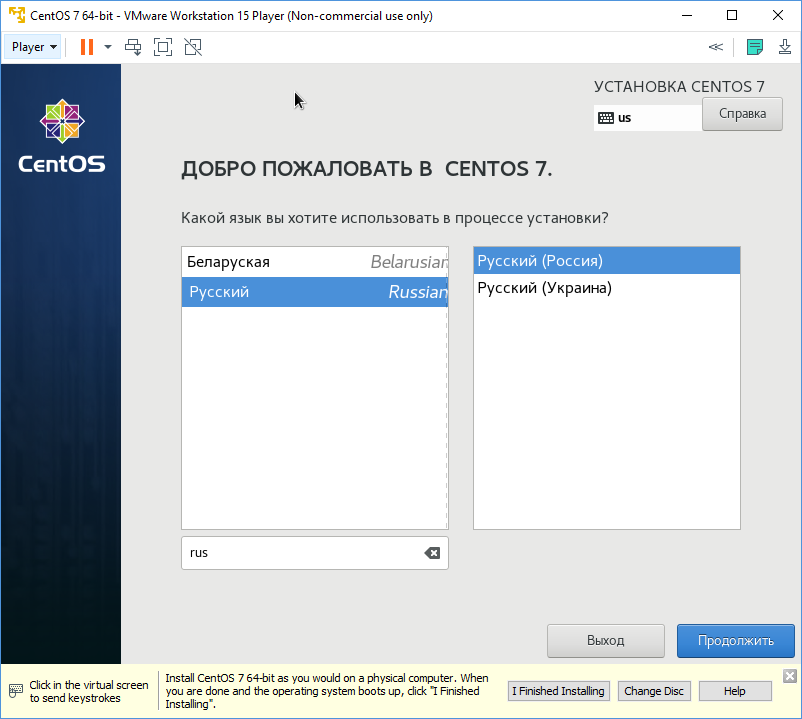
Мы предлагаем использовать самый стабильный, надежный и распространенный в корпоративном сегменте дистрибутив Linux — CentOS. Все дальнейшее описание будет строиться на его основе.
Загружаем с этого адреса крайнюю версию CentOS 7 Minimal ISO к себе на компьютер. Например, ссылка для загрузки Centos 7.9.2009 будет 7.9.2009/isos/x86_64 .
Создание виртуальной машины
- Запускаем VMWare Player.
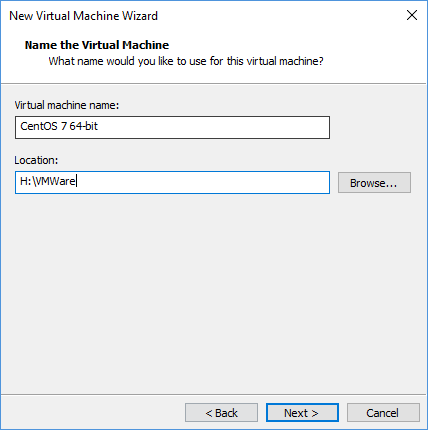
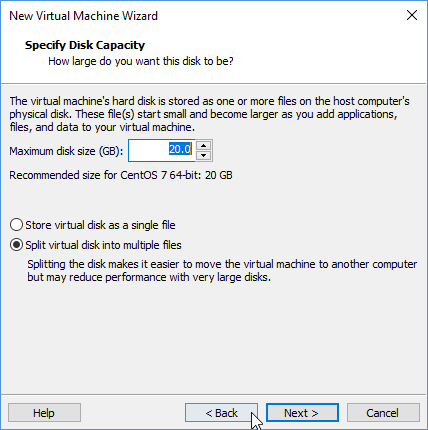
- Нажимаем Create a New Virtual Machine

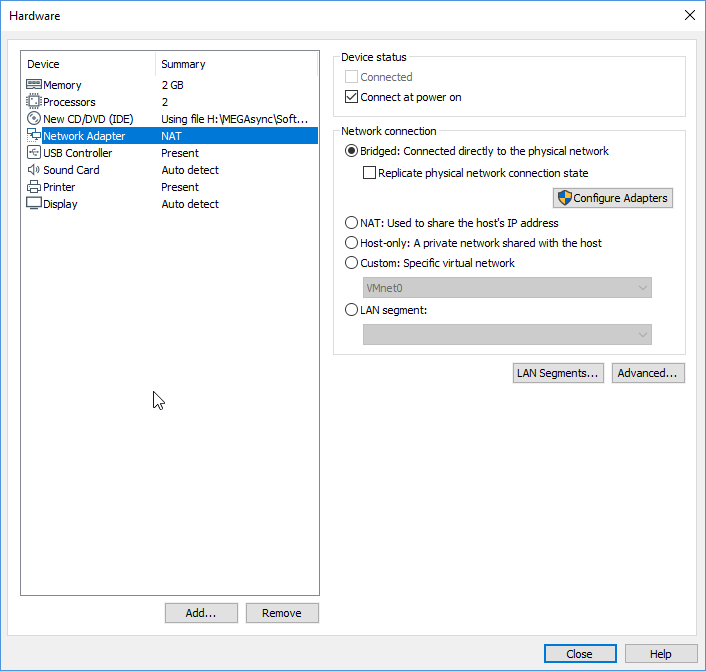
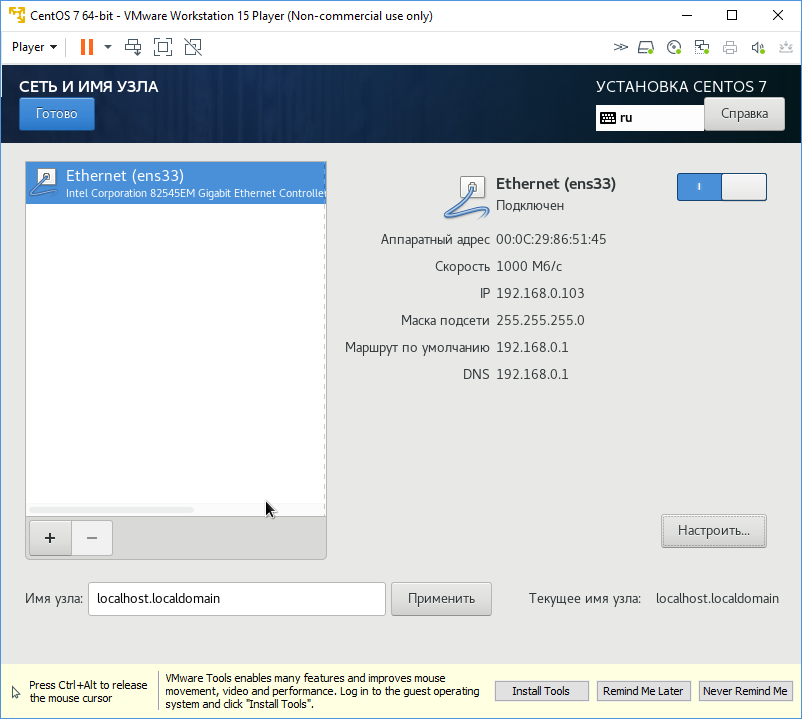
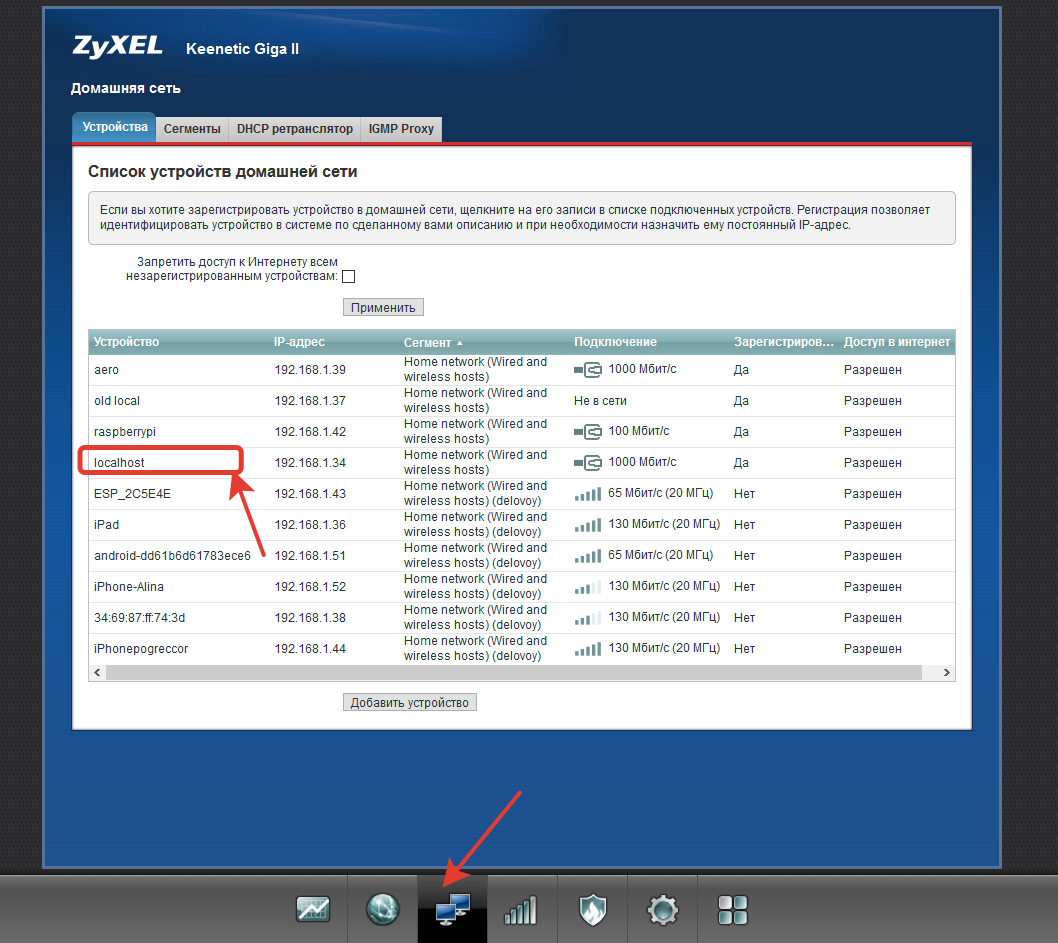
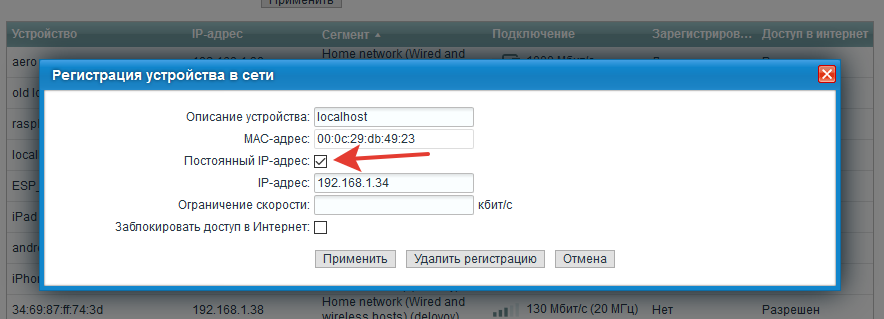
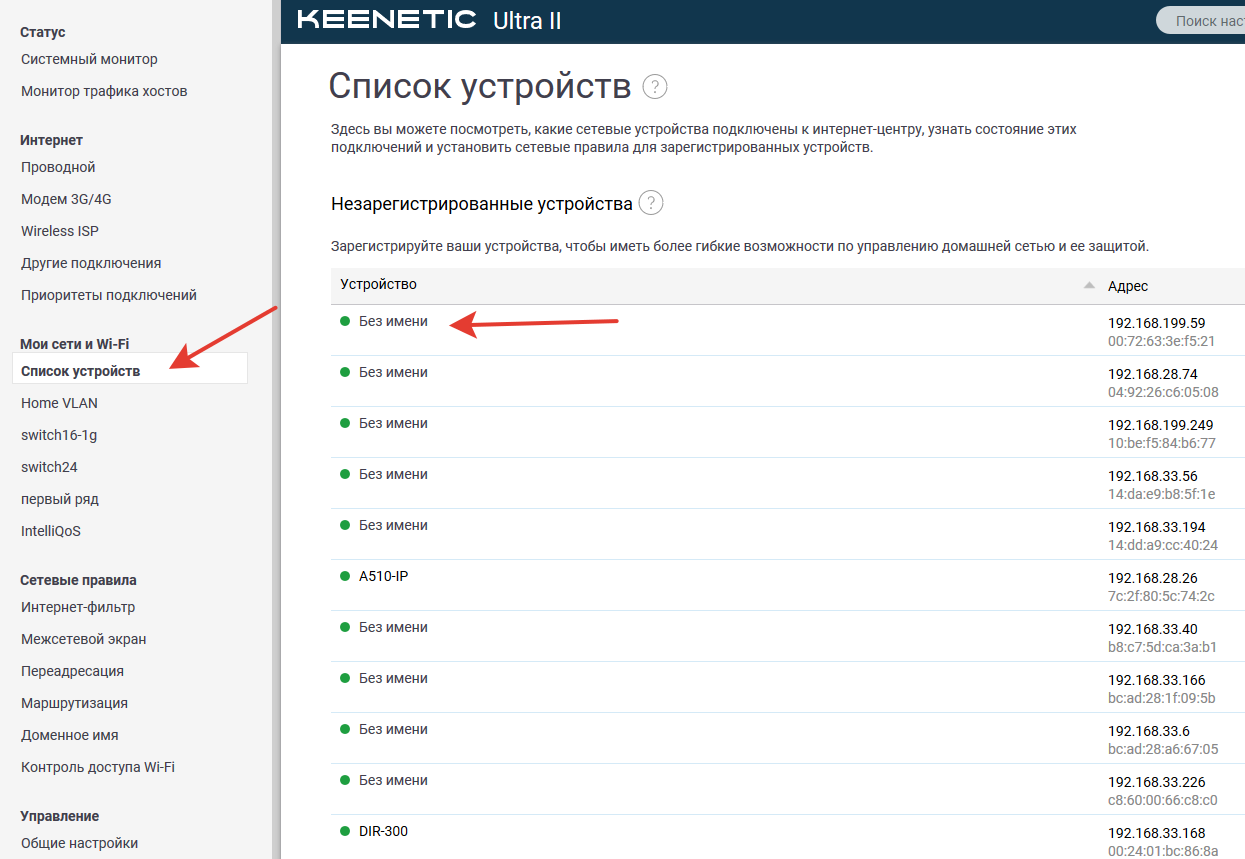
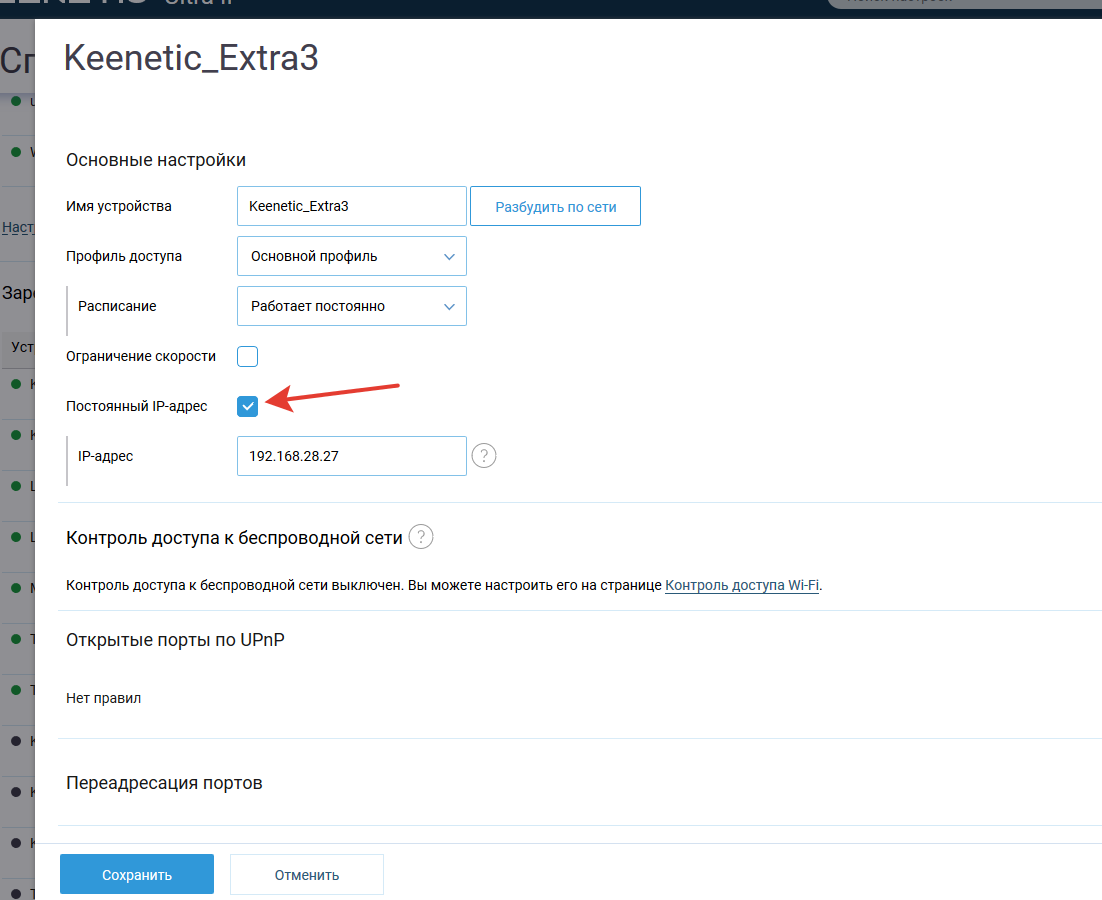
Лучше зафиксировать выданный вашим роутером локальный адрес для вашей виртуальной машины. Иначе может быть ситуация, когда наша виртуальная машина будет получать разные IP адреса.
Вот так это выглядит на разных ротуерах:

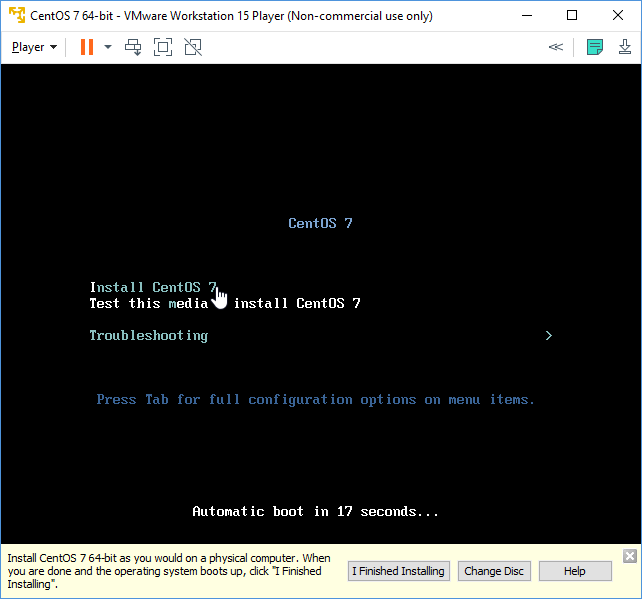
На этом создание виртуальной машины закончено.
Установка open-vm-tools
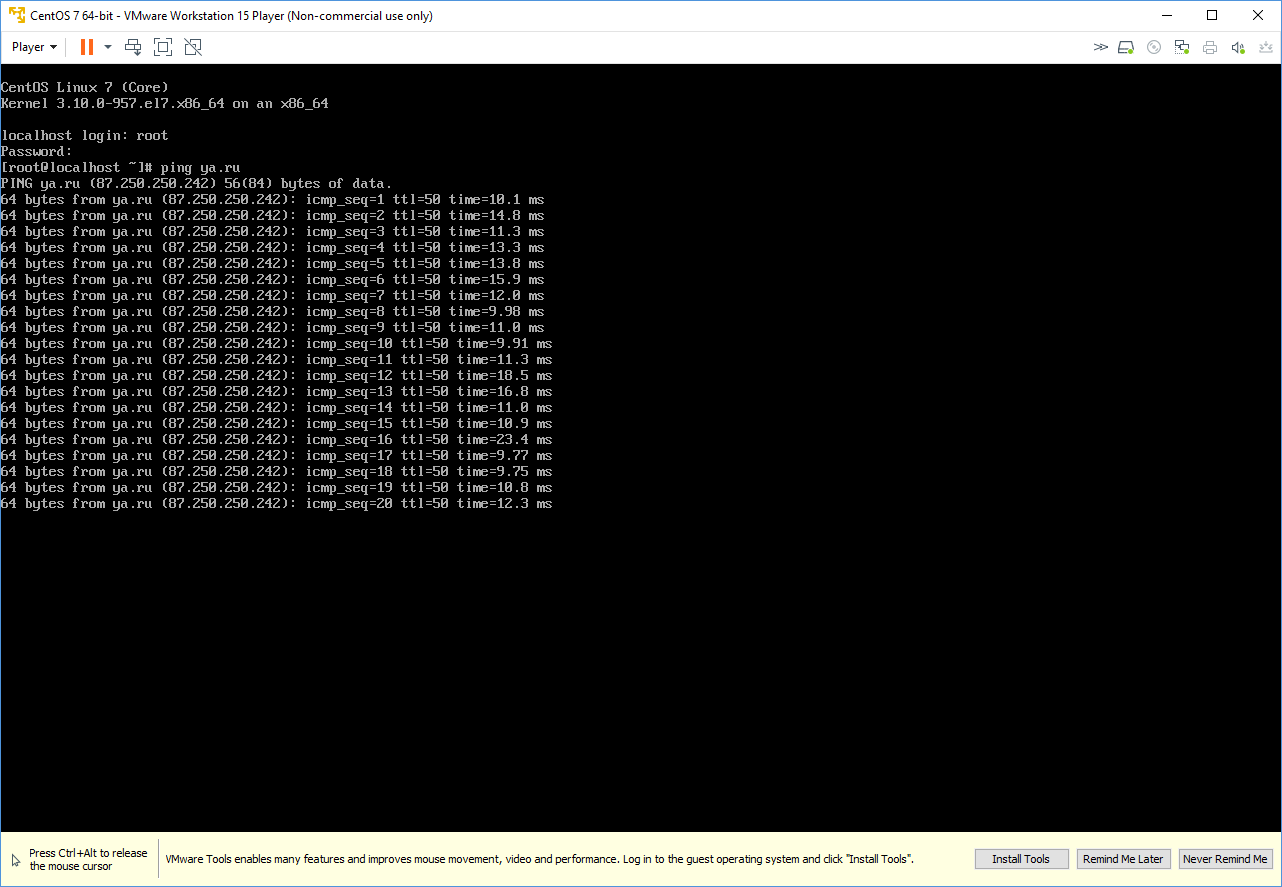
Так же советуем в самой виртуальной машине установить vm-tools, которые помогут решить некоторые проблемы со временем в виртуальной машине и другие несоответствия. Во избежание неожиданностей во время эксплуатации — установите opn-vm-tools командой: yum install open-vm-tools
Доступ по SSH с помощью ключей
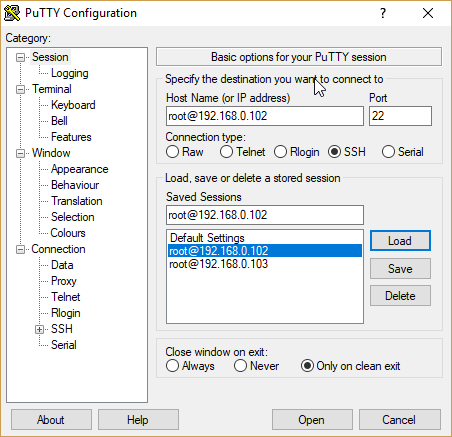
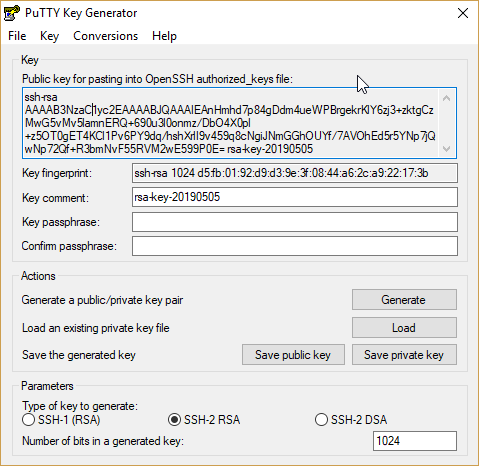
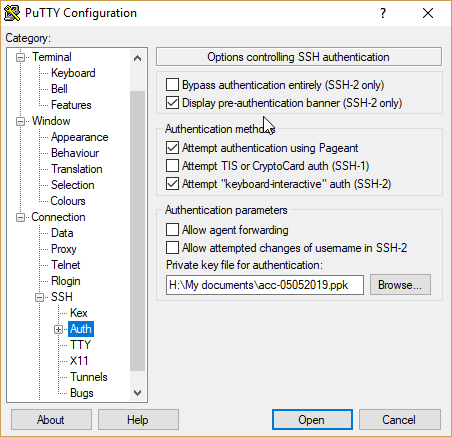
С Windows компьютеров доступ к серверам по SSH (протокол, предназначенный для удаленного доступа к операционной системе) обычно осуществляется с помощью программы PuTTY. Создание персональных ключей доступа лучше всего осуществлять программой puttygen.
Получить саму программу PuTTY и все сопутствующие утилиты можно по этой ссылке.
- Устанавливаем и запускаем программу PuTTY.
- Настраиваем и сохраняем параметры сессии к нашей виртуальной машине (указываем IP адрес, который был присвоен виртуальной машине):
Что дальше?
Сервер готов, но на нем пока отсутствует программная среда разработки и тестирования. В качестве такой среды можно использовать стандартный стек LAMP (Linux, Apache, MySQL, PHP). У нас вы найдете подробное руководство по установке LAMP.
- Последнее обновление: 14 июня 2021 .
Источник
Prepare a CentOS-based virtual machine for Azure
Applies to: вњ”пёЏ Linux VMs вњ”пёЏ Flexible scale sets
Learn to create and upload an Azure virtual hard disk (VHD) that contains a CentOS-based Linux operating system.
Prerequisites
This article assumes that you have already installed a CentOS (or similar derivative) Linux operating system to a virtual hard disk. Multiple tools exist to create .vhd files, for example a virtualization solution such as Hyper-V. For instructions, see Install the Hyper-V Role and Configure a Virtual Machine.
CentOS installation notes
- Please see also General Linux Installation Notes for more tips on preparing Linux for Azure.
- The VHDX format is not supported in Azure, only fixed VHD. You can convert the disk to VHD format using Hyper-V Manager or the convert-vhd cmdlet. If you are using VirtualBox this means selecting Fixed size as opposed to the default dynamically allocated when creating the disk.
- When installing the Linux system it is recommended that you use standard partitions rather than LVM (often the default for many installations). This will avoid LVM name conflicts with cloned VMs, particularly if an OS disk ever needs to be attached to another identical VM for troubleshooting. LVM or RAID may be used on data disks.
- Kernel support for mounting UDF file systems is required. At first boot on Azure the provisioning configuration is passed to the Linux VM via UDF-formatted media that is attached to the guest. The Azure Linux agent must be able to mount the UDF file system to read its configuration and provision the VM.
- Linux kernel versions below 2.6.37 do not support NUMA on Hyper-V with larger VM sizes. This issue primarily impacts older distributions using the upstream Red Hat 2.6.32 kernel, and was fixed in RHEL 6.6 (kernel-2.6.32-504). Systems running custom kernels older than 2.6.37, or RHEL-based kernels older than 2.6.32-504 must set the boot parameter numa=off on the kernel command-line in grub.conf. For more information see Red Hat KB 436883.
- Do not configure a swap partition on the OS disk. More information about this can be found in the steps below.
- All VHDs on Azure must have a virtual size aligned to 1MB. When converting from a raw disk to VHD you must ensure that the raw disk size is a multiple of 1MB before conversion. See Linux Installation Notes for more information.
CentOS 6.x
In Hyper-V Manager, select the virtual machine.
Click Connect to open a console window for the virtual machine.
In CentOS 6, NetworkManager can interfere with the Azure Linux agent. Uninstall this package by running the following command:
Create or edit the file /etc/sysconfig/network and add the following text:
Create or edit the file /etc/sysconfig/network-scripts/ifcfg-eth0 and add the following text:
Modify udev rules to avoid generating static rules for the Ethernet interface(s). These rules can cause problems when cloning a virtual machine in Microsoft Azure or Hyper-V:
Ensure the network service will start at boot time by running the following command:
If you would like to use the OpenLogic mirrors that are hosted within the Azure datacenters, then replace the /etc/yum.repos.d/CentOS-Base.repo file with the following repositories. This will also add the [openlogic] repository that includes additional packages such as the Azure Linux agent:
The rest of this guide will assume you are using at least the [openlogic] repo, which will be used to install the Azure Linux agent below.
Add the following line to /etc/yum.conf:
Run the following command to clear the current yum metadata and update the system with the latest packages:
Unless you are creating an image for an older version of CentOS, it is recommended to update all the packages to the latest:
A reboot may be required after running this command.
(Optional) Install the drivers for the Linux Integration Services (LIS).
The step is required for CentOS 6.3 and earlier, and optional for later releases.
Alternatively, you can follow the manual installation instructions on the LIS download page to install the RPM onto your VM.
Install the Azure Linux Agent and dependencies. Start and enable waagent service:
The WALinuxAgent package will remove the NetworkManager and NetworkManager-gnome packages if they were not already removed as described in step 3.
Modify the kernel boot line in your grub configuration to include additional kernel parameters for Azure. To do this, open /boot/grub/menu.lst in a text editor and ensure that the default kernel includes the following parameters:
This will also ensure all console messages are sent to the first serial port, which can assist Azure support with debugging issues.
In addition to the above, it is recommended to remove the following parameters:
Graphical and quiet boot are not useful in a cloud environment where we want all the logs to be sent to the serial port. The crashkernel option may be left configured if desired, but note that this parameter will reduce the amount of available memory in the VM by 128MB or more, which may be problematic on the smaller VM sizes.
CentOS 6.5 and earlier must also set the kernel parameter numa=off . See Red Hat KB 436883.
Ensure that the SSH server is installed and configured to start at boot time. This is usually the default.
Do not create swap space on the OS disk.
The Azure Linux Agent can automatically configure swap space using the local resource disk that is attached to the VM after provisioning on Azure. Note that the local resource disk is a temporary disk, and might be emptied when the VM is deprovisioned. After installing the Azure Linux Agent (see previous step), modify the following parameters in /etc/waagent.conf appropriately:
Run the following commands to deprovision the virtual machine and prepare it for provisioning on Azure:
Click Action -> Shut Down in Hyper-V Manager. Your Linux VHD is now ready to be uploaded to Azure.
CentOS 7.0+
Changes in CentOS 7 (and similar derivatives)
Preparing a CentOS 7 virtual machine for Azure is very similar to CentOS 6, however there are several important differences worth noting:
- The NetworkManager package no longer conflicts with the Azure Linux agent. This package is installed by default and we recommend that it is not removed.
- GRUB2 is now used as the default bootloader, so the procedure for editing kernel parameters has changed (see below).
- XFS is now the default file system. The ext4 file system can still be used if desired.
Configuration Steps
In Hyper-V Manager, select the virtual machine.
Click Connect to open a console window for the virtual machine.
Create or edit the file /etc/sysconfig/network and add the following text:
Create or edit the file /etc/sysconfig/network-scripts/ifcfg-eth0 and add the following text:
Modify udev rules to avoid generating static rules for the Ethernet interface(s). These rules can cause problems when cloning a virtual machine in Microsoft Azure or Hyper-V:
If you would like to use the OpenLogic mirrors that are hosted within the Azure datacenters, then replace the /etc/yum.repos.d/CentOS-Base.repo file with the following repositories. This will also add the [openlogic] repository that includes packages for the Azure Linux agent:
The rest of this guide will assume you are using at least the [openlogic] repo, which will be used to install the Azure Linux agent below.
Run the following command to clear the current yum metadata and install any updates:
Unless you are creating an image for an older version of CentOS, it is recommended to update all the packages to the latest:
A reboot maybe required after running this command.
Modify the kernel boot line in your grub configuration to include additional kernel parameters for Azure. To do this, open /etc/default/grub in a text editor and edit the GRUB_CMDLINE_LINUX parameter, for example:
This will also ensure all console messages are sent to the first serial port, which can assist Azure support with debugging issues. It also turns off the new CentOS 7 naming conventions for NICs. In addition to the above, it is recommended to remove the following parameters:
Graphical and quiet boot are not useful in a cloud environment where we want all the logs to be sent to the serial port. The crashkernel option may be left configured if desired, but note that this parameter will reduce the amount of available memory in the VM by 128MB or more, which may be problematic on the smaller VM sizes.
Once you are done editing /etc/default/grub per above, run the following command to rebuild the grub configuration:
If building the image from VMware, VirtualBox or KVM: Ensure the Hyper-V drivers are included in the initramfs:
Edit /etc/dracut.conf , add content:
Rebuild the initramfs:
Install the Azure Linux Agent and dependencies for Azure VM Extensions:
Install cloud-init to handle the provisioning
Swap configuration Do not create swap space on the operating system disk.
Previously, the Azure Linux Agent was used automatically configure swap space by using the local resource disk that is attached to the virtual machine after the virtual machine is provisioned on Azure. However this is now handled by cloud-init, you must not use the Linux Agent to format the resource disk create the swap file, modify the following parameters in /etc/waagent.conf appropriately:
If you want mount, format and create swap you can either:
Pass this in as a cloud-init config every time you create a VM
Use a cloud-init directive baked into the image that will do this every time the VM is created:
Run the following commands to deprovision the virtual machine and prepare it for provisioning on Azure:
Click Action -> Shut Down in Hyper-V Manager. Your Linux VHD is now ready to be uploaded to Azure.
Next steps
You’re now ready to use your CentOS Linux virtual hard disk to create new virtual machines in Azure. If this is the first time that you’re uploading the .vhd file to Azure, see Create a Linux VM from a custom disk.
Источник


