- Virtualbox pci passthrough windows host
- Замечание
- Метки безопасности VBoxSDL
- Releasing modifiers with VBoxSDL on Linux
- Автоматический вход в гостевую систему
- Автоматический вход для гостевой системы Windows
- Замечание
- Автоматический вход в гостевую систему Linux/Unix
- Замечание
- Предупреждение
- Предупреждение
- Дополнительные настройки гостей Windows
- Автоматизация установки Windows систем
- Замечание
- Дополнительные настройки гостей Linux и Solaris
- Ручная уставновка сервисов в гостевой Linux
- Guest graphics and mouse driver setup in depth
- CPU hot-plugging
- PCI passthrough
- Замечание
- Advanced display configuration
- Пользовательские разрешения VESA
- Настройка максимального графического разрешения гостя при использовании графического интерфейса
- Advanced storage configuration
- Прямое использование гостем жесткого диска хост системы
- Предупреждение
- Доступ ко всему жесткому диску
- Настройка данных поставщика жестких дисков(VPD)
- Доступ к iSCSI targets через внутреннюю сеть
- Запуск более чем 120 ВМ на хосте с Solaris
- Legacy commands for using serial ports
- Замечание
- Тонкая настройка VirtualBox NAT
- Настройка адреса сетевого интерфейса NAT
- Configuring the boot server (next server) of a NAT network interface
- Настройка буферов TCP/IP для NAT
- Binding NAT sockets to a specific interface
- Включение DNS прокси (proxy) в режиме NAT
- Using the host’s resolver as a DNS proxy in NAT mode
- Настройка псевдонимов в механизме NAT
- Настройка информации BIOS DMI
Virtualbox pci passthrough windows host
VBoxSDL это простой графический интерфейс пользователя (GUI) из которого исключены графические элементы управления имеющиеся в VirtualBox. В настоящее время VBoxSDL используется в первую очередь для внутренней отладки VirtualBox и поэтому официально не поддерживается. Однако, вы можете найти его полезным для использования в среде, где не требуется управление виртуальными машинами пользователям использующим эти машины.
Замечание
VBoxSDL не доступен на хостах платформы Mac OS X.
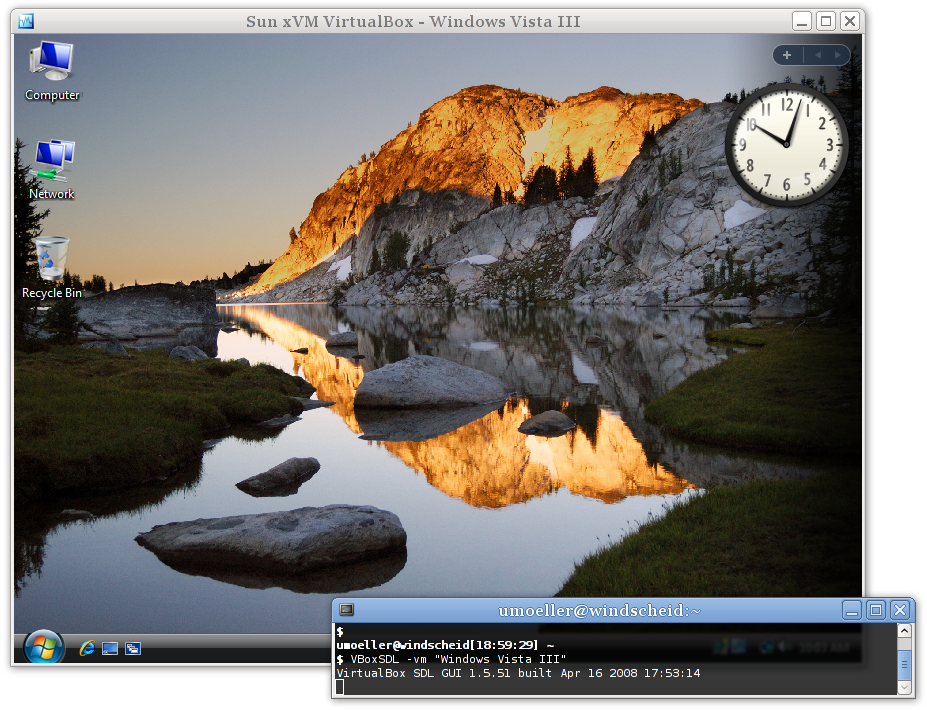
Как вы можете видеть на следующей картинке, VBoxSDL предоставляет только простое окно которое отображает «чистую» виртуальную машину, без меню, управляющих элементов и индикаторов активности виртуальной машины:
 |
Для запуска виртуальной машины с помощью VBoxSDL, без использования VirtualBox GUI, выполните в командной строке команду:
где имя или UUID существующей ВМ.
Метки безопасности VBoxSDL
Когда гостевая операционная система работает в полноэкранном режиме, то гостевая система получает контроль над всей рабочей зоной монитора. Это может приводить к некоторому риску, поскольку пользователь может спутать экраны гостевой и хост системы или поверх окна гостевой системы могут выводится диалоговые сообщения операционной системы хоста.
Для защиты пользователя от этих рисков, была разработана функция безопасносных меток. Данный функционал доступен в настоящее время только для VBoxSDL. При ее включении, часть области экрана выделяется для показа определяемых пользователем сообщений (меток). В VBoxSDL высота метки установлена в 20 пикселей . Цвет шрифта и фона могут быть произвольно установлены как шестнадцатеричные значения цвета RGB. Используется следующий синтаксис команды для включения маркеров безопасности:
Здесь дополнительно устанавливается также шрифт меток. Для указания другого размера шрифта(стандартный 12), используется параметр —seclabelsiz .
Текст метки может быть установлен командой
Эта команда приводит к немедленному изменению метки.
Как правило, разрешение полноэкранного режима ограничено «стандартным» размером 1024 x 768. Increasing this by twenty lines is not usually feasible, so in most cases, VBoxSDL will chose the next higher resolution, e.g. 1280 x 1024 and the guest’s screen will not cover the whole display surface. If VBoxSDL is unable to choose a higher resolution, the secure label will be painted on top of the guest’s screen surface. In order to address the problem of the bottom part of the guest screen being hidden, VBoxSDL can provide custom video modes to the guest that are reduced by the height of the label. For Windows guests and recent Solaris and Linux guests, the VirtualBox Guest Additions automatically provide the reduced video modes. Additionally, the VESA BIOS has been adjusted to duplicate its standard mode table with adjusted resolutions. The adjusted mode IDs can be calculated using the following formula:
For example, in order to start Linux with 1024 x 748 x 16, the standard mode 0x117 (1024 x 768 x 16) is used as a base. The Linux video mode kernel parameter can then be calculated using:
The reason for duplicating the standard modes instead of only supplying the adjusted modes is that most guest operating systems require the standard VESA modes to be fixed and refuse to start with different modes.
When using the X.org VESA driver, custom modelines have to be calculated and added to the configuration (usually in /etc/X11/xorg.conf . A handy tool to determine modeline entries can be found at http://www.tkk.fi/Misc/Electronics/faq/vga2rgb/calc.html .)
Releasing modifiers with VBoxSDL on Linux
При переключения с одного виртуального X терминала (VT) на другой, с помощью клавиатурной комбинации Ctrl-Alt-Fx, в фокус ввода находится в окне VBoxSDL, гостевая система получает события нажатия клавиш Ctrl и Alt, но не получает полного события нажатия . Это архитектурное ограничение Linux. In order to reset the modifier keys, it is possible to send SIGUSR1 to the VBoxSDL main thread (first entry in the ps list). For example, when switching away to another VT and saving the virtual machine from this terminal, the following sequence can be used to make sure the VM is not saved with stuck modifiers:
Автоматический вход в гостевую систему
Гостевые дополнения VirtualBox поставляются с модулями для Windows, Linux и Solaris позволяющие реализовать автоматический вход в гостевую систему.
В виртуальной машине существует возможность установить автоматический вход в гостевую ОС используя учетные данные гостя — мандат системы. (Говоря о «мандате», мы говорим о данных входа в систему: имя пользователя, пароль и доменное имя, где каждое значение может быть пустым).
Автоматический вход для гостевой системы Windows
Начина с Windows NT, Windows предоставляет модульную подсистему входа в систему («Winlogon»), которая может быть настроена с помощью так называемых модулей GINA (Graphical Identification and Authentication). В Windows Vista и Windows 7, GINA модули были заменен новым механизмом, называемым «credential providers». Гостевые дополнения для Windows поставляются с обоими модулем (GINA и credential provider).
Для их активации нужно установить гостевые дополнения, используя командную строку с параметром /with_autologon . Все шаги требующие установки этих модулей, выполняемые «вручную», выполняются инсталятром.
Для «ручной» установки модуля VirtualBox GINA, распакуйте гостевые дополнения (см. раздел “Ручная распаковка файла”) и скопируйте файл VBoxGINA.dll в папку Windows SYSTEM32 . Затем в реестре создайте следующую запись ключа:
с установленным значением VBoxGINA.dll .
Замечание
VirtualBox GINA реализован как обертка над стандартным модулем Windows GINA ( MSGINA.DLL ). Поэтому, существует возможность, что модуль не всегда будет правильно работать с модулями GINA сторонних разработчиков.
Для «ручной» установки модуля VirtualBox credential provider, распакуйте гостевые дополнения (см. раздел “Ручная распаковка файла”) и скопируйте файл VBoxCredProv.dll в папку Windows SYSTEM32 . Затем в реестре создайте следующую запись ключа:
все значения по умолчанию, установите (ключ с именем (Default) ) в VBoxCredProv . После этого будет создана новая строка
с значением Apartment .
Для применения мандата, используйте следующую команду запуска виртуальной машины:
Пока работает ВМ, мандат может быть запрошен модулем «автологона» VirtualBox с использованием драйвера устройства гостевых дополнений VirtualBox. Когда Windows находится в режиме «logged out» (нет пользователей вошедших в систему), модуль «автологона» постоянно запрашивает мандат и как только он будет установлен происходит попытка входа в систему. После получения мандата, модуль удаляет его, поэтому нужно будет повторить указанную выше команду для последующего входа в систему.
По соображениям безопасности, мандат не хранится постоянно и будет удален при перезагрузке ВМ. Так же мандат можно только записать, т.е. нет способа получить мандат со стороны хоста. Мандат можно сбросить установкой его параметров в пустые значения .
В зависимости от гостевой системы Windows, имеются следующие ограничения:
Для гостей Windows XP, подсистема входа должна быть настроена с использованием с классического диалога входа, т.к. VirtualBox GINA не поддерживает стиль XP диалога «добро пожаловать».
В Windows Vista и Windows 7 гостях, подсистема входа не поддерживает так называемую безопасную последовательность (Secure Attention Sequence) ( CTRL+ALT+DEL ). Поэтому, групповая политика гостя должна быть настроена без использования безопасной последовательности. Кроме того, имя пользователся сравнивается только с истинным именем учетной записи, а не его пользовательским представлением. Это значит, что когда вы изменяете имя пользователя, то вы должны все равно передавать первоначальное имя пользователся (в нутри Windows никогда не переименовывает пользовательский аккаунт).
Обработка автовхода в встроеной службе удаленного рабочего стола Windows (называемой ранее терминальной службой) по умолчанию отключена. Для ее включения, необходимо задать значение ключа
с типом DWORD в 1 .
Следующая команда заставляет VirtualBox сохранять мандат, после его получения гостем и сбросом ВМ:
Имейте ввиду, что это приводит к возникновению потенциальных рисков для безопасности.
Автоматический вход в гостевую систему Linux/Unix
Начиная с версии 3.2, VirtualBox поставляется с PAM модулем (Pluggable Authentication Module), который может выполнять автоматический вход в системы, которые используют эти модули. Фактически все современные Linux/Unix дистрибутивы используют PAM.
Сам модуль pam_vbox.so не делает проверки учетных данных полученых гостевой ОС; вместо этого он использует другие модули, такие как pam_unix.so или pam_unix2.so . Поэтому pam_vbox.so должен быть размещен в начале списка служб PAM .
Замечание
pam_vbox.so поддерживает только auth . Другие элементы, account , session или password не поддерживаются.
Модуль pam_vbox.so поставляется с гостевыми дополнениями, но по умолчанию не устанавливается и не активируется в гостевой ОС. Для его установки, его нужно скопировать из /opt/VBoxGuestAdditions- /lib/VBoxGuestAdditions/ в директорию PAM модулей — обычно /lib/security/ в 32-bit или /lib64/security/ в 64-bit гостях Linux . Пожалуйстя обратитесь к документации вашей гостевой ОС, для определения правильного расположения директории PAM модулей.
Например, что бы использовать pam_vbox.so в Ubuntu Linux и GDM ( GNOME Desktop Manager) для автоматического входа в систему с использованием учетных данных передаваемых хостом, гостевая система должна быть настроена следующим образом:
Модуль pam_vbox.so должен быть скопирован в директорию модулей безопасности, в данном случае в /lib/security .
Отредактируйте файл настроек PAM для GDM /etc/pam.d/gdm , вставив в начало строку auth requisite pam_vbox.so . Дополнительно, во многих Linux дистрибутивах существует файл /etc/pam.d/common-auth . Этот файл включается в настройки множества других служб (как и в файл упомянутой выше службы GDM). В него вы должны также добавить строку auth requisite pam_vbox.so .
Для аутентификации через теневую базу паролей (shadow database) с помощью pam_unix.so или pam_unix2.so , нужно задать аргумент try_first_pass для pam_unix.so или use_first_pass для pam_unix2.so , если необходимо передать мандат от модуля irtualBox в модуль аутентификации теневой базы паролей. В Ubuntu, нужно добавить в конец файла /etc/pam.d/common-auth , ссылку на pam_unix.so . Данный аргумент сообщает PAM модулю, что использовать учетные данные, уже сохраненные в стеке системе, т.е. предаставляемых PAM модулем VirtualBox .
Предупреждение
Неправильная настройка PAM может привести к невозможности входа в гостевую систему!
Для упрощения настроки, вы можете указать агрумент debug в правой части строки pam_vbox.so . Отладочные сообщения будут регестрироваться в журнале через syslog.
Предупреждение
В настоящее время, менеджер GDM получает учетные данные только при запуске, поэтому если мандат не был предоставлен гостевой системе до его запуска, то автологон работать не будет. This limitation needs to be addressed by the GDM developers or another display manager must be used.
Дополнительные настройки гостей Windows
Автоматизация установки Windows систем
Начиная с Windows NT 4.0, Microsoft предоставляет инструмент «подготовки системы»(«system preparation») (коротко: Sysprep) для подготовки развертывания Windows систем. Windows 2000 и XP поставляются с Sysprep на установочном носителе, а также этот инстумент доступен на веб сайте Microsoft. В Windows Vista и 7, Sysprep уже включен в стандартный установщик. Sysprep состоит из основной программы с именем sysprep.exe , при запуске которой пользователь настраивает установщик Windows в режим подготовки.
Начиная с VirtualBox 3.2.2, гостевые дополнения предоставляют способ запустить подготовку системы в автоматическом режиме, которым управляет хост ситема. Ознакомтесь с разделом “Guest control” для использования этой функции, передав на выполнение как прогрумму специальный идентификатор sysprep , используя для идентификации имя пользователя sysprep и пароль sysprep . В данном случае Sysprep запустится с нужнвми для этого правами.
Замечание
Определить местоположение «sysprep.exe» не представляется возможным — используйте следующие пути (в зависимости от гостевой ОС):
C:\sysprep\sysprep.exe для Windows NT 4.0, 2000 и XP
%WINDIR%\System32\Sysprep\sysprep.exe для Windows Vista, 2008 Server и 7
Гостевые дополнения автоматически будут использовать соостветствующий путь для запуска инструмента подготовки системы.
Дополнительные настройки гостей Linux и Solaris
Ручная уставновка сервисов в гостевой Linux
Гостевые дополнения VirtualBox содержат несколько различных драйверов. Если по каким либо причинам, вы не хотите устанавливать все, то вы можете запустить установку гостевых дополнений из командной строки:
После этого, вам необходимо скомпилировать модули ядра, выпонив команду
от пользователя root (необходимо заменить lib на lib64 в некоторых 64bit гостях), а на гостевых системах без сервиса udev, вам нужно добавить vboxadd сервис в дефолтный runlevel, для гарантированой загрузки модулей.
Для установки службы синхронизации времени, запустите команду
и добавте службу vboxadd-service в runlevel по умолчанию. Для установки модулей X11 и OpenGL , выполните
(нет необходимости настройки запуска этих сервисов).
Для компиляция модулей ядра гостя используйте команду:
После компиляции вам необходимо перезагрузить гостевую систему.
Guest graphics and mouse driver setup in depth
This section assumes that you are familiar with configuring the X.Org server using xorg.conf and optionally the newer mechanisms using hal or udev and xorg.conf.d. If not you can learn about them by studying the documentation which comes with X.Org.
The VirtualBox Guest Additions come with drivers for X.Org versions
- X11R6.8/X11R6.9 and XFree86 version 4.3 (vboxvideo_drv_68.o and vboxmouse_drv_68.o)
- X11R7.0 (vboxvideo_drv_70.so and vboxmouse_drv_70.so)
- X11R7.1 (vboxvideo_drv_71.so and vboxmouse_drv_71.so)
- X.Org Server versions 1.3 and later (vboxvideo_drv_13.so and vboxmouse_drv_13.so and so on).
By default these drivers can be found in the directory
and the correct versions for the X server are symbolically linked into the X.Org driver directories.
For graphics integration to work correctly, the X server must load the vboxvideo driver (many recent X server versions look for it automatically if they see that they are running in VirtualBox) and for an optimal user experience the guest kernel drivers must be loaded and the Guest Additions tool VBoxClient must be running as a client in the X session. For mouse integration to work correctly, the guest kernel drivers must be loaded and in addition, in X servers from X.Org X11R6.8 to X11R7.1 and in XFree86 version 4.3 the right vboxmouse driver must be loaded and associated with /dev/mouse or /dev/psaux; in X.Org server 1.3 or later a driver for a PS/2 mouse must be loaded and the right vboxmouse driver must be associated with /dev/vboxguest.
The VirtualBox guest graphics driver can use any graphics configuration for which the virtual resolution fits into the virtual video memory allocated to the virtual machine (minus a small amount used by the guest driver) as described in the section called “Display settings”. The driver will offer a range of standard modes at least up to the default guest resolution for all active guest monitors. In X.Org Server 1.3 and later the default mode can be changed by setting the output property VBOX_MODE to » x » for any guest monitor. When VBoxClient and the kernel drivers are active this is done automatically when the host requests a mode change. The driver for older versions can only receive new modes by querying the host for requests at regular intervals.
With pre-1.3 X Servers you can also add your own modes to the X server configuration file. Вам просто необходимо добавить их в запись «Modes» подсекции «Display» секции «Screen» . Например, в приведенном ниже примере добавляется пользовательское разрешение 2048×800:
CPU hot-plugging
With virtual machines running modern server operating systems, VirtualBox supports CPU hot-plugging. [37] Whereas on a physical computer this would mean that a CPU can be added or removed while the machine is running, VirtualBox supports adding and removing virtual CPUs while a virtual machine is running.
CPU hot-plugging works only with guest operating systems that support it. So far this applies only to Linux and Windows Server 2008 x64 Data Center Edition. Windows supports only hot-add while Linux supports hot-add and hot-remove but to use this feature with more than 8 CPUs a 64bit Linux guest is required.
At this time, CPU hot-plugging requires using the VBoxManage command-line interface. First, hot-plugging needs to be enabled for a virtual machine:
After that, the —cpus option specifies the maximum number of CPUs that the virtual machine can have:
When the VM is off, you can then add and remove virtual CPUs with the modifyvm —plugcpu and —unplugcpu subcommands, which take the number of the virtual CPU as a parameter, like this:
Note that CPU 0 can never be removed.
While the VM is running, CPUs can be added with the controlvm plugcpu/unplugcpu commands instead:
With Linux guests, the following applies: To prevent ejection while the CPU is still used it has to be ejected from within the guest before. The Linux Guest Additions contain a service which receives hot-remove events and ejects the CPU. Also, after a CPU is added to the VM it is not automatically used by Linux. The Linux Guest Additions service will take care of that if installed. If not a CPU can be started with the following command:
PCI passthrough
When running on Linux hosts, with a recent enough kernel (at least version 2.6.31 ) experimental host PCI devices passthrough is available. [38]
Замечание
The PCI passthrough module is shipped as a VirtualBox extension package, which must be installed separately. См. раздел “Установка VirtualBox и модулей расширений”.
Essentially this feature allows to directly use physical PCI devices on the host by the guest even if host doesn’t have drivers for this particular device. Both, regular PCI and some PCI Express cards, are supported. AGP and certain PCI Express cards are not supported at the moment if they rely on GART (Graphics Address Remapping Table) unit programming for texture management as it does rather nontrivial operations with pages remapping interfering with IOMMU. This limitation may be lifted in future releases.
To be fully functional, PCI passthrough support in VirtualBox depends upon an IOMMU hardware unit which is not yet too widely available. If the device uses bus mastering (i.e. it performs DMA to the OS memory on its own), then an IOMMU is required, otherwise such DMA transactions may write to the wrong physical memory address as the device DMA engine is programmed using a device-specific protocol to perform memory transactions. The IOMMU functions as translation unit mapping physical memory access requests from the device using knowledge of the guest physical address to host physical addresses translation rules.
Intel’s solution for IOMMU is marketed as «Intel Virtualization Technology for Directed I/O» (VT-d), and AMD’s one is called AMD-Vi. So please check if your motherboard datasheet has appropriate technology. Even if your hardware doesn’t have a IOMMU, certain PCI cards may work (such as serial PCI adapters), but the guest will show a warning on boot and the VM execution will terminate if the guest driver will attempt to enable card bus mastering.
It is very common that the BIOS or the host OS disables the IOMMU by default. So before any attempt to use it please make sure that
Your motherboard has an IOMMU unit.
Your CPU supports the IOMMU.
The IOMMU is enabled in the BIOS.
The VM must run with VT-x/AMD-V and nested paging enabled.
Your Linux kernel was compiled with IOMMU support (including DMA remapping, see CONFIG_DMAR kernel compilation option). The PCI stub driver ( CONFIG_PCI_STUB ) is required as well.
Your Linux kernel recognizes and uses the IOMMU unit ( intel_iommu=on boot option could be needed). Search for DMAR and PCI-DMA in kernel boot log.
Once you made sure that the host kernel supports the IOMMU, the next step is to select the PCI card and attach it to the guest. To figure out the list of available PCI devices, use the lspci command. The output will look like this
The first column is a PCI address (in format bus:device.function ). This address could be used to identify the device for further operations. For example, to attach a PCI network controller on the system listed above to the second PCI bus in the guest, as device 5, function 0, use the following command:
To detach same device, use
Please note that both host and guest could freely assign a different PCI address to the card attached during runtime, so those addresses only apply to the address of the card at the moment of attachment (host), and during BIOS PCI init (guest).
If the virtual machine has a PCI device attached, certain limitations apply:
- Only PCI cards with non-shared interrupts (such as using MSI on host) are supported at the moment.
- No guest state can be reliably saved/restored (as the internal state of the PCI card could not be retrieved).
- Teleportation (live migration) doesn’t work (for the same reason).
- No lazy physical memory allocation. The host will preallocate the whole RAM required for the VM on startup (as we cannot catch physical hardware accesses to the physical memory).
Advanced display configuration
Пользовательские разрешения VESA
Отдельно от стандартных разрешений VESA , VirtualBox VESA BIOS позволяет вам добавить до 16 видео режимов которые будут доступны гостевой ОС. При использовании гостя Windows с гостевыми дополнениями VirtualBox, a custom graphics driver will be used instead of the fallback VESA solution so this information does not apply.
Дополнительные видео режимы можно настроить для каждой ВМ используя механизм дополнительных данных (the extra data facility). The extra data key is called CustomVideoMode with x being a number from 1 to 16. Please note that modes will be read from 1 until either the following number is not defined or 16 is reached. Следующая команда добавит видео режим который является «родным» для большинства ноутбуков:
The VESA mode IDs for custom video modes start at 0x160 . In order to use the above defined custom video mode, the following command line has be supplied to Linux:
For guest operating systems with VirtualBox Guest Additions, a custom video mode can be set using the video mode hint feature.
Настройка максимального графического разрешения гостя при использовании графического интерфейса
При запуске гостевой системы, с установленными дополнениями, используя графический интерфейс started using the graphical frontend (обычно программу VirtualBox),не возможно использовать разрешения больше чем размер экрана хоста, если пользователь вручную изменяя размер окна, переключаясь в полноэкранный режим, seamless режим или посылая сообщение смены видеорежима командой VBoxManage. Это поведение требуется большинству пользователей, но если ва это не нужно, то существует возможность изменить его используя командную строку:
эта команда кдалит все ограничения на видео разрешения гостевой системы.
вручную установит максимальное разрешение.
востановит настройку по умолчанию. Заметьте, что эта настройка применяется ко всем гостевым системам , а не к одной машине.
Advanced storage configuration
Прямое использование гостем жесткого диска хост системы
Starting with version 1.4, as an alternative to using virtual disk images (as described in detail in Chapter 5, Virtual storage), VirtualBox can also present either entire physical hard disks or selected partitions thereof as virtual disks to virtual machines.
В VirtualBox этот вид доступа называется «raw hard disk access»; он позволяет гостевой операционной системы получить доступ к своему виртуальному жесткому диску без использования файловой системы хоста. The actual performance difference for image files vs. raw disk varies greatly depending on the overhead of the host file system, whether dynamically growing images are used and on host OS caching strategies. Кеширования также косвенно затрагивает другие аспекты — такие как отказоустойчивость файловой системе, т.е. будет ли виртуальный диск содержать ошибки после аварийного завершения ОС хоста. Ищите подробную информацию о вашей файловой системе в документации по вашей ОС.
Предупреждение
Использовать «raw hard disk access» рекомендуется только опытным пользователям. Incorrect use or use of an outdated configuration can lead to total loss of data on the physical disk. Most importantly, do not attempt to boot the partition with the currently running host operating system in a guest. Это может привести к непредсказуемым повреждениям ваших данных.
Доступ через «raw hard disk access» — как ко всему диску так и к отдельным его разделам, — осуществляется через механизм образов диска VMDK. Поэтому, вам придется создать специальный файл VMDK, который определяет, где данные будут хранится. После его создания, вы можете использовать его как обычный виртуальный образ диска. For example, you can use the Virtual Media Manager (the section called “The Virtual Media Manager”) or VBoxManage to assign the image to a virtual machine.
Доступ ко всему жесткому диску
While this variant is the simplest to set up, you must be aware that this will give a guest operating system direct and full access to an entire physical disk . If your host operating system is also booted from this disk, please take special care to not access the partition from the guest at all. С другой стороны, на физическом диске можно изменить структуру или состав разделов, без повторного создания файлов виртуальных образов дисков.
Чтобы создать образ, который представляет весь физический жесткий диск на Linux хосте, используйте команду
This creates the image /path/to/file.vmdk (must be absolute), and all data will be read and written from /dev/sda .
On a Windows host, instead of the above device specification, use e.g. \\.\PhysicalDrive0 . On a Mac OS X host, instead of the above device specification use e.g. /dev/disk1 . Note that on OS X you can only get access to an entire disk if no volume is mounted from it.
Создание образа (физического диска) требует полных прав (чтение и запись) к этому устройству. Полный доступ к нему также необходим при использовании образа в виртуальной машине.
Just like with regular disk images, this does not automatically attach the newly created image to a virtual machine. This can be done with e.g.
После выполнения данной команды указанная виртуальная машина будет грузиться с данного физического диска.
Доступ к отдельным разделам жесткого диска
Данный режим «raw partition support» сильно похож на режим «full hard disk», который описан выше. Однако, в этом случае, в VMDK образе будет содержаться информация о разделах диска. В данном режиме вы можете, например, указать другой образ загрузчика для виртуального жесткого диска без внесения изменений в физический диск. While the guest will be able to see all partitions that exist on the physical disk, access will be filtered in that reading from partitions for which no access is allowed the partitions will only yield zeroes, and all writes to them are ignored.
Для создания образа «raw partition support» (который будет небольшим по размеру, как было упомянуто ранее), в Linux используйте команду:
As you can see, the command is identical to the one for «full hard disk» access, except for the additional -partitions parameter. This example would create the image /path/to/file.vmdk (which, again, must be absolute), and partitions 1 and 5 of /dev/sda would be made accessible to the guest.
VirtualBox использует ту же самую нумерацию разделов, что и ваш хост Linux. Поэтому , номера указанные в вышеприведенном примере будут указывать на первый диск первичного раздела и первый диск дополнительного раздела (first primary partition and first logical drive in the extended partition).
On a Windows host, instead of the above device specification, use e.g. \\.\PhysicalDrive0 . On a Mac OS X host, instead of the above device specification use e.g. /dev/disk1 . Note that on OS X you can only use partitions which are not mounted (eject the respective volume first). Partition numbers are the same on Linux, Windows and Mac OS X hosts.
Список номеров разделов вы можете получить командой
Вывод этой команды содержит список разделов, их тип и размер, что позволяет пользователю определить нужный раздел.
Образы которые предоставляют доступ к отдельным разделам привязаны к дискам хост системы. You cannot transfer these images to another host; also, whenever the host partitioning changes, the image must be recreated .
Создание образа (физического диска) требует полных прав (чтение и запись) к этому устройству. Полный доступ к нему также необходим при использовании образа в виртуальной машине. Если это не возможно, имеется особый вариант «raw partition access» (в настоящее время доступен только для Linux хостов) который позволяет избежать предоставления полного доступа ко всему диску текущему пользователю. Для настройки этих образов используйте команду
When used from a virtual machine, the image will then refer not to the entire disk, but only to the individual partitions (in the example /dev/sda1 and /dev/sda5 ). Поэтому, полный доступ требуется только к этим разделам, а не ко всему диску. Однако для создания этого образа полный доступ ко всему диску необходим для получения информации о структуре диска.
В некоторых конфигурация возможно потребуется изменение кода MBR создаваемого образа, например чтобы заменить загрузчик Linux, вместо того который используется хостом. Это позволит, например, сразу загрузить гостевую систему Windows, если Linux хост система загружается с «того же самого» диска. For this purpose the -mbr parameter is provided. Он определяет имя файла в котором хранится код MBR. При этом таблица разделов не изменяется, что позволяет использовать один файл с кодом MBR для загрузки с различных разделов. Пример использования:
Код из файла MBR будет сохранен внутри образа, а не на диске хоста.
The created image can be attached to a storage controller in a VM configuration as usual.
Настройка данных поставщика жестких дисков(VPD)
VirtualBox предоставляет информацию поставщика для своих виртуальных дисках, которая состоит из серийного номера диска, версии прошивки и номере модели. Эта информация может быть изменена командами:
Серийный номер является строкой 20 из байт, версия прошивки строкой из 8 байт, а номер моделистрокой из 40 байт. Instead of «Port0» (referring to the first port), specify the desired SATA hard disk port.
The above commands apply to virtual machines with an AHCI (SATA) controller. The commands for virtual machines with an IDE controller are:
For hard disks it’s also possible (experimental!) to mark the drive as having a non-rotational medium with:
Additional three parameters are needed for CD/DVD drives to report the vendor product data:
The vendor id is an 8 byte alphanumeric string, the product id an 16 byte alphanumeric string and the revision a 4 byte alphanumeric string. Instead of «Port0» (referring to the first port), specify the desired SATA hard disk port.
Доступ к iSCSI targets через внутреннюю сеть
As an experimental feature, VirtualBox allows for accessing an iSCSI target running in a virtual machine which is configured for using Internal Networking mode. Please see the section called “iSCSI servers”; the section called “Internal networking”; and the section called “VBoxManage storageattach” for additional information.
Для виртуальной машины которая используется в качестве iSCSI target должен быть сконфигурирован виртуальный сетевой адаптер в режиме «внутренней сети». Необходимо выбрать IP и MAC адреса не используемые в других виртуальных машинах. In the example below, adapt the name of the virtual machine, the MAC address, the IP configuration and the Internal Networking name («MyIntNet») according to your needs. The following seven commands must first be issued:
Finally the iSCSI disk must be attached with the —intnet option to tell the iSCSI initiator to use internal networking:
Compared to a «regular» iSCSI setup, IP address of the target must be specified as a numeric IP address, as there is no DNS resolver for internal networking.
Виртуальная машина с iSCSI target должна запускаться до ВМ использующего его. Если виртуальная машина использующая iSCSI диск запускается без работающего iSCSI target, то это приводит к тому, что она будет пытаться обнаружить его в течении 200 секунд. И ВМ не сможет запуститься.
Запуск более чем 120 ВМ на хосте с Solaris
Хосты с ОС Solaris имеют фиксированное количество семафоров в IPC на процесс, что не позволяет запустить более чем 120 виртуальных машин. При попытке запустить больше ВМ вы увидете сообщение об ошибке «Cannot create IPC semaphore».
Что бы запустить больше ВМ, вы должны отключить лимит семафоров для процесса VBoxSVC. Execute as root the prctl command as shown below. The process ID of VBoxSVC can be obtained using the ps list command.
Legacy commands for using serial ports
Starting with version 1.4, VirtualBox provided support for virtual serial ports, which, at the time, was rather complicated to set up with a sequence of VBoxManage setextradata statements. Since version 1.5, that way of setting up serial ports is no longer necessary and deprecated. To set up virtual serial ports, use the methods now described in the section called “Serial ports”.
Замечание
For backwards compatibility, the old setextradata statements, whose description is retained below from the old version of the manual, take precedence over the new way of configuring serial ports. Если настройка последовательных портов новым способом не работает , убедитесь, что виртуальная машина не имеет старых настроек.
Старая метод настройки последовательных портов использует следующие 6 команд:
This sets up a serial port in the guest with the default settings for COM1 (IRQ 4, I/O address 0x3f8) and the Location setting assumes that this configuration is used on a Windows host, because the Windows named pipe syntax is used. Keep in mind that on Windows hosts a named pipe must always start with \\.\pipe\ . On Linux the same config settings apply, except that the path name for the Location can be chosen more freely. Local domain sockets can be placed anywhere, provided the user running VirtualBox has the permission to create a new file in the directory. Последняя команда, из перечисленных выше, определяет что VirtualBox будет работать как сервер, т.е. она создает именованный канал, вместо подключения к уже существующему.
Тонкая настройка VirtualBox NAT
Настройка адреса сетевого интерфейса NAT
In NAT mode, the guest network interface is assigned to the IPv4 range 10.0.x.0/24 by default where x corresponds to the instance of the NAT interface +2. So x is 2 when there is only one NAT instance active. In that case the guest is assigned to the address 10.0.2.15 , the gateway is set to 10.0.2.2 and the name server can be found at 10.0.2.3 .
Если по каким то причинам, необходимо изменить эти настройки сети NAT, то это возможно сделать следующей командой:
This command would reserve the network addresses from 192.168.0.0 to 192.168.254.254 for the first NAT network instance of «VM name». The guest IP would be assigned to 192.168.0.15 and the default gateway could be found at 192.168.0.2 .
Configuring the boot server (next server) of a NAT network interface
Для сетевой загрузки в режиме NAT, VirtualBox по умолчанию использует встроенный TFTP сервер с IP адресом 10.0.2.3. Эта стандартное поведение будет прекрасно работать в типичных сценариях удаленной загрузки. Однако, имеется возможность изменить IP сервер загрузки и расположение образа загрузки командой:
Настройка буферов TCP/IP для NAT
The VirtualBox NAT stack performance is often determined by its interaction with the host’s TCP/IP stack and the size of several buffers ( SO_RCVBUF and SO_SNDBUF ). For certain setups users might want to adjust the buffer size for a better performance. This can by achieved using the following commands (values are in kilobytes and can range from 8 to 1024):
This example illustrates tuning the NAT settings. The first parameter is the MTU, then the size of the socket’s send buffer and the size of the socket’s receive buffer, the initial size of the TCP send window, and lastly the initial size of the TCP receive window. Note that specifying zero means fallback to the default value.
Each of these buffers has a default size of 64KB and default MTU is 1500.
Binding NAT sockets to a specific interface
By default, VirtualBox’s NAT engine will route TCP/IP packets through the default interface assigned by the host’s TCP/IP stack. (The technical reason for this is that the NAT engine uses sockets for communication.) If, for some reason, you want to change this behavior, you can tell the NAT engine to bind to a particular IP address instead. Use the following command:
After this, all outgoing traffic will be sent through the interface with the IP address 10.45.0.2. Please make sure that this interface is up and running prior to this assignment.
Включение DNS прокси (proxy) в режиме NAT
The NAT engine by default offers the same DNS servers to the guest that are configured on the host. In some scenarios, it can be desirable to hide the DNS server IPs from the guest, for example when this information can change on the host due to expiring DHCP leases. In this case, you can tell the NAT engine to act as DNS proxy using the following command:
Using the host’s resolver as a DNS proxy in NAT mode
For resolving network names, the DHCP server of the NAT engine offers a list of registered DNS servers of the host. If for some reason you need to hide this DNS server list and use the host’s resolver settings, thereby forcing the VirtualBox NAT engine to intercept DNS requests and forward them to host’s resolver, use the following command:
Note that this setting is similar to the DNS proxy mode, however whereas the proxy mode just forwards DNS requests to the appropriate servers, the resolver mode will interpret the DNS requests and use the host’s DNS API to query the information and return it to the guest.
Настройка псевдонимов в механизме NAT
By default, the NAT core uses aliasing and uses random ports when generating an alias for a connection. This works well for the most protocols like SSH, FTP and so on. Though some protocols might need a more transparent behavior or may depend on the real port number the packet was sent from. It is possible to change the NAT mode via the VBoxManage frontend with the following commands:
The first example disables aliasing and switches NAT into transparent mode, the second example enforces preserving of port values. These modes can be combined if necessary.
Настройка информации BIOS DMI
Данные DMI, которые VirtualBox предоставляет гостевым системам, можно изменить для определенной ВМ. Используются следующие команды для настройки информации DMI BIOS :
Если строка DMI не определена, используется значение по умолчанию. To set an empty string use » » .
Note that in the above list, all quoted parameters (DmiBIOSVendor, DmiBIOSVersion but not DmiBIOSReleaseMajor) are expected to be strings. If such a string is a valid number, the parameter is treated as number and the VM will most probably refuse to start with an VERR_CFGM_NOT_STRING error. In that case, use «string: » , for instance
Изменение этой информации может понадобиться для предотвращения запросов кода активации гостевой Windows. На хостах Linux информация DMI BIOS может быть получена командой


