- Install VirtualBox Guest Additions in Linux Mint Step by Step
- What is VirtualBox Guest Additions?
- How to Install Virtualbox Guest Additions in Linux Mint
- If VirtualBox Can’t Find the Guest Additions CD Image
- Enable Copy and Paste Clipboard Between Host and Guest
- Enable Shared Folder
- Wrapping Up
- How to enable a Virtualbox shared folder for Linux guest systems
- INTRODUCTION
- VIDEO TUTORIAL
- Enable a shared folder in VirtualBox for Arch Linux guest
- Prepare the system
- Add the shared folder
- Enable a shared folder in VirtualBox for Debian guest
- Prepare the system and add a shared folder
- Install the GuestAddition CD Image
- Setting the permissions to the shared folder
- Enable a shared folder in VirtualBox for Linux Mint / Ubuntu guest
- CONCLUSION
- Настройка общих папок в VirtualBox
- Общие папки в VirtualBox
- Шаг 1: Создание общей папки на хост-машине
- Шаг 2: Настройка VirtualBox
- Шаг 3: Установка гостевых дополнений
Install VirtualBox Guest Additions in Linux Mint Step by Step
In this tutorial I will show you how to install VirtualBox guest additions in Linux Mint virtual machine. To follow this tutorial, you need to have Linux Mint installed inside VirtualBox as a guest OS. I’m using Debian 10 Buster as the host OS, but the following method works for any host OS (including MacOS and Windows).
What is VirtualBox Guest Additions?
VirtualBox guest additions provide the following capabilities:
- Enable users to seamlessly move mouse pointer between host and guest OS.
- Allow guest OS to have read and write access to hard drives on the host OS, so you can transfer files between them.
- Power up the graphics/video ability of the guest OS. The screen resolution of guest OS can be automatically adjusted and 3D graphics can be accelerated.
- Enable bidirectional shared clipboard between host and guest OS, so you can copy and paste stuff between them.
How to Install Virtualbox Guest Additions in Linux Mint
Log into Linux Mint (guest OS) and run the following command in a terminal window to update software packages.
Please note that if a new Linux kernel is installed in the upgrade process, then you need to reboot Linux Mint virtual machine. After that, run the following command to install required packages for building kernel modules.
Next, prepare Linux Mint for building kernel module with the following command.
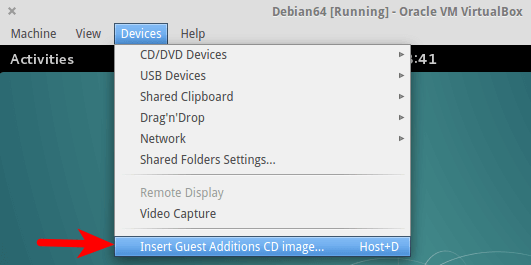
Then in the VirtualBox window menu bar, select Devices > Insert Guest Additions CD image.
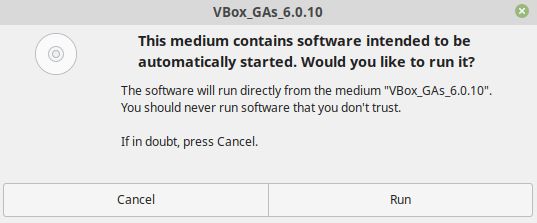
If your host OS already has the CD image, then you will be asked if you want to run the software. Select Run.
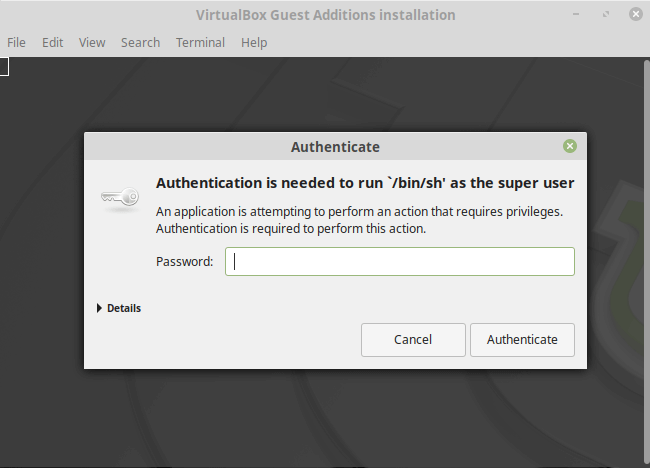
Then you will need to enter your password in order to install the guest additions.
Output in terminal window.
Once the guest additions is installed, press Enter to close the terminal window and restart your Linux Mint virtual machine. Now the resizeable display should be working. The screen resolution of Linux Mint VM will adjust with the size of VirtualBox window. You can press right Ctrl and F keyboard shortcut to enter full-screen mode. You can now also configure shared folder and bidirectional shared clipboard.
If VirtualBox Can’t Find the Guest Additions CD Image
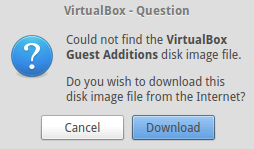
If your host OS doesn’t have the guest additions CD image, then it will ask you to click a button to download the CD image onto the host OS. Click Download.
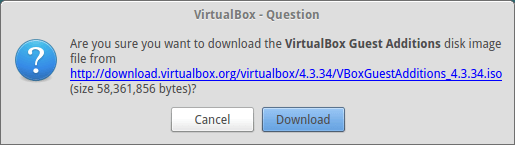
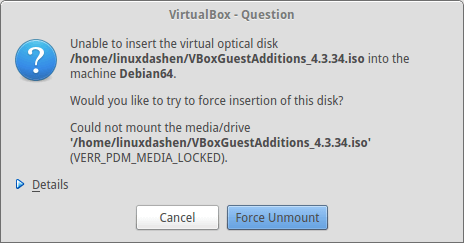
If you can’t download it from the above window, then go to http://download.virtualbox.org/virtualbox/. Select a version and download VBoxGuestAdditions ISO to your home directory. Once downloaded, insert the ISO image. If you see the following error, click Force Umount.
Enable Copy and Paste Clipboard Between Host and Guest
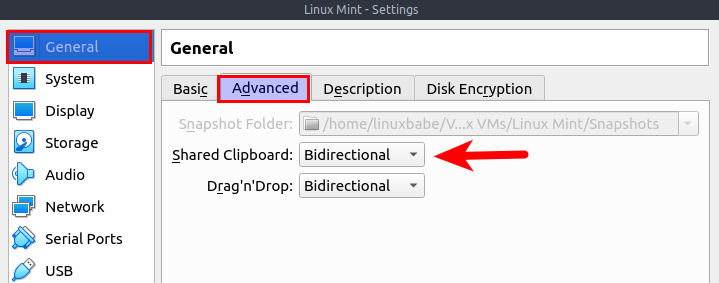
After installing guest additions, you can go to the virtual machine settings -> General -> Advanced and enable bidirectional clipboard.
Enable Shared Folder
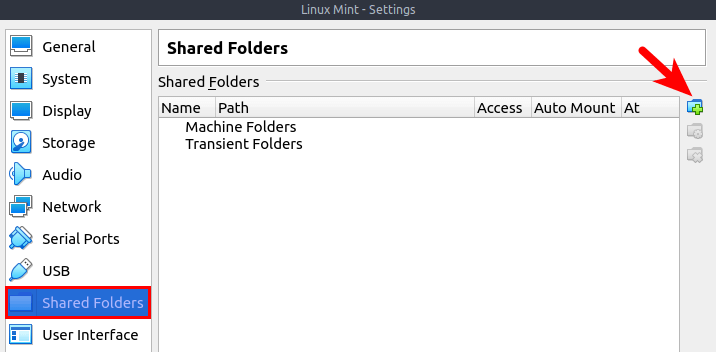
Now you can also share files between host and guest OS via the shared folder feature. Go to the virtual machine settings. In the left pane, select Shared Folders . Then click on the add button to add a shared folder.
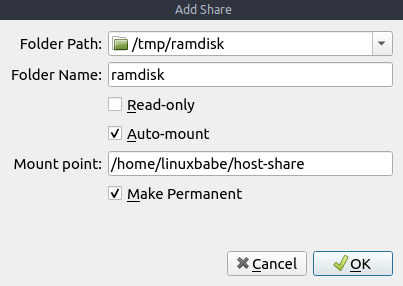
- In the Folder Path field, select a folder on your host OS.
- Tick on the Auto-mount checkbox so that the shared folder will be automatically mounted to the guest OS when virtual machine boots up.
- In the Mount-point field, enter a path on the guest OS, such as a sub-directory in your user’s home directory.
- Tick on the Make Permanent checkbox.
After saving the settings, you will find the shared folder appears in your home directory in the Linux Mint virtual machine, but only the root user and members of the vboxsf group have read and write access to this shared folder. So what we need to now is add your user to vboxsf group. Open up a terminal in Linux Mint and run the following command. Replace username with your real username.
Log out of the current session and log back in. Now you should be able to access the shared folder.
Wrapping Up
I hope this tutorial helped you install VirtualBox guest additions in Linux Mint. You may also want to read:
As always, if you found this post useful, then subscribe to our free newsletter to get more tips and tricks. Take care 🙂
Источник
How to enable a Virtualbox shared folder for Linux guest systems
VirtualBox is a very useful tool to install operating systems inside the main system. However, configuring the Virtualbox to share files between your main system and the system you installed in a VirtualBox is not trivial. So, I will show you how to enable a shared folder in Virtualbox for Debian, Linux Mint/Ubuntu, and Arch Linux as guest systems. I will also show a universal way that should work for any Linux guest distribution.
INTRODUCTION
There are several essential steps you need to follow, to enable a shared folder between the real machine (host) and the virtual machine (guest):
- Install guest additions for your guest system.
- Create a shared folder.
- Change the user permission for the shared folder.
In this tutorial, my host system is Arch Linux, but the host system does not matter in this case because we will do all the setting in the guest systems. So, I will show you the settings for Arch Linux, Linux Mint and Debian as guest systems. If you use some other distributions as a guest, look at the instructions for Debian. It is a universal way to enable a shared folder and it should work for all distributions.
VIDEO TUTORIAL
Enable a shared folder in VirtualBox for Arch Linux guest
Prepare the system
First, make sure your Arch Linux guest system is up to date. Open a terminal and update it:
Next, install kernel headers. I use the Linux kernel LTS, so I have to install the linux-lts-headers package. If you use the standard kernel, install linux-headers .
Then, install the virtualbox-guest-utils package. It will make you choose a package: either virtualbox-guest-modules-arch or virtualbox-guest-dkms . The Arch Linux wiki recommends choosing the virtualbox-guest-modules-arch package if you use the Linux kernel and virtualbox-guest-dkms for others kernels like LTS. Again, I use the linux-lts kernel so I needed to install the virtualbox-guest-dkms package.
After that, enable the VirtualBox kernel modules:
Add the shared folder
In VirtualBox, go to the Devices menu -> Shared Folders menu -> Shared folders settings.
In the window that opens, on the right side, you will find the button to add a new shared folder. Click on it.
And select the folder you want to share between systems. For example, I usually share my Public folder. Make it permanent and activate auto-mounting by clicking on the options.
Then, you need to reboot the guest system. Once the guest system has rebooted, you can find the shared folder in the /media folder.
The problem is, however, that only the root user can access the folder. To gain access to this folder as a regular user, open the terminal in your guest system and add your user to the vboxsf group.
`whoami` stand there to automatically paste your username. You can also type your username directly.
Next, give that user a permission to access the media folder.
Finally, log out, and log in again. Open the file manager and you should be able to access the shared folder as a regular user.
So, this is the whole process to enable a shared folder in VirtualBox using Arch Linux. You can start placing files there.
Enable a shared folder in VirtualBox for Debian guest
Installing guest addition in Debian is a little different from in Arch Linux. For Debian, I will show you a more universal way that you can apply to any other distro including Arch Linux. However, the way I showed before is preferable for Arch Linux.
Prepare the system and add a shared folder
In Debian guest, open a terminal and install the build-essential, dkms, and linux-headers packages.
After that, you can add a shared folder. It is the same procedure as before. Go to the Devices menu -> Shared folders -> click on the Shared folder settings option.
Again, click on the button at the right to add the shared folder. Set the folder options you want and click on the Ok button.
After the packages are installed and the shared folder is added, reboot the system.
Install the GuestAddition CD Image
When your guest system has started. Go to the Devices menu and click on the Insert Guest addition image option.
Then, open a file manager, navigate to VBOXADDITION CD, right click in that directory and click on the open Terminal here option.
In the terminal, run the following command to install the VirtualBoxLinuxAddtions:
Make sure it is installed without errors. If some errors occur, read the message, most likely the instruction for a fix will be provided. If the install is successful, you need to reboot the system.
Setting the permissions to the shared folder
If you go to the /media folder in the file manager and check if a shared folder is mounted, most likely you will not be able to access it as a regular user.
To enable the access to this folder for a regular user, do the same what we did for Arch Linux, add your user to the vboxsf group.
And change the permission of the media folder.
Log out, log in and you should be able to access the shared folder.
This method to enable a shared folder in VirtualBox for Debian is universal and it should work for any other distributions.
Enable a shared folder in VirtualBox for Linux Mint / Ubuntu guest
Linux Mint and Ubuntu usually come with VirtualBox guest addition pre-installed by default. If not, you can install it using a software manager like Synaptic.
Open the software manager, search and install virtualbox-guest-X11 , virtualbox-guest-utils , and virtualbox-guest-dkms .
Then do the same steps I showed for Arch Linux and Debian. First, add a shared folder.
Reboot the system. Then, add your user to the vboxsf group.
Change the permissions.
Finally, log out and log in, and you should have the shared folder working.
CONCLUSION
Now, you can use your VirtuaBox systems more extensively by sharing files between your host and guest systems.
If you use any other distro than Ubuntu-based ones, Arch Linux or Debian, try the way I show for Debian and let me know how it worked.
I recommend for the next read to learn how to clean Arch Linux.
Источник
Настройка общих папок в VirtualBox
Для более комфортного управления виртуальной ОС, запущенной в VirtualBox, существует возможность создания общих папок. Они одинаково доступны из хостовой и гостевой систем и предназначены для удобного обмена данными между ними.
Общие папки в VirtualBox
Через общие папки пользователь может просматривать и использовать локально хранящиеся файлы не только на хост-машине, но и в гостевой ОС. Эта возможность упрощает взаимодействие операционных систем и избавляет от необходимости подключать флешки, переносить документы в облачные сервисы хранения и прочие способы хранения данных.
Шаг 1: Создание общей папки на хост-машине
Общие папки, с которыми в дальнейшем могут работать обе машины, должны располагаться в основной ОС. Они создаются точно таким же способом, как и обычные папки в вашей Windows или Linux. Кроме того, в качестве общей папки можно выбирать любую существующую.
Шаг 2: Настройка VirtualBox
Созданные или выбранные папки необходимо сделать доступными для обеих операционных систем через настройку VirtualBox.
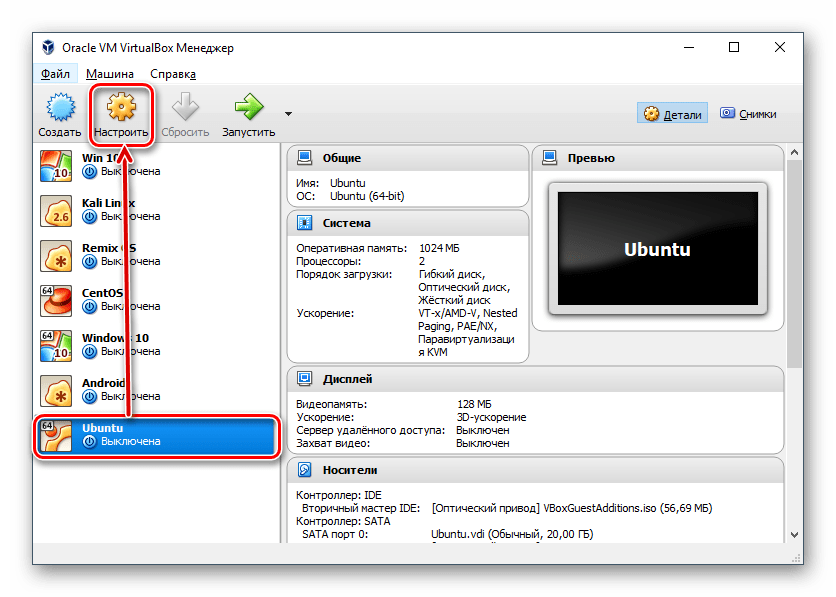
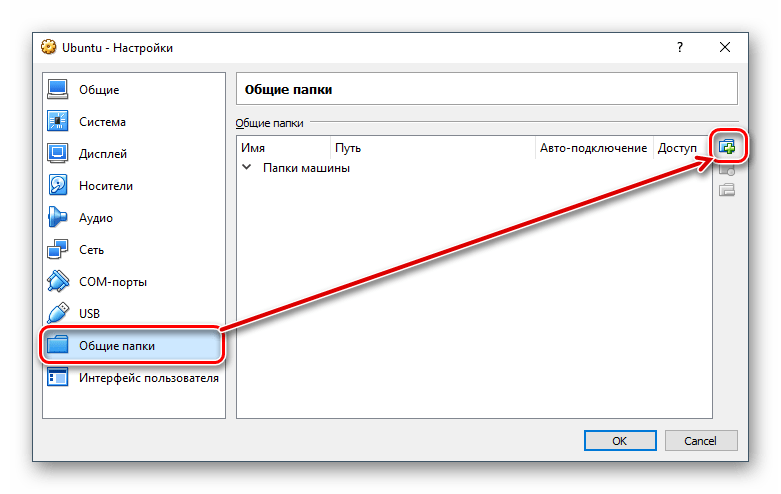
- Откройте VB Менеджер, выделите виртуальную машину и нажмите «Настроить».
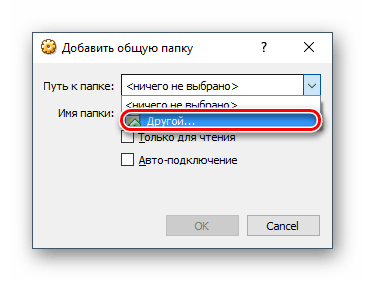
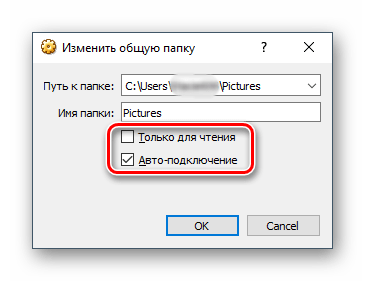
Перейдите в раздел «Общие папки» и нажмите на иконку с плюсом, что находится справа.
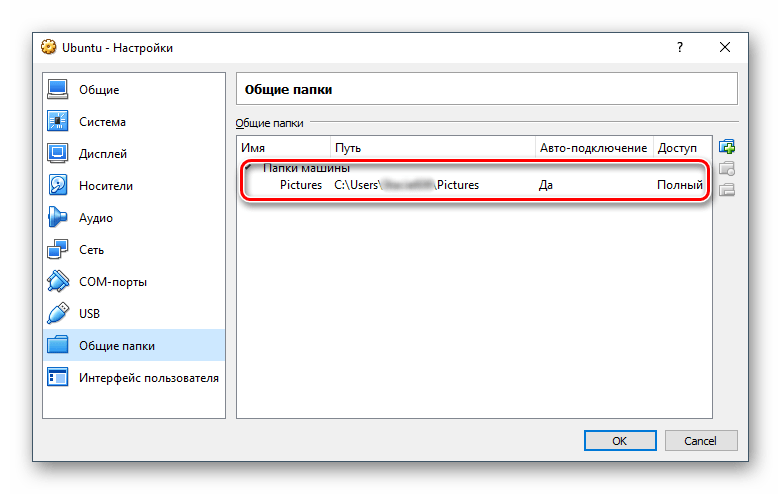
Когда настройка будет закончена, выбранная папка появится в таблице. Можно добавлять несколько таких папок, и все они будут отображаться здесь же.
Когда этот этап будет выполнен, потребуется воспользоваться дополнительным ПО, предназначенным для тонкой настройки ВиртуалБокс.
Шаг 3: Установка гостевых дополнений
Гостевые дополнения VirtualBox — это фирменный набор расширенных функций для более гибкой работы с виртуальными операционными системами.
Перед установкой не забудьте обновить VirtualBox до последней версии во избежание проблем с совместимостью программы и дополнений.
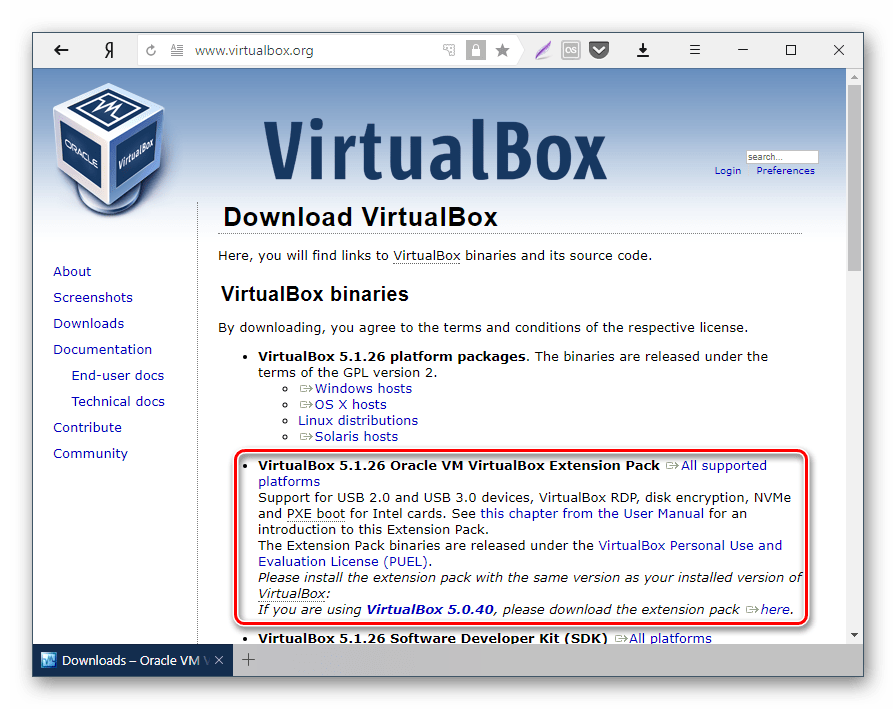
Перейдите по этой ссылке на страницу загрузок официального сайта ВиртуалБокс.
Нажмите на ссылку «All supported platforms» и скачайте файл.
На Windows и Linux он устанавливается по-разному, поэтому далее мы рассмотрим оба варианта.
- Установка VM VirtualBox Extension Pack в Windows
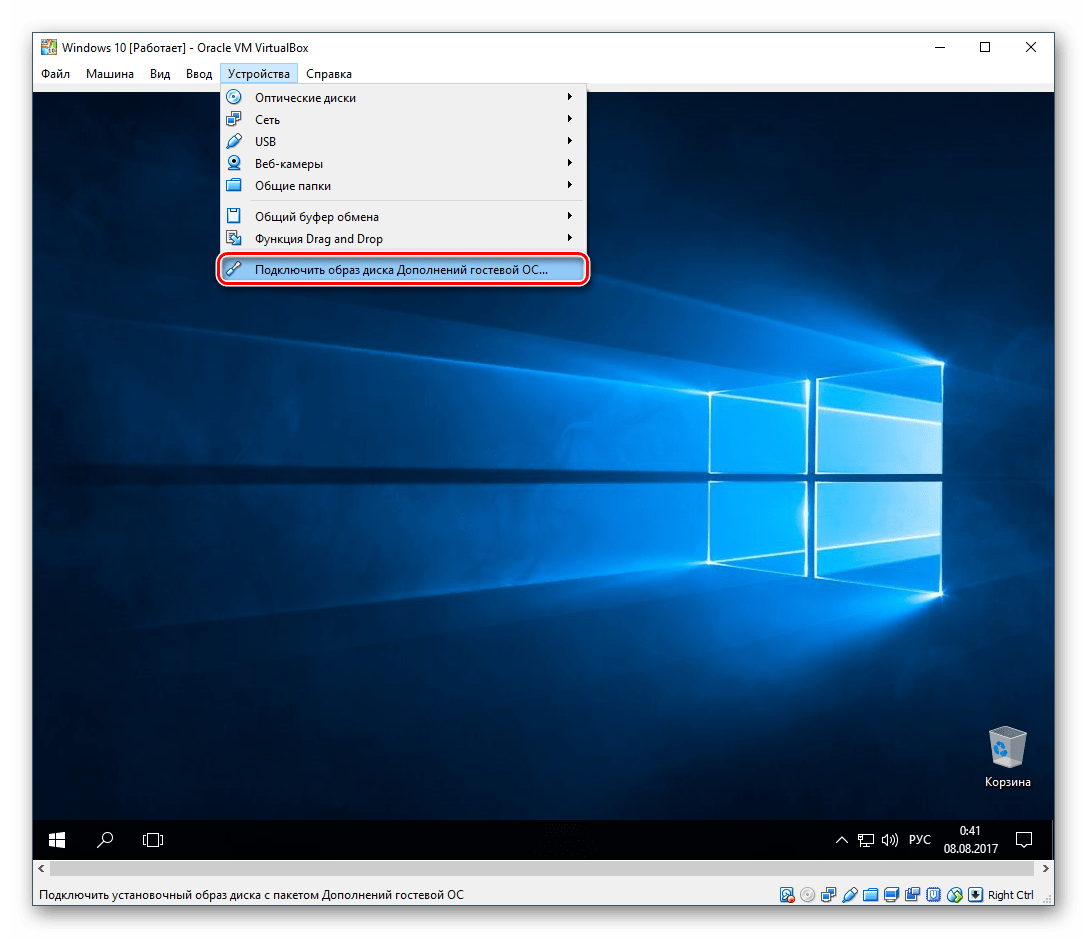
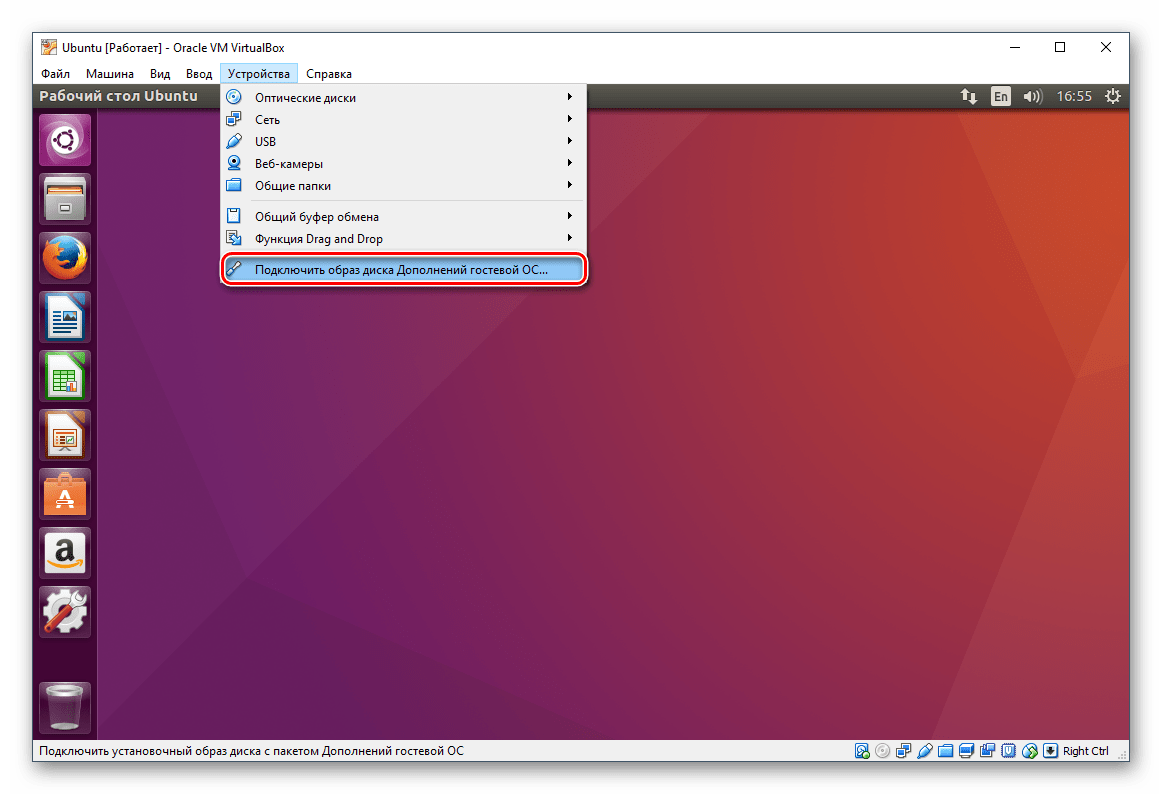
- На панели меню VirtualBox выберите «Устройства» >«Подключить образ диска Дополнений гостевой ОС…».

В Проводнике появится эмулированный диск с установщиком гостевых дополнений.
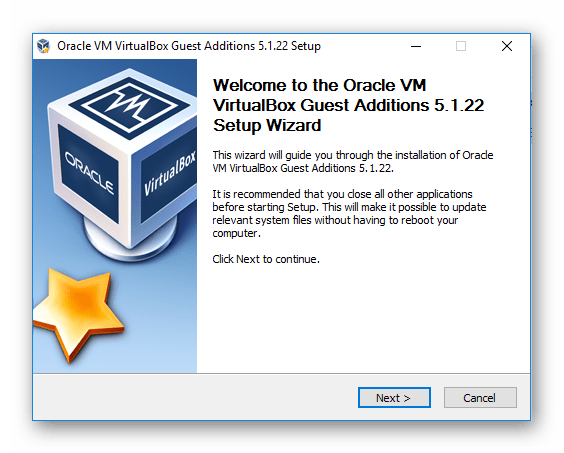
Щелкните по диску два раза левой кнопкой мыши, чтобы запустить инсталлятор.
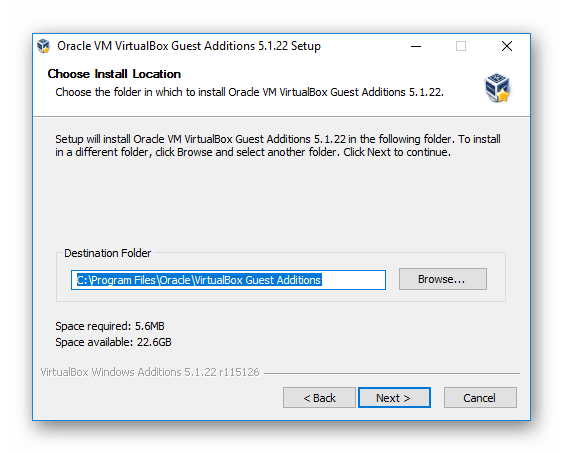
Выберите папку в виртуальной ОС, куда будут установлены дополнения. Рекомендуется не менять путь.
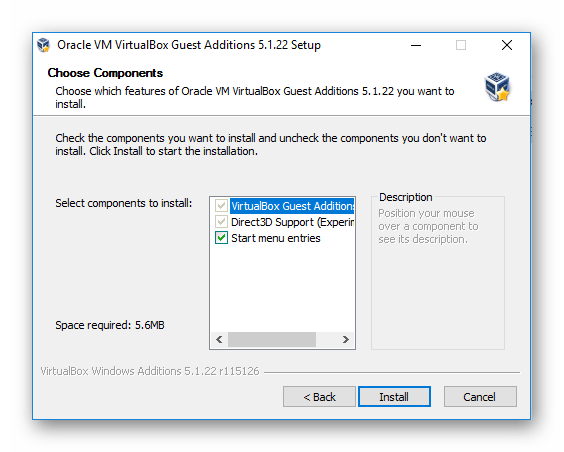
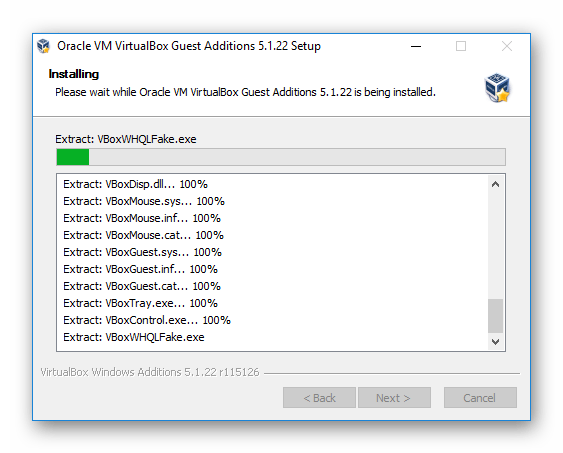
Отобразятся компоненты для установки. Нажмите «Install».
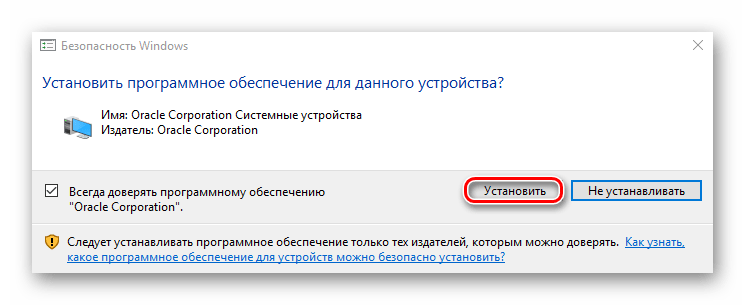
На вопрос: «Установить программное обеспечение для данного устройства?» выберите «Установить».
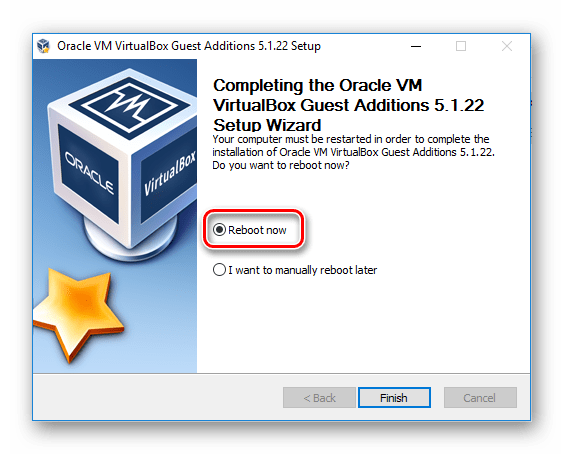
По завершении вам будет предложена перезагрузка. Согласитесь, нажав «Finish».
- После перезагрузки зайдите в Проводник, и в разделе «Сеть» вы сможете найти ту самую общую папку.
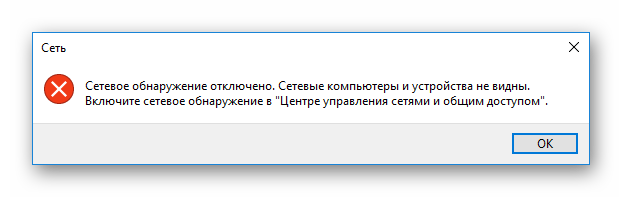
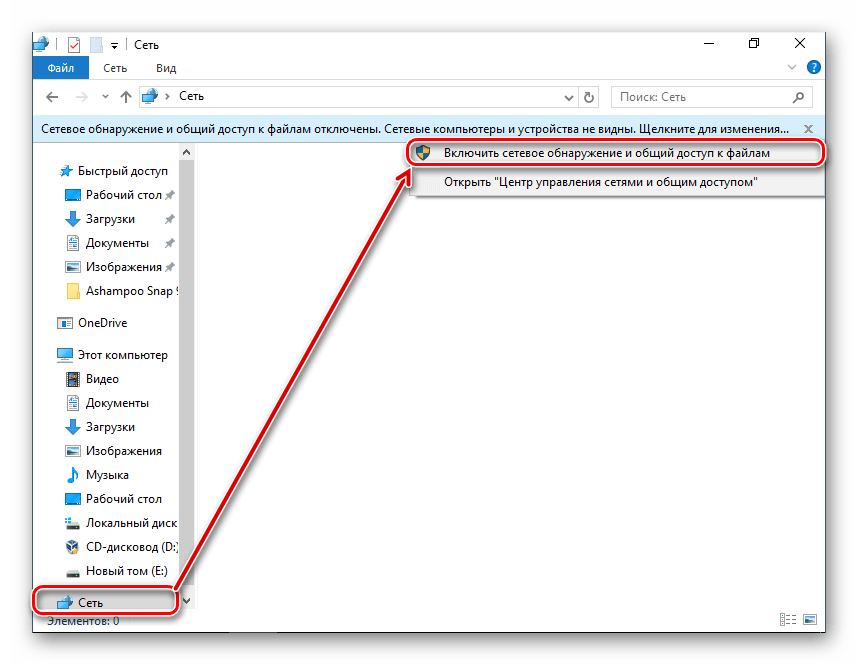
- В некоторых случаях сетевое обнаружение может быть отключено, и при нажатии на «Сеть» появляется такое сообщение об ошибке:
Нажмите «Ок».
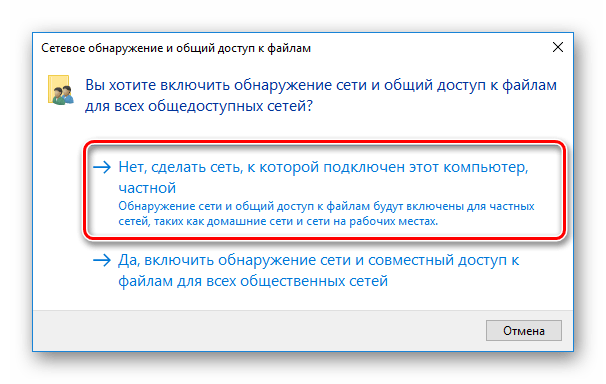
Откроется папка, в которой будет оповещение о том, что сетевые параметры недоступны. Щелкните по этому уведомлению и в меню выберите пункт «Включить сетевое обнаружение и общий доступ к файлам».В окне с вопросом о включении обнаружения сети выберите первый вариант: «Нет, сделать сеть, к которой подключен этот компьютер, частной».
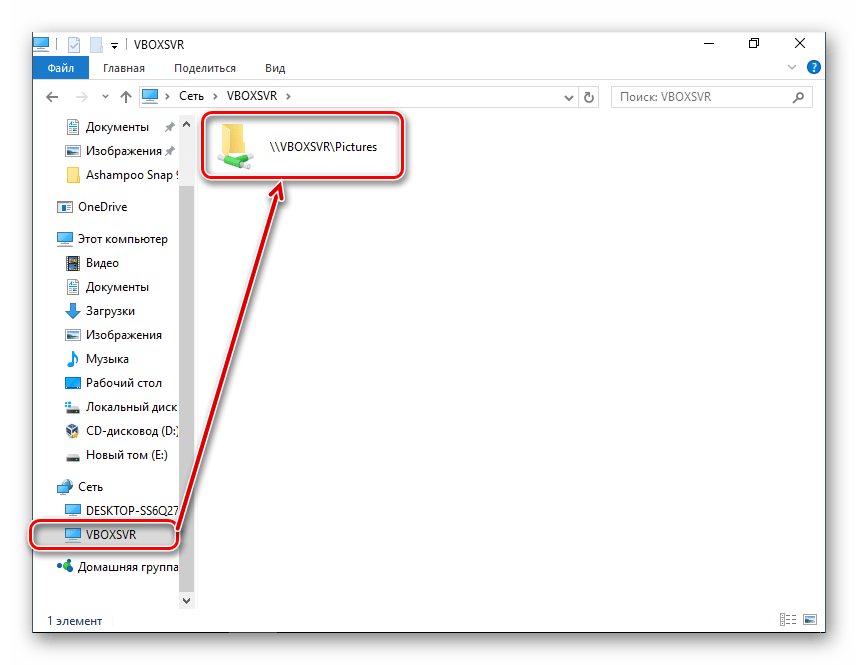
Теперь, щелкнув по «Сеть» в левой части окна еще раз, вы увидите общую папку, которая называется «VBOXSVR».
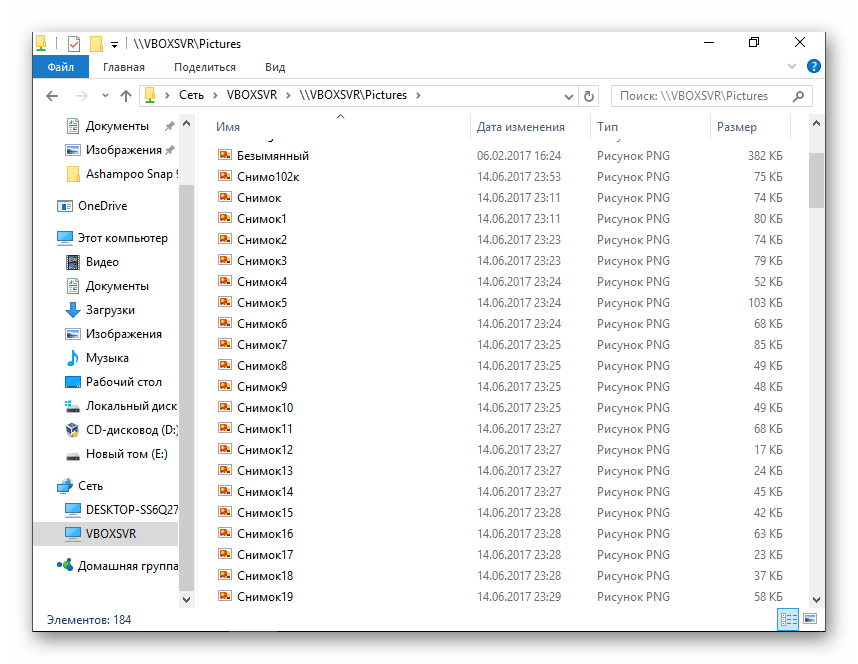
Внутри нее будут отображаться хранящиеся файлы той папки, которую вы расшарили.
- Установка VM VirtualBox Extension Pack в Linux
Установка дополнений в ОС на Linux будет показана на примере самого распространенного дистрибутива — Ubuntu.
- Запустите виртуальную систему и на панели меню VirtualBox выберите «Устройства» >«Подключить образ диска Дополнений гостевой ОС…».
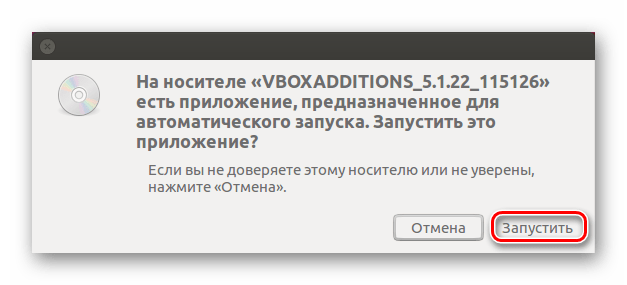
Откроется диалоговое окно, запрашивающее запуск исполняемого файла на диске. Нажмите на кнопку «Запустить».
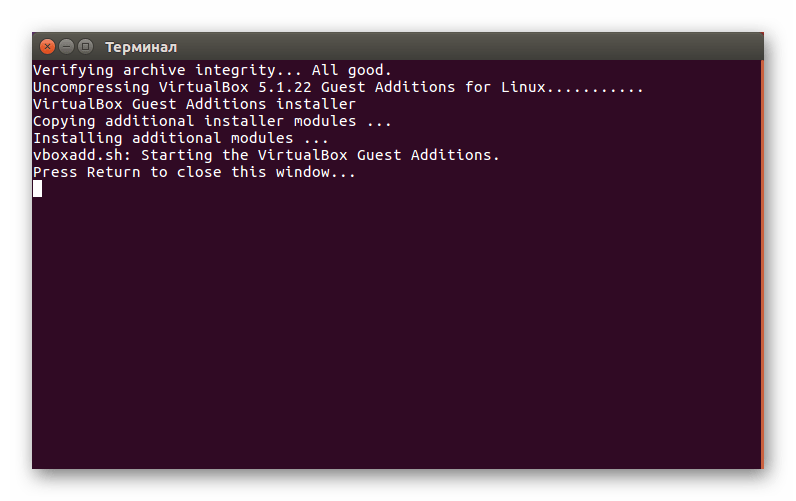
Процесс установки будет отображен в «Терминале», который затем можно будет закрыть.
Созданная общая папка может быть недоступна со следующей ошибкой:
«Не удалось показать содержимое этой папки. Недостаточно прав для просмотра содержимого объекта sf_Имя_папки».
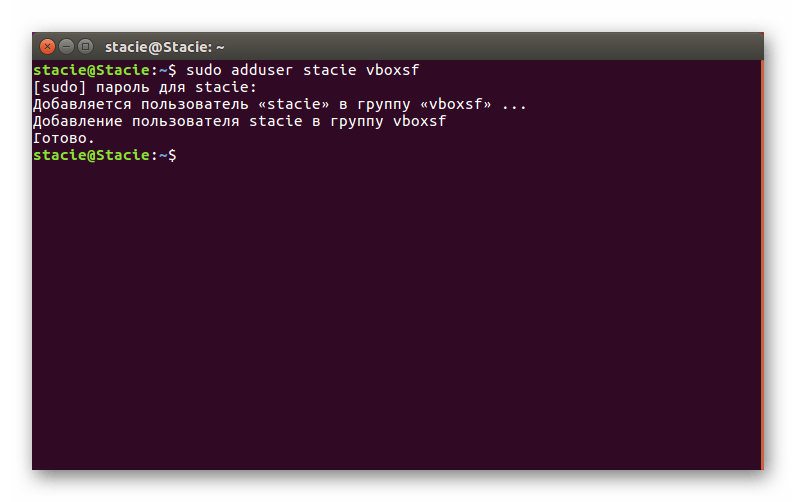
Поэтому заранее рекомендуется открыть новое окно «Терминала» и прописать в нем следующую команду:
sudo adduser имя_учетной_записи vboxsf
Введите пароль для sudo и дождитесь добавления пользователя в группу vboxsf.
- Перезагрузите виртуальную машину.
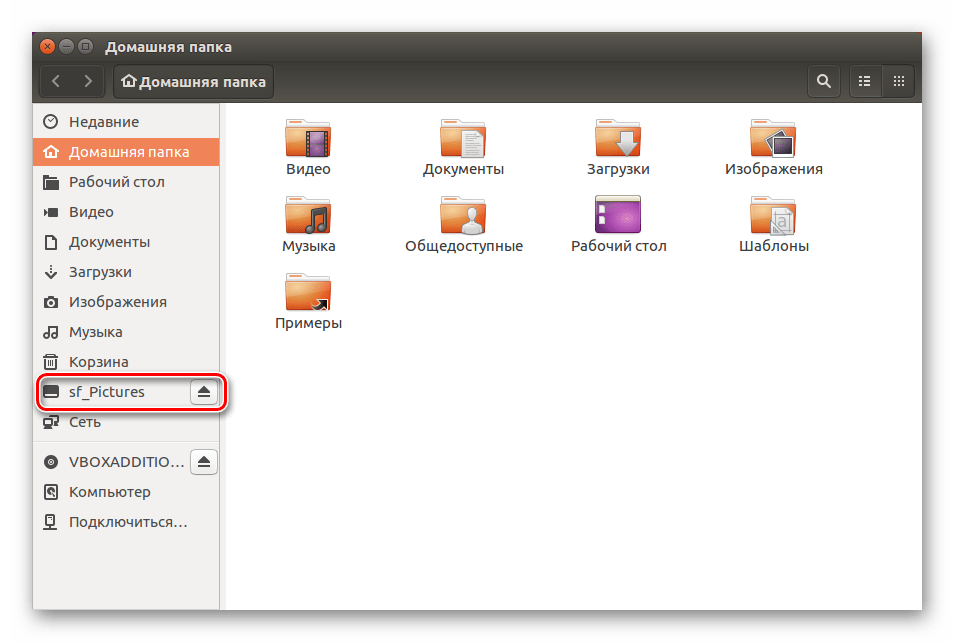
- После запуска системы зайдите в проводник, и в каталоге слева найдите ту папку, которую расшаривали. В данном случае общей стала стандартная системная папка «Изображения». Теперь ей можно пользоваться через хостовую и гостевую операционные системы.
В других дистрибутивах Linux последний шаг может несколько отличаться, однако в большинстве случаев принцип подключения общей папки остается таким же.
Таким несложным способом вы можете подключить любое количество общих папок в VirtualBox.
Помимо этой статьи, на сайте еще 12315 инструкций.
Добавьте сайт Lumpics.ru в закладки (CTRL+D) и мы точно еще пригодимся вам.Отблагодарите автора, поделитесь статьей в социальных сетях.
Источник