- Настройка сети VirtualBox
- Виды сетевых адаптеров VirtualBox
- Настройка сети Virtualbox
- 1. Настройка сети NAT
- 2. Настройка сети NAT
- 3. Настройка адаптера виртуального хоста
- 4. Настройка сетевого моста VirtualBox
- 5. Внутренняя сеть VirtualBox
- Выводы
- Set up a NAT network
- NAT Overview
- Create a NAT virtual network
- Connect a virtual machine
- Configuration Example: Attaching VMs and Containers to a NAT network
- Docker for Windows (Linux VM) and Windows Containers
- Multiple Applications using the same NAT
- Troubleshooting
- Multiple NAT networks are not supported
Настройка сети VirtualBox
Виртуальные машины VirtualBox очень часто используются для тестирования различного программного обеспечения и его взаимодействия между собой. Обычно, таким программам необходим доступ к интернету. Время от времени возникает необходимость протестировать работу программ по сети или даже создать небольшую тестовую лабораторию из виртуальных машин.
В этой инструкции мы рассмотрим как выполняется настройка сети VirtualBox различными способами. Вы узнаете как объединить машины в одну локальную сеть, как дать им доступ к интернету и как связать их с основной системой. Но сначала поговорим о том, как может работать сеть.
Виды сетевых адаптеров VirtualBox
Существует несколько способов как настроить сеть в virtualbox, и каждый из них подходит для лучше для решения одной задачи и меньше для другой. Рассмотрим основные:
- NAT — этот способ используется по умолчанию. Для каждой машины создается отдельная внутренняя локальная сеть, в которой машина получает ip 10.10.0.1. Машина может связаться с интернетом, используя технологию NAT, и вы можете обратиться к машине, используя проброс портов VirtualBox, но если у вас будет две виртуальные машины, то вы уже не сможете между ними так взаимодействовать. И если из основной системы к гостевой можно обратиться, то к основной ни гостевой уже никак не получится;
- Виртуальный адаптер хоста — создается виртуальный сетевой адаптер, к которому можно подключить несколько виртуальных машин, тем самым объединив их в локальную сеть. Доступа к интернету нет, но зато машины находятся в одной сети и каждая имеет свой ip адрес, теперь они могут взаимодействовать между собой. Основная система тоже доступна по ip 192.168.56.1. Машины доступны не только между собой, но и из основной системы;
- Сетевой мост — при таком подключении виртуальная машина становится полноценным членом локальной сети, к которой подключена основная система. Машина использует сетевой интерфейс чтобы получить адрес у роутера и становится доступна для других устройств, как и основной компьютер по своему ip адресу.
- Внутренняя сеть — почти то же самое, что и виртуальный адаптер хоста, только без возможности доступа к виртуальной сети из основной системы, доступа к интернету нет.
- Универсальный драйвер — позволяет использовать драйвер из расширений VirtualBox для связи между машинами, расположенными на разных физических хостах.
Теперь рассмотрим каждый вариант настройки более подробно.
Настройка сети Virtualbox
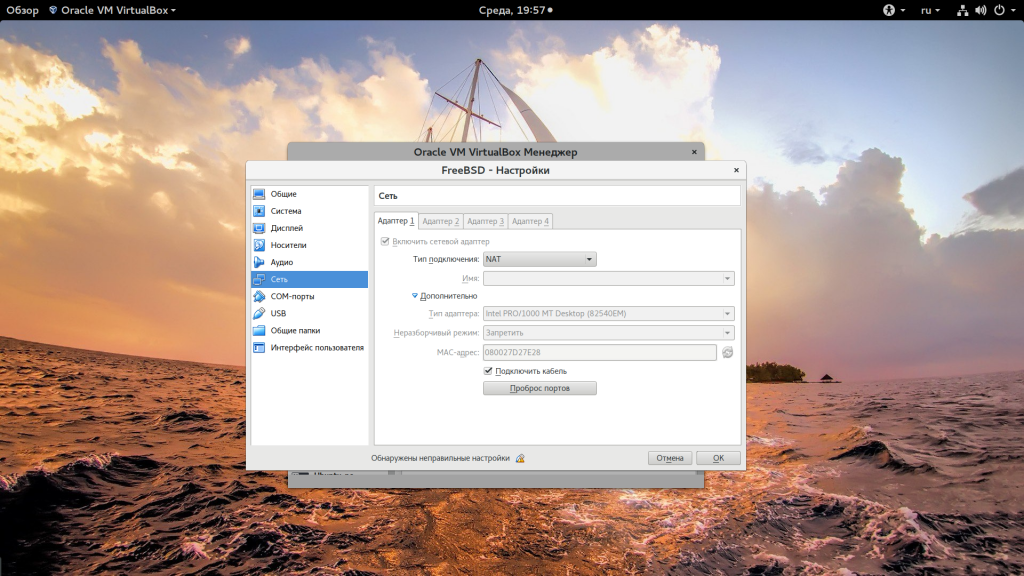
1. Настройка сети NAT
Здесь почти нет о чем говорить. Получение доступа к сети через NAT включено по умолчанию. Проброс портов я рассматривал в отдельной статье. Но если вы раньше отключали сетевые адаптеры, то чтобы включить NAT обратно достаточно открыть настройки нужной машины:
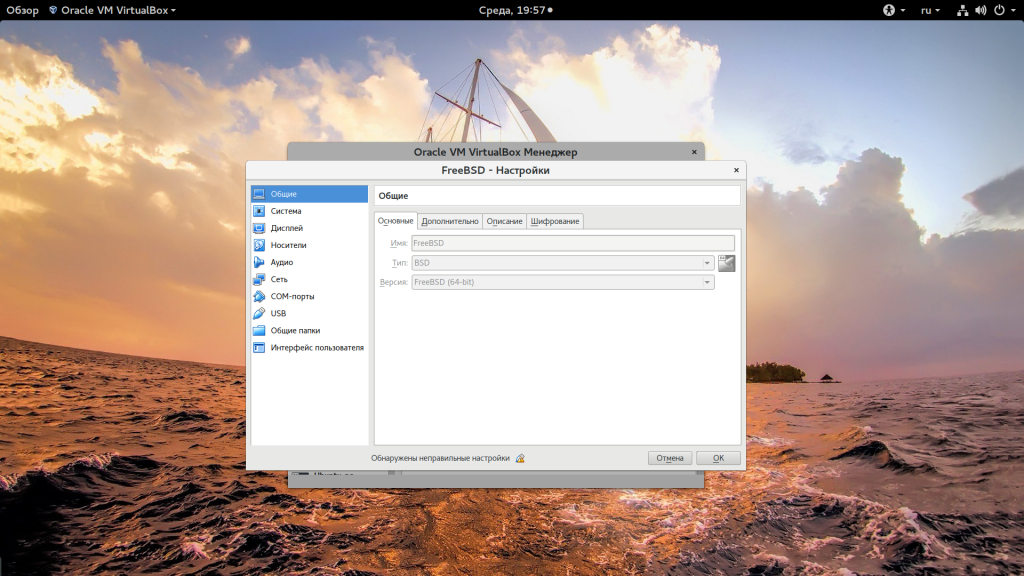
Перейти на вкладку «Сеть»:
Выбрать один из адаптеров. К виртуальной машине можно подключить несколько адаптеров и это очень удобно, так как вы можете комбинировать вместе адаптер виртуального хоста и NAT чтобы получить преимущества обоих режимов. Дальше вам нужно выбрать пункт «NAT» в списке «Тип подключения».
На вкладке «Дополнительно» вы можете настроить марку устройства адаптера и MAC адрес:

Если вы собираетесь устанавливать туда в Windows, то лучше будет работать Intel PRO/1000 MT Desktop, а для Linux можно оставить AMD PCNet FAST III, так как он поддерживается всеми операционными системами.
2. Настройка сети NAT
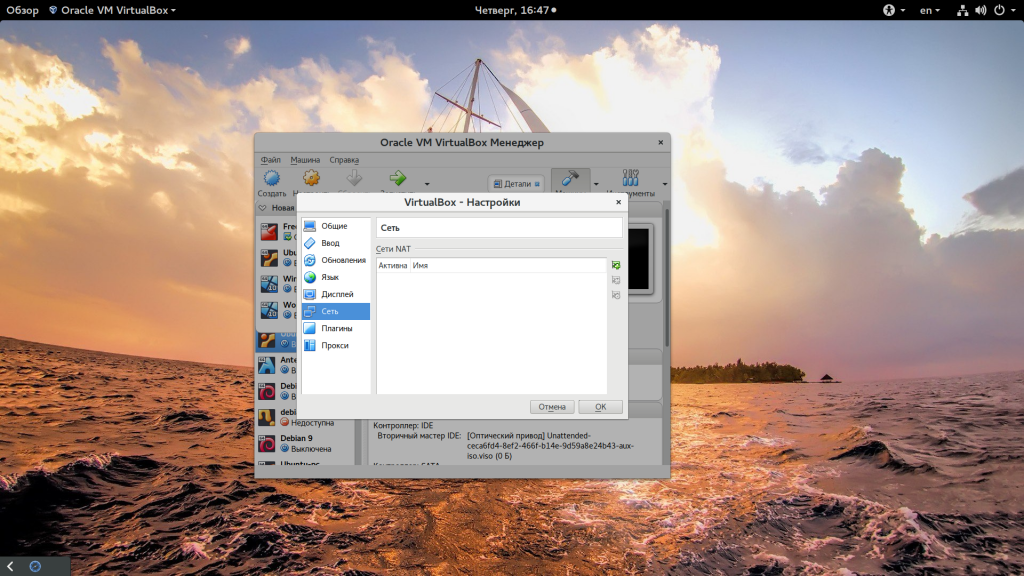
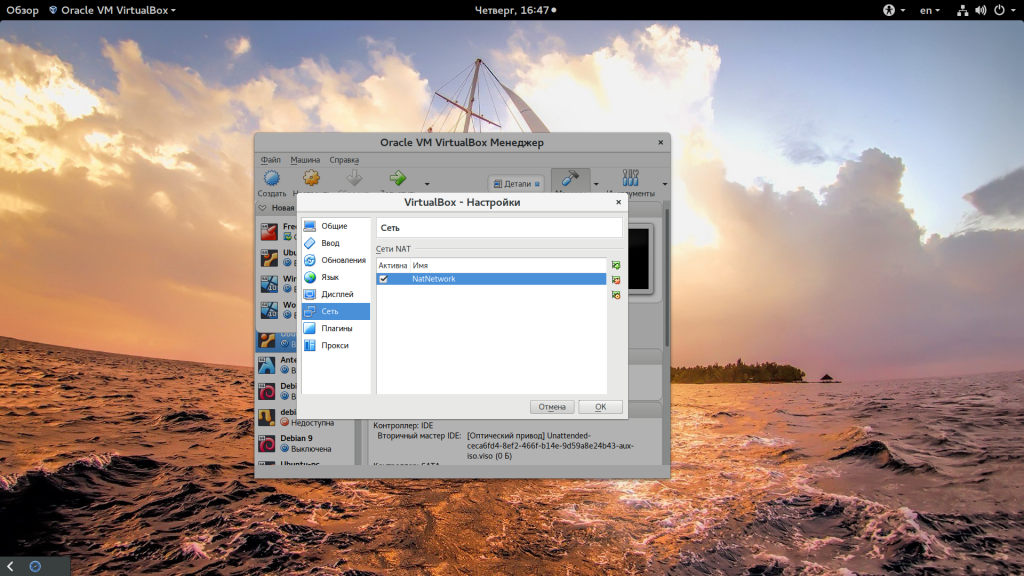
В версии Virtualbox, начиная с 4.3 была добавлена поддержка сетей NAT, это работает очень похоже на виртуальный адаптер хоста, все машины, подключенные к одной сети могут получить доступ друг к другу, а доступ в интернет выполняется через NAT, но основная система доступа к гостевым не имеет. Чтобы настроить такое подключение нужно сначала создать сеть NAT. Для этого откройте «Файл» -> «Настройки», «Сеть». Здесь перейдите на вкладку «Сети NAT». Дальше нажмите кнопку с зеленым плюсом, чтобы создать новую сеть:
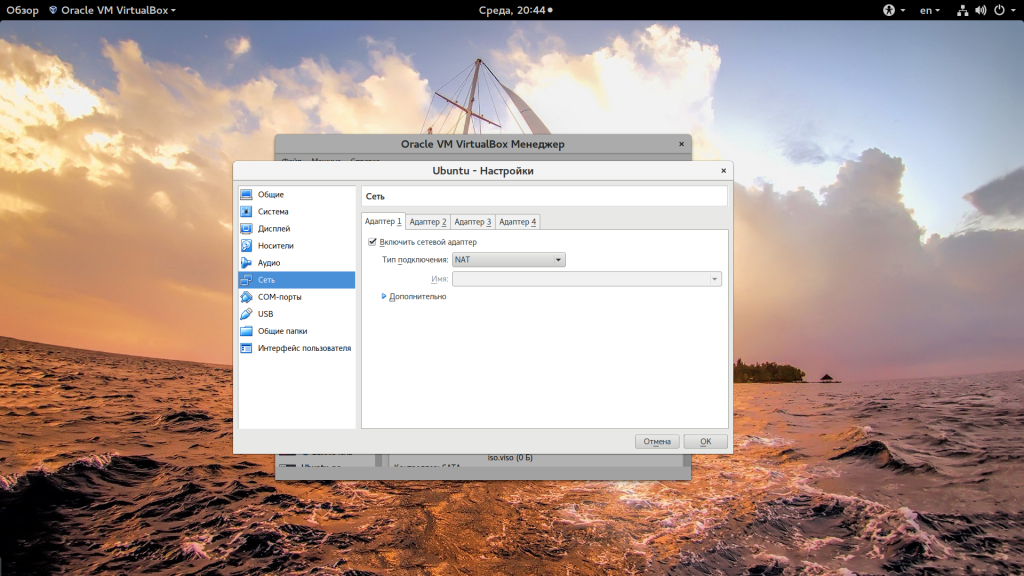
Нажмите «Ok» и закройте это окно. Дальше откройте настройки для виртуальной машины, перейдите на вкладку «Сеть» -> «Адаптер 1»:
Выберите «Тип подключения» — «Сеть NAT», а «Имя» — только что созданную сеть.
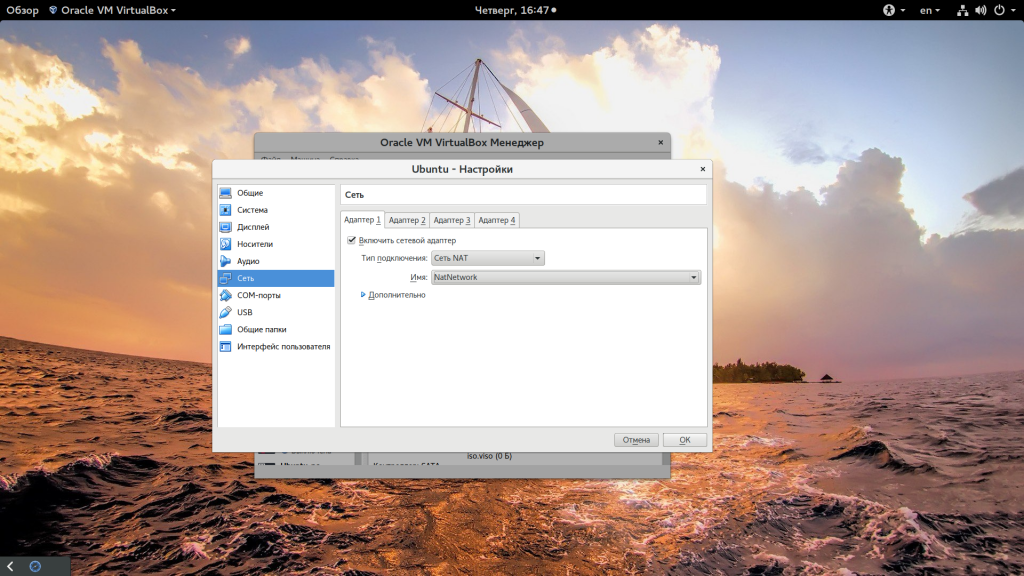
Теперь все машины, подключенные к этой сети, будут доступны друг другу, как в VMWare.
3. Настройка адаптера виртуального хоста
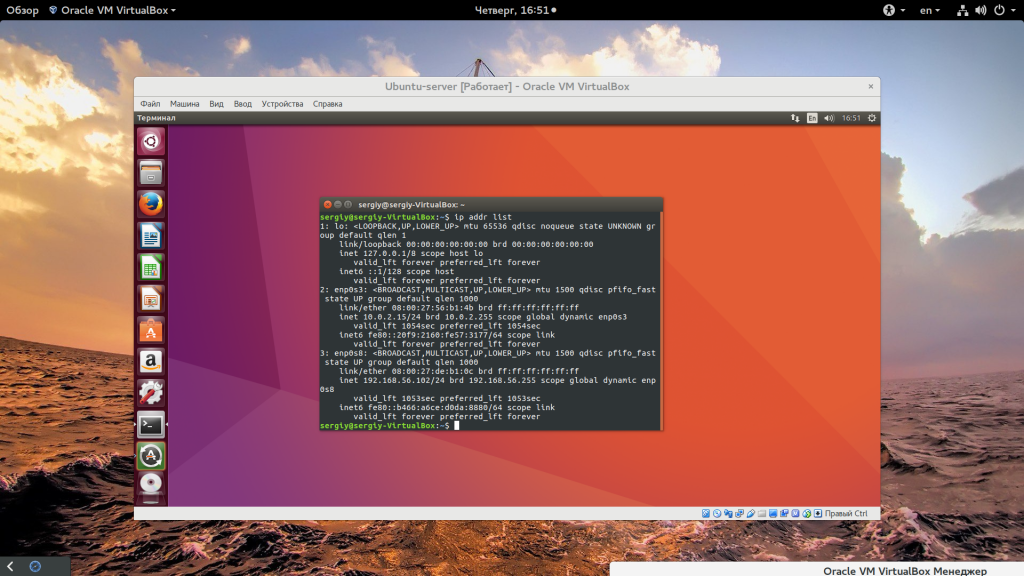
Теперь задача немного интереснее — нам нужна локальная сеть virtualbox между несколькими виртуальными машинами и хостом. Для того чтобы все это заработало в Linux, нам нужно чтобы были загружены модули ядра vboxnetadp и vboxnetflt:
lsmod | grep vbox
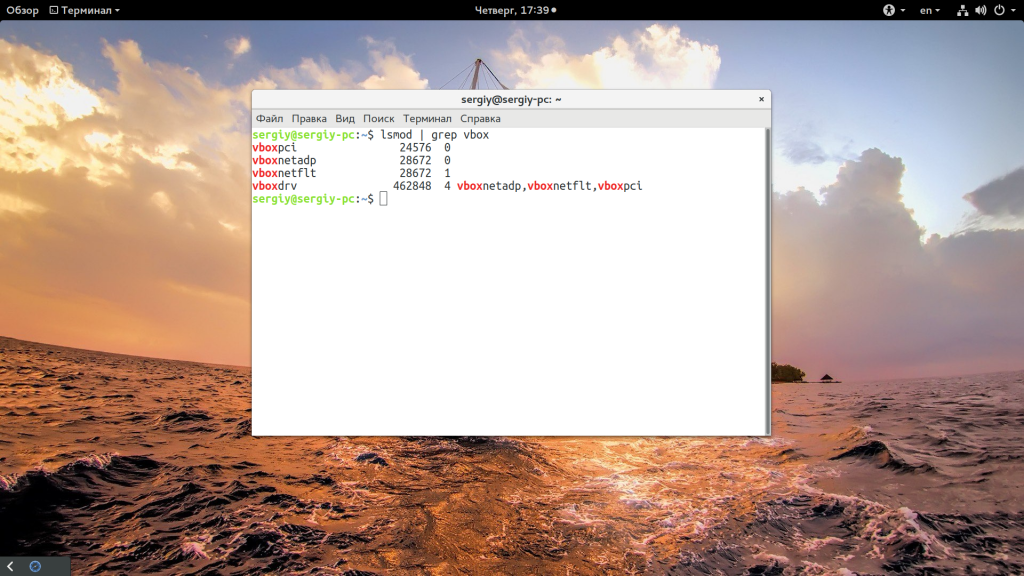
Возможно, для их правильной работы вам придется установить пакет net-tools. Дальше нужно создать сам виртуальный адаптер. Для этого откройте меню «Файл», затем «Настройки» -> «Сеть». Затем нажмите кнопку с зеленым значком плюс, а затем «Ok», все параметры можно оставить по умолчанию. В VirtualBox 5.2 и выше интерфейс был изменен. Теперь вам нужно открыть меню «Инструменты» -> «Менеджер сетей хоста»:
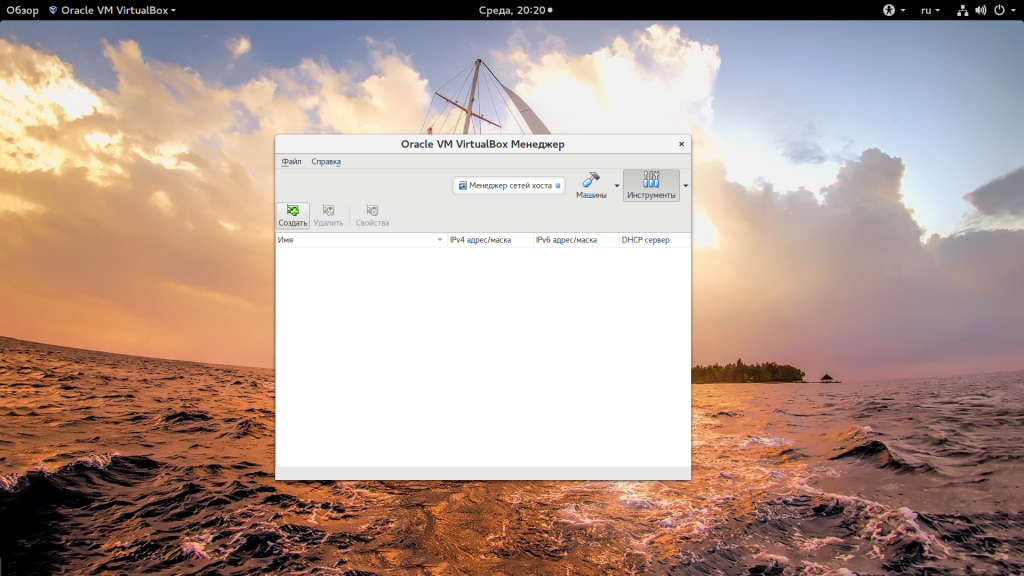
Нажмите кнопку «Создать», затем, в появившемся адаптере, напротив пункта DHCP установите галочку «Включен».
Теперь вернитесь к списку виртуальных машин, зайдите в настройки машины, «Сеть»:

Выберите «Тип подключения» — «Виртуальный адаптер хоста», а имя vboxnet0, тот, который вы создали раньше.
Для всех машин, которые вы хотите объединить в одну сеть нужно выбирать один и тот же адаптер хоста. Если вы захотите добавить машинам также доступ в интернет, просто перейдите на вкладку «Адаптер 2», включите его и настройте NAT, как описано в первом пункте.
4. Настройка сетевого моста VirtualBox
Режим сетевого моста позволяет виртуальной машине выступать в роли реального сетевого устройства с отдельным ip адресом. Чтобы это настроить откройте это же меню — настойки виртуальной машины, затем «Сеть». Здесь выберите «Тип подключения» — «Сетевой мост»:
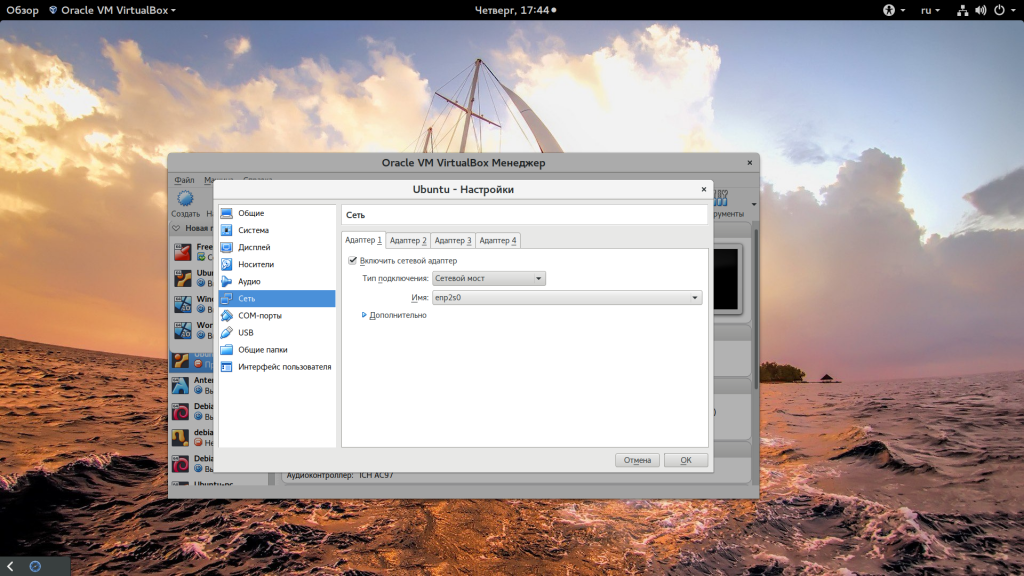
В поле «Имя» вам необходимо выбрать сетевой интерфейс, который будет использоваться для связи с внешним миром. Минус такого способа в том, что внешние компьютеры смогут получить доступ к виртуальной машине, а это не очень хорошо с точки зрения безопасности.
5. Внутренняя сеть VirtualBox
Режим внутренняя сеть Virtualbox похож на «Виртуальный адаптер хоста», за тем лишь исключением, что из хостовой системы доступа к гостевым не будет, и настроить все немного проще. Достаточно выбрать «Тип подключения» — «внутренняя сеть», а затем просто выбрать нужную сеть в поле «Имя», или создать новую, просто изменив имя текущей.

Как видите, существует тип подключения NAT — где только интернет, Мост — где машина становится членом внешней сети, а все остальные — это настройка виртуальной сети virtualbox, где машины могут видеть друг друга.
Выводы
В этой небольшой статье мы рассмотрели как выполняется настройка сети VirtualBox, как видите, это не так уж сложно, как может показаться на первый взгляд, несмотря на операционную систему, которую вы используете. В большинстве случаев достаточно сети NAT, но иногда может понадобиться виртуальный адаптер хоста, все же остальные режимы используются намного реже.
Set up a NAT network
Windows 10 Hyper-V allows native network address translation (NAT) for a virtual network.
This guide will walk you through:
- creating a NAT network
- connecting an existing virtual machine to your new network
- confirming that the virtual machine is connected correctly
- Windows 10 Anniversary Update or later
- Hyper-V is enabled (instructions here)
Note: Currently, you are limited to one NAT network per host. For additional details on the Windows NAT (WinNAT) implementation, capabilities, and limitations, please reference the WinNAT capabilities and limitations blog
NAT Overview
NAT gives a virtual machine access to network resources using the host computer’s IP address and a port through an internal Hyper-V Virtual Switch.
Network Address Translation (NAT) is a networking mode designed to conserve IP addresses by mapping an external IP address and port to a much larger set of internal IP addresses. Basically, a NAT uses a flow table to route traffic from an external (host) IP Address and port number to the correct internal IP address associated with an endpoint on the network (virtual machine, computer, container, etc.)
Additionally, NAT allows multiple virtual machines to host applications that require identical (internal) communication ports by mapping these to unique external ports.
For all of these reasons, NAT networking is very common for container technology (see Container Networking).
Create a NAT virtual network
Let’s walk through setting up a new NAT network.
Open a PowerShell console as Administrator.
Create an internal switch.
Find the interface index of the virtual switch you just created.
You can find the interface index by running Get-NetAdapter
Your output should look something like this:
The internal switch will have a name like vEthernet (SwitchName) and an Interface Description of Hyper-V Virtual Ethernet Adapter . Take note of its ifIndex to use in the next step.
Configure the NAT gateway using New-NetIPAddress.
Here is the generic command:
In order to configure the gateway, you’ll need a bit of information about your network:
IPAddress — NAT Gateway IP specifies the IPv4 or IPv6 address to use as the NAT gateway IP.
The generic form will be a.b.c.1 (e.g. 172.16.0.1). While the final position doesn’t have to be .1, it usually is (based on prefix length)
A common gateway IP is 192.168.0.1
PrefixLength — NAT Subnet Prefix Length defines the NAT local subnet size (subnet mask). The subnet prefix length will be an integer value between 0 and 32.
0 would map the entire internet, 32 would only allow one mapped IP. Common values range from 24 to 12 depending on how many IPs need to be attached to the NAT.
A common PrefixLength is 24 — this is a subnet mask of 255.255.255.0
InterfaceIndex — ifIndex is the interface index of the virtual switch, which you determined in the previous step.
Run the following to create the NAT Gateway:
Configure the NAT network using New-NetNat.
Here is the generic command:
In order to configure the gateway, you’ll need to provide information about the network and NAT Gateway:
Name — NATOutsideName describes the name of the NAT network. You’ll use this to remove the NAT network.
InternalIPInterfaceAddressPrefix — NAT subnet prefix describes both the NAT Gateway IP prefix from above as well as the NAT Subnet Prefix Length from above.
The generic form will be a.b.c.0/NAT Subnet Prefix Length
From the above, for this example, we’ll use 192.168.0.0/24
For our example, run the following to setup the NAT network:
Congratulations! You now have a virtual NAT network! To add a virtual machine, to the NAT network follow these instructions.
Connect a virtual machine
To connect a virtual machine to your new NAT network, connect the internal switch you created in the first step of the NAT Network Setup section to your virtual machine using the VM Settings menu.
Since WinNAT by itself does not allocate and assign IP addresses to an endpoint (e.g. VM), you will need to do this manually from within the VM itself — i.e. set IP address within range of NAT internal prefix, set default gateway IP address, set DNS server information. The only caveat to this is when the endpoint is attached to a container. In this case, the Host Network Service (HNS) allocates and uses the Host Compute Service (HCS) to assign the IP address, gateway IP, and DNS info to the container directly.
Configuration Example: Attaching VMs and Containers to a NAT network
If you need to attach multiple VMs and containers to a single NAT, you will need to ensure that the NAT internal subnet prefix is large enough to encompass the IP ranges being assigned by different applications or services (e.g. Docker for Windows and Windows Container – HNS). This will require either application-level assignment of IPs and network configuration or manual configuration which must be done by an admin and guaranteed not to re-use existing IP assignments on the same host.
Docker for Windows (Linux VM) and Windows Containers
The solution below will allow both Docker for Windows (Linux VM running Linux containers) and Windows Containers to share the same WinNAT instance using separate internal vSwitches. Connectivity between both Linux and Windows containers will work.
User has connected VMs to a NAT network through an internal vSwitch named “VMNAT” and now wants to install Windows Container feature with docker engine
Docker/HNS will assign IPs to Windows containers and Admin will assign IPs to VMs from the difference set of the two.
User has installed Windows Container feature with docker engine running and now wants to connect VMs to the NAT network
Docker/HNS will assign IPs to Windows containers and Admin will assign IPs to VMs from the difference set of the two.
In the end, you should have two internal VM switches and one NetNat shared between them.
Multiple Applications using the same NAT
Some scenarios require multiple applications or services to use the same NAT. In this case, the following workflow must be followed so that multiple applications / services can use a larger NAT internal subnet prefix
We will detail the Docker 4 Windows — Docker Beta — Linux VM co-existing with the Windows Container feature on the same host as an example. This workflow is subject to change
C:> net stop docker
Stop Docker4Windows MobyLinux VM
PS C:> Get-ContainerNetwork | Remove-ContainerNetwork -force
PS C:> Get-NetNat | Remove-NetNat
Removes any previously existing container networks (i.e. deletes vSwitch, deletes NetNat, cleans up)
New-ContainerNetwork -Name nat -Mode NAT –subnetprefix 10.0.76.0/24 (this subnet will be used for Windows containers feature) Creates internal vSwitch named nat
Creates NAT network named “nat” with IP prefix 10.0.76.0/24
Remove-NetNAT
Removes both DockerNAT and nat NAT networks (keeps internal vSwitches)
New-NetNat -Name DockerNAT -InternalIPInterfaceAddressPrefix 10.0.0.0/17 (this will create a larger NAT network for both D4W and containers to share)
Creates NAT network named DockerNAT with larger prefix 10.0.0.0/17
Run Docker4Windows (MobyLinux.ps1)
Creates internal vSwitch DockerNAT
Creates NAT network named “DockerNAT” with IP prefix 10.0.75.0/24
Net start docker
Docker will use the user-defined NAT network as the default to connect Windows containers
In the end, you should have two internal vSwitches – one named DockerNAT and the other named nat. You will only have one NAT network (10.0.0.0/17) confirmed by running Get-NetNat. IP addresses for Windows containers will be assigned by the Windows Host Network Service (HNS) from the 10.0.76.0/24 subnet. Based on the existing MobyLinux.ps1 script, IP addresses for Docker 4 Windows will be assigned from the 10.0.75.0/24 subnet.
Troubleshooting
Multiple NAT networks are not supported
This guide assumes that there are no other NATs on the host. However, applications or services will require the use of a NAT and may create one as part of setup. Since Windows (WinNAT) only supports one internal NAT subnet prefix, trying to create multiple NATs will place the system into an unknown state.
To see if this may be the problem, make sure you only have one NAT:
If a NAT already exists, delete it
Make sure you only have one “internal” vmSwitch for the application or feature (e.g. Windows containers). Record the name of the vSwitch
Check to see if there are private IP addresses (e.g. NAT default Gateway IP Address – usually x.y.z.1) from the old NAT still assigned to an adapter
If an old private IP address is in use, please delete it
Removing Multiple NATs
We have seen reports of multiple NAT networks created inadvertently. This is due to a bug in recent builds (including Windows Server 2016 Technical Preview 5 and Windows 10 Insider Preview builds). If you see multiple NAT networks, after running docker network ls or Get-ContainerNetwork, please perform the following from an elevated PowerShell:
Reboot the operating system prior executing the subsequent commands ( Restart-Computer )
See this setup guide for multiple applications using the same NAT to rebuild your NAT environment, if necessary.


