- Running VS Code on Linux
- Installation
- Debian and Ubuntu based distributions
- RHEL, Fedora and CentOS based distributions
- openSUSE and SLE based distributions
- AUR package for Arch Linux
- Installing .rpm package manually
- Updates
- Node.js
- Setting VS Code as the default text editor
- xdg-open
- Debian alternatives system
- Next Steps
- Common Questions
- Azure VM Issues
- Debian and Moving Files to Trash
- error ENOSPC
- I can’t see Chinese characters in Ubuntu
- Package git is not installed
- The code bin command does not bring the window to the foreground on Ubuntu
- приступая к работе с Visual Studio Code с подсистема Windows для Linux
- установка VS Code и расширения Remote WSL
- Обновление дистрибутива Linux
- Откройте проект WSL в Visual Studio Code
- Из командной строки
- Из VS Code
- расширения в VS Code Remote
- Установка Git (необязательно)
- Установка Терминала Windows (необязательно)
- Дополнительные ресурсы
- Using C++ on Linux in VS Code
- Prerequisites
- Ensure GCC is installed
- Create Hello World
- Add hello world source code file
- Explore IntelliSense
- Build helloworld.cpp
- Running the build
- Modifying tasks.json
- Debug helloworld.cpp
- Start a debugging session
- Step through the code
- Set a watch
- C/C++ configurations
- Reusing your C++ configuration
Running VS Code on Linux
Installation
Debian and Ubuntu based distributions
The easiest way to install for Debian/Ubuntu based distributions is to download and install the .deb package (64-bit) either through the graphical software center if it’s available or through the command line with:
Installing the .deb package will automatically install the apt repository and signing key to enable auto-updating using the regular system mechanism. Note that 32-bit and .tar.gz binaries are also available on the download page.
The repository and key can also be installed manually with the following script:
Then update the package cache and install the package using:
RHEL, Fedora and CentOS based distributions
We currently ship the stable 64-bit VS Code in a yum repository, the following script will install the key and repository:
Then update the package cache and install the package using dnf (Fedora 22 and above):
Or on older versions using yum :
openSUSE and SLE based distributions
The yum repository above also works for openSUSE and SLE based systems, the following script will install the key and repository:
Then update the package cache and install the package using:
AUR package for Arch Linux
There is a community maintained Arch User Repository (AUR) package for VS Code.
Installing .rpm package manually
The .rpm package (64-bit) can also be manually downloaded and installed, however auto-updating won’t work unless the repository above is installed. Once downloaded it can be installed using your package manager, for example with dnf :
Note that 32-bit and .tar.gz binaries are are also available on the download page.
Updates
VS Code ships monthly and you can see when a new release is available by checking Updates. If the VS Code repository was installed correctly, then your system package manager should handle auto-updating in the same way as other packages on the system.
Node.js
Node.js is a popular platform and runtime for easily building and running JavaScript applications. It also includes NPM, a Package Manager for Node.js modules. You’ll see Node.js and NPM mentioned frequently in our documentation and some optional VS Code tooling requires Node.js (for example, the VS Code extension generator).
If you’d like to install Node.js on Linux, see Installing Node.js via package manager to find the Node.js package and installation instructions tailored to your Linux distribution.
To learn more about JavaScript and Node.js, see our Node.js tutorial where you’ll learn about running and debugging Node.js applications with VS Code.
Setting VS Code as the default text editor
xdg-open
You can set the default text editor for text files ( text/plain ) that is used by xdg-open with the following command:
Debian alternatives system
Debian-based distributions allow setting a default editor using the alternatives system, without concern for the mime type. You can set this by running the following and selecting code.
Next Steps
Once you have installed VS Code, these topics will help you learn more about VS Code:
- Additional Components — Learn how to install Git, Node.js, TypeScript and tools like Yeoman.
- User Interface — A quick orientation to VS Code.
- User/Workspace Settings — Learn how to configure VS Code to your preferences through settings.
Common Questions
Azure VM Issues
I’m getting a «Running without the SUID sandbox» error?
You can safely ignore this error.
Debian and Moving Files to Trash
If you see an error when deleting files from the VS Code Explorer on the Debian operating system, it might be because the trash implementation that VS Code is using is not there.
Run these commands to solve this issue:
error ENOSPC
When you see this error, it indicates that the VS Code file watcher is running out of handles. The current limit can be viewed by running:
The limit can be increased to its maximum by editing /etc/sysctl.conf and adding this line to the end of the file:
The new value can then be loaded in by running sudo sysctl -p . Note that Arch Linux works a little differently, view this page for advice.
While 524288 is the maximum number of files that can be watched, if you’re in an environment that is particularly memory constrained, you may wish to lower the number. Each file watch takes up 540 bytes (32-bit) or
1kB (64-bit), so assuming that all 524288 watches are consumed that results in an upper bound of around 256MB (32-bit) or 512MB (64-bit).
I can’t see Chinese characters in Ubuntu
We’re working on a fix. In the meantime, open the application menu, then choose File > Preferences > Settings. Then set editor.fontFamily as shown:
Package git is not installed
This error can appear during installation and is typically caused by the package manager’s being out of date. Try updating it and installing again:
The code bin command does not bring the window to the foreground on Ubuntu
Running ‘code .’ on Ubuntu when VS Code is already open in the current directory will not bring VS Code into the foreground. This is a feature of the OS which can be disabled using ccsm .
Under General > General Options > Focus & Raise Behaviour, set «Focus Prevention Level» to «Off». Remember this is an OS-level setting that will apply to all applications, not just VS Code.
Источник
приступая к работе с Visual Studio Code с подсистема Windows для Linux
Visual Studio Code, вместе с расширением Remote-WSL, позволяет использовать WSL в качестве среды разработки для полной времени непосредственно из VS Code. Вы можете выполнить следующие действия:
- Разработка в среде под управлением Linux
- Использование цепочек инструментов и служебных программ для Linux
- запускайте и отлаживать приложения Linux с помощью Windows и сохраняя доступ к средствам повышения производительности, таким как Outlook и Office
- использование встроенного терминала VS Code для запуска дистрибутива Linux по выбору
- воспользуйтесь преимуществами VS Code функций, таких как завершение кода Intellisense, linting, поддержка отладки, фрагменты кодаи модульное тестирование .
- простота управления версиями с помощью встроенной поддержки Git VS Code
- выполнение команд и VS Code расширений непосредственно в проектах WSL
- изменение файлов в Linux или смонтированной Windows файловой системе (например,/мнт/к) без беспокойства о проблемах с путями, двоичной совместимости или других трудностей между операционными системами
установка VS Code и расширения Remote WSL
перейдите на страницу установки VS Code и выберите двоичный установщик 32 или 64. установите Visual Studio Code на Windows (а не в файловую систему WSL).
При появлении запроса на Выбор дополнительных задач во время установки обязательно установите флажок Добавить в путь , чтобы можно было легко открыть папку в WSL с помощью команды Code.
Установите Пакет расширений для удаленной разработки. Этот пакет расширений включает расширение Remote-WSL в дополнение к расширениям Remote-SSH и Remote-Container, что позволяет открывать любую папку в контейнере, на удаленном компьютере или в WSL.
Чтобы установить расширение Remote-WSL, потребуется версия 1,35 или более поздняя VS Code. не рекомендуется использовать WSL в VS Code без расширения Remote-WSL, так как будет потеряна поддержка автоматического завершения, отладки, linting и т. д. Забавный факт. это расширение WSL устанавливается в $HOME/.вскоде/екстенсионс (введите команду ls $HOME\.vscode\extensions\ в PowerShell).
Обновление дистрибутива Linux
в некоторых дистрибутивах WSL Linux отсутствуют библиотеки, необходимые для запуска сервера VS Code. Вы можете добавить дополнительные библиотеки в дистрибутив Linux с помощью диспетчера пакетов.
Например, чтобы обновить Debian или Ubuntu, используйте:
Чтобы добавить wget (для получения содержимого с веб-серверов) и CA-Certificates (чтобы разрешить приложениям на основе SSL проверять подлинность SSL-соединений), введите:
Откройте проект WSL в Visual Studio Code
Из командной строки
Чтобы открыть проект из дистрибутива WSL, откройте командную строку распространения и введите: code .

Из VS Code
кроме того, можно получить доступ к дополнительным VS Code удаленным параметрам с помощью ярлыка: CTRL+SHIFT+P в VS Code, чтобы открыть палитру команд. если затем ввести, Remote-WSL вы увидите список доступных VS Code удаленных параметров, что позволит повторно открыть папку в удаленном сеансе, указать, какое распространение следует открыть в, и многое другое.

расширения в VS Code Remote
расширение Remote-WSL разделяет VS Code в архитектуру «клиент-сервер» с помощью клиента (пользовательского интерфейса), работающего на компьютере Windows, и сервера (код, Git, подключаемые модули и т. д.), запускаемые удаленно.
при запуске VS Code удаленно на вкладке «расширения» отобразится список расширений, разделенных между локальным компьютером и дистрибутивом WSL.
Установка локального расширения, например темы, должна быть установлена только один раз.
Некоторые расширения, такие как расширение Python или все, что обрабатывает такие действия, как linting или Отладка, должны устанавливаться отдельно на каждом удаленном распределении WSL. VS Code отобразит значок предупреждения ⚠ , а также зеленую кнопку «установить в WSL», если установлено локальное расширение, которое не установлено на удаленном компьютере WSL.
дополнительные сведения см. в VS Code документах:
при запуске VS Code Remote в WSL сценарии запуска оболочки запускаться не будут. Дополнительные сведения о выполнении дополнительных команд или изменении среды см. в этой статье о сценариях расширенной настройки среды .
возникли проблемы при запуске VS Code из командной строки WSL? В этом руководство по устранению неполадок содержатся советы по изменению переменных пути, устранению ошибок расширения, связанных с отсутствием зависимостей, устранению проблем с завершением строк Git, установке локального VSIX на удаленном компьютере, запуску окна браузера, порту localhost для блокировки, веб-сокеты не работают, ошибки при хранении данных расширения и многое другое.
Установка Git (необязательно)
Если вы планируете работать совместно с другими пользователями или размещать проект на сайте с открытым исходным кодом (например, GitHub), примите во внимание, что VS Code поддерживает управление версиями с помощью Git. Вкладка системы управления версиями в VS Code отслеживает все изменения и содержит общие команды Git (добавление, фиксация, принудительная отправка, извлечение) прямо в пользовательском интерфейсе.
Установка Терминала Windows (необязательно)
новая Терминал Windows включает несколько вкладок (быстро переключаться между дистрибутивами командной строки, PowerShell или несколькими установочными областями Linux), пользовательскими привязками клавиш (создайте собственные сочетания клавиш для открытия и закрытия вкладок, копирования и вставки и т. д.), эмодзи ☺ и пользовательских тем (цветовые схемы, стили и размеры шрифтов, фоновое изображение, размытие и прозрачность). дополнительные сведения см. в Терминал Windows документах.
Скачайте Терминал Windows из Microsoft Store: При установке через магазин обновления выполняются автоматически.
После установки откройте Терминал Windows и щелкните Параметры, чтобы настроить Терминал использовать файл profile.json .
Дополнительные ресурсы
К дополнительным рекомендуемым расширениям относятся следующие:
- Раскладки клавиатуры других редакторов — эти расширения позволят использовать необходимую раскладку при переходе в другой текстовый редактор (например, Atom, Sublime, Vim, eMacs, Notepad++ и т. п.).
- Расширение синхронизации параметров — позволяет синхронизировать параметры VS Code в разных установках, используя GitHub. Если вы работаете на разных компьютерах, это обеспечит согласованность среды между ними.
- Отладчик для Chrome: после завершения разработки на стороне сервера с Linux необходимо разработать и протестировать клиентскую часть. Это расширение интегрирует редактор VS Code со службой отладки браузера Chrome, что увеличивает эффективность выполнения операций.
—>
Источник
Using C++ on Linux in VS Code
In this tutorial, you will configure Visual Studio Code to use the GCC C++ compiler (g++) and GDB debugger on Linux. GCC stands for GNU Compiler Collection; GDB is the GNU debugger.
After configuring VS Code, you will compile and debug a simple C++ program in VS Code. This tutorial does not teach you GCC, GDB, Ubuntu or the C++ language. For those subjects, there are many good resources available on the Web.
If you have trouble, feel free to file an issue for this tutorial in the VS Code documentation repository.
Prerequisites
To successfully complete this tutorial, you must do the following:
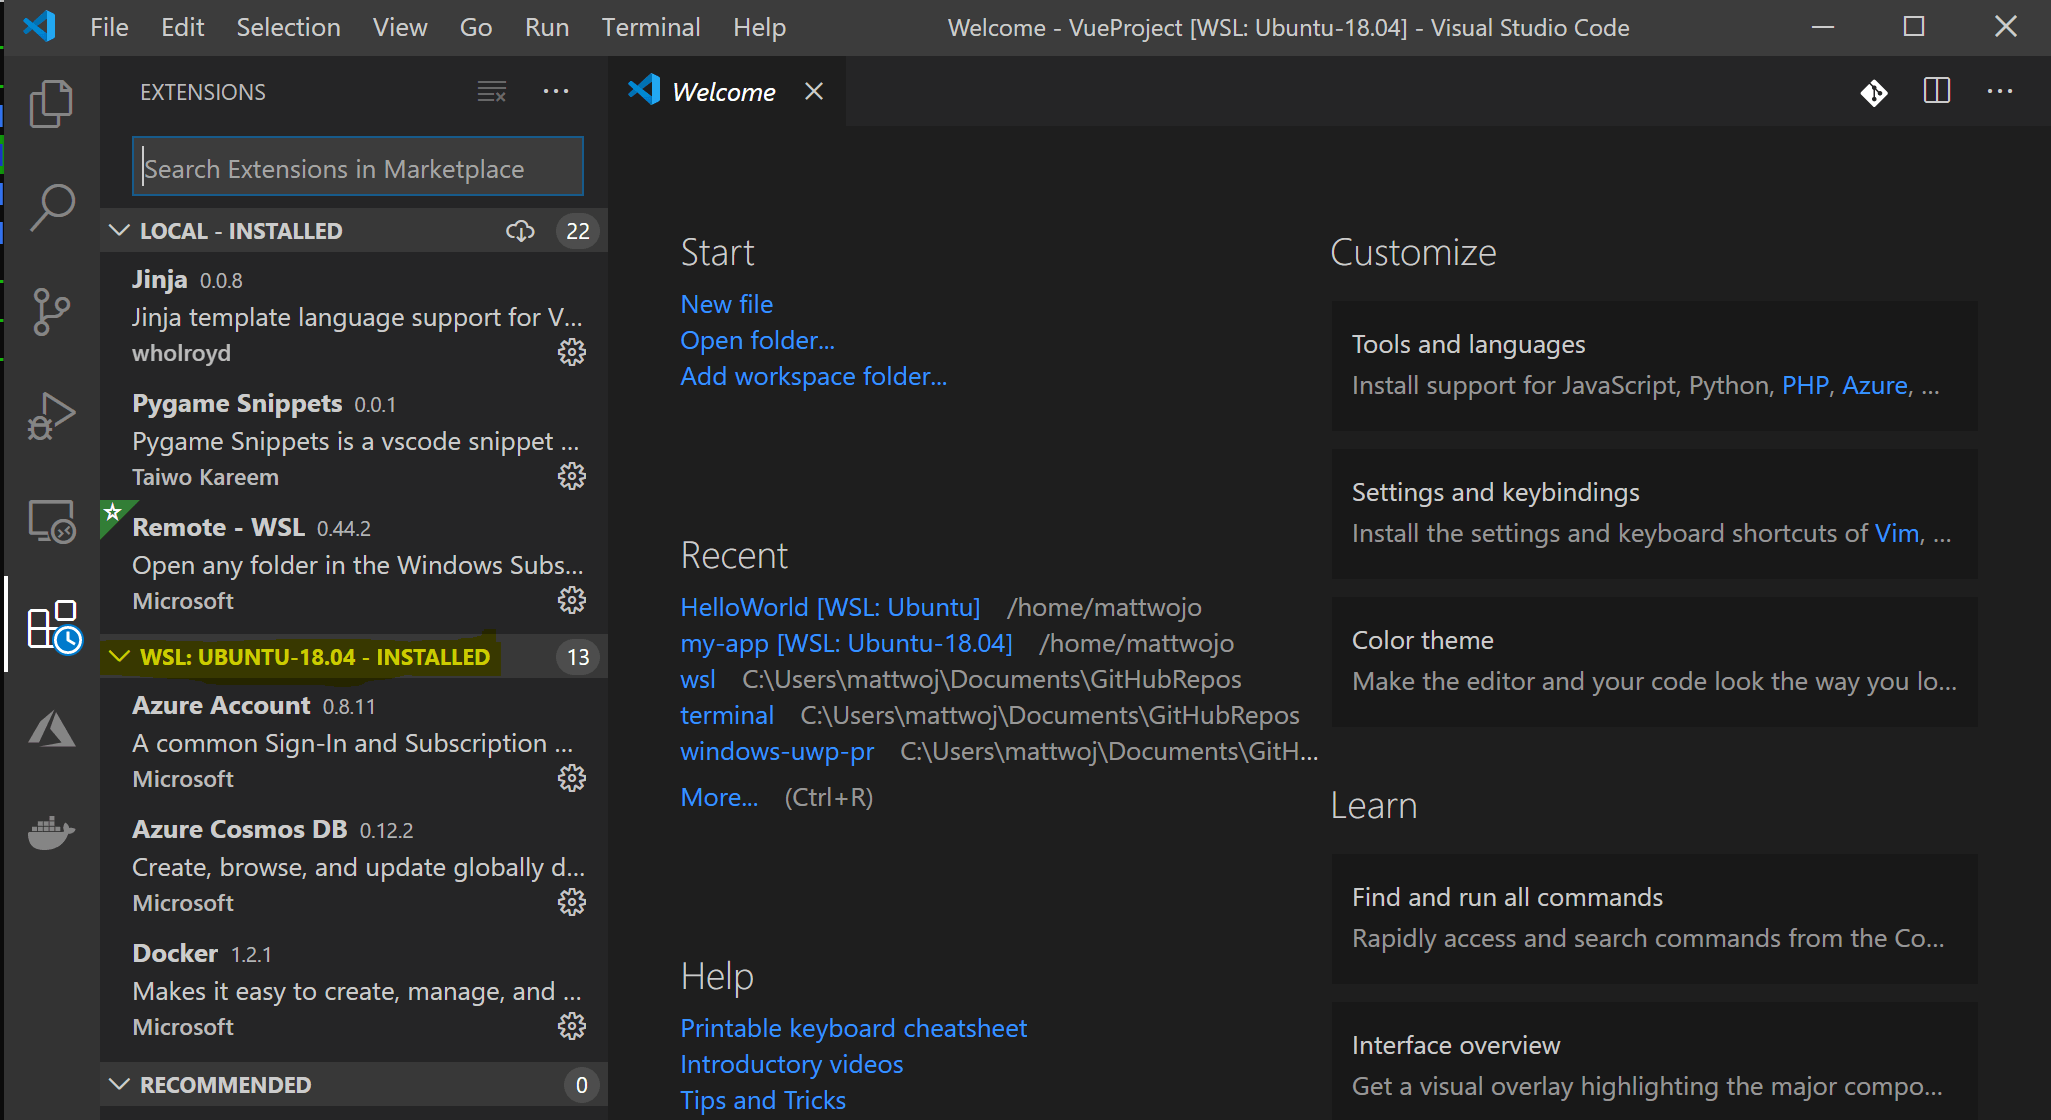
Install the C++ extension for VS Code. You can install the C/C++ extension by searching for ‘c++’ in the Extensions view ( ⇧⌘X (Windows, Linux Ctrl+Shift+X ) ).

Ensure GCC is installed
Although you’ll use VS Code to edit your source code, you’ll compile the source code on Linux using the g++ compiler. You’ll also use GDB to debug. These tools are not installed by default on Ubuntu, so you have to install them. Fortunately, that’s easy.
First, check to see whether GCC is already installed. To verify whether it is, open a Terminal window and enter the following command:
If GCC isn’t installed, run the following command from the terminal window to update the Ubuntu package lists. An out-of-date Linux distribution can sometimes interfere with attempts to install new packages.
Next install the GNU compiler tools and the GDB debugger with this command:
Create Hello World
From the terminal window, create an empty folder called projects to store your VS Code projects. Then create a subfolder called helloworld , navigate into it, and open VS Code in that folder by entering the following commands:
The code . command opens VS Code in the current working folder, which becomes your «workspace». As you go through the tutorial, you will create three files in a .vscode folder in the workspace:
- tasks.json (compiler build settings)
- launch.json (debugger settings)
- c_cpp_properties.json (compiler path and IntelliSense settings)
Add hello world source code file
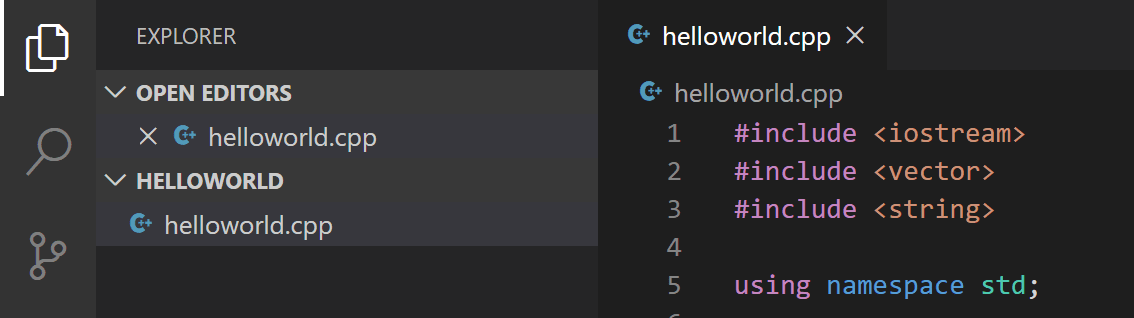
In the File Explorer title bar, select New File and name the file helloworld.cpp .
Paste in the following source code:
Now press ⌘S (Windows, Linux Ctrl+S ) to save the file. Notice that your files are listed in the File Explorer view ( ⇧⌘E (Windows, Linux Ctrl+Shift+E ) ) in the side bar of VS Code:
You can also enable Auto Save to automatically save your file changes, by checking Auto Save in the main File menu.
The Activity Bar on the edge of Visual Studio Code lets you open different views such as Search, Source Control, and Run. You’ll look at the Run view later in this tutorial. You can find out more about the other views in the VS Code User Interface documentation.
Note: When you save or open a C++ file, you may see a notification from the C/C++ extension about the availability of an Insiders version, which lets you test new features and fixes. You can ignore this notification by selecting the X (Clear Notification).
Explore IntelliSense
In the helloworld.cpp file, hover over vector or string to see type information. After the declaration of the msg variable, start typing msg. as you would when calling a member function. You should immediately see a completion list that shows all the member functions, and a window that shows the type information for the msg object:
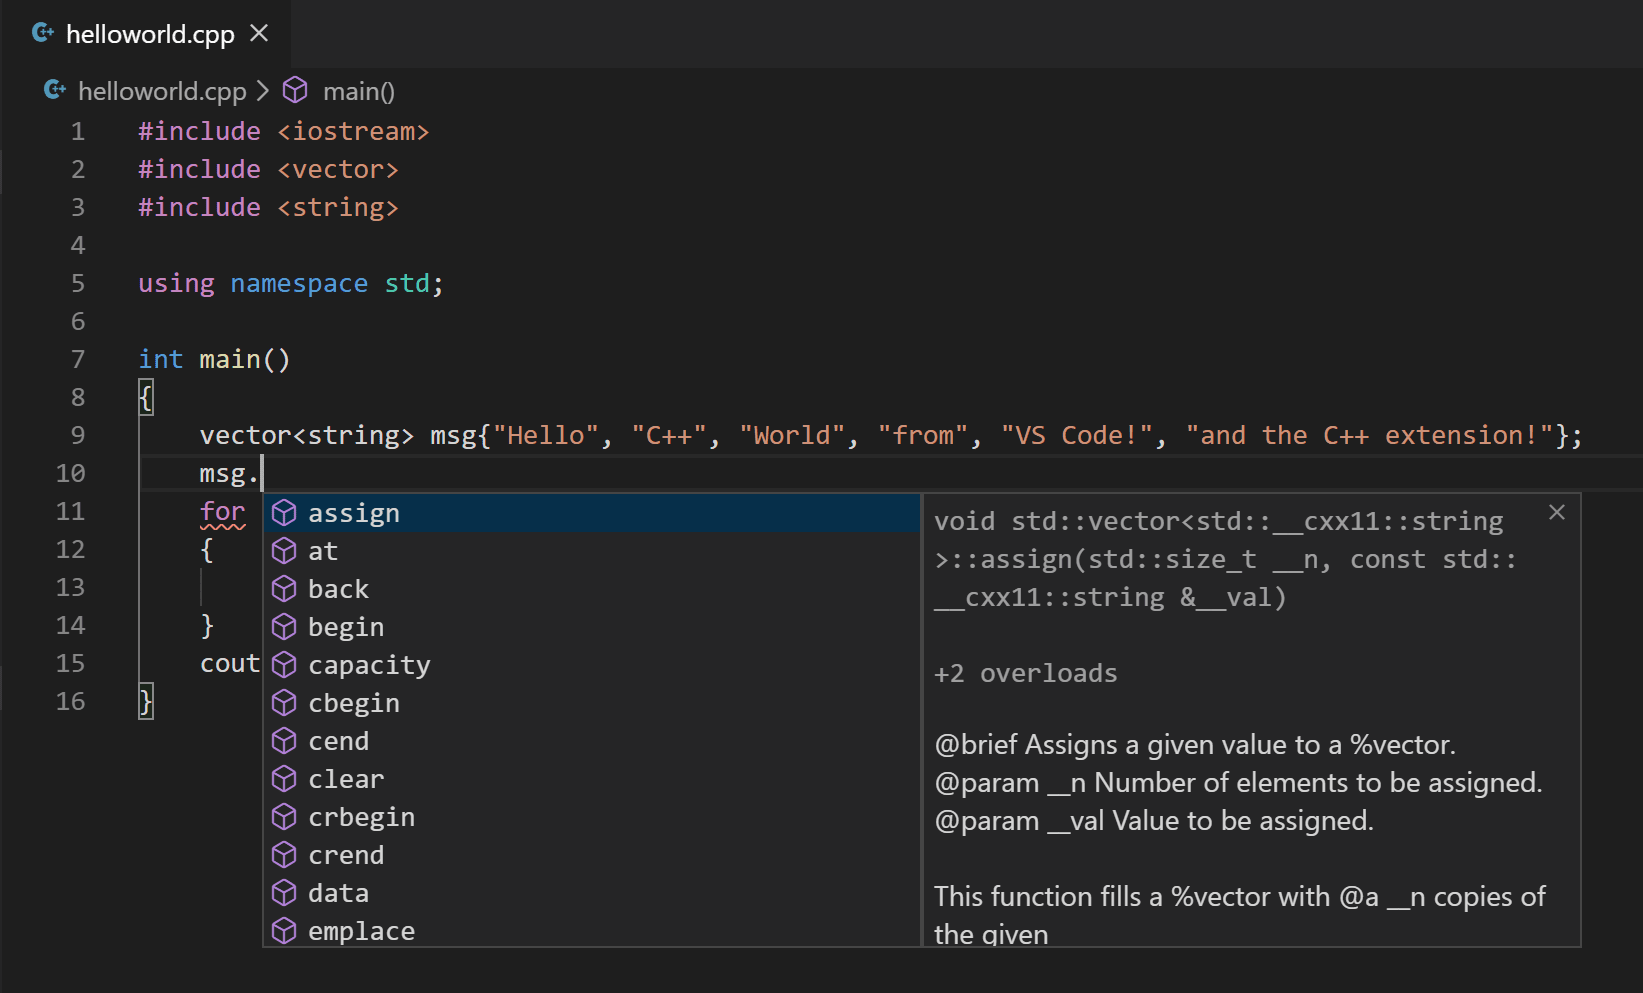
You can press the Tab key to insert the selected member. Then, when you add the opening parenthesis, you’ll see information about arguments that the function requires.
Build helloworld.cpp
Next, you’ll create a tasks.json file to tell VS Code how to build (compile) the program. This task will invoke the g++ compiler to create an executable file from the source code.
It’s important to have helloworld.cpp open in the editor because the next step uses the active file in the editor for context to create the build task in the next step.
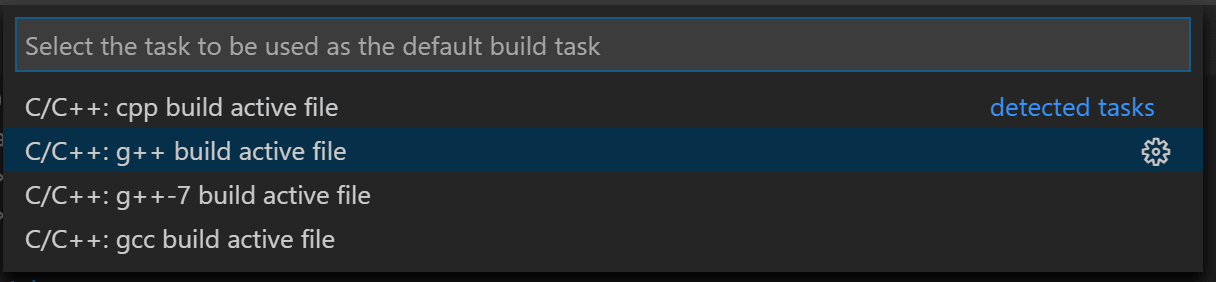
From the main menu, choose Terminal > Configure Default Build Task. A dropdown appears showing various predefined build tasks for C++ compilers. Choose C/C++: g++ build active file.
This will create a tasks.json file in a .vscode folder and open it in the editor.
Your new tasks.json file should look similar to the JSON below:
Note: You can learn more about tasks.json variables in the variables reference.
The command setting specifies the program to run; in this case that is g++. The args array specifies the command-line arguments that will be passed to g++. These arguments must be specified in the order expected by the compiler.
This task tells g++ to take the active file ( $
The label value is what you will see in the tasks list; you can name this whatever you like.
The «isDefault»: true value in the group object specifies that this task will be run when you press ⇧⌘B (Windows, Linux Ctrl+Shift+B ) . This property is for convenience only; if you set it to false, you can still run it from the Terminal menu with Tasks: Run Build Task.
Running the build
Go back to helloworld.cpp . Your task builds the active file and you want to build helloworld.cpp .
To run the build task defined in tasks.json , press ⇧⌘B (Windows, Linux Ctrl+Shift+B ) or from the Terminal main menu choose Run Build Task.
When the task starts, you should see the Integrated Terminal panel appear below the source code editor. After the task completes, the terminal shows output from the compiler that indicates whether the build succeeded or failed. For a successful g++ build, the output looks something like this:

Create a new terminal using the + button and you’ll have a terminal running your default shell with the helloworld folder as the working directory. Run ls and you should now see the executable helloworld (no file extension).
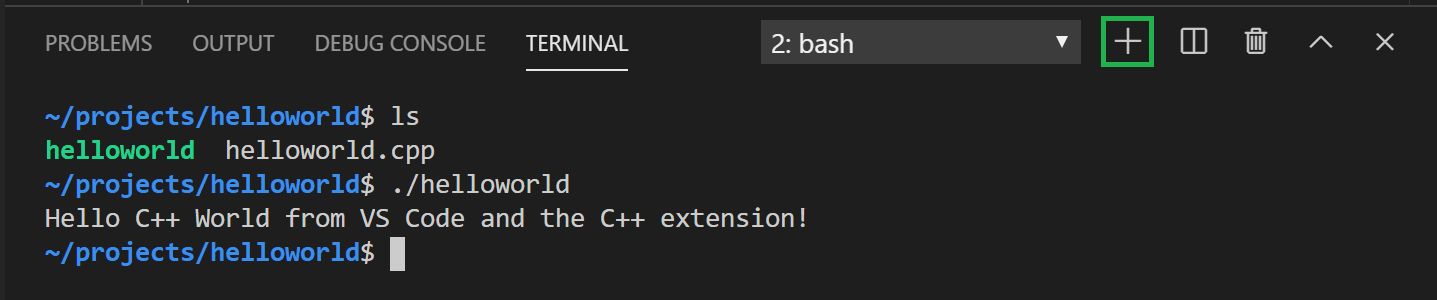
You can run helloworld in the terminal by typing ./helloworld .
Modifying tasks.json
You can modify your tasks.json to build multiple C++ files by using an argument like «$
Debug helloworld.cpp
Next, you’ll create a launch.json file to configure VS Code to launch the GDB debugger when you press F5 to debug the program.
From the main menu, choose Run > Add Configuration. and then choose C++ (GDB/LLDB).
You’ll then see a dropdown for various predefined debugging configurations. Choose g++ build and debug active file.
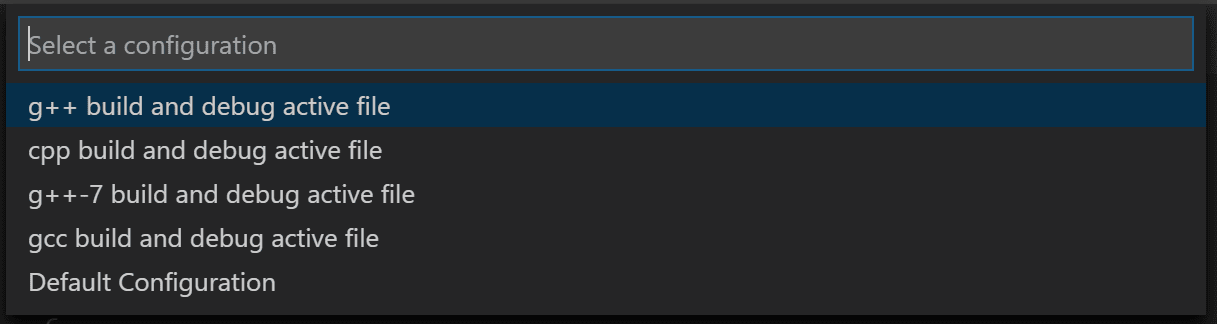
VS Code creates a launch.json file, opens it in the editor, and builds and runs ‘helloworld’.
In the JSON above, program specifies the program you want to debug. Here it is set to the active file folder $
By default, the C++ extension won’t add any breakpoints to your source code and the stopAtEntry value is set to false .
Change the stopAtEntry value to true to cause the debugger to stop on the main method when you start debugging.
Start a debugging session
- Go back to helloworld.cpp so that it is the active file.
- Press F5 or from the main menu choose Run > Start Debugging. Before you start stepping through the code, let’s take a moment to notice several changes in the user interface:
-
The Integrated Terminal appears at the bottom of the source code editor. In the Debug Output tab, you see output that indicates the debugger is up and running.
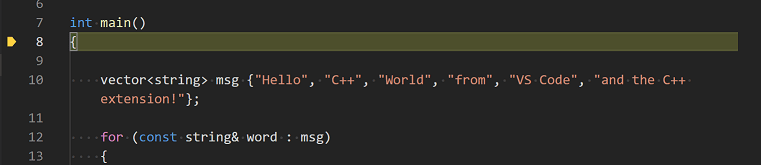
The editor highlights the first statement in the main method. This is a breakpoint that the C++ extension automatically sets for you:

The Run view on the left shows debugging information. You’ll see an example later in the tutorial.
At the top of the code editor, a debugging control panel appears. You can move this around the screen by grabbing the dots on the left side.
Step through the code
Now you’re ready to start stepping through the code.
Click or press the Step over icon in the debugging control panel.
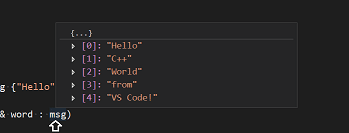
This will advance program execution to the first line of the for loop, and skip over all the internal function calls within the vector and string classes that are invoked when the msg variable is created and initialized. Notice the change in the Variables window on the side.
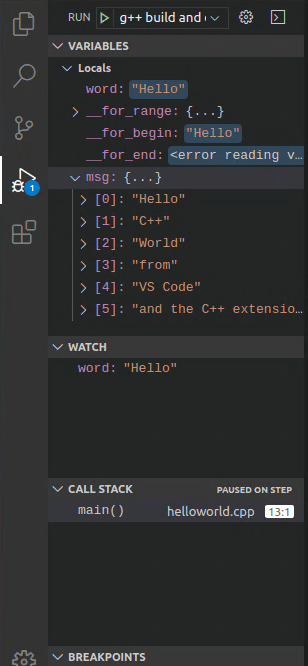
Press Step over again to advance to the next statement in this program (skipping over all the internal code that is executed to initialize the loop). Now, the Variables window shows information about the loop variables.
Press Step over again to execute the cout statement. (Note that as of the March 2019 release, the C++ extension does not print any output to the Debug Console until the last cout executes.)
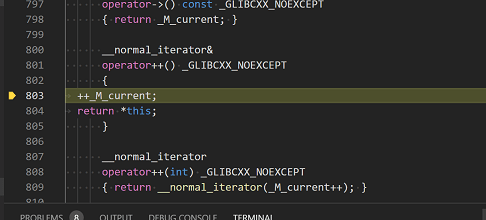
If you like, you can keep pressing Step over until all the words in the vector have been printed to the console. But if you are curious, try pressing the Step Into button to step through source code in the C++ standard library!
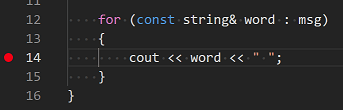
To return to your own code, one way is to keep pressing Step over. Another way is to set a breakpoint in your code by switching to the helloworld.cpp tab in the code editor, putting the insertion point somewhere on the cout statement inside the loop, and pressing F9 . A red dot appears in the gutter on the left to indicate that a breakpoint has been set on this line.
Then press F5 to start execution from the current line in the standard library header. Execution will break on cout . If you like, you can press F9 again to toggle off the breakpoint.
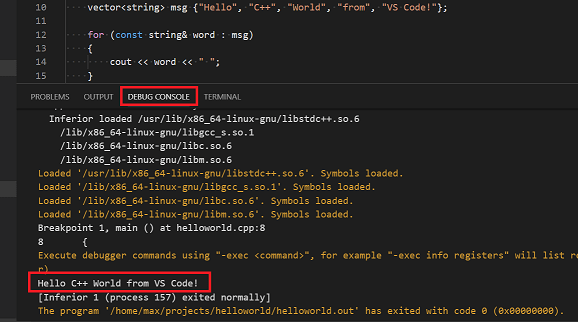
When the loop has completed, you can see the output in the Debug Console tab of the integrated terminal, along with some other diagnostic information that is output by GDB.
Set a watch
To keep track of the value of a variable as your program executes, set a watch on the variable.
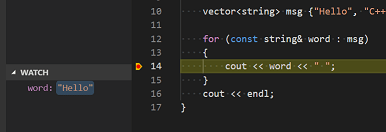
Place the insertion point inside the loop. In the Watch window, click the plus sign and in the text box, type word , which is the name of the loop variable. Now view the Watch window as you step through the loop.
To quickly view the value of any variable while execution is paused on a breakpoint, you can hover over it with the mouse pointer.
C/C++ configurations
If you want more control over the C/C++ extension, you can create a c_cpp_properties.json file, which will allow you to change settings such as the path to the compiler, include paths, C++ standard (default is C++17), and more.
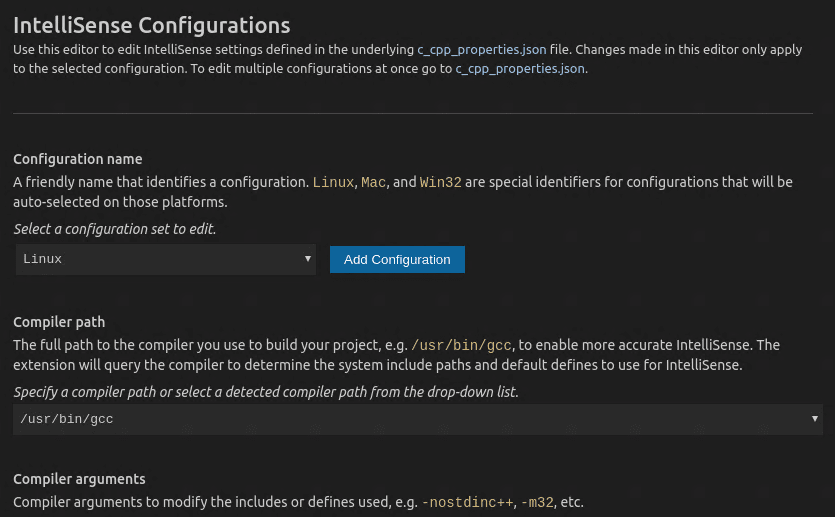
You can view the C/C++ configuration UI by running the command C/C++: Edit Configurations (UI) from the Command Palette ( ⇧⌘P (Windows, Linux Ctrl+Shift+P ) ).
This opens the C/C++ Configurations page. When you make changes here, VS Code writes them to a file called c_cpp_properties.json in the .vscode folder.
You only need to modify the Include path setting if your program includes header files that are not in your workspace or in the standard library path.
Visual Studio Code places these settings in .vscode/c_cpp_properties.json . If you open that file directly, it should look something like this:
Reusing your C++ configuration
VS Code is now configured to use gcc on Linux. The configuration applies to the current workspace. To reuse the configuration, just copy the JSON files to a .vscode folder in a new project folder (workspace) and change the names of the source file(s) and executable as needed.
Источник