- Introducing .NET Core Windows Forms Designer Preview 1
- Introducing .NET Core Windows Forms Designer Preview 1
- Enabling the designer
- It is early days for the designer, here is what to expect…
- Give us your feedback!
- Addressing Questions
- What to do if Windows Forms Designer doesn’t work?
- Does .NET Core WPF Designer depend on Windows Forms Designer installation?
- Updates to .NET Core Windows Forms designer in Visual Studio 16.5 Preview 1
- What’s new
- Features currently under development
- Upgrade to .NET Core 3.1
- Under the hood of the new Windows Forms Core designer (or why it takes us so much time)
- The concept
- Was there a better way?
- This is how it works
- How to report issues
- Учебник. Создание нового приложения WinForms (Windows Forms .NET) Tutorial: Create a new WinForms app (Windows Forms .NET)
- Предварительные требования Prerequisites
- Создание приложения WinForms Create a WinForms app
- Важные элементы среды Visual Studio Important parts of Visual Studio
- Добавление элементов управления на форму Add controls to the form
- Обработка событий Handle events
- Запустите приложение Run the app
Introducing .NET Core Windows Forms Designer Preview 1

September 30th, 2019
Introducing .NET Core Windows Forms Designer Preview 1
We just released a GA version of .NET Core 3.0 that includes support for Windows Forms and WPF. And along with that release we’re happy to announce the first preview version of the Windows Forms Designer for .NET Core projects!
For developers the .NET Core Windows Forms Designer (when we will release the GA version) will look and feel the same as the .NET Framework Windows Forms Designer. But for us it is a huge technical challenge to bring the designer to .NET Core because it requires the design surface that hosts the live .NET Core form to run outside the Visual Studio process. That means we need to re-architect the way the designer surface “communicates” with Visual Studio. You can watch these communications in the Output Window, where we track each request sent when the Visual Studio components are accessing properties or executing methods on the live controls in the design surface. The engineering team is still working on this technical challenge, and we will be releasing the Preview versions on regular basis to give you the early glance at the .NET Core Designer. Stay tuned! The next Preview will be coming out in early November.
Because this is the very first preview of the designer, it isn’t yet bundled with Visual Studio and instead is available as a Visual Studio extension (“VSIX”) (download). That means that if you open a Windows Forms project targeting .NET Core in Visual Studio, it won’t have the designer support by default – you need to install the .NET Core Designer first!
Enabling the designer
To enable the designer, download and install the Windows Forms .NET Core Designer VSIX package. You can remove it from Visual Studio at any time. After you install the .NET Core Designer, Visual Studio will automatically pick the right designer (.NET Core or .NET Framework) depending on the target framework of the project you’re working on.
It is early days for the designer, here is what to expect…
Please keep in mind, that this is the first preview, so the experience is limited. We support the most commonly used controls and base operations and will be adding more in each new Preview version. Eventually, we will bring the .NET Core Designer at parity with the Windows Forms Designer for .NET Framework.
Because many controls aren’t yet supported in Preview 1 of the designer, we don’t recommend porting your Windows Forms applications to .NET Core just yet if you need to use the designer on a regular basis. This Preview 1 is good for “Hello World” scenarios of creating new projects with common controls.
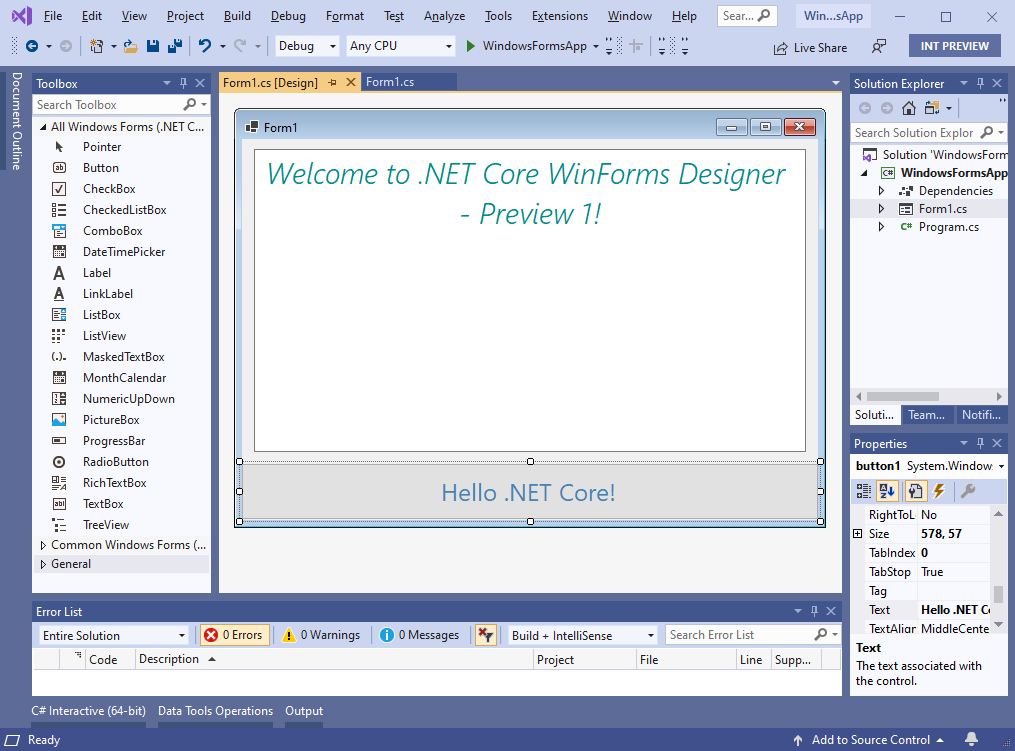
Controls included in Preview 1:
- Pointer
- Button
- Checkbox
- CheckedListBox
- ComboBox
- DateTimePicker
- Label
- LinkLabel
- ListBox
- ListView
- MaskedTextBox
- MonthCalendar
- NumericUpDown
- PictureBox
- ProgressBar
- RadioButton
- RichTextBox
- TextBox
- TreeView
What is not supported in Preview 1:
- Container
- Resources
- Component Tray
- In-place editing
- Designer Actions
- Databinding
- User Controls/Inherited Controls
Give us your feedback!
We are putting out our first bits so early to support the culture of developing the product with our users’ early feedback in mind. Please do reach out with your suggestions, issues and feature requests via Visual Studio Feedback channel. To do so, click on Send Feedback icon in Visual Studio top right corner as it is shown on the picture below.

We appreciate your engagement!
Addressing Questions
What to do if Windows Forms Designer doesn’t work?
We heard some question related to the Windows Forms Designer not working. Here’s what could have happened:
You might have created a .NET Core Windows Forms project instead of the traditional .NET Framework one without realizing it. If you type “WinForms” or “Windows Forms” in the New Project Dialog, the first option would be a .NET Core Windows Forms project. If your intention is to create a .NET Framework project (with the mature designer support), just find and select Windows Forms App (.NET Framework). 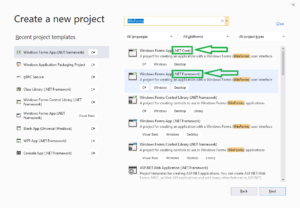
If you want to work with .NET Core project, don’t forget to install the .NET Core Windows Forms Designer, since it isn’t yet shipped inside Visual Studio by default. See the previous “Enabling the designer” section.
Does .NET Core WPF Designer depend on Windows Forms Designer installation?
We also received some questions related to the .NET Core WPF Designer not working and if it requires a separate installation or the Windows Forms Designer installation. No, the WPF Designer is completely independent of the Windows Forms Designer. We released its GA version of the WPF .NET Core Designer at the same time as .NET Core 3.0 and it comes with Visual Studio. In Visual Studio version 16.3.0 we had an issue with the Enable XAML Designer property set to false by default. That means that when you click on .xaml files, the designer doesn’t open automatically. Upgrade to the latest Visual Studio version 16.3.1 where this issue is fixed. Another option to fix it is to go to Tools -> Options -> XAML Designer and check Enable XAML Designer.
Updates to .NET Core Windows Forms designer in Visual Studio 16.5 Preview 1
December 5th, 2019
We are happy to announce the new preview version of the .NET Core Windows Forms designer, which is available with the Visual Studio 16.5 Preview 1.
The big news is that the designer is now part of Visual Studio! This means that installing the .NET Core Windows Forms designer from a separate VSIX is no longer needed!
To use the designer:
- You must be using Visual Studio 16.5 Preview 1 or a later version.
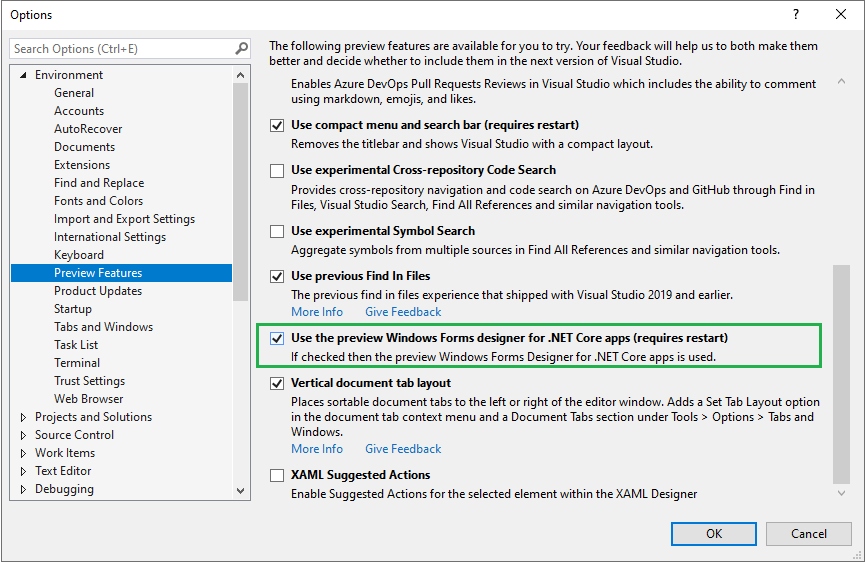
- You need to enable the designer in Visual Studio. Go to Tools >Options >Environment >Preview Features and select the Use the preview Windows Forms designer for .NET Core apps option.
If you haven’t enabled the Windows Forms designer, you might notice a yellow bar in the upper part of your Visual Studio Preview suggesting you to enable it:
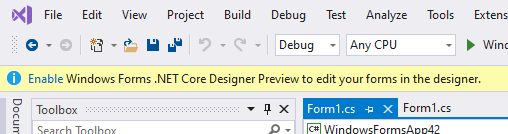
Selecting the Enable link takes you to the same place in Tools > Options > Environment > Preview Features where you can enable the Windows Forms .NET Core designer preview.
What’s new
In this preview version of the designer, we’ve improved reliability and enhanced performance, fixed many bugs, and added the following features:
- Designer Actions for available controls, such as making a TextBox multiline or adding items to a CheckedListBox .
- Improved Undo/Redo actions to prevent hangs or incomplete undos.
- Scrollbars now appear when the form is larger than the visible document window and on Forms with the AutoScroll property set to True and controls outside the visible area of the form.
- Added GroupBox and Panel container control support.
- Copy-paste is supported between container controls.
- Limited Component Tray support.
- Local resources support.
- Timer control support.
Features currently under development
Support for the following features is currently on our backlog and being actively addressed:
- Localization of your own Windows Forms applications.
- Data-related scenarios including data binding and data-related controls.
- Document Outline Window.
- The remaining container controls.
- MenuStrip and ToolStrip are expected in the next preview.
- Third-party controls and UserControls.
- Inherited Forms and UserControls.
- Tab Order.
- Tools > Options page for the designer.
Upgrade to .NET Core 3.1
We recommend that you upgrade your applications to .NET Core 3.1 before using the Windows Forms .NET Core designer. Visual Studio may not perform as expected if your project is targeting an earlier version of .NET Core.
In .NET Core 3.1 a few outdated Windows Forms controls ( DataGrid , ToolBar , ContextMenu , Menu , MainMenu , MenuItem , and their child components) were removed. These controls were replaced with newer and more powerful ones in .NET Framework 2.0 in 2005 and haven’t been available by default in the designer Toolbox. Moving forward with .NET Core, we had to cut them out of the runtime as well in order to maintain support for areas like high DPI, accessibility, and reliability. For more information please see the announcement blog post.
Under the hood of the new Windows Forms Core designer (or why it takes us so much time)
We know that you’ve noticed: although the Windows Forms .NET Core designer Preview has basic functionalities, it is not mature enough for providing the full Windows Forms experience and we need a little more time to get there. In this chapter we wanted to give you a glimpse into how we are implementing the designer for .NET Core and explain some of the time frames.
The concept
Visual Studio is based on .NET Framework. The Windows Forms Core designer however should enable users to create a visual design for .NET Core apps. If you’ve tried to “mix” .NET Framework and .NET Core projects, you probably know what the challenge is here: .NET Core assemblies cannot be integrated into .NET Framework projects. Because of this (and some other reasons that we don’t want to overwhelm you with), we came up with the following internal concept: whenever the .NET Core designer is started (for example, by double-clicking on a form), a second designer process starts under the hood almost independently of Visual Studio. And that process takes over the .NET Core design part, or better to say – it’s responsible for instantiating the .NET Core based objects that are then rendered on the monitor by the .NET Core process and not the Visual Studio process.
For example, when you drag a Button from the Toolbox onto a form – this action is handled by Visual Studio ( devenv.exe process which is .NET Framework). But, once you release the mouse button to drop the Button on the form, all further actions (instantiating a Button , rendering it at a specific location, and so on) are related to .NET Core. That means .NET Framework process can no longer handle it. Instead it calls to a .NET Core process which does the job and also creates the user interface code at runtime, which lives in the InitializeComponent method of a Form or a UserControl . This is the same way the XAML designer works for UWP and .NET Core.
Was there a better way?
There was another approach we could take that would save us a lot of time. We could simply “map” the .NET Core objects, features, and so on to .NET Framework ones. But this approach has significant limitations. The new features, that are available only in .NET Core won’t be available in this “mapped” designer. And we already have quite a few Core-only functionalities such as: the new PlaceholderText property of the TextBox control, the new default font, that is used in Windows Forms .NET Core. And going forward we expect more innovations coming.
That’s why we turned down that idea, and proceeded with the described above “out-of-process approach” that handles new additions to .NET Core very well.
This is how it works
The Property Browser in Visual Studio is based on the .NET Framework. However, thanks to TypeDescriptors , we can create “proxy objects” as a communication link between the two processes at design time to access the actual .NET Core objects in the other (.NET Core) process via inter-process communication. That way, even though the UI is still in Visual Studio and thus is .NET Framework, users will see and edit every single aspect of the Windows Forms .NET Core objects’ functionality.
The downside of this approach is that it requires us to rewrite significant portions of the Framework Windows Forms designer. To do this correctly, with the performance and stability that you expect, we had to set out a significant amount of time. The XAML designer team already developed an out-of-process model for UWP XAML designer support when UWP implemented .NET Standard 2.0. They were able to share much of that architecture with WPF running against .NET Core. This gave a head-start for .NET Core WPF designer, and now it is released and ready for .NET Core developers. The Windows Forms team started working on the designer with the .NET Core 3.0 announcement. We expect to get to feature parity by May 2020, and complete the work by the end of 2020.
The Windows Forms team wants to say THANK YOU! to those who are already testing preview versions of the designer and reporting issues! We know the experience may not be stable and we appreciate your patience and your desire to help us! 🙂
How to report issues
Your feedback and help are important to us! Please report issues or feature requests via the Visual Studio Feedback channel. To do so, select the Send Feedback icon in Visual Studio top-right corner as shown in the following picture and specify that it is related to the “WinForms .NET Core” area.
Учебник. Создание нового приложения WinForms (Windows Forms .NET) Tutorial: Create a new WinForms app (Windows Forms .NET)
Из этого краткого руководства вы узнаете, как создать новое приложение Windows Forms (WinForms) с помощью Visual Studio. In this short tutorial, you’ll learn how to create a new Windows Forms (WinForms) app with Visual Studio. После создания первоначального приложения вы научитесь добавлять элементы управления и обрабатывать события. Once the initial app has been generated, you’ll learn how to add controls and how to handle events. По завершении работы с этим руководством у вас будет простое приложение, добавляющее имена в список. By the end of this tutorial, you’ll have a simple app that adds names to a list box.
Документация для Руководства по рабочему столу по .NET 5 (и .NET Core) находится в разработке. The Desktop Guide documentation for .NET 5 (and .NET Core) is under construction.
В этом руководстве описано следующее: In this tutorial, you learn how to:
- Создание нового приложения WinForms Create a new WinForms app
- Добавление элементов управления на форму Add controls to a form
- Обработка событий элемента управления для предоставления функциональных возможностей приложения Handle control events to provide app functionality
- Запустите приложение Run the app
Предварительные требования Prerequisites
- Visual Studio 2019 версии 16.8 или более поздней Visual Studio 2019 version 16.8 or later versions
- Выберите рабочую нагрузку «Рабочий стол Visual Studio» Select the Visual Studio Desktop workload
- Выберите Отдельные компоненты .NET 5 Select the .NET 5 individual component
Создание приложения WinForms Create a WinForms app
Первым шагом в создании нового приложения является запуск Visual Studio и создание приложения на основе шаблона. The first step to creating a new app is opening Visual Studio and generating the app from a template.
Запустите Visual Studio. Open Visual Studio.
Выберите Создать новый проект. Select Create a new project.

В поле Поиск шаблонов введите winforms и нажмите клавишу ВВОД . In the Search for templates box, type winforms, and then press Enter .
В раскрывающемся списке язык кода выберите C# или Visual Basic. In the code language dropdown, choose C# or Visual Basic.
В списке шаблонов выберите Приложение Windows Forms (.NET) и затем щелкните Далее. In the templates list, select Windows Forms App (.NET) and then click Next.
Не выбирайте шаблон Приложение Windows Forms (.NET Framework) . Don’t select the Windows Forms App (.NET Framework) template.

В окне Настроить новый проект задайте в качестве имени проекта значение Names и щелкните Создать. In the Configure your new project window, set the Project name to Names and click Create.
Вы также можете сохранить проект в другую папку, изменив параметр Расположение. You can also save your project to a different folder by adjusting the Location setting.

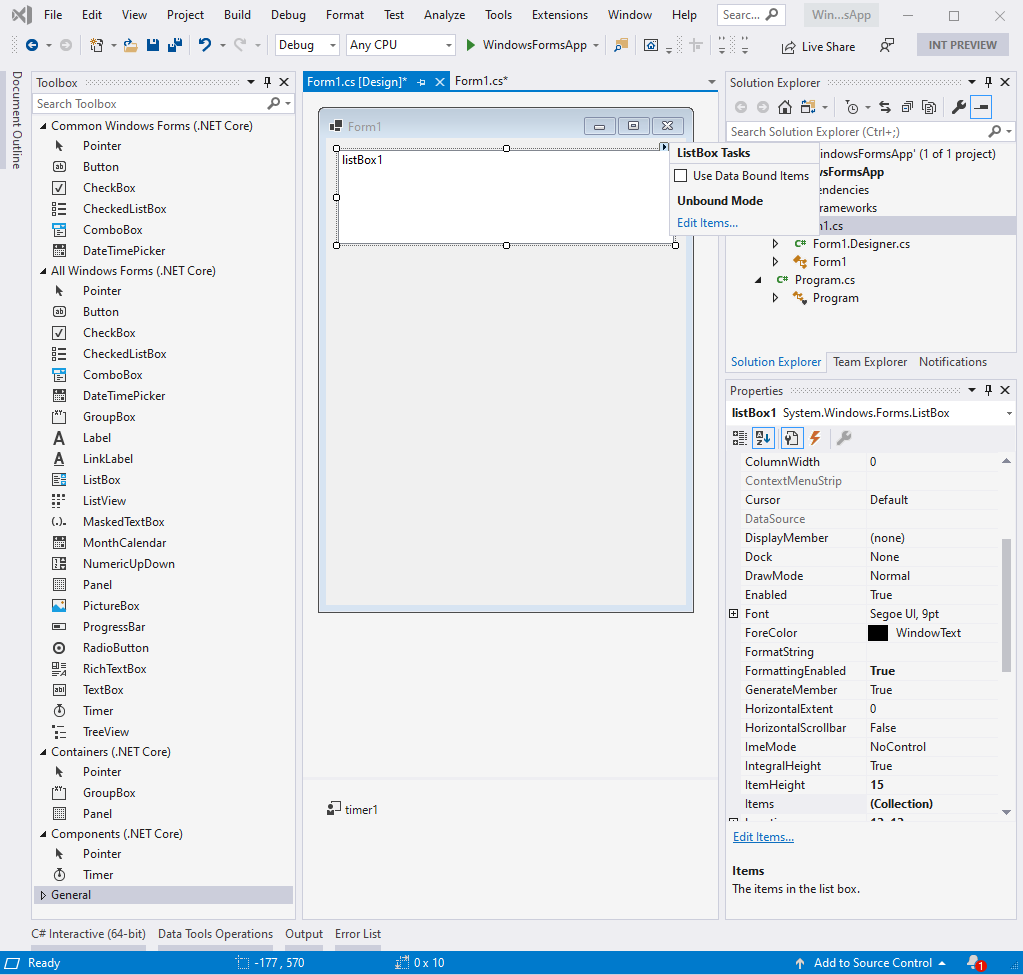
После создания приложения Visual Studio должен открыть панель конструктора для формы по умолчанию Form1. Once the app is generated, Visual Studio should open the designer pane for the default form, Form1. Если конструктор форм не отображается, дважды щелкните форму в области Обозреватель решений, чтобы открыть окно конструктора. If the form designer isn’t visible, double-click on the form in the Solution Explorer pane to open the designer window.
Важные элементы среды Visual Studio Important parts of Visual Studio
Поддержка WinForms в Visual Studio состоит из четырех важных компонентов, с которыми вы будете взаимодействовать при создании приложения. Support for WinForms in Visual Studio has four important components that you’ll interact with as you create an app:

обозреватель решений Solution Explorer
Все файлы проекта, код, формы и ресурсы отображаются в этой области. All if your project files, code, forms, resources, will appear in this pane.
Properties (Свойства) Properties
На этой панели отображаются параметры свойств, которые можно настроить в зависимости от выбранного элемента. This pane shows property settings you can configure based on the item selected. Например, если выбрать элемент в Обозревателе решений, отобразятся параметры свойств, связанные с файлом. For example, if you select an item from Solution Explorer, you’ll see property settings related to the file. Если выбрать объект в конструкторе, отобразятся параметры элемента управления или формы. If you select an object in the Designer, you’ll see settings for the control or form.
Конструктор форм Form Designer
Это конструктор для формы. This is the designer for the form. Он является интерактивным, и на него можно перетаскивать объекты из панели элементов. It’s interactive and you can drag-and-drop objects from the Toolbox. Выбирая и перемещая элементы в конструкторе, можно визуально создавать пользовательский интерфейс для приложения. By selecting and moving items in the designer, you can visually compose the user interface (UI) for your app.
Панель элементов Toolbox
Панель элементов содержит все элементы управления, которые можно добавить на форму. The toolbox contains all of the controls you can add to a form. Чтобы добавить элемент управления на текущую форму, дважды щелкните элемент управления или перетащите его. To add a control to the current form, double-click a control or drag-and-drop the control.
Добавление элементов управления на форму Add controls to the form
Открыв конструктор форм Form1, используйте панель Область элементов, чтобы добавить на форму следующие элементы управления: With the Form1 form designer open, use the Toolbox pane to add the following controls to the form:
- Метка Label
- Кнопка Button
- Listbox Listbox
- Текстовое поле Textbox
Вы можете расположить и изменить размер элементов управления в соответствии со следующими настройками. You can position and size the controls according to the following settings. Либо визуально перенесите их, чтобы они соответствовали следующему снимку экрана, либо щелкните каждый элемент управления и настройте параметры в области Свойства. Either visually move them to match the screenshot that follows, or click on each control and configure the settings in the Properties pane. Можно также щелкнуть область заголовка формы, чтобы выбрать форму. You can also click on the form title area to select the form:
| Объект Object | Параметр Setting | Значение Value |
|---|---|---|
| Form Form | Текст Text | Names |
| Размер Size | 268, 180 | |
| Label Label | Расположение Location | 12, 9 |
| Текст Text | Names | |
| Listbox Listbox | Имя Name | lstNames |
| Расположение Location | 12, 27 | |
| Размер Size | 120, 94 | |
| текстовое поле; Textbox | Имя Name | txtName |
| Расположение Location | 138, 26 | |
| Размер Size | 100, 23 | |
| Button Button | Имя Name | btnAdd |
| Расположение Location | 138, 55 | |
| Размер Size | 100, 23 | |
| Текст Text | Add Name |
Вы должны получить в конструкторе форму, которая выглядит следующим образом. You should have a form in the designer that looks similar to the following:

Обработка событий Handle events
Теперь, когда в форме есть все элементы управления, необходимо обрабатывать события элементов управления, чтобы реагировать на вводимые пользователем данные. Now that the form has all of its controls laid out, you need to handle the events of the controls to respond to user input. Открыв конструктор форм, выполните следующие действия. With the form designer still open, perform the following steps:
Выберите в форме элемент управления «Кнопка». Select the button control on the form.
В области Свойства щелкните значок события , чтобы вывести список событий кнопки.
Найдите событие Click и дважды щелкните его, чтобы создать обработчик событий. Find the Click event and double-click it to generate an event handler.
Это действие добавляет следующий код в форму: This action adds the following code to the the form:
Код, помещаемый в этот обработчик, будет добавлять имя, заданное элементом управления TextBox txtName , в элемент управления ListBox lstNames . The code we’ll put in this handler will add the name specified by the txtName textbox control to the lstNames listbox control. Однако мы хотим, чтобы имя удовлетворяло двум условиям: указанное имя не должно быть пустым, и его еще не должно быть в списке. However, we want there to be two conditions to adding the name: the name provided must not be blank, and the name must not already exist.
В следующем примере кода показано добавление имени в элемент управления lstNames . The following code demonstrates adding a name to the lstNames control:
Запустите приложение Run the app
Теперь, когда у нас есть код события, можно запустить приложение, нажав клавишу F5 или выбрав пункт меню Отладка > Начать отладку. Now that the event has been coded, you can run the app by pressing the F5 key or by selecting Debug > Start Debugging from the menu. Отобразится форма, и вы можете ввести имя в текстовое поле, а затем добавить его, нажав кнопку. The form displays and you can enter a name in the textbox and then add it by clicking the button.


