- Embed An Audio Visualizer On Your Linux Desktop Background Using GLava (PPA Installation And Configuration Guide)
- Installing and configuring GLava OpenGL audio spectrum visualizer
- 1. Initial GLava configuration
- 2. Changing the GLava window geometry to match your desktop resolution (and move it to the desired monitor in multi-monitors setups)
- (Optional) How to add GLava to startup
- (Optional) How to change the GLava music visualizer type
- (Optional) How to display multiple GLava visualizers (with different visualizer types) on your desktop background
- (Optional) How to change individual visualizer types (mods) settings
- Визуализатор glava linux настройка
Embed An Audio Visualizer On Your Linux Desktop Background Using GLava (PPA Installation And Configuration Guide)
GLava is an OpenGL audio spectrum visualizer for Linux (X11). Using it, you can make a real-time audio visualizer appear as if it’s embedded in your desktop background.
Wallpaper Engine / Rainmeter may not be available on Linux, but there are other ways of getting an animated wallpaper on Linux desktops. GLava is one of them, great for those who want a desktop background that displays a configurable audio visualizer.
GLava displays the audio spectrum visualizer on top of the wallpaper, making it appear as if you’re using a live, animated wallpaper, with the added bonus that you can still have icons on your desktop, as GLava has an option to allow clicks through its window (automatically enabled when running GLava with —desktop ).
GLava makes use of PulseAudio to sync the desktop audio visualizer with any music source you’re using, including audio player like Audacious or Rhythmbox, Spotify, as well as web browsers like Chrome or Firefox.
The desktop audio visualizer application supports most EWMH-compliant window managers. This includes Mutter (Gnome, Budgie), KWin (KDE), Unity, Openbox (LXDE), Xfwm (XFCE), Fluxbox, IceWM or Bspwm. A few have some minor known issues, while others, like Enlightenment, need testing. You can see a list of supported window managers and their status by visiting this link.
GLava requires X11 (Xext, Xcomposite and Xrender) and PulseAudio, and it comes with 5 different visualizers:
- bars: cava style vertical bar visualizer
- radial: similar to bars, except bars are drawn around a circle
- graph: draw a vertical, solid graph of the fft output data
- wave: draw the raw left audio wave recieved from PulseAudio
- circle: draw a circle-style visualizer, where the radius is the visualizer amplitude
I should also mention that the tool includes a multitude of customization options, though there’s no GUI to easily tweak its settings. Instead, the GLava options are available in its rc.glsl configuration file. In this file you can enable or disable window hints, use native, xroot or no window opacity, specify the window background color, and much more. You can also set the window geometry in this file, so you can properly align the audio spectrum visualizer with your desktop and/or place it on the desired monitor in multi-monitor setups.
Each visualizer type (called «mod») can also be customized — you can change the colors, transparency, and much more. These can be changed by modifying the mod file ( circle.glsl , bars.glsl , and so on).
Before using GLava to embed a live audio visualizer on your desktop background, I should note that GLava can be a bit CPU-intensive. On my 8 core system, the CPU usage is about 3.3% (or around 25-30% for one CPU core, as reported by htop).
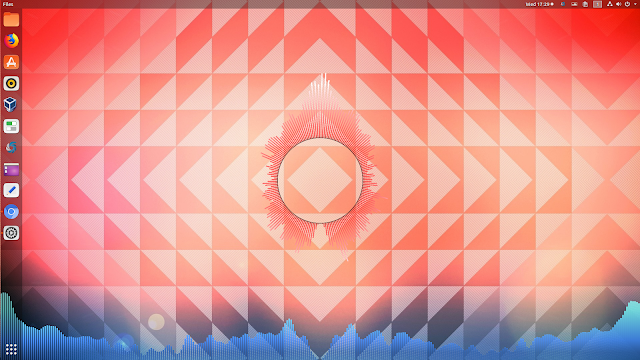
In the screenshot at the top of this article I’m using 2 GLava audio visualizers embedded on my desktop: radial (the one in the middle), and bars (at the bottom). This is another screenshot, this time using only one OpenGL audio spectrum visualizer — graph:
Since a simple screenshot is not exactly enough for an audio visualizer, here’s a video recorded by the GLava developer, showing multiple GLava audio visualizers (bars at the bottom, circle on the left, radial on the right, and graph in the upper part of the screen) running in the same time on the desktop background:
Installing and configuring GLava OpenGL audio spectrum visualizer
Like I was mentioning a while back, I created a PPA for application that I use and are not available in Ubuntu. The PPA is growing slowly, and today it got a new package — GLava.
GLava can be installed from the Linux Uprising Apps PPA on Ubuntu 19.04, 18.10 or 18.04, Linux Mint 19.* (there’s a dependency that’s not available in Ubuntu 16.04 / Linux Mint 18 so I couldn’t get it to work in this Ubuntu version) and other Linux distributions based on Ubuntu 18.04, like elementary OS 5.0 Juno:
You also have the alternative of downloading the DEB package for your Ubuntu version (use the Ubuntu bionic package in Linux Mint 19 or elementary OS 5.0 Juno) instead of adding the PPA.
Fedora users can install GLava by using the ycollet/linuxmao Copr repository. Add it and install GLava using:
In case you don’t use Ubuntu / Linux Mint or Fedora, you can find instructions for installing GLava from source (and links to AUR packages) on its project page.
Now that GLava is installed, it’s time to set it up.
1. Initial GLava configuration
/.config/glava ). This can be done automatically by running GLava with the —copy-config option in a terminal, like this:
2. Changing the GLava window geometry to match your desktop resolution (and move it to the desired monitor in multi-monitors setups)
To embed the GLava OpenGL audio spectrum visualizer on your desktop background, run it with the —desktop flag. This flag enables running Glava as a desktop window by detecting the desktop environment and setting the appropriate properties. Using this, the GLava window won’t show up on your application launcher / dock, it won’t have any window borders, the window will be set to allow clicks through it, and so on. Always launch it with —desktop , unless you want to run it in a regular window.
Let’s launch GLava with the —desktop flag:
Play some audio in any application, and you should see the GLava audio visualizer embedded in your desktop. Chances are its size and position is wrong though. Let’s fix this.
GLava can be configured by editing its rc.glsl configuration file, which is available in the
/.config/glava folder (it’s created here after running GLava with —copy-config , as explained above). Open your file manager, navigate to
/.config/glava , and open the rc.glsl file with a text editor.
Look for the line that begins with #request setgeometry . Here you can specify the size of the GLava embedded window, as well as its X and Y offset, so you can set it on the monitor you desire, in case you have a multi-monitor setup.
If you have only one monitor, leave the first two values (X and Y) as 0, and modify the last two values (width and height) to your screen resolution. For example, if you have only one display with the resolution of 1920×1080, you’d have to set #request setgeometry like this: #request setgeometry 0 0 1920 1080 .
X and Y (the first two values) are horizontal and vertical offsets (with 0 0 being the top left corner). On multiple monitors setups, if you want to move the GLava window on another monitor you’ll have to change the X (first) value. Using «0» will show the GLava visualizer on the left-most monitor. Change the X value to the resolution of your left monitor to move the GLava window on the monitor to the right. For example, use #request setgeometry 1920 0 1920 1080 to show it on the second monitor (from left to right).
You can also raise the GLava window so it doesn’t start right at bottom of the screen, by changing the Y (second) value, useful in case you have some dock at the bottom and you want the GLava audio visualizer to be displayed above it. For example, if you don’t see the GLava visualizer on your desktop, try to set the Y value to -150 .
After making changes to the
/.config/glava/rc.glsl configuration file, close GLava (use Ctrl + C in the terminal to send the interrupt signal), then run it again to see your changes.
There are various other options in the GLava configuration file, with proper descriptions, so take a look and change the options to suit your needs. But besides the window geometry and visualizer type, most default options should be enough for most users.
The next customizations are optional, that’s why I didn’t number them. This is in case you want to change some of the GLava options or run multiple instances with different audio visualizers, and you don’t know where to begin.
Once you’re done, run GLava like this:
Play some music and GLava should now show an animated audio visualizer on top of your wallpaper.
(As a side note, remember to always run GLava with the —desktop flag, or else the visualizer won’t appear to be embedded in your desktop wallpaper and instead, a normal, but transparent window will be shown, which appears in your application launcher, has window borders, etc., which is probably not what you want.)
(Optional) How to add GLava to startup
It’s best to run GLava at startup with a delay, so your desktop loads before launching the application, or else it might not work properly. For this reason we’ll use the following startup command: sh -c ‘sleep 10 && glava —desktop’ (where «10» is a delay of 10 seconds before running Glava, and the GLava launch command is glava —desktop , but you can modify this if you want to launch it with a particular configuration file (see below), etc.).
To add GLava to startup, launch Startup Applications or similar from your applications menu, and add a new startup entry with the name «GLava» and this as the startup command: sh -c ‘sleep 10 && glava —desktop’ .
You can also do this manually, by creating a file called glava.desktop in
/.config/autostart/ with the following contents:
(Optional) How to change the GLava music visualizer type
/.config/glava/rc.glsl file and change the bars from the #request mod bars line to one of the visualizers I mentioned above.
(Optional) How to display multiple GLava visualizers (with different visualizer types) on your desktop background
There are two ways of displaying multiple GLava visualizers (with different visualizer types) in the same time, useful if you want to have multiple music visualizers embedded in your desktop background.
The first one involves creating a new configuration .glsl file in
/.config/glava . You can start by copying the original rc.glsl file (using a different name), and make changes to it. Then run a new GLava instance by using the —entry flag followed by the new configuration file name (without the file path — the new configuration file must be placed in
/.config/glava ). For example:
Another way of running another GLava instance with a different visualizer type than the one specified in the default rc.glsl configuration file is to specify the visualizer type («mod») on the second (and third, etc.) instance, using the —force-mod flag. For example, to run a new GLava instance that uses the circle visualizer, run this command:
Where the —force-mod value can be bars , radial , graph , wave or circle .
(Optional) How to change individual visualizer types (mods) settings
GLava supports changing various settings for each of its visualizer mods (bars, radial, graph, wave or circle). The settings for these are not included in the main configuration file ( rc.glsl ), but in separate files.
In the GLava configuration folder (
/.config/glava ) you should find a file for each of these mods, called bars.glsl , circle.gls , graph.glsl and so on. Depending on the mod type, in these files you can change visualizer settings like the colors, transparency, amplify magnitude, and much more.
Each of these options is explained directly in each .glsl file, so open the file for the visualizer mod you want to change and look at the comments there to see what each option does.
Источник
Визуализатор glava linux настройка
Table of Contents generated with DocToc

![]()
Command line visualizer. Supports mpd, with experimental support for alsa and pulseaudio.
This project was heavily inspired by C.A.V.A, ncmpcpp, and rainbow


fftw and ncursesw libraries are required to build. Note that ncurses with wide character support is needed.
A C++ compiler that supports C++14 is also needed. On arch linux, the latest g++ or clang++ will work.
In order to show the colors, you need a terminal with 256 color support. rxvt-unicode out of the box.
For xterm, the default $TERM setting needs to be changed to rxvt-256color . To change this run
Setting TERM to xterm-256color may also work but seems to cause issues with rendering of the visualizers in some terminals.
For pulseaudio support, the pulseaudio library also needs to be installed
Older versions of Ubuntu also need newer a newer gcc compiler. Note, while this should be safe, it will upgrade some base libc libraries that might break your system.
In arch, the ncursesw is bundled with the ncurses package.
Solus requires a handful of development packages and creating a link for libtinfo before installing.
Make sure to compile ncurses with unicode flag, have fftw and cmake installed on your Gentoo system.
Mac os x has a version of ncurses builtin, but a newer version is required.
After the pre-requisites have been installed, run the install script.
The configuration file is installed under «
Older version of Ubuntu need to compile with the newer g++ compiler.
The Arch Linux install is much simpler since an AUR package exist for cli-visualizer.
You will have to copy config and colors manually.
At least one of the following needs to be configured (and linked in the config): mpd, alsa and pulseaudio
The visualizer needs to use mpd’s fifo output file to read in the audio stream. To do this, add the following lines to your mpd config file.
If you have any sync issues with the audio where the visualizer either get ahead or behind the music, try lowering the audio buffer in your mpd config.
WARNING: alsa support is very very experimental. It is very possible that it will be completely broken on various systems and could cause weird/bad behaviour.
Similar to the MPD setup, the visualizer needs to use a fifo output file to read in the alsa audio stream. To do this, add the following lines to your alsa config file, usually at /etc/asound.conf . If the file does not exist create it under /etc/asound.conf .
Next change the visualizer config
/.config/vis/config to point to the new fifo file
A normal fifo file can not be used since otherwise no sound would work unless the fifo file is being read. This effectively means that no sound would be played if the visualizer is not running. To get around this issue a helper program safe_fifo is used. The safe_fifo program is essentially a non-blocking fifo file, it takes stdin and writes it to a fifo files given as the first parameter. If the fifo buffer is full, it clears the buffer and writes again.
Note that alsa support is still very experimental. There are a couple of caveats with this approach. Firstly safe_fifo must in a location alsa can find it. If you are building from source it us under cli-visualizer/bin/safe_fifo . Secondly slave.pcm must match whatever your alsa playback device is.
On sound cards that do not support hardware level mixing, alsa uses dmix to allow playback from multiple applications at once. In order to make this work with the visualizer a dmixer plugin needs to be defined in /etc/asound.conf and the visualizer pcm set to use dmixer instead of the hardware device directly. This configuration might will change slightly depending on the system.
This is an example asound.conf for Intel HD Audio.
Pulse Audio Setup (Easy)
Pulse audio should be the easiest to setup out of all the options. In order for this to work pulseaudio must be installed and vis must be built with pulseaudio enabled. To build with pulseaudio support run make ENABLE_PULSE=1 .
To enable pulse audio in the vis config set audio sources to pulse with
If this does not work, then vis has most likely not guess the correct sink to use. Try switching the pulseaudio source vis uses. A list can be found by running the command pacmd list-sinks | grep -e ‘name:’ -e ‘index’ . The correct pulseaudio source can then be set with
Troubleshooting with Pulse For MacOS Users:
If vis is hanging for you after running it make sure the pulseaudio daemon is running. You can start it if you installed it with brew by running
Alternatively you can run the pulseaudio command and send it to the background, then run bg to continue it.
Then try to run vis again. You’ll know it worked if it asks to have access to your microphone.
Port Audio Setup (Wicked Easy)
Install portaudio, then build vis. That’s it.
To enable port audio in the vis config set audio sources to port with
The correct port audio device can then be set with
Источник


