- Как установить VMware Workstation 16 в Linux
- Что нового появилось в VMware Workstation 16 Pro
- Требования к установке
- Шаг 1: Загрузка VMware Workstation 16 Pro
- Шаг 2: Установка VMWare Workstation 16 Pro в Linux
- Шаг 3: Запуск VMWare Workstation 16 Pro
- Удаление VMWare Workstation Pro из системы Linux
- Заключение
- How to Install .bundle packages (VMware Player Bundle) on Ubuntu 16.04/18.04 Linux
- What is a .bundle File?
- Installing VMware .bundle File
- Conclusion
- Ubuntu Documentation
- Ubuntu as a VMware host
- Installing from the .bundle
- Alternate Installation from .bundle
- Installing on Jaunty
- Installing from the .rpm
- Ubuntu as a VMware Guest
- Initial Install
- Installing Virtual VmwareTools
- Installation tips
- Enabling Parallel Port Access
- Troubleshooting Tips
- After a kernel update, VMWare stops working
- Important Note about Updating from Hoary to Breezy
- Configuration aborts when updating from Dapper to Edgy
- Configuration aborts when updating from Feisty to Hardy (or any system running the 2.6.24-2 kernel)
- Configuration aborts when Installing VMware 6.0.5 on Intrepid (or any system running the 2.7.27 kernel)
- Ubuntu is hosting a guest VM, and the clock gets out of sync
- VMWare «Snapshot Manager» Crashes
- VMWare Runs Slowly on Pentium-M «Centrino» Notebook
- Bridged Networking Won’t Start
- VMWare 5.5 breaks after installing the ‘vmware-any-any-update’ package
- Missing Library Files Error
Как установить VMware Workstation 16 в Linux
VMware Workstation 16 Pro — это популярное программное обеспечение, которое позволяет запускать несколько различных виртуальных машин на физических хостах. Используя концепцию гипервизоров Hosted Hypervisors. В этом руководстве также рассматриваются некоторые распространенные проблемы в процессе установки.
Что нового появилось в VMware Workstation 16 Pro
- 1. Поддержка образов и Kubernetes – создавайте, запускайте и извлекайте образы с помощью инструмента командной строки vctl.
- 2. Поддержка RHEL 8.2, Debian 10.5, Fedora 32, CentOS 8.2, SLE 15 SP2 GA, FreeBSD 11.4 и ESXi 7.0.
- 3. Поддержка DirectX 11 и OpenGL 4.1.
- 4. Поддержка рендеринга Vulkan для рабочей станции Linux
- 5. Поддержка vSphere 7.0
- 6. Поддержка операций питания хоста ESXi, таких как выключение, перезапуск и вход/выход из режима технического обслуживания.
- 7. Улучшенная поддержкой OVF/OVA для тестирования и экспериментов внутри рабочей станции.
- 8. Сканирование виртуальных машин, в локальных папках, в сетевых хранилищах и USB-накопителях.
- 9. Автоматическая Приостановка Общих Виртуальных Машин При Завершении Работы Хоста.
- 10. Новый пользовательский интерфейс на основе GTK+ 3 для Linux.
- 11. Есть также некоторые другие функции, которые вы откроете для себя на практике.
Требования к установке
- Убедитесь, что ваша система 64-разрядная «VMware не предоставляет 32-разрядную версию» и ее функция виртуализации включена.
- К сожалению, 16 -е издание не поддерживает 32-битные процессоры, возможно, из-за улучшений функций, которые требуют более высокого уровня процессора. VMware не сообщала о конкретных причинах использования только 64 битных процессоров.
- Убедитесь, что у вас есть лицензионный ключ для активации продукта, или вы будете работать в тестовом режиме. ОстанутсяТе же функции, но только с 30-дневным периодом, после окончания периода тестового режима вы должны ввести лицензионный ключ для активации продукта.
- Прежде чем вы приступите, вам понадобится учетная запись root или пользователь с правами sudo, настроенными в вашей системе.
- Убедитесь, что ваша система и ее ядро находятся в актуальном состоянии.
Шаг 1: Загрузка VMware Workstation 16 Pro
1. сначала войдите на свой сервер как пользователь root или с разрешениями sudo. Далее выполните следующую команду, чтобы обновить вашу систему и привести ее в актуальное состояние.
# yum update [на системах RedHat]
# update dnf [на Fedora]
# apt-get update && apt-get upgrade [в системах Debian]
2. Теперь загрузите пакет сценариев установки VMWare Workstation Pro с официального сайта VMware. Для этого используйте команду wget.
3. После загрузки файла сценария VMWare Workstation Pro перейдите в каталог, который содержит файл сценария. И установите соответствующее разрешение на выполнение, как показано ниже.
# chmod a+x VMware-Workstation-Full-16.1.0-17198959.x86_64.bundle
Шаг 2: Установка VMWare Workstation 16 Pro в Linux
4. Теперь запустите сценарий который вы скачали для установки VMWare Workstation Pro на хост-систему Linux. Установка произойдет автоматически и ход установки будет показан в терминале. Введите команду:
Или такую команду:
Пример вывода в терминале
Шаг 3: Запуск VMWare Workstation 16 Pro
5. При запуске программы VMware Workstation 16.1.0 в первый раз,у вас появятся некоторые проблемы. Они описанные ниже, а так же вы найдете исправления для VMware. А сейчас давайте просто запустим Workstation 16. Для этого введите vmware в терминале.
После выполнения приведенной выше команды, если у вас нет компилятора GCC GNU C, вы увидите сообщение, которое уведомляет вас об установке компилятора GCC и некоторых компонентов. Просто нажмите кнопку «Отмена‘, чтобы продолжить.
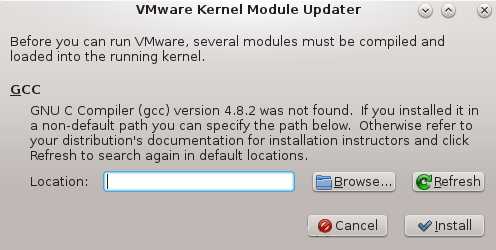 Средство Обновления Модулей Ядра VMWare
9. Далее требуется вернутся к терминалу и установить “Development Tools”.
[[email protected] Downloads]# yum groupinstall «Development tools» [для RedHat систем]
[email protected]:
# apt-get install build-essential [для Debian систем]
10. Когда он закончит, давайте попробуем запустить программное обеспечение снова.
На этот раз появится еще одна проблема, речь пойдет о kernel-headers. Вам следует выбирать “отмена” . Давайте проверим, установлены ли заголовки ядра.
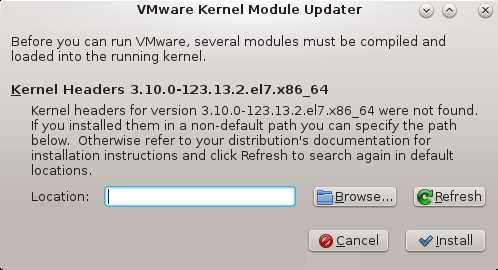 Отсутствуют Заголовки Ядра VMWare
[[email protected]]# rpm -qa | grep kernel-headers [в системах RedHat]
[email protected]:
# dpkg -l | grep linux-headers [в системах Debian]
Если ничего не появляется, установите его, используя это.
[[email protected]]# yum install kernel-headers [On RedHat Systems]
[email protected]:
# apt-get install linux-headers-`uname -r` [On Debian Systems]
11. В дистрибутивах Linux на базе RedHat вам необходимо установить пакет “Kernel-devel”, как показано ниже.
[[email protected] Downloads]# yum install kernel-devel [On RedHat Systems]
12. Когда все установится, давайте попробуем снова запустить программу. Наберитесь терпения и поверьте мне ..это будет последняя попытка ;).
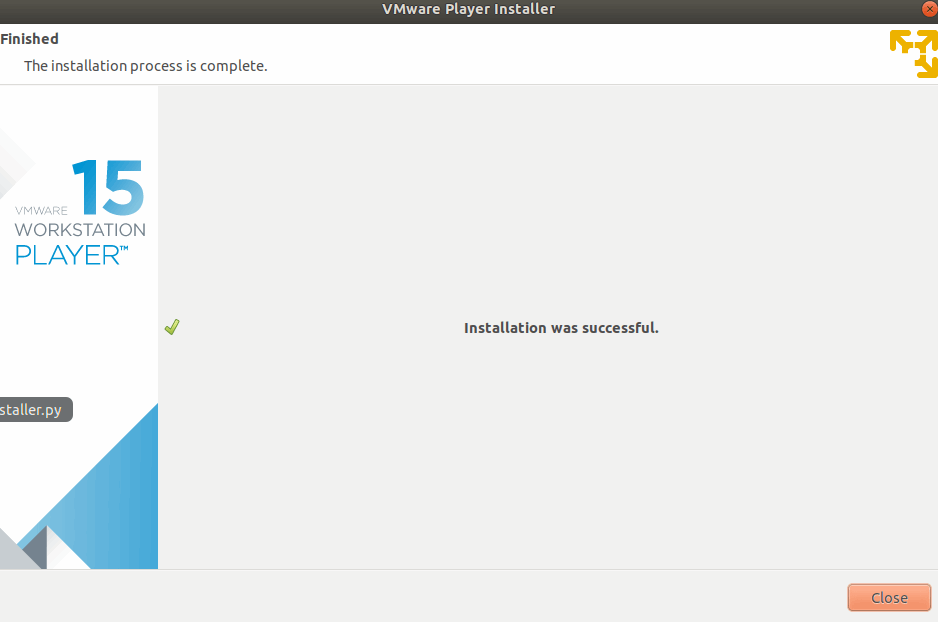
Поздравляю! Мы решили все проблемы и если вы все сделали правильно вы увидите это окно.
 Запуск Рабочей Станции VMWare на Linux
Но требуется немного подождать, пока вносятся некоторые изменения в модули ядра и компилируются некоторые новые инструменты. Все это продлится всего несколько минут. Далее появится окно запуска приложения.
 Лицензия VMWare на Linux системах
  Обновление VMWare
 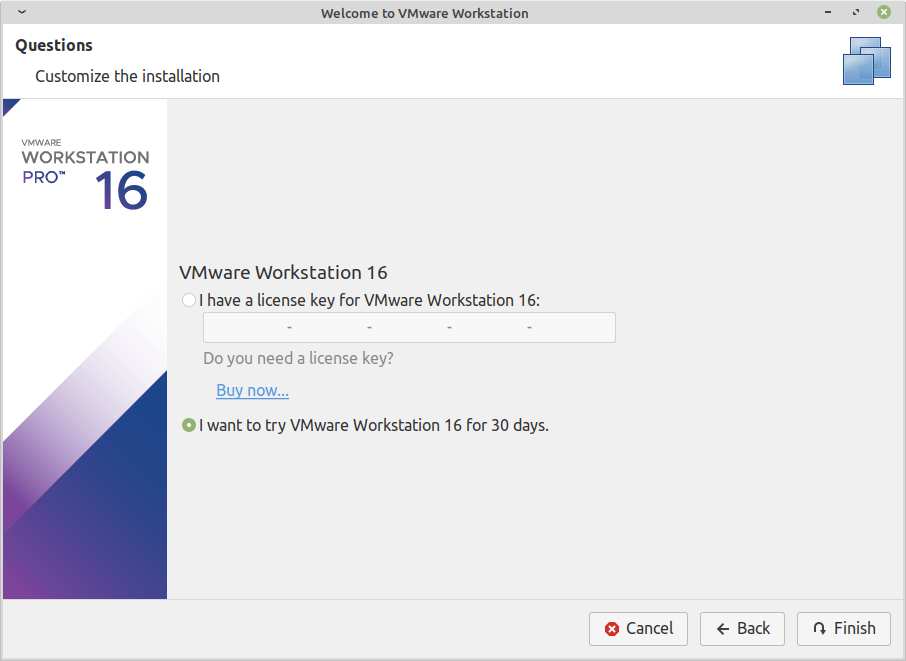 Ввод лицензионного ключа VMWare
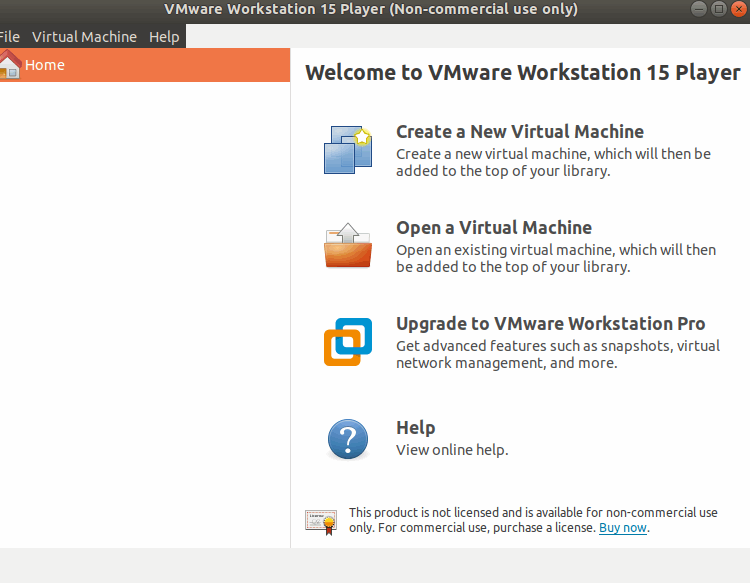
 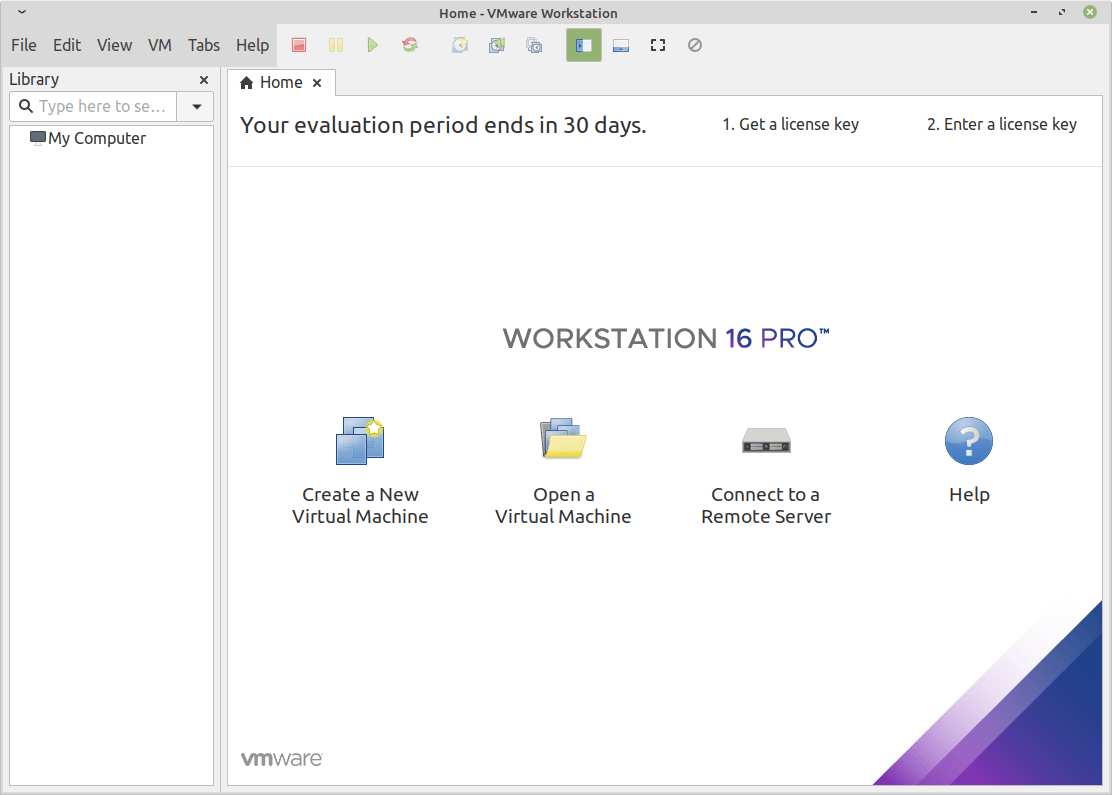 Рабочая Станция VMWare в Linux
Удаление VMWare Workstation Pro из системы Linux
Для удаления Workstation Pro с хоста Linux, требуется в окне терминала ввести следующую команду.
# vmware-installer -u vmware-workstation
или ввести такую команду:
$ sudo vmware-installer -u vmware-workstation
Ответ терминала будет следующим:
[sudo] password for user:
All configuration information is about to be removed. Do you wish to
keep your configuration files? You can also input ‘quit’ or ‘q’ to
cancel uninstallation. [yes]: no
Uninstalling VMware Installer 3.0.0
Deconfiguring…
[######################################################################] 100%
Uninstallation was successful.
Заключение
Поздравляю! вы успешно установили VMWare Workstation в своей системе Linux.
Источник
How to Install .bundle packages (VMware Player Bundle) on Ubuntu 16.04/18.04 Linux
This post will guide you how to install a .bundle file on your Ubuntu Linux server. How do I install VMware .bundle file on Ubuntu Linux 16.04/18.04.
What is a .bundle File?
The .bundle files for VMware Player, Workstation, and other products are actually shell scripts in Linux system.
Installing VMware .bundle File
If you downloaded a package with .bundle extension called VMware-Player-15.0.2-10952284.x86_64.bundle on your Ubuntu Linux server, and you want to install it on your Ubuntu. Just do the following steps:
#1 downloading VMware bundle file to your local disk from VMware official site, type the following wget command to get it:
#2 you can use the file utility to verify this .bundle file to find out what kind of file is. Type the following command:
From the above outputs, you should see that this bundle file is a shell script.
#3 you need to change permission of the bundle file to make it executable, type the following chmod command:
#4 try to install it with root privileges in the Ubuntu terminal, type:
Note: you will be prompted to enter root password for authentication.
#5 you should see something like to this output: “Extracting VMware Installer …done”

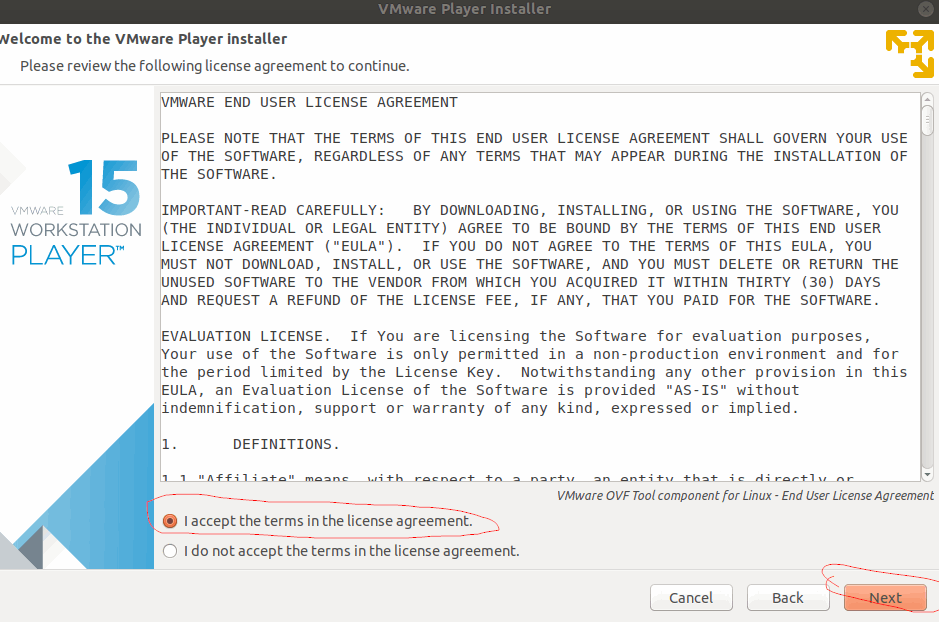
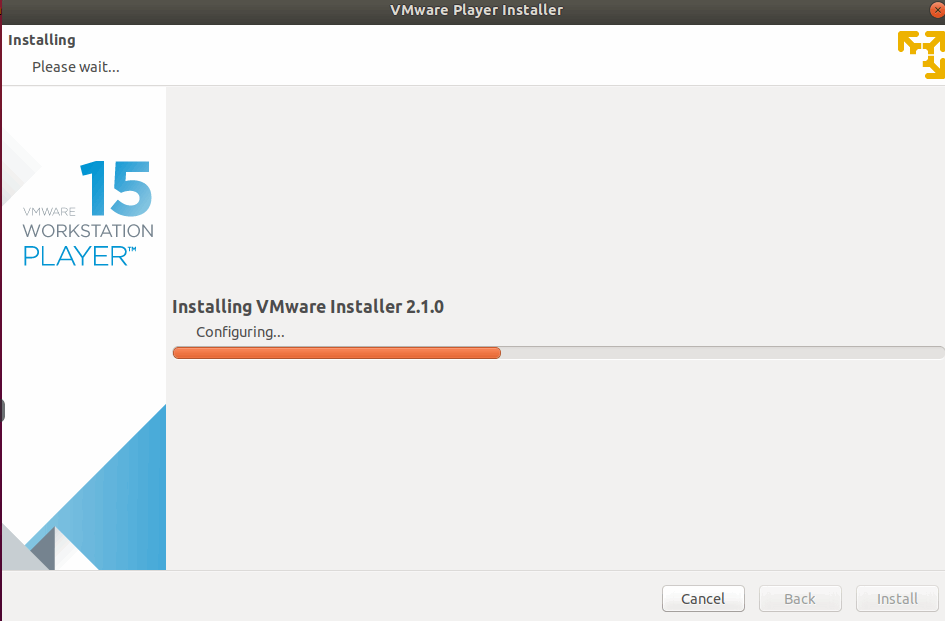
#6 you need to accept the terms in the license agreement, and then continue the installation with the Ubuntu GUI window.
#7 After installation, you can try to start the VMware player application. type the following command in Ubuntu terminal:
Conclusion
You should know that how to install VMware player bundle file on Ubuntu 16.04 or 18.04 from this guide.
Источник
Ubuntu Documentation

Style Cleanup Required
This article does not follow the style standards in the Wiki Guide. More info.
Unsupported Version
This article applies to an unsupported version of Ubuntu. More info.
Ubuntu as a VMware host
Installing from the .bundle
Tested with:
- VMware Workstation 6.5.1 Build 126130, Ubuntu 8.10, AMD64
- VMware Workstation 6.5.1, Kubuntu 8.10, AMD64
- VMWare Workstation 6.5.0, Ubuntu 8.10 x86
- VMWare Workstation 6.5.0, Super Ubuntu 8.10 x86
Install required packages build-essential, linux-kernel-headers and linux-kernel-devel
Navigate to where the .bundle VMWare file is, then type this in
And that’s it! Enjoy your VMWare Workstation installation!
Alternate Installation from .bundle
VMWare Workstation 6.5.0, HackBuntu Alpha 3 8.10 x86 (PM me for DL link)
In the terminal, navigate (cd) to where your installation resides. Then type this in
Installing on Jaunty
0. Same as above, but then you have to remove the broken module:
1. then simply rebuild the module.
Installing from the .rpm
It’s relatively easy to convert VMWare’s .rpm to a .deb and install VMWare inside the package manager. Here’s how:
- Make sure you have the kernel headers and compiler first, with:
Download VMWare Workstation 6.0 from their site in .rpm format, and get a serial number from them while you’re at it.
Convert the .rpm to a .deb with
Install the .deb with
Edit /etc/vmware/locations as root and add the following three lines (not necessary on 6.0.5):
- Just after
- add
- Just after
- add
Run vmware-config.pl (and answer the questions accordingly; this hasn’t really changed since VMWare 4.5. You will have to give the correct location for the kernel headers, i.e. /usr/src/linux- uname -r/, although you must know in advance what uname -r will return.) with
Ubuntu as a VMware Guest
VMware version 5 is reported to work with Ubuntu out-of-the-box. Try using NAT rather than bridging when using VMware 5 with Ubuntu as a guest OS.
Initial Install
Download the iso from http://www.ubuntu.com/download/ this demo used the ubuntu-5.10-install-i386.iso image.
Create a new Virtual Machine.
Virtual Machine Configuration: Typical
Guest Operating System: Linux
Version: Other Linux 2.6.x kernel
Virtual Machine Name & Location: Pick as you will. (for the record I chose Ubuntu and O:\VPC\)
Network Connection: Use bridged networking (Refer to this VMware documentation for information on the other network connection configurations.)
Disk capacity: Again the choice is yours, I chose 4GB and turned on Allocate all disk space now and Split disk into 2 GB files. Allocating the disk space will increase performance, while spliting the disk into 2GB chunks will minimise any file size limitations if transferring a virtual machine using Samba.
Change the settings of the new virtual machine:
- Memory — Increase the memory given to the guest OS from 256 (the default) to 512. Although not necessary since I’ve got the RAM, why not.
CD-ROM — Use ISO Image: set to the location of the downloaded is, mine was O:\BitTorrent\ubuntu-5.10-install-i386.iso
Language & Location: Doesn’t matter
Keyboard: I stuck with the default, American English
Hostname: Doesn’t matter, I went with Ubuntu
Disk Partition: Erase entire disk: SCSI (.
Write Changes to Disk: Yes
Full name for the new user: I chose bob
Username for your account: I chose bob
Password and Verify: pick one, no restrictions
Reboot: Continue, I didn’t bother «removing» the ISO.
Once you see Restarting system. Ubuntu has shutdown, press Ctrl-Alt to release the cursor and click VM->Power->Reset
. wait.
Select video modes. Don’t add anything more than the defaults 1024×768, 800×600, 640×480
At this point Ubuntu is usable but without the virtual tools you can not use some of the higher resolutions. and to release the mouse you must press Ctrl-Alt. So onto the install.
Installing Virtual VmwareTools
There a number of advantages in installing VmwareTools in your Ubuntu guest VM.
Open the System->Administration->Synaptic Package Manager
Install the following packages (replace ‘kernel version’ below with what is reported with uname -r):
- Goto the desktop and eject the Ubuntu iso.
Ctrl-Alt to get the cursor back, VM->Install VMware Tools.
Wait for the CD to appear on the desktop. This may require going to Places->Computer and clicking on the CD icon to make Ubuntu read the new disk.
Copy VMwareTools-x.x.x-xxxx.tar.gz from the CD to your desktop.
Right click on the VMware Tools tarball and select Extract Here
- Accept all the defaults, this should take you through making a few directories and then run the config program. The config program will need to compile the drivers and so it will use make, the gcc you specified and the headers to compile.
- The first non default is screen size. I know 640×480, 800×600 and 1024×768 work, I have had 1280×1024 work (I use this one) and I’ve had 1600×1200 not work.
- If you pick one that doesn’t work, get to a terminal and run /usr/bin/vmware-config-tools.pl to pick a different one.
- What you pick here becomes the max setting and you can pick a lower one withing Ubuntu, however the max is used at startup so if it doesn’t work you are up the creek.
Restart the system with System->Log out->Shutdown. Wait until Ubuntu has shutdown and either turn off or restart the VM.
Installation tips
The install script asks for the path of gcc. If it isn’t automatically found find the path on your system by running
. Set the full path to the binary in the variable CC:
When you run vmware-config.pl, if the script can’t find your kernel’s C headers you must install the appropriate headers package. Do this by running
You must then point vmware-config.pl to the appropriate directory, such as
If the VMware Management Interface (MUI) for GSX complains about a lack of libdb.so.3 and instruct you to get compat-db-3.3. — .i386.rpm. You want the Ubuntu package libdb2 for this.
Enabling Parallel Port Access
VMware allows direct access to parallel ports, which is handy if you’ve got a scanner that only has Windows drivers. You may need to make the following minor change to VMware’s startup script.
Open /etc/iniit.d/vmware in an editor by running
Find the case statement that looks like this (around line 814)
Add the following text at the end of the case statement
Troubleshooting Tips
After a kernel update, VMWare stops working
After upgrading to a newer kernel version, you may find VMWare stops working and displays the error (note: if you’re not running it from a terminal the program will just exit with no graphical error messages):
This happens even on a minor kernel update (e.g 2.6.12-9 to 2.6.12-10), but is simple to rectify using the steps above. Before running «/usr/bin/vmware-config.pl» as suggested you will need to get the correct kernel headers for your new kernel, and make sure you point the correct version of gcc to the config script.
All this is explained above, so I wont go through it here. Once you’ve done that run the conifg script, select the defaults for all the options except:
Select yes, as you’re network setting should not have changed.
Once the config file has finished you should be able to run VMWare again with no problems.
Important Note about Updating from Hoary to Breezy
A heads up for people coming from hoary to breezy with a VMWare install. I was trying to reconfigure my vmware install for use in breezy (regenerate kernel modules, etc) using vmware-config.pl; however, doing so would not only fail to make VMWare work, but it would leave my system relatively unusable (specifically, sudo no longer worked!). The solution was to download the distribution tarball again, and reinstall (as per the instructions here). Simply reconfiguring the old install doesn’t seem to work.
Configuration aborts when updating from Dapper to Edgy
When upgrading from Dapper to Edgy, and then running sudo vmware-config.pl (as explained above), you might find that the configuration aborts with the message:
You need to install the vmware-any-any-update patch, which you can find here: http://platan.vc.cvut.cz/ftp/pub/vmware. Just download the vmware-any-any-update file, untar it, and run sudo ./runme.pl It will automatically call vmware-config.pl, which should then complete normally (ignore the warnings generated).
Configuration aborts when updating from Feisty to Hardy (or any system running the 2.6.24-2 kernel)
When using the 2.6.24-2 kernel, a patch must be applied to get the vmware modules to compile. This applies to you if vmware-config.pl crashes with the message
The solution is to download a patch from http://platan.vc.cvut.cz/ftp/pub/vmware/vmware-any-any-update115.tar.gz that will correct this issue. Extract the files, then run
from the vmware-any-any-update115 directory. Note: This is not my mirror, if someone cares to mirror this file it would be a good thing
When running kernel 2.6.24-16, you need the patched patch from http://aldeby.org/blog/?p=113.
Configuration aborts when Installing VMware 6.0.5 on Intrepid (or any system running the 2.7.27 kernel)
You need to replace the three files
Ubuntu is hosting a guest VM, and the clock gets out of sync
The clock of a Linux guest OS could run much faster than the host computer, if the host computer isusing dynamic CPU speed technology.
To Fix this problem:
Edit your /etc/vmware/config
Add the following line to /etc/vmware/config x = Max CPU speed in kHz (i.e. 2GHz CPU = 2000000)
VMWare «Snapshot Manager» Crashes
The VMWare «Snapshot Manager» may still crash when clicked on. To work around this problem, set an environment variable in the shell before running VMware. I have these two commands together in a shell script for launching the program:
VMWare Runs Slowly on Pentium-M «Centrino» Notebook
If you have a Pentium-M «Centrino» notebook, you may notice VMware runs very slowly at times. To fix this problem, do as follows in a shell script:
Bridged Networking Won’t Start
Some people may have a problem starting bridged networking (vmnet0). vmnet0 is bridged to eth0, so try running ifdown eth0 first, THEN running the vmware-config.pl or runme.pl.
VMWare 5.5 breaks after installing the ‘vmware-any-any-update’ package
VMware 5.5 doesn’t need the ‘vmware-any-any-update’ package. If you did try this, you will get the following sorts of errors:
To fix this problem, run the version of vmware-config.pl included in the VMware package. If have already run the version in the vmware-any-any-update package, rerun the vmware-install.pl script to reinstall VMware.
Missing Library Files Error
You get an error about missing library files (file extension .so). This will happen if you don’t have the X Window system installed. You can either install the libraries one by one or install x-window-system-core, which is simpler, but will also install other unnecessary packages:
VMware/Workstation (последним исправлял пользователь crazybilly 2010-04-09 02:36:49)
The material on this wiki is available under a free license, see Copyright / License for details
You can contribute to this wiki, see Wiki Guide for details
Источник


