- Установка VMware Player в Ubuntu 12.04
- Устанавливаем VMware Player в Ubuntu, Linux Mint и Debian
- Скачиваем VMware Player для Linux
- Устанавливаем VMware Player в Ubuntu, Mint и Debian
- Create virtual machine with VMware player 15 Linux Mint/Windows
- The short version:
- The detailed version:
- Problems and fixes
- VMware Player 15 Not loading Virtual Machine
- Network configuration problems
- VirtualBox vs VMware player in 2019
- Как установить VMware Workstation на Linux Mint 20
- Как установить VMware Workstation на Linux Mint 20
- Установите VMware Workstation на Linux Mint 20.1 Ulyssa
- Шаг 1. Перед запуском приведенного ниже руководства важно убедиться, что ваша система обновлена, выполнив следующие apt команды в терминале:
- Шаг 2. Установка необходимых пакетов.
- Шаг 3. Установка Workstation Player на Linux Mint 20.
- Шаг 4. Доступ к VMware Workstation в Linux Mint.
- How To Install VMware Player on Ubuntu 18.04/ Mint 19
- Download
- Preparation
- Installation
Установка VMware Player в Ubuntu 12.04
Последний релиз VMware Player 4.0.3 не устанавливается в Ubuntu 12.04 (с ядром Linux Kernel 3.2.x), вследствие ошибки в виртуальной сетевой карте, но вы можете заставить его заработать, используя специальный патч. Ниже написано, как это сделать.
1. Скачайте Vmware Player в свою домашнюю директорию. Для скачивания вам необходимо будет зарегистрироваться (или скачать его из какого-нибудь другого места).
Примечание: если вы используете Google Chrome, скачанный файл будет иметь расширение «.txt». Переименуйте его в «.bundle».
2. Теперь установим требуемые зависимости и запустим скачанный файл.
Для 32-битной системы:
Для 64-битной системы:
Имя файла в приведенных выше командах может отличаться, в зависимости от того, какую версию VMware вы скачали.
В этот момент запустится инсталлятор. Здесь нужно просто жать кнопку»Next»:
3. Установка патча для работы VMware 4.0.3 в Ubuntu 12.04 Precise Pangolin
Не пытайтесь запустить VMware player сразу после установки, он не будет работать и выдаст сообщение об ошибке: «Unable to start services. See log file /tmp/vmware-root/mdconfig-23331.log for details».
Необходимо пропатчить его, используя приведенные ниже команды:
Замечание: для других версий, например, VMware Player 4.0.4, откройте в текстовом редакторе файл «patch-modules_3.2.0.sh» (он находится в архиве, скачанном второй сверху командой) и измените версию «plreqver» на ту версию VMWare Player, которую вы используете.
Приведенные выше команды скачивают патч и запускают его, однако, если вы хотите, то можете скачать патч вручную отсюда.
Если у вас уже установлена более ранняя версия VMware и вы пропатчите ее, то получите ошибку вида: «/usr/lib/vmware/modules/source/.patched found. You have already patched your sources. Exiting».
Чтобы исправить ее, просто удалите файл «.patched» и попробуйте снова.
Теперь VMware Player 4.0.3 должен работать под Ubuntu 12.04 Precise Pangolin:
Патч должен работать как с VMware Player, так и с VMware Workstation, но я тестировал его только с VMware Player.
Источник
Устанавливаем VMware Player в Ubuntu, Linux Mint и Debian
VMware Player в репозиториях Ubuntu нет, поэтому нужно делать всё руками
Если Вы знаете, что такое VMware Player, и зачем он Вам нужен — пропустите следующий абзац с описанием.
VMware Player — бесплатный для некоммерческого использования программный продукт, на основе виртуальной машины VMware Workstation, но с ограниченной функциональностью, предназначенный для запуска образов виртуальных машин, созданных в других продуктах VMware, а также в Microsoft VirtualPC и Symantec LiveState Recovery. Начиная с версии 3.0 VMware Player позволяет также создавать образы виртуальных машин. Ограничение функциональности теперь касается в основном функций, предназначенных для IT-специалистов и разработчиков ПО. Например, отсутствует возможность тонкой настройки виртуальных сетевых адаптеров через Virtual Network Editor.
Скачиваем VMware Player для Linux
В общем, для использования обычным пользователем вариант VMware Player будет более чем достаточным. А раз так — не будем нарушать законы, искать поломанные версии VMware Workstation, а сразу обратимся на официальный сайт — my.vmware.com, страницу с вариантами загрузки VMware Player. Скачиваем файл .bundle под свою архитектуру системы (узнать можно, выполнив в консоли uname -m ).
Устанавливаем VMware Player в Ubuntu, Mint и Debian
Подготовим необходимые пакеты:
Даём файлу установщику право на исполнение:
И запускаем саму установку:
В результате нажатия кнопок «Согласен», «Далее» и т.д. получаем в своей системе VMware Player!
sudo apt-get install build-essential linux-headers-i686
Чтение списков пакетов… Готово
Построение дерева зависимостей
Чтение информации о состоянии… Готово
E: Не удалось найти пакет linux-headers-i686
Источник
Create virtual machine with VMware player 15 Linux Mint/Windows

The creation of a virtual machine with VMware Player 15 with Linux Mint 19 / Ubuntu 18 seems to be easy task but there are many hidden problems. The ultimate goal of this article is to cover all possible problems you can have like:
- VMware Player 15 Not loading Virtual Machine — even though the machine was created successfully and can be browsed
- network configuration problems — VMWare — Could not connect ‘Ethernet0’ to virtual network ‘/dev/vmnet8’.
- VirtualBox vs VMware player — which one to choose in 2019 and why?
To create a new virtual machine you will need to install the latest VMware Player on Linux Mint / Ubuntu. In order to do this you can check this article(with video):
The short version:
- Start VMware Player — For Linux Mint cinnamon both VMware player and virtualbox are in menu Administration
- Choose your disc image file ( .iso) — in my case — Win10_1709_English_x64.iso (or insert your operating system install disc into your CD/DVD drive.)
- Enter the required information
- user name
- password
- license key (if required)
- Select a name for the virtual machine and choose a location to save.
- Select the disk size as your needs ( I usually create 40 or 50 GB and add a new drive if needed later). Choose either
- to store the file as a single file
- to split it into multiple files
- Customize Hardware:
- change the network settings
- add shared folders
- change number of the CPUs
- select the GPU settings
- Finish

The detailed version:
The New Virtual Machine wizard helps the creation of a new virtual machines with VMware Player 15. The wizard can be started by:
select
- Start the Player — For Linux Mint cinnamon both VMware player and virtualbox are in menu Administration
- File
- Create a New Virtual Machine ( CTRL + N ) ( or Player > File > New Virtual Machine)
- Choose your disc image file ( I use option 2 always)
- Use a physical drive – install guest OS from an optical drive
- Use ISO image — select the ISO file for guest OS installation
- I will install the operating system later
- Wait the Virtual Machine Wizard to open and recognize the operating system on the install disc or image file.
- Enter the OS information for the new machine like
- user name
- password
- license key (if required)
- log on automatically
- Version of the OS — Windows 7 Home Basic, Home Premium, Professional, Ultimate/
- Select a name for the virtual machine and choose a location to save.
- You can change the location if needed — you may need to path to the machine in the future
- You can change the virtual machine name — make the name descriptive in order to avoid confusion when you have many machines
- Select the disk size ( I use the default option here — Split virtual disk)
- Store virtual disk as a single file
- Split virtual disk into a multiple files
Select Split virtual disk into multiple files if the virtual disk is stored on a file system that has a file size limitation.
- Customize Hardware — for a test machine I will not change the default settings but for a gaming virtual machine I would:
- Increase the memory to 6 GB RAM
- Processors — 4 core processors + Virtualize CPU performance counters
- Network — sometimes you may need to use Bridged connection
- Display
- Allocate 2 GB of Graphics memory
- Accelerate 3D graphics
- Choose settings for monitors
- Finish
A golden rule for installation for beginners and people without a lot of experience:
Problems and fixes
VMware Player 15 Not loading Virtual Machine
This problem will occur on Linux Mint(cinnamon) and Ubuntu. You can create and work with a virtual machine. Then save the machine and closed the player. But when you open the VMware player to not see the machines you may be able to browse the machine files and even try to open them by:
without any success. In order to fix this problem you need to do (Linux Mint 19 cinnamon):
- Preferences
- Privacy (or just search for privacy)
- Switch on Remember recently accessed files
- Switch on Never forget old files
Now you will be able to open the virtual machines
Network configuration problems
Depending on your needs and will have different network configurations. In my case none of them work until I run (in the host):
I tried other options like:
which resulted ( and still ) in
VirtualBox vs VMware player in 2019
- VMware player is obviously the better choice if you want to play games, as it will provide more and better GPU memory — max 3 GB and 3D graphics with DX10 and OpenGL 3.3 support (while virtualbox player offer only 256 MB). You will have many options but also some problems with VMware player 15. Overall the better choice for gaming and graphics. The VMware player is free to use for non commercial usage.
- VirtualBox is excellent if you need a test machine which will be accessed via shell or as a server. Less troubles and easier to work with. Perfect for non gui OS or testing Android. The virtual box is also free for personal or educational use.
In practice I use both of them depending on my needs. Both has their advantages and disadvantages. So all will depends on your needs.
Источник
Как установить VMware Workstation на Linux Mint 20

Как установить VMware Workstation на Linux Mint 20
В этом руководстве мы покажем вам, как установить VMware Workstation на Linux Mint 20. Для тех из вас, кто не знал, VMware — это зрелое и стабильное решение для виртуализации, которое позволяет запускать несколько изолированных операционных систем на одной машине. . Это позволяет иметь виртуальные машины с разными операционными системами, работающими без ресурсов хоста. Инструменты VMware предлагают несколько полезных функций, таких как более высокая производительность графики, общие папки, общие буферы обмена, операции перетаскивания и многое другое.
В этой статье предполагается, что у вас есть хотя бы базовые знания Linux, вы знаете, как использовать оболочку, и, что наиболее важно, вы размещаете свой сайт на собственном VPS. Установка довольно проста и предполагает, что вы работаете с учетной записью root, в противном случае вам может потребоваться добавить ‘ sudo ‘ к командам для получения привилегий root. Я покажу вам пошаговую установку VMware Player / Workstation на Linux Mint 20.1 (Ulyssa).
Установите VMware Workstation на Linux Mint 20.1 Ulyssa
Шаг 1. Перед запуском приведенного ниже руководства важно убедиться, что ваша система обновлена, выполнив следующие apt команды в терминале:
Шаг 2. Установка необходимых пакетов.
Выполните следующие команды, чтобы установить все необходимые пакеты в вашей системе:
Шаг 3. Установка Workstation Player на Linux Mint 20.
Теперь скачиваем последнюю версию VMware Workstation с официальной страницы:
После того, как вы загрузили рабочую станцию VMWare в свою систему, пора приступить к ее установке:
Шаг 4. Доступ к VMware Workstation в Linux Mint.
После завершения установки значок VMware Workstation будет добавлен в ваши системные приложения. Щелкните по нему, чтобы запустить рабочую станцию VMware. Откроется интерактивный мастер для завершения настройки рабочей станции VMware.
Поздравляю! Вы успешно установили VMware . Благодарим за использование этого руководства для установки последней версии VMware Workstation в системе Linux Mint. Для получения дополнительной помощи или полезной информации мы рекомендуем вам посетить официальный веб-сайт VMware .
Источник
How To Install VMware Player on Ubuntu 18.04/ Mint 19
VMware Workstation Player is one of the choices for virtualization in 2019 that allows you to run multiple, isolated operating systems on a single machine. These guest machines can then be configured to run multiple operation systems like Windows, Linux, MacOS, android and many more. With VMware Player you will be able to run different applications from your native OS or even play games.
The advantage of VMware Workstation Player is that allows higher GPU allocation which can be helpful for some games.
In this article we will check how to install it on Ubuntu 18.04/ Linux Mint 19.
Download
From the VMware site you can download the latest version for your OS. This is the link: Download VMware Workstation Player. For this article we are interested in: VMware Workstation 15.0.2 Player for Linux 64-bit. Once the download is complete you can prepare your system for the installation. The download file will be similar to: VMware-Player-15.0.2-10952284.x86_64.bundle

Preparation
In order to install and run VMware Workstation Player you will need some additional packages for your system. It’s better also to update your system to the latest possible state with:
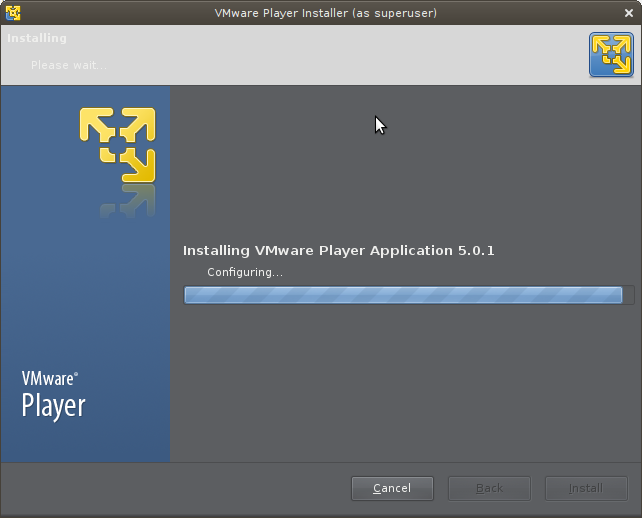
Installation
For the installation you need to find the folder where you donwloaded the bunddle file. And then open it in the terminal. So something like this:
Installation process is simple but you will need to accept several End User agreements, would you like to share information about your usage. You can enter a license key or add it later.
Источник


