- Docs
- Prerequisites
- Procedure
- Results
- Установка MacOS High Sierra 10.13 на VMware Workstation Pro
- 1. Скачиваем необходимые файлы.
- 2. Создаем виртуальную машину.
- 3. Установка MacOS High Sierra.
- 4. Установка VMware Tools.
- How to Install VMware Tools on macOS High Sierra
- How to Setup VMware Tools on macOS High Sierra
- How to Build VMware Tools on Mac OS Virtual Machine in VMware
- How to Setup VMware Tools on Mac OS Mojave
- Final Word
- Install VMware Tools on MacOS Sierra 10.12 to Enhance VM Performance
- Install VMware Tools on MacOS Sierra 10.12 to Enhance VM Performance
- 1# Run & Open VMware Tools
- #2 Install VMware Tools From Installation Wizard
Docs
—> share-line
—> —> —> —> plus
You can install or upgrade VMware Tools on a macOS virtual machine using an installer assistant.
If you use VMware Fusion or ESXi on a computer with an Apple label, you can create Mac OS X Server (10.5 or later) virtual machines and install VMware Tools.
Prerequisites
- Power on the virtual machine.
- Verify that the guest operating system is running.
Procedure
- Select the menu command to mount and open the VMware Tools virtual disc on the guest operating system.
VMware Product Menu Command vSphere Client Right-click the virtual machine and select Guest OS > Install VMware Tools. or Guest OS > Upgrade VMware Tools. and select Interactive Tools Installation or Interactive Tools Upgrade Fusion Virtual Machine > Install (or Upgrade) VMware Tools - Open Install VMware Tools on the VMware Tools virtual disc, follow the prompts in the installer assistant, and click OK .
Results
The virtual machine restarts to have VMware Tools take effect.
Источник
Установка MacOS High Sierra 10.13 на VMware Workstation Pro
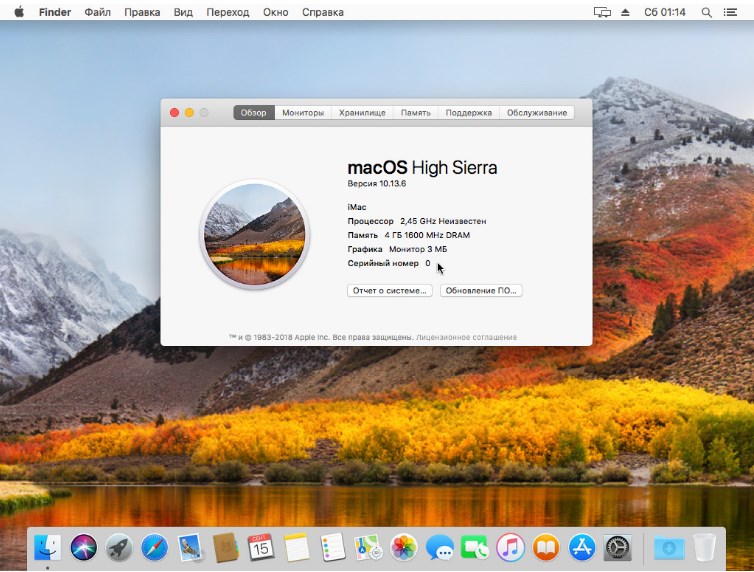
Виртуальная машина с MacOS быстрее и стабильнее работает на VMware Workstation Pro. К тому же нет проблем с подключением внешних устройств. У меня получилось развернуть систему гораздо быстрее и не было никаких проблем с разрешением экрана, подключением Iphone и видеопамятью, таких как с установкой в среде VirtualBox.
1. Скачиваем необходимые файлы.
2. Создаем виртуальную машину.
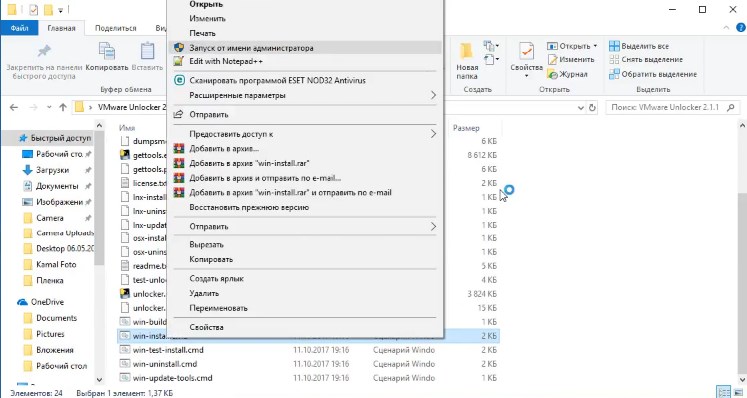
Устанавливаем VMware Workstation Pro. Закрываем программу и запускаем win-install.cmd из папки с unlocker. Ждем установки и окно закрывается автоматически.
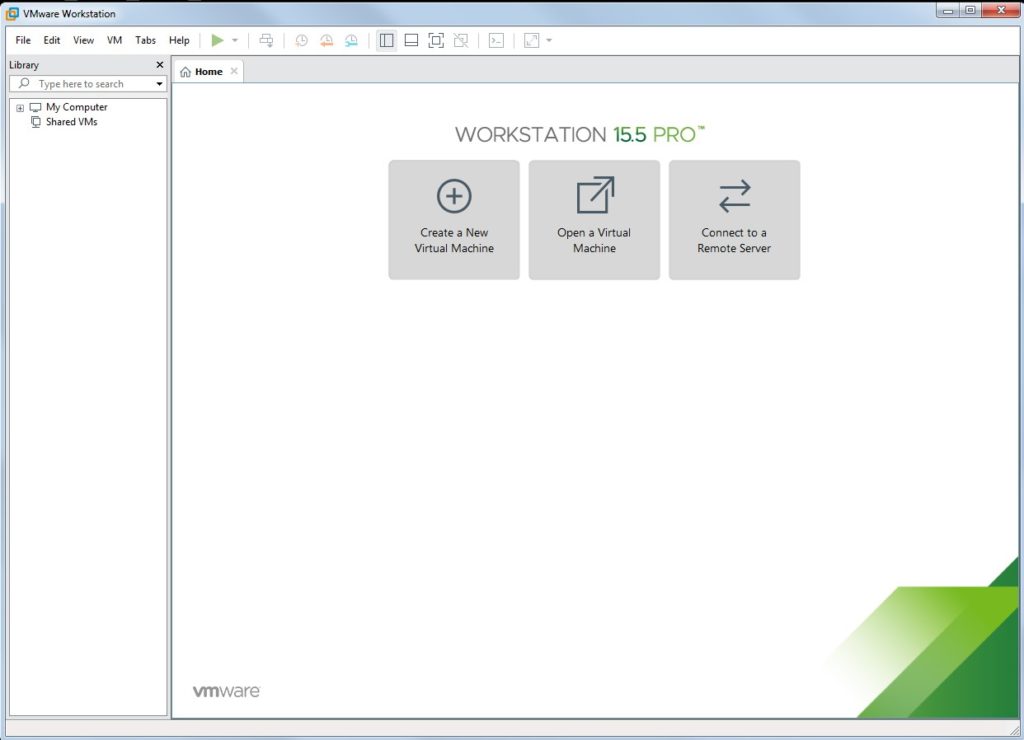
Открываем VMware Workstation Pro и нажимаем Create a New Virtual Machine. Если unlocker правильно сработал, то появится возможность выбора операционной системы MacOS.
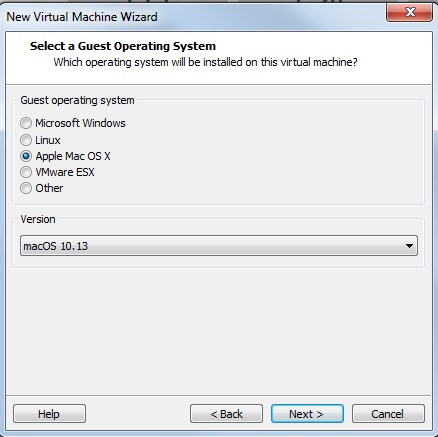
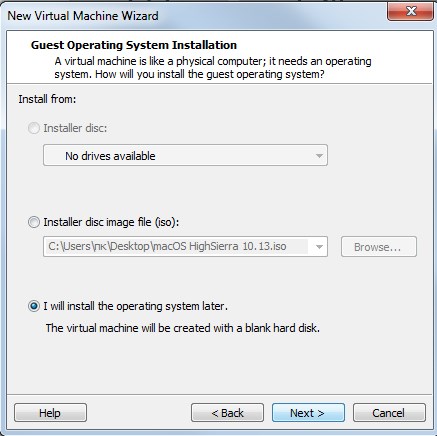
В первом окне выбираем Custom, потом далее и I will install operating system later. В следующем окне выбираем MacOS 10.13. Далее необходимо указать не менее 2 ядер процессора и не менее 4 Гб оперативной памяти. Все машина создана.
Теперь в списке слева нажимаем правой кнопкой по имени нашей виртуальной машины и переходим в настройки Settings. Размер памяти мы установили ранее.
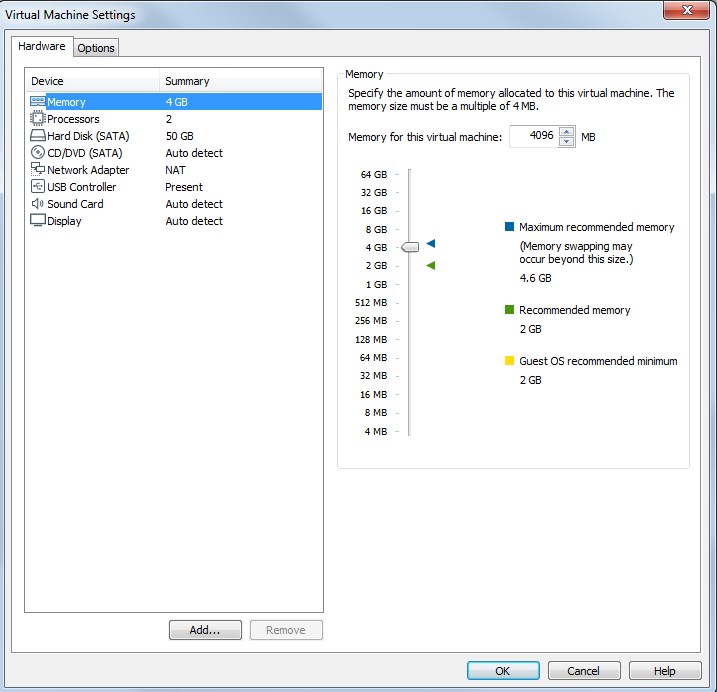
Отмечаем все галочки в разделе Processors.

В разделе CD/DVD выбираем ранее скачанный образ MacOS HighSierra.
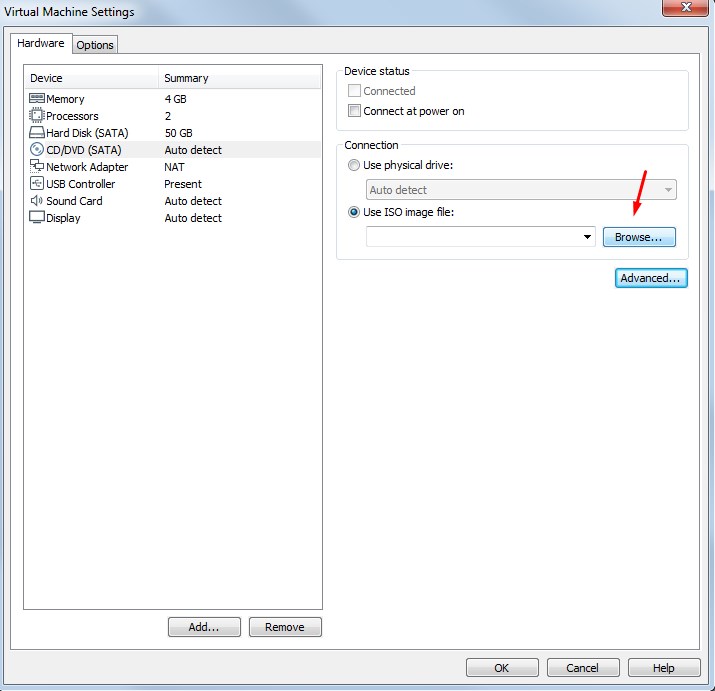
Сохраняем настройки и запускаем машину кнопкой Start.
3. Установка MacOS High Sierra.
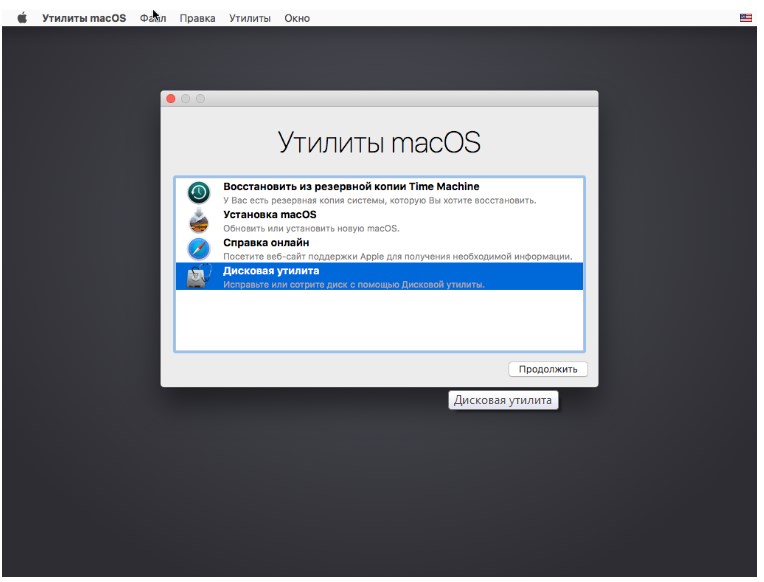
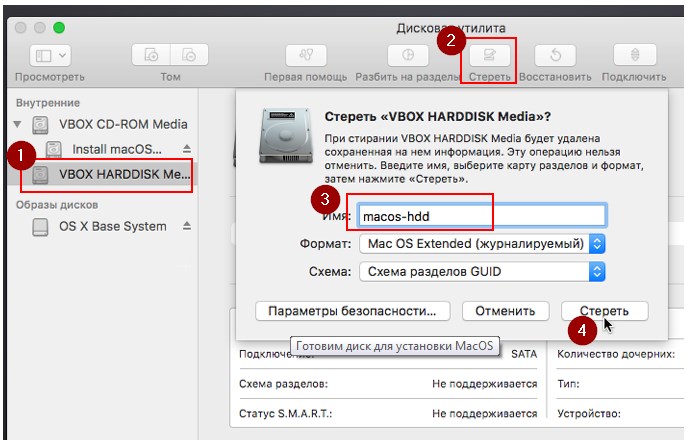
Выбираем язык и запускаем дисковую утилиту. В появившемся окне выбираем наш виртуальный жесткий диск и нажимаем вверху кнопку стереть. Задаем имя жесткого диска, например macos-hdd https://piar4you.com/youtube-subscribers
Теперь можно запускать установку macOS.
На этом этапе у меня возникла ошибка, что образ поврежден. В других случаях просто черный экран или ребут. Чтобы это поправить перед нажатием кнопки установка нужно выбрать Утилиты и Терминал в верхнем меню. В терминале вводим следующее:
Дальше все просто. Принимаем лицензионное соглашение и выбираем жесткий диск, на который будет установлена macOS. Все установка началась.
Во время установки надо дождаться, когда система будет перезапускаться и отключить виртуальный образ установщика из привода.
Если после перезапуска появляется окно Shell, то вводим и продолжаем установку:
В процессе установки выбираем нужные параметры, имя пользователя и пароль. Тут будет все интуитивно понятно. И в итоге получаем полноценную macOS.
4. Установка VMware Tools.
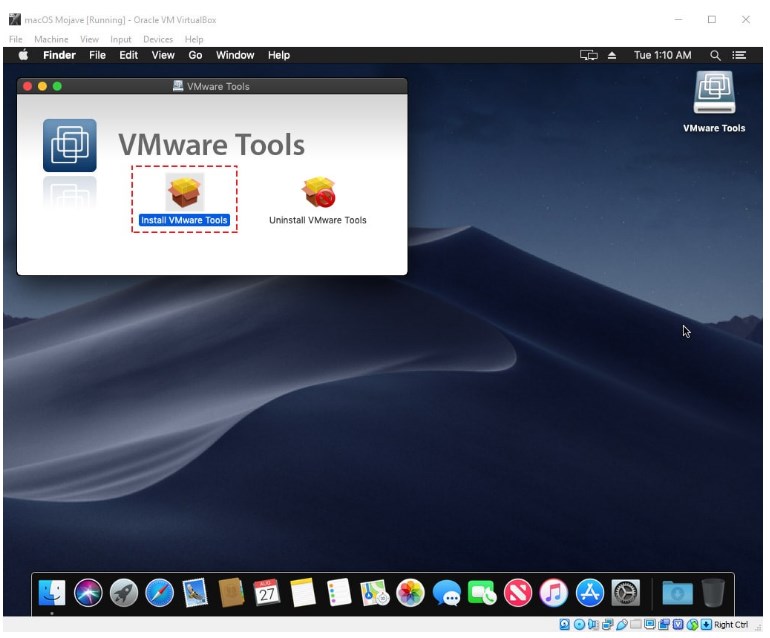
Для этого необходимо в верхнем меню выбрать пункт VM и Install VMware Tools. После чего смонтируется образ установочного диска и появится меню.
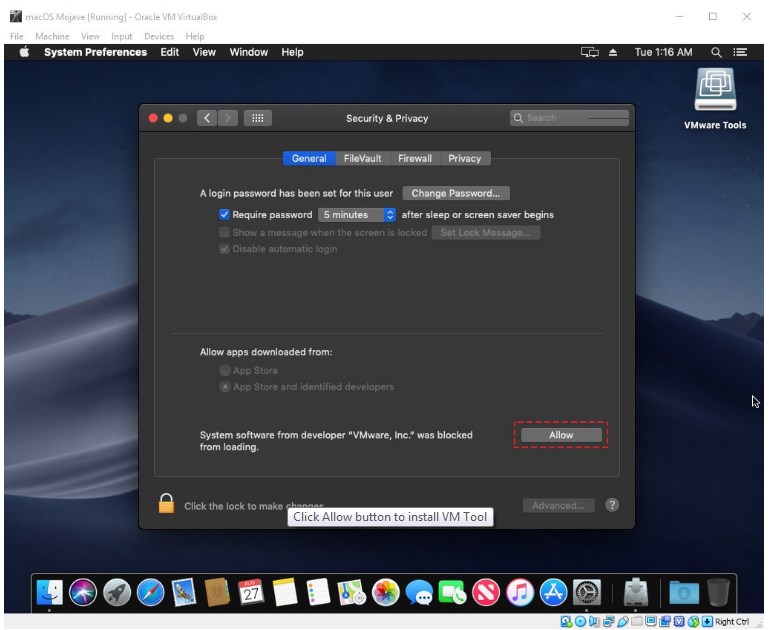
Если в процессе установки появляется окно блокировки, то нажимаем открыть настройки безопасности и разрешаем, чтобы продолжить процесс установки.
Возможно понадобится перезагрузка и на этом все!
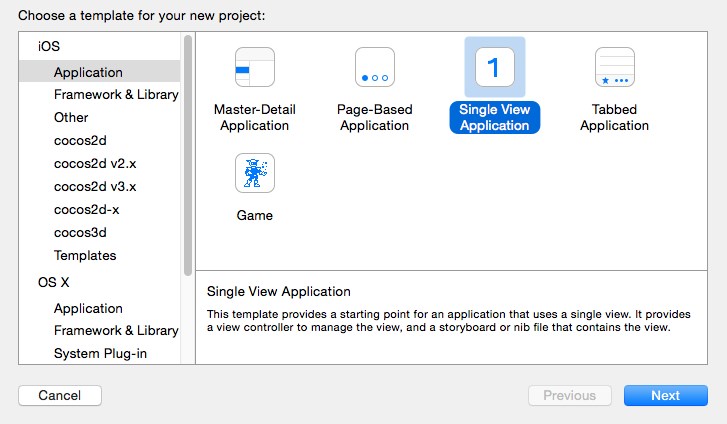
Простое приложение, которое при запуске внутри себя открывает сайт по заданному URL. 1. Создаем в Xcode Single View Application. 2. Для перехода в визуальный режим кликаем 2 раза по Main.storyboard. Перед нами открывается окно с устройством. Если справа у вас не появилась Читать далее

В этой статье рассмотрим, как добавить поддержку устройств с IOS 12 и выше в Xcode 10. А так же подключить Iphone и запустить на нем свое приложение. 1. Настройка поддержки IOS 12 и выше в Xcode 10 В Xcode 10 Читать далее
Xcode среда программирования для разработки приложений для MacOS, iOS, WatchOS и TvOS. Самое главное, что это единственная среда, где вы сможете протестировать свое приложение на реальном устройстве и без активации аккаунта разработчика. В предыдущих статьях мы говорили о том, как Читать далее
Бывает нужно протестировать проект на MacOS, например в Safari. Или нужно сделать небольшое приложение для IOS и протестировать его на реальном устройстве. Тут есть 3 варианта. Конечно же самый лучший это реальный Mac. Второй это хакинтош и третий собственно виртуальная Читать далее

Довольно распространённая проблема, когда после добавления ссылки на внешнюю страницу в соц. сеть, её данные, в том числе и изображение, кэшируются, и при последующем изменении остаются прежними. В этой статье вы узнаете, как можно очистить кэш расшариваемых внешних страниц сайта Читать далее

Wappalyzer — это кроссплатформенная утилита, которая определяет технологии, используемые на веб-сайтах. Она обнаруживает системы управления контентом, платформы электронной коммерции, веб-фреймворки, серверное программное обеспечение, аналитические инструменты и многое другое. Установить Weppalyzer можно как плагин для браузеров Google Chrome и Firefox, а Читать далее
Источник
How to Install VMware Tools on macOS High Sierra
In this article, we will examine how to install VMware Tools on macOS High Sierra installed with VMware Workstation in Windows or Linux operating system.

How to Setup VMware Tools on macOS High Sierra
Once you installed your macOS operating system using VM Workstation, you need to setup the VMware Tools.
The goal of setting up VMware Tools on macOS virtual machine is to use the machine more efficiently. After installing VM Tools, you can use the machine’s VRAM value as 128MB.
After setting up VM software on the virtual machine, you get full screen support, mouse performance boost, and shared folders support between host and guest machines.
You can transfer files by drag and drop from your physical computer to the macOS virtual machine.
In our previous articles, we installed macOS with VMware. You can access these articles from the links below;
How to Build VMware Tools on Mac OS Virtual Machine in VMware
To setup virtual machine software for Apple operating system, follow the steps below.
Step 1
After you have installed Apple Mac OS X with VM Workstation 14 Pro , run the VM and from the menu click VM and then Install VMware Tools.

Step 2
As soon as the CD image adds to the system, the setup window will open as below. Click Install VM Tools to start the setup.

Step 3
Setup will use a disk area of 7.3 MB on your computer. Click the Install button to continue.

Step 4
After the setup is complete, your computer will restart. Click the Continue Installation button to continue the setup.

Step 5
Type your root password and click on the Install Software button.

Step 6
Click on the Open Security Preferences button when you encounter with the System Extension Blocked warning.

Step 7
In the Security & Privacy window, click the Allow button to allow the setup.

Step 8
Restart the VM after completing VM Tools setup on macOS system.

Step 9
After restarting the VM, click VM / Fit Guest Now to automatically configure the display setting.

Step 10
The virtual machine will be automatically set to full screen as shown in the following image.

How to Setup VMware Tools on Mac OS Mojave
Apple has named macOS 10.14 as Mojave. After installing macOS Mojave on a virtual machine, you need to setup VM Tools to get more performance from the virtual machine in the same way.
Click on the image below to browse our article on setting up VM Tools on Mojave.

Final Word
In this article, we have discussed the VM Tools installation required for the High Sierra machine installed on VM Workstation. Thanks for following us!
Источник
Install VMware Tools on MacOS Sierra 10.12 to Enhance VM Performance
By Karar
Post date
Every virtual machine (VM) needs to install VMware Tools to go for the best as the new MacOS Sierra 10.12 or OS X El Capitan. When you’ve finished the installation, you’re ready to experience the best of it by installing the VMware tools. It is a suite of utilities that enhances the performance of the virtual machine’s guest operating system and improves management of the virtual machines. It is necessary utility for all the virtual machines running on VMware which includes many improvements and experiences such as time synchronization, graphics performance, efficient memory allocation, accelerated mouse driver, optimized SCSI driver, replicate with guest operating systems run scripts etc. Although a virtual machine can run without VMware tools but you can improve performance and abilities by installing it.
Check out this if you haven’t done yet:
Install VMware Tools on MacOS Sierra 10.12 to Enhance VM Performance
Now that you’ve known all about VMware Tools, let’s move towards installing it.
1# Run & Open VMware Tools
1. Once you have installed macOS Sierra or El Capitan on VMware, now power on the virtual machine and sign in. Navigate to VMware options> VM> Install VMware Tools, when the confirmation window pops up just hit Install.
Notice: You can install VMware Tools on any OS X using this method.
2. When the VMware tools window pops up, select Install VMware Tools.
 VMware Tools
#2 Install VMware Tools From Installation Wizard
1. On the installation wizard, hit Continue.
2. Now hit Install to perform a standard installation of VMware Tools.
 Installation Type
After continuing, the installation will take a moment to install, and here’s what you’ll see but you have to restart the virtual machine in order to complete the process.
 Installation Completed – Summary
Once the virtual machine restarted, you’ll have all the enhancements and user experiences also have fixed the screen resolution + speed like the shot below. Also, you can drag & drop from guest OS to VM or from VM to guest OS and use mouse better than before.
 VMware Tools Installed – macOS Sierra
Thus, you can use it like a pro and have everything or every apps you want to work with, you can do each and everything you want. So did you find it helpful? Share now with your friends and let them be aware, they might thank you later. If you have any question regarding this, feel free to ask.
Источник


